
1. Introduction
This manual provides detailed instructions for the setup, operation, maintenance, and troubleshooting of your SGPRO SG-82BB Dual Wireless Microphone System. This professional-grade UHF system is designed for reliable audio transmission in various settings, including live performances, presentations, and events. It features a durable metal receiver and two bodypack transmitters, compatible with both headset and lavalier microphones.
2. What's in the Box
Please verify that all components are present upon unpacking:
- 1 x SGPRO SG-82BB Dual Channel Receiver
- 2 x SGPRO Bodypack Transmitters (SG-82)
- 2 x Headset Microphones
- 2 x Lavalier Microphones
- 2 x BNC Antennas
- 1 x Power Adapter for Receiver
- 1 x 6.35mm (1/4 inch) Audio Cable
- User Manual
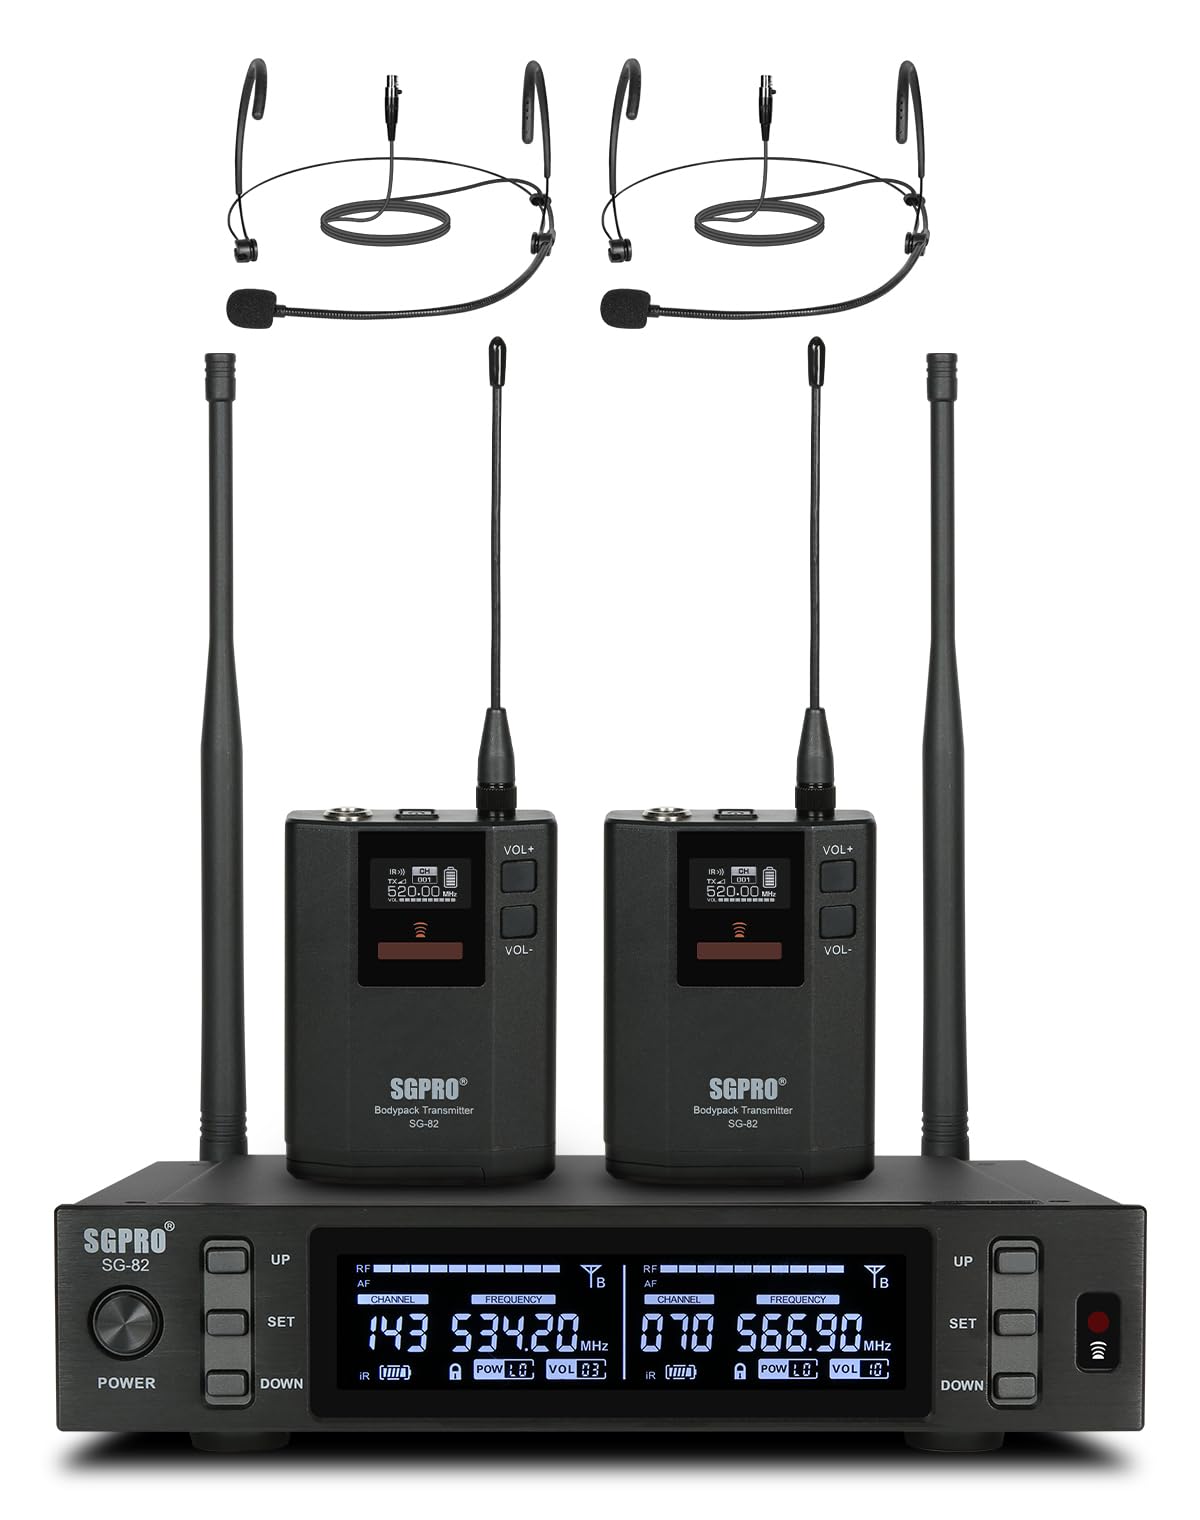
Image: Overview of the SGPRO SG-82BB Dual Wireless Microphone System, showing the receiver, two bodypack transmitters, and two headset microphones.
3. Setup Guide
3.1. Receiver Setup
- Connect Antennas: Screw the two BNC antennas into the ANT A and ANT B connectors on the rear panel of the receiver. Ensure they are securely tightened.
- Power Connection: Connect the provided power adapter to the DC INPUT 12V/1A port on the receiver and plug it into a power outlet.
- Audio Output: Connect the receiver to your audio mixer, amplifier, or audio interface using either the balanced XLR outputs (CH.A, CH.B) or the unbalanced 6.35mm (1/4 inch) MIX OUT jack. For optimal sound quality and individual channel control, using XLR outputs is recommended.
- Power On: Press the POWER button on the receiver's front panel. The display should illuminate.

Image: Close-up of the receiver's rear panel showing the BNC antenna connections.

Image: The rear panel of the SGPRO receiver, highlighting the balanced XLR outputs and the mixed 6.35mm output.
3.2. Transmitter Setup
- Battery Installation: Open the battery compartment on each bodypack transmitter. Insert two AA batteries, ensuring correct polarity. Close the compartment securely.
- Microphone Connection: Connect your desired headset or lavalier microphone to the mini XLR input on the bodypack transmitter.
- Power On: Press and hold the power button on each bodypack transmitter until the display illuminates.

Image: A SGPRO bodypack transmitter connected to a headset microphone, showing the mini XLR input.
3.3. Frequency Synchronization (IR Sync)
The system features an infrared (IR) synchronization function for easy pairing:
- On the receiver, select the desired channel (CH.A or CH.B) using the UP/DOWN buttons.
- Press the 'SET' button on the receiver to initiate frequency scanning.
- Once a clear frequency is found, align the IR window of the bodypack transmitter with the IR sensor on the receiver.
- The transmitter and receiver will automatically synchronize. The display on both units will show the same frequency and channel. Repeat for the second transmitter.
Video: This video demonstrates the setup process, including connecting antennas, installing batteries in transmitters, and synchronizing frequencies via IR sync. It also shows the system in use with both handheld and bodypack microphones.
4. Operating Instructions
4.1. Adjusting Volume
Each bodypack transmitter has VOL+ and VOL- buttons to adjust the microphone's input sensitivity. The receiver also has individual volume controls for each channel (CH.A and CH.B) to fine-tune the output level.
4.2. Mute Function
To temporarily mute a transmitter, briefly press the power button on the bodypack. The display will indicate 'MUTE'. Press it again to unmute.
4.3. Changing Frequencies
If you experience interference, you can manually change the frequency:
- On the receiver, press the 'SET' button for the desired channel.
- Use the UP/DOWN buttons to cycle through available frequencies.
- Once a new frequency is selected, perform an IR sync with the corresponding bodypack transmitter as described in Section 3.3.

Image: The receiver's front panel display, showing active channels, frequencies, and signal strength indicators.
4.4. Memory Settings
The receiver retains your last used frequency settings even after being powered off, ensuring quick setup for recurring events.

Image: The receiver display indicating that settings are saved and will be recalled upon power-up.
5. Maintenance
5.1. Cleaning
Wipe the receiver and transmitters with a soft, dry cloth. Do not use liquid cleaners or solvents, as they may damage the finish or internal components.
5.2. Battery Care
Remove batteries from transmitters if the system will not be used for an extended period to prevent leakage and damage. Use high-quality alkaline or rechargeable AA batteries for optimal performance.
5.3. Storage
Store the system in a cool, dry place away from direct sunlight and extreme temperatures. Keep components in their original packaging or a protective case when not in use.
6. Troubleshooting
| Problem | Possible Cause | Solution |
|---|---|---|
| No sound output | Transmitter not powered on; Receiver not powered on; Incorrect frequency synchronization; Audio cable disconnected; Mixer/amplifier volume too low. | Ensure all units are powered on. Perform IR sync. Check all cable connections. Increase volume on mixer/amplifier. |
| Interference or static | Nearby electronic devices; Other wireless systems on the same frequency; Weak signal due to distance or obstacles. | Change the operating frequency. Ensure line of sight between transmitter and receiver. Move away from sources of interference. |
| Low volume or distorted audio | Low battery in transmitter; Transmitter volume too low; Microphone too far from source. | Replace or recharge batteries. Increase transmitter volume. Position microphone closer to the sound source. |
| Transmitter not syncing | IR windows not aligned; Receiver not in sync mode. | Ensure IR windows are facing each other closely. Press 'SET' on the receiver to activate sync mode. |
7. Specifications
| Feature | Detail |
|---|---|
| Model Name | SG-82BB |
| Brand | SGPRO |
| Connectivity Technology | UHF |
| Frequency Range | 520-590 MHz |
| Number of Channels | 2 (Dual Channel) |
| Special Features | 600 Preset Frequencies, Frequency Scan, Full-metal Cased Receiver, Mute Function, Noise Reduction, Antenna Diversity |
| Connector Type | 6.35 mm Jack, XLR |
| Compatible Devices | Active Speakers, Amplifier, Audio Interface, Audio Mixer |
| Microphone Form Factor | Headset (also compatible with Lavalier) |
| Power Source (Transmitter) | 2 AA batteries required (not included) |
| Enclosure Material | Metal |
| Item Weight | 1.97 Kilograms |
| Rack Mountable | 1/2 standard audio rack size, preset rack mount holes |
8. Warranty and Support
8.1. Warranty Information
The SGPRO SG-82BB Dual Wireless Microphone System comes with a 1-Year Manufacturer Warranty. This warranty covers defects in materials and workmanship under normal use. Please retain your proof of purchase for warranty claims.
8.2. Customer Support
For technical assistance, troubleshooting, or warranty inquiries, please contact SGPRO customer support through the retailer's platform or visit the official SGPRO website. You can also refer to the SGPRO Store on Amazon for additional resources and contact information.