
1. Introduction
This manual provides detailed instructions for the installation, operation, and maintenance of your NANU SHOP B85M2K Intel B85 Micro-ATX LGA 1150 Motherboard. Please read this manual thoroughly before attempting any installation or configuration to ensure proper functionality and to prevent damage to your components.
2. Safety Information
Always observe the following safety precautions when handling computer components:
- Electrostatic Discharge (ESD) Protection: Always wear an anti-static wrist strap or frequently touch a grounded metal object before handling the motherboard or any other components. ESD can severely damage electronic parts.
- Power Disconnection: Ensure the power supply is unplugged from the wall outlet before installing or removing any components.
- Component Compatibility: Verify that all components (CPU, RAM, GPU, PSU) are compatible with this motherboard model. Refer to the specifications section.
- Proper Ventilation: Ensure your PC case has adequate airflow to prevent overheating.
- Handle with Care: Avoid touching the gold contacts on expansion cards or memory modules. Hold components by their edges.
3. Package Contents
Verify that all items are present in your motherboard package:
- NANU SHOP B85M2K Motherboard
- I/O Shield
- SATA Data Cable(s)
- CMOS Battery (CR2032)
- User Manual (this document)

Image: Included accessories, showing the I/O shield, a CMOS battery, and a SATA data cable.
4. Product Overview
The NANU SHOP B85M2K is a Micro-ATX motherboard designed for Intel LGA 1150 processors. It supports DDR3 RAM and offers essential connectivity for a modern personal computer.
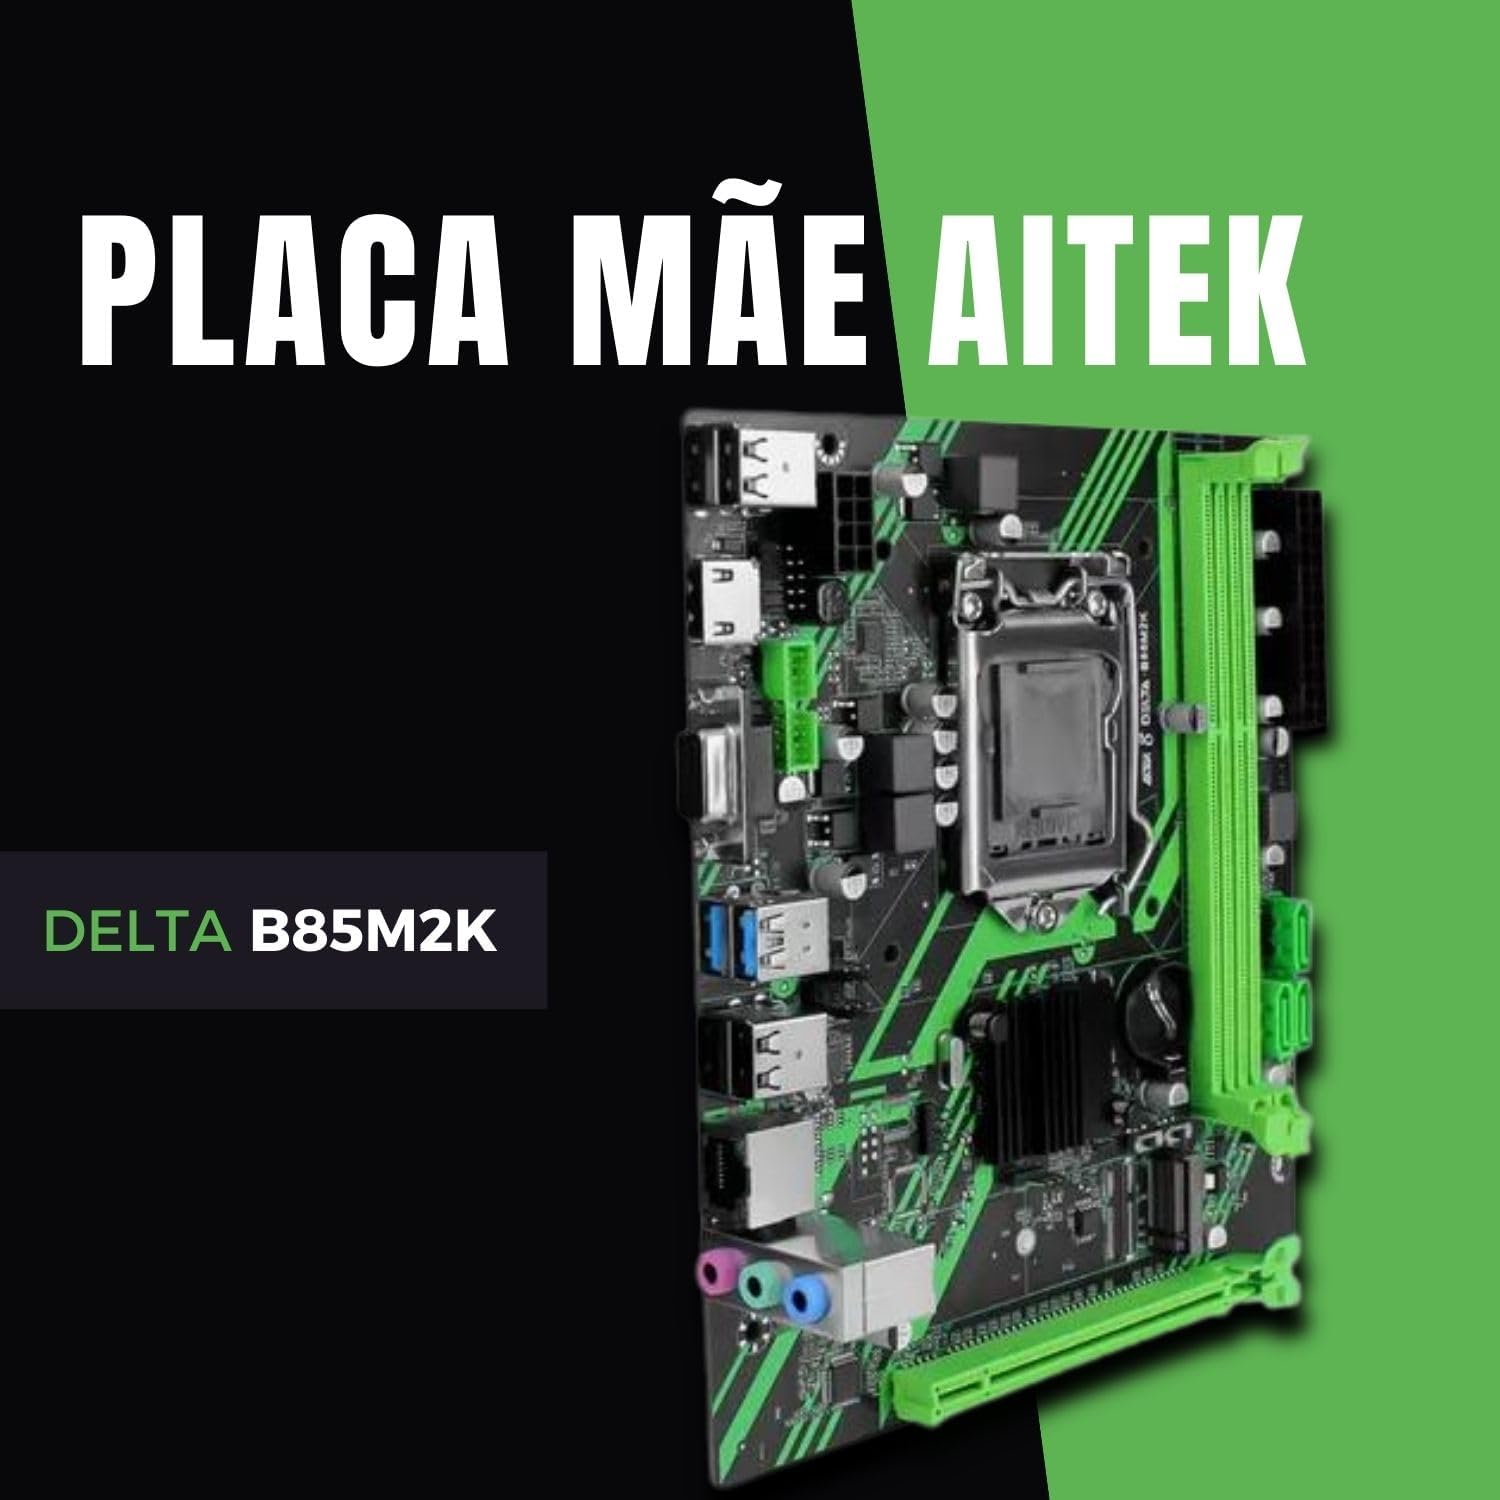
Image: Top-down view of the NANU SHOP B85M2K motherboard, highlighting the CPU socket, RAM slots, PCIe slots, and various connectors.
Rear I/O Panel
The rear I/O panel provides external connectivity for your peripherals.

Image: Close-up of the motherboard's rear I/O panel, showing USB ports, LAN port, audio jacks, and video outputs (VGA, HDMI).
- USB Ports: Connect USB devices such as keyboards, mice, and external storage.
- LAN Port: Connect to your network via an Ethernet cable.
- Audio Jacks: Connect speakers, headphones, or microphones.
- Video Outputs: Connect to a display using VGA or HDMI (requires an Intel processor with integrated graphics).
5. Setup and Installation
Follow these steps carefully to install your motherboard and components.
5.1. CPU Installation
- Locate the LGA 1150 CPU socket on the motherboard.
- Gently push down the load lever and pull it to the side to open the CPU socket retention frame.
- Carefully align the CPU with the socket, ensuring the golden triangle on the CPU matches the triangle on the socket. Do not force the CPU into the socket.
- Lower the retention frame and push the load lever back into place until it clicks.
- Apply a thin, even layer of thermal paste to the top of the CPU.
- Install the CPU cooler according to its manufacturer's instructions.
5.2. RAM Installation
- Open the clips at both ends of the DDR3 DIMM slots.
- Align the notch on the RAM module with the notch in the DIMM slot.
- Press down firmly on both ends of the RAM module until the clips snap into place.
5.3. Storage (SATA) Connection
- Connect one end of a SATA data cable to a SATA port on the motherboard.
- Connect the other end of the SATA data cable to your SSD or HDD.
- Connect a SATA power cable from your power supply to your SSD or HDD.
5.4. Power Supply Connection
- Connect the 24-pin ATX main power connector from your power supply to the corresponding port on the motherboard.
- Connect the 4-pin or 8-pin ATX 12V CPU power connector from your power supply to the port near the CPU socket.
5.5. Front Panel Connections
Connect the cables from your PC case's front panel (power button, reset button, USB ports, audio jacks, power LED, HDD LED) to the corresponding headers on the motherboard. Refer to the motherboard layout for exact pin locations.
5.6. Expansion Cards (PCIe)
Insert graphics cards or other expansion cards into the appropriate PCIe slots. Ensure they are seated firmly and secured with the case's retention mechanism.
6. Operating Instructions
6.1. Initial Boot-up
- After assembling all components, connect your monitor, keyboard, and mouse.
- Plug in the power supply and turn on the power switch on the PSU.
- Press the power button on your PC case.
- The system should power on and display the BIOS/UEFI screen or boot into an operating system if one is installed.
6.2. BIOS/UEFI Configuration
To enter the BIOS/UEFI setup, press the designated key (usually DEL or F2) repeatedly during the initial boot sequence. Within the BIOS/UEFI, you can configure boot order, system time, fan speeds, and other advanced settings.
6.3. Driver Installation
After installing your operating system, install the necessary drivers for the motherboard's chipset, audio, LAN, and any other integrated components. These drivers are typically available on the manufacturer's website or included on a driver CD/USB drive.
7. Maintenance
7.1. Cleaning
Regularly clean your PC to prevent dust buildup, which can lead to overheating. Use compressed air to remove dust from fans, heatsinks, and motherboard components. Ensure the system is powered off and unplugged before cleaning.
7.2. BIOS Updates
Periodically check the manufacturer's website for BIOS/UEFI updates. Updates can improve system stability, add support for new hardware, or fix bugs. Follow the update instructions provided by the manufacturer carefully to avoid damaging the motherboard.
8. Troubleshooting
If you encounter issues, refer to the following common troubleshooting steps:
- No Power: Ensure all power cables (24-pin ATX, 4/8-pin CPU) are securely connected. Check the power supply switch and wall outlet.
- No Display: Verify that the monitor is connected to the correct video output (motherboard or graphics card). Reseat the graphics card and RAM modules.
- System Instability/Crashes: Check RAM seating. Ensure CPU cooler is properly installed and thermal paste is applied. Monitor temperatures.
- Component Not Detected: Reseat the component (RAM, GPU, SATA drive). Check power and data connections. Verify BIOS settings.
- BIOS Reset: If the system is unstable after configuration changes, clear the CMOS by removing the CMOS battery for 5-10 minutes (with power unplugged) or by using the clear CMOS jumper (if available).
9. Specifications
| Feature | Specification |
|---|---|
| Brand | NANU SHOP |
| CPU Socket | LGA 1150 |
| Compatible Processors | Intel Pentium, Intel Core (LGA 1150) |
| Chipset | Intel B85 |
| RAM Technology | DDR3 |
| Max RAM Capacity | 16 GB |
| Memory Clock Speed | 1600 MHz |
| SATA Ports | 4 (SATA III) |
| USB Ports | 4 (USB 3.0) |
| PCIe Slots | 5 (various types, including for graphics cards) |
| Main Power Connector | 24-pin |
| Form Factor | Micro-ATX |
10. Warranty and Support
For warranty information and technical support, please refer to the documentation provided with your purchase or visit the official NANU SHOP website. Keep your proof of purchase for warranty claims.