1. Introduction
This manual provides detailed instructions for the installation, operation, and maintenance of your Lonsge 550W Industrial Sewing Machine Servo Motor. Please read this manual thoroughly before use to ensure proper function and safety. This servo motor is designed to provide efficient and precise speed control for various industrial sewing machines.
2. Safety Information
- Always disconnect the power supply before performing any installation, maintenance, or troubleshooting.
- Ensure the power supply voltage matches the motor's specifications (AC110V).
- Keep hands and loose clothing away from moving parts during operation.
- Do not operate the motor in wet or damp conditions.
- Ensure all connections are secure to prevent electrical hazards.
- Only use the motor for its intended purpose with compatible industrial sewing machines.
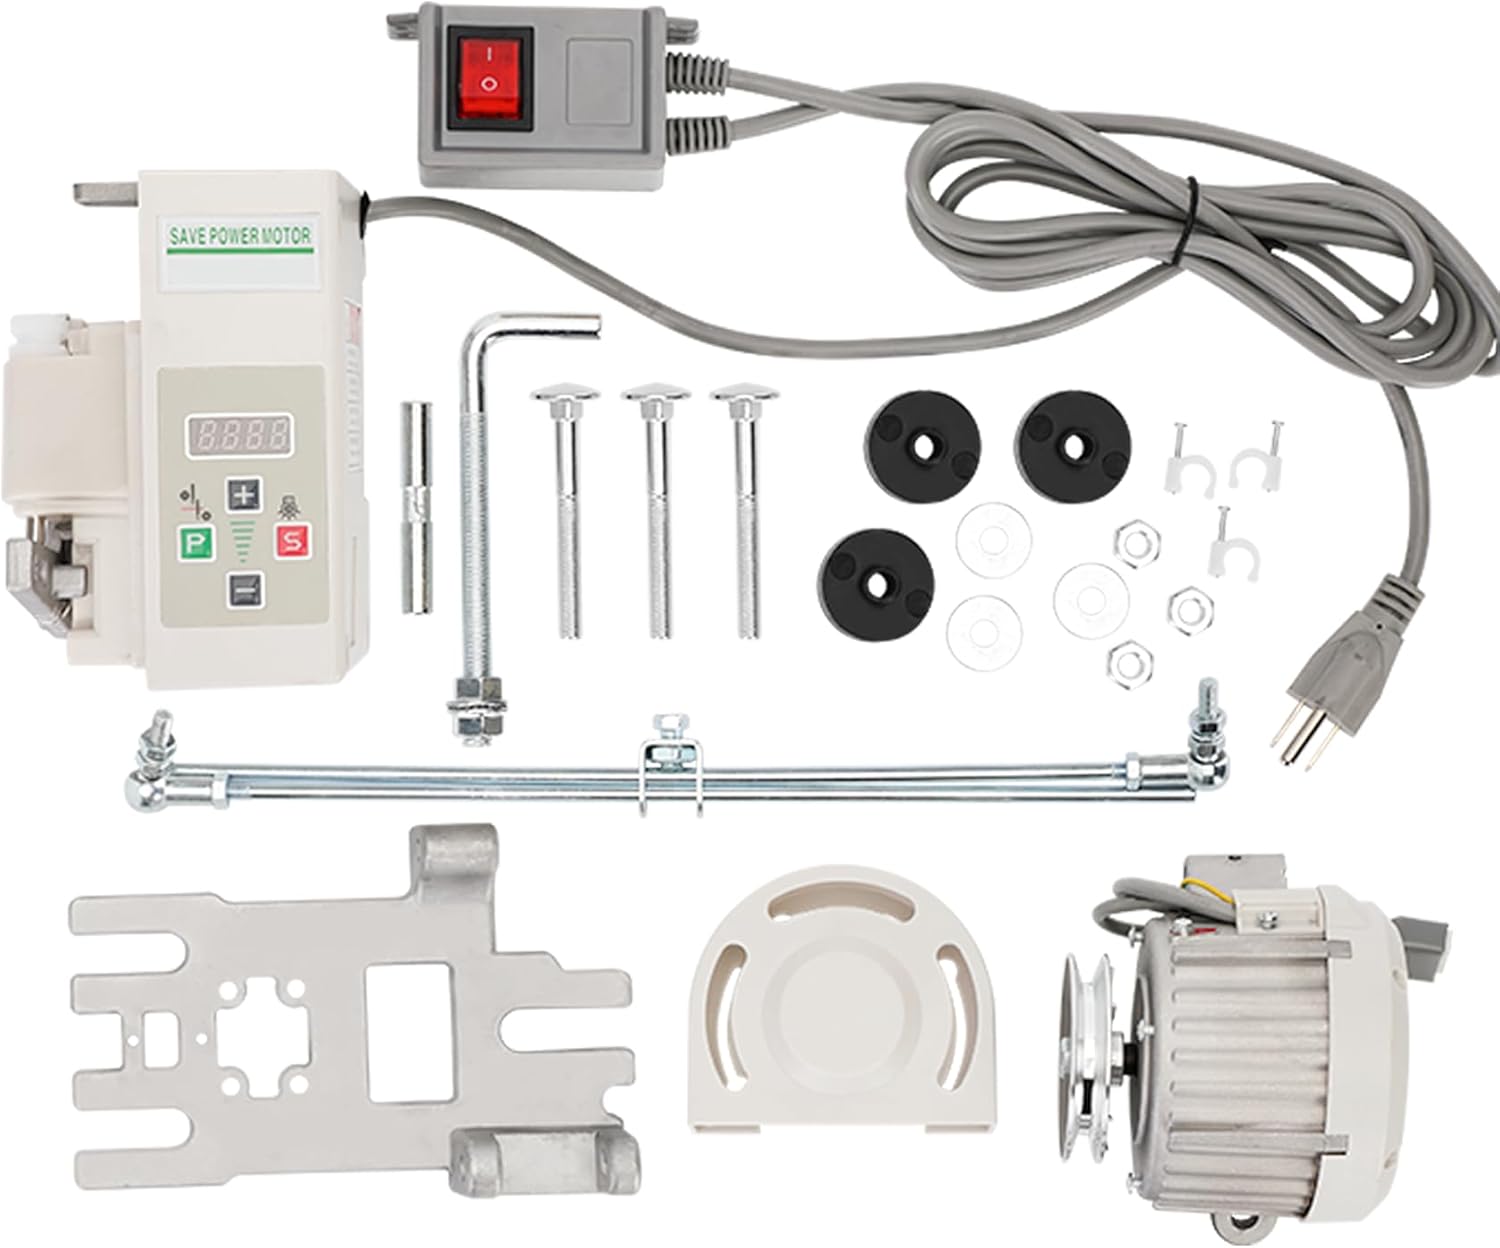
3. Package Contents
Verify that all components are present in the package:
- 550W Brushless Servo Motor
- Controller Unit
- Foot Switch
- Mounting Hardware (bolts, washers, nuts, rubber pads)
- Connecting Rod
- Instruction Manual
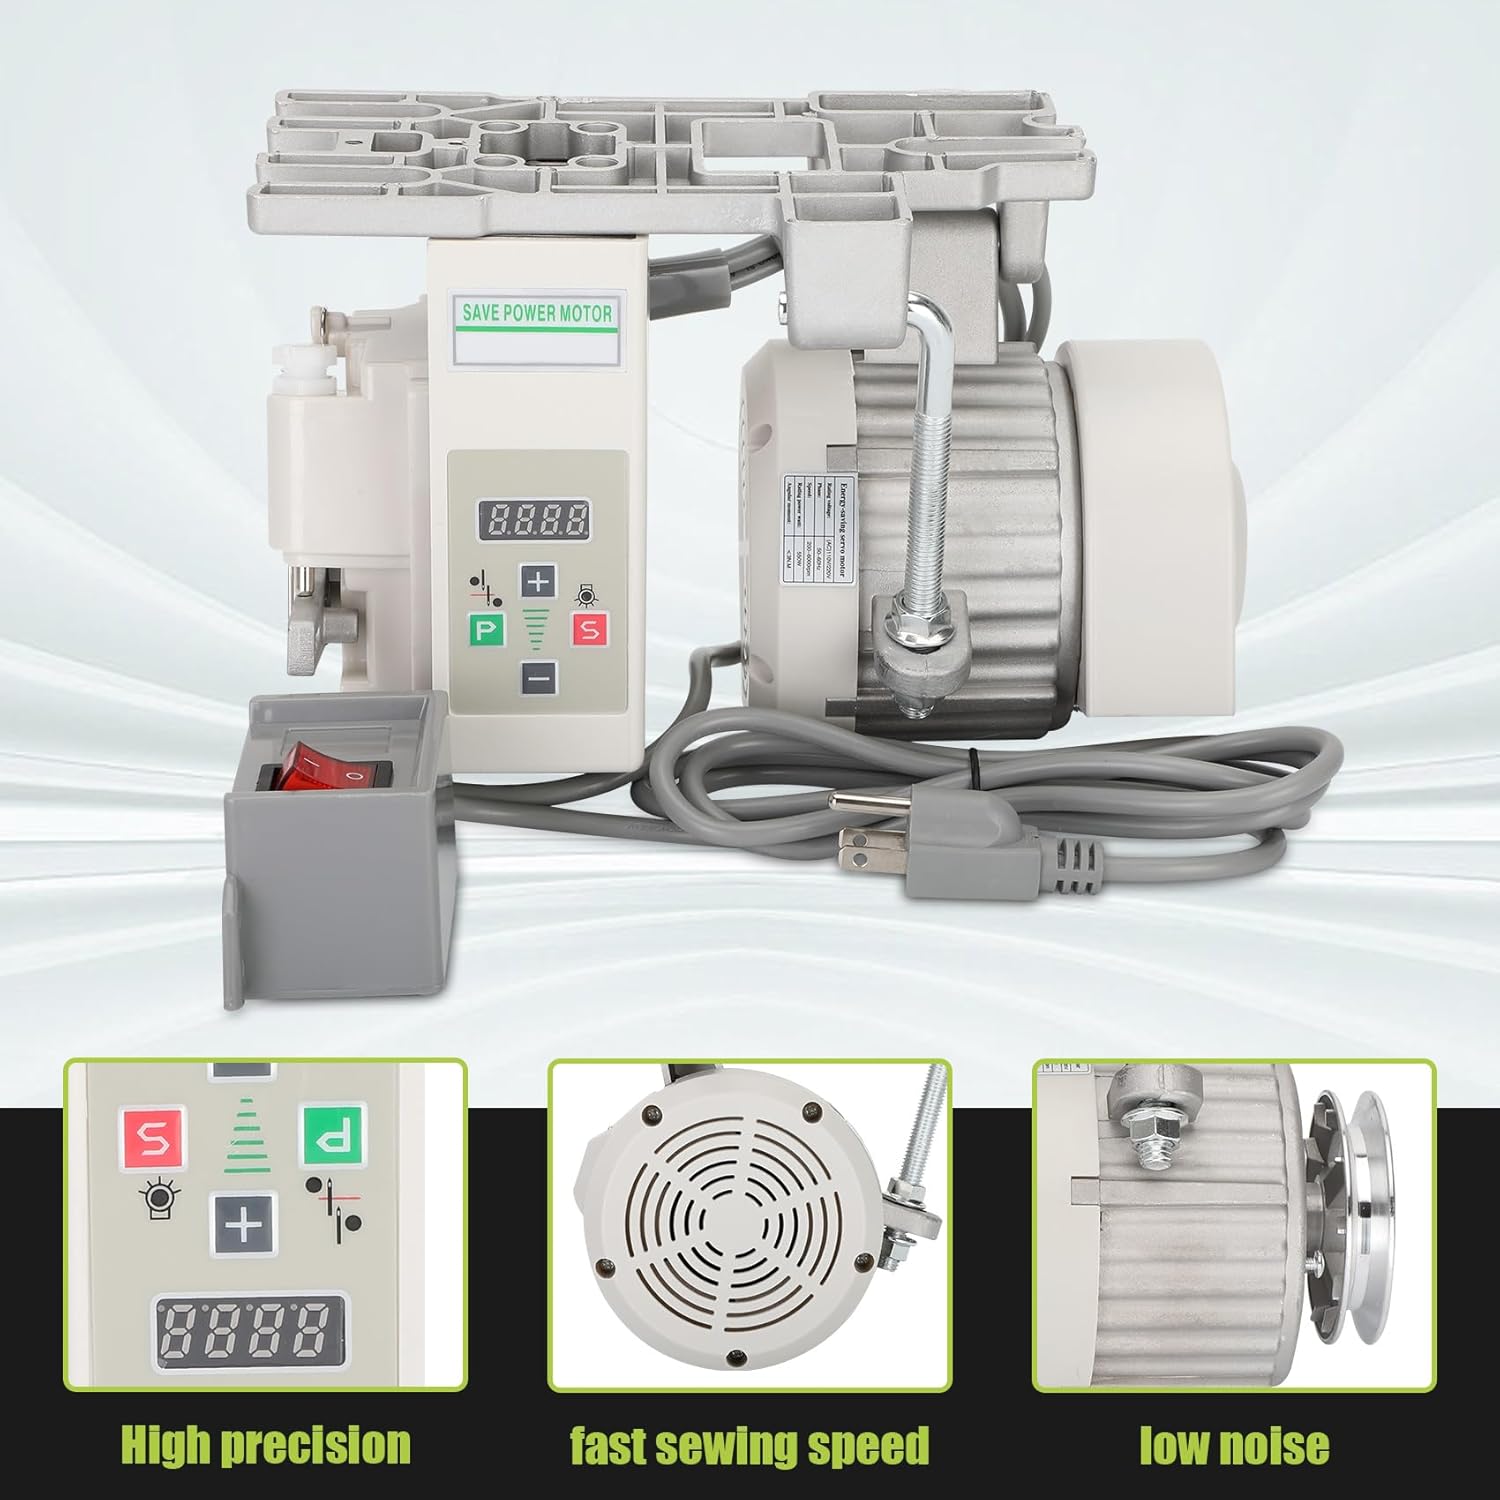
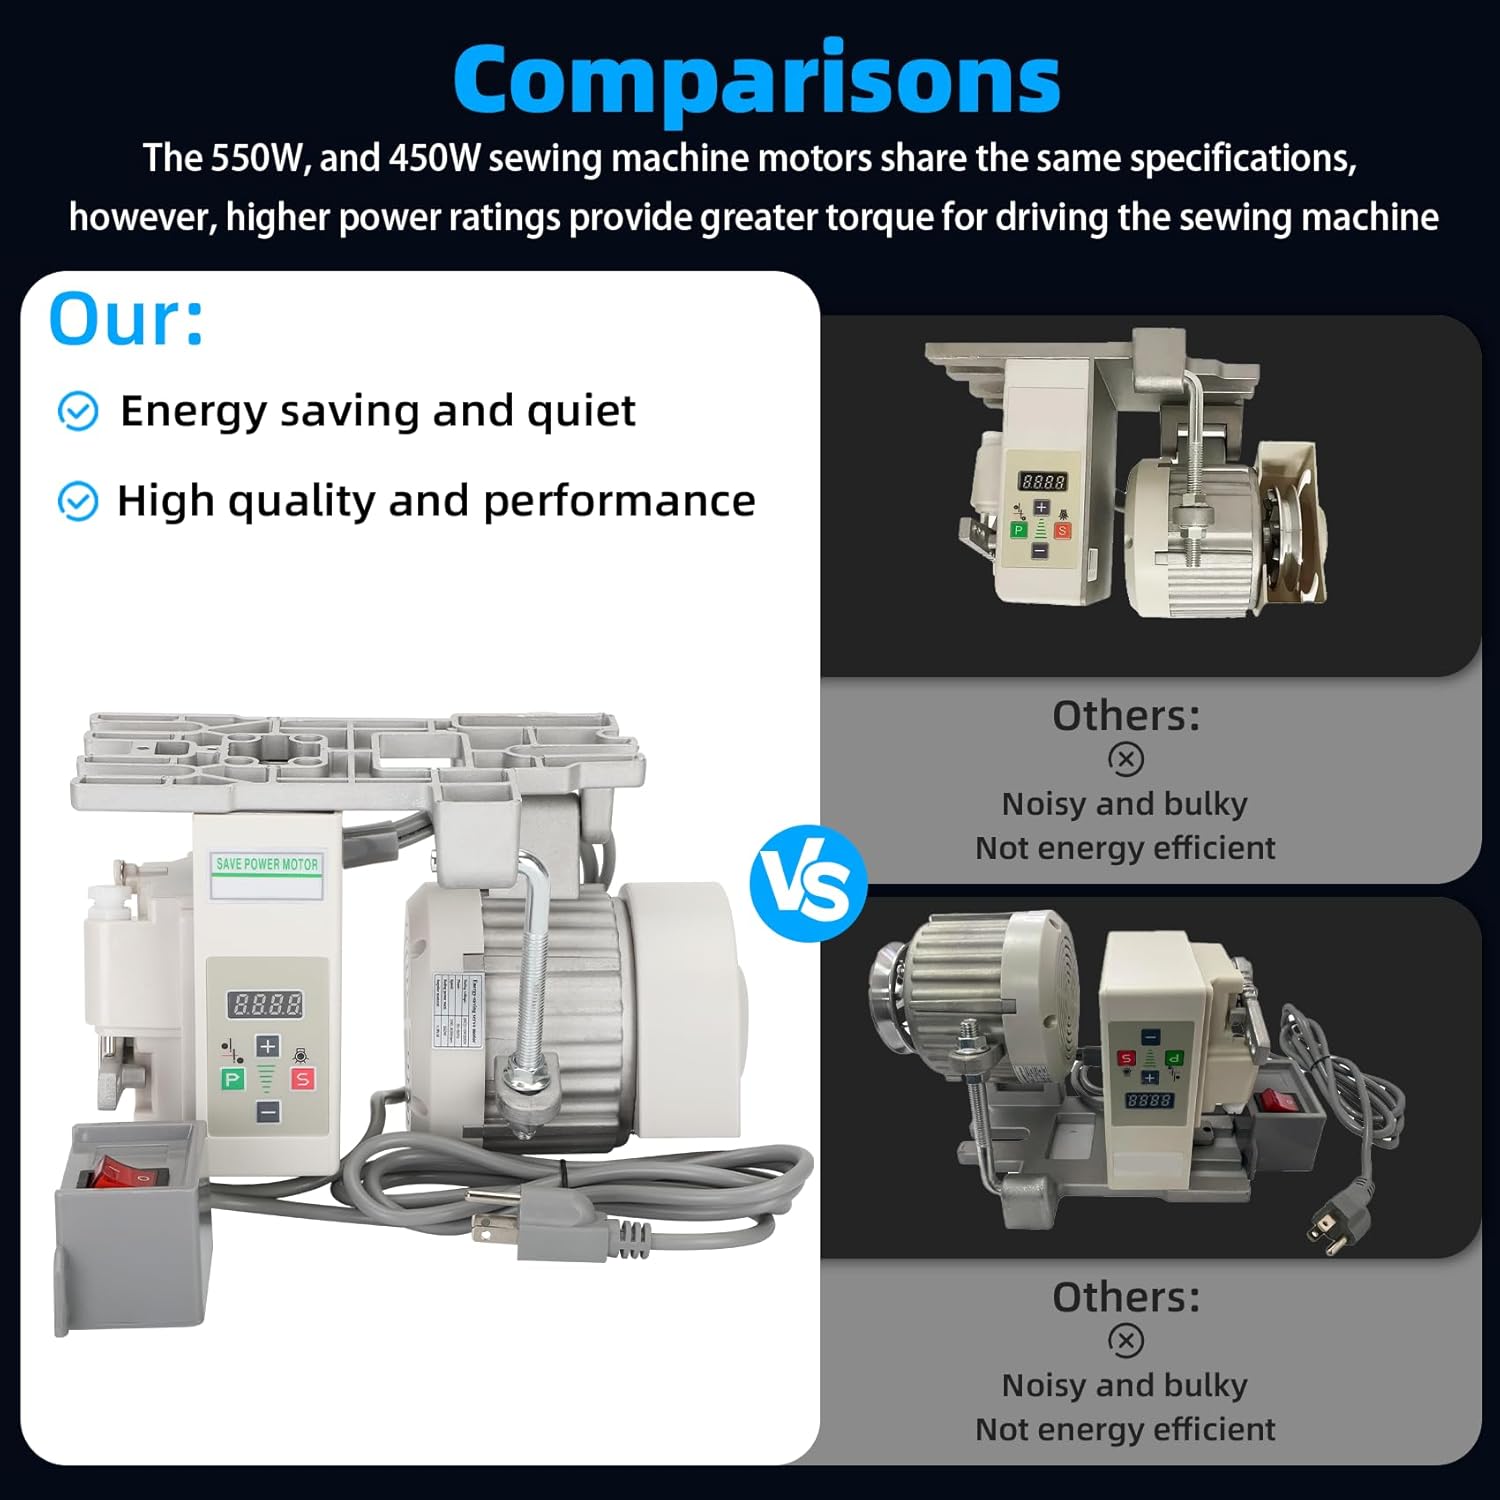
4. Product Features
The Lonsge 550W Industrial Sewing Machine Servo Motor offers several key features:
- High Compatibility: Suitable for various industrial sewing machine types.
- Powerful Performance: 550W, 3/4HP motor with adjustable speed from 200 RPM to 6000 RPM.
- Energy Efficient: Saves up to 70% electricity compared to traditional clutch motors.
- Quiet Operation: Brushless design ensures minimal noise and vibration.
- High Precision Control: Digital controller allows for precise speed adjustments.
- Durable Construction: Features a pure copper coil and aluminum sheath for excellent temperature resistance and multi-layer protection.
- Easy Installation: Designed for straightforward installation by aligning with existing motor holes.
- Multiple Protections: Includes over-current, over-voltage, under-voltage, short-circuit, and blocking protection.

5. Setup and Installation
Follow these steps to install your Lonsge 550W Industrial Sewing Machine Servo Motor:
- Mounting the Motor: Align the servo motor with the existing motor mounting holes on your industrial sewing machine table. Secure it using the provided mounting hardware (bolts, washers, nuts). Ensure the motor is stable and properly aligned with the machine's pulley.
- Connecting the Foot Switch: Plug the foot switch cable into the designated port on the motor's controller unit.
- Connecting the Power: Plug the motor's power cord into a standard AC110V outlet.
- Connecting Rod Adjustment: Attach the connecting rod between the foot switch and the sewing machine's pedal mechanism. Adjust its length to ensure comfortable and responsive operation of the foot switch.

6. Operating Instructions
The servo motor's speed and parameters are adjusted via the controller unit.
- Power On/Off: Use the red switch on the external power box to turn the motor on or off.
- Speed Adjustment: Use the '+' and '-' buttons on the controller to increase or decrease the motor speed. The digital display will show the current RPM setting. The speed range is 200 RPM to 6000 RPM.
- Direction Control (CW/CCW): The motor supports both clockwise (CW) and counter-clockwise (CCW) rotation. Refer to the detailed manual for specific instructions on how to change the rotation direction, usually involving a 'P' (Parameter) button and a specific code.
- Foot Switch Operation: The foot switch provides variable speed control during sewing. Pressing the pedal further increases the speed up to the set maximum.
7. Maintenance
Regular maintenance ensures the longevity and optimal performance of your servo motor:
- Cleaning: Periodically clean the motor and controller unit with a dry, soft cloth. Avoid using liquid cleaners or solvents.
- Inspection: Regularly inspect all cables and connections for signs of wear or damage. Ensure mounting bolts remain tight.
- Ventilation: Ensure the motor's ventilation openings are clear of dust and debris to prevent overheating.
8. Troubleshooting
If you encounter issues with your Lonsge 550W Industrial Sewing Machine Servo Motor, refer to the following common problems and solutions:
| Problem | Possible Cause | Solution |
|---|---|---|
| Motor does not run (Error Code E-03) | Loose plug on the back of the motor. | Check and secure the plug connection on the back of the motor. |
| Motor runs but speed is inconsistent | Incorrect speed setting or faulty foot switch. | Verify speed settings on the controller. Inspect foot switch and connecting rod for proper function. |
| Unusual noise or vibration | Loose mounting, worn belt, or internal issue. | Check all mounting points for tightness. Inspect the drive belt for wear and tension. If issues persist, contact customer support. |
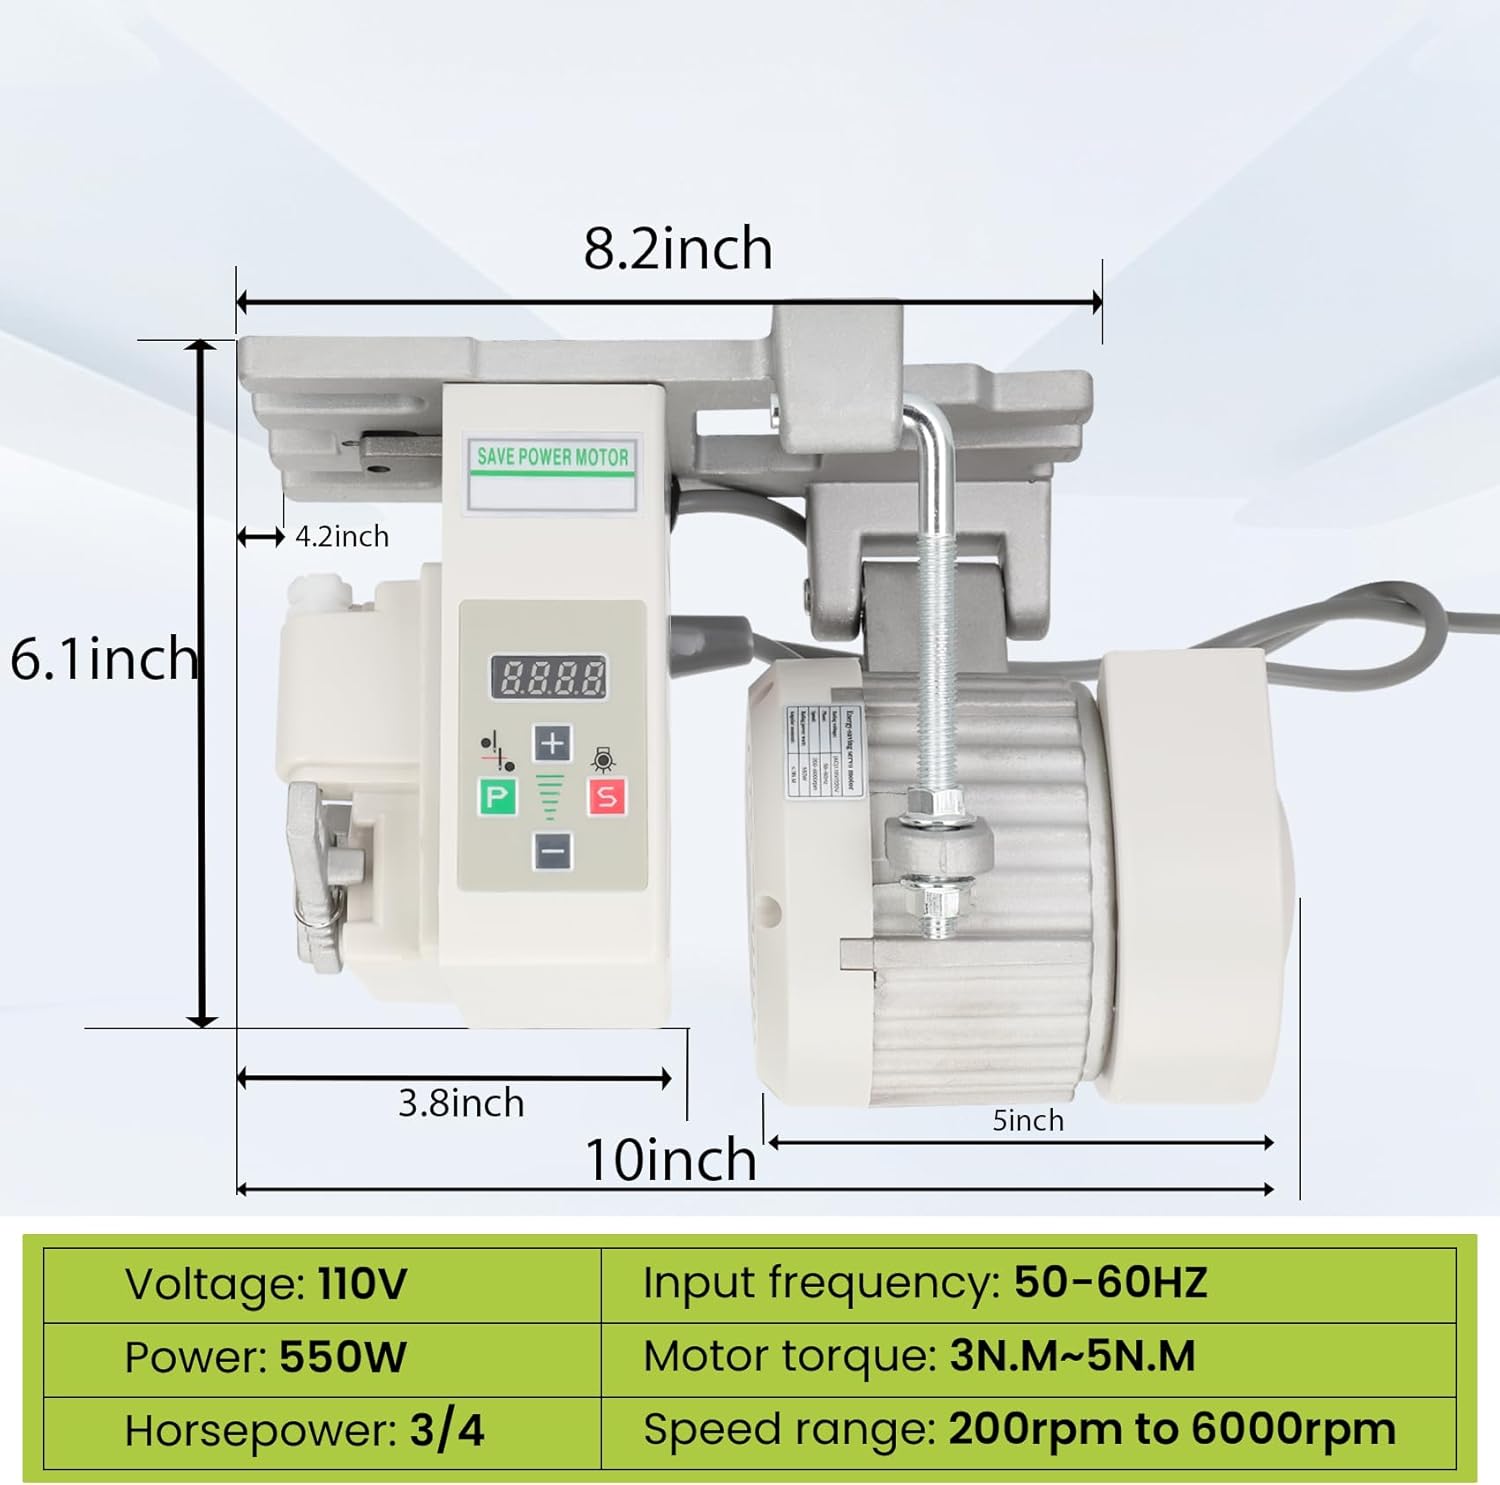
9. Specifications
| Feature | Specification |
|---|---|
| Model | 550W |
| Power | 550W (3/4 HP) |
| Voltage | AC110V |
| Speed Range | 200 RPM to 6000 RPM |
| Motor Torque | 3N.M ~ 5N.M |
| Input Frequency | 50-60HZ |
| Product Dimensions | 11.2 x 6.3 x 7.67 inches |
| Item Weight | 7.37 pounds |
| Motor Construction | Pure copper coil, aluminum sheath |


10. Warranty and Support
Lonsge is committed to providing quality products and customer satisfaction. While specific warranty terms are not detailed here, we offer dedicated customer support.
- For any questions regarding product parameters, performance, suitability, or troubleshooting, please contact our customer service team.
- We commit to responding to all inquiries within 24 hours to provide a satisfactory solution.


