
Yamnweo NG-88
NG-88 2-Channel Wireless Microphone System User Manual
Model: NG-88 | Brand: Yamnweo
1. Introduction
Thank you for choosing the Yamnweo NG-88 2-Channel Wireless Microphone System. This system is designed to provide high-quality audio transmission for various applications, including karaoke, public speaking, DJ events, and parties. Please read this manual carefully before operating the system to ensure proper setup, optimal performance, and longevity of your device.
2. Product Overview
The NG-88 system includes a receiver base and two handheld dynamic transmitter microphones, designed for reliable and clear audio reproduction.

Figure 2.1: The complete NG-88 wireless microphone system, showing the receiver base with two antennas and two handheld microphones.

Figure 2.2: Detailed view of a handheld microphone, highlighting the high-quality metal mesh head for durability and an informative orange-light LCD screen displaying frequency and battery status.
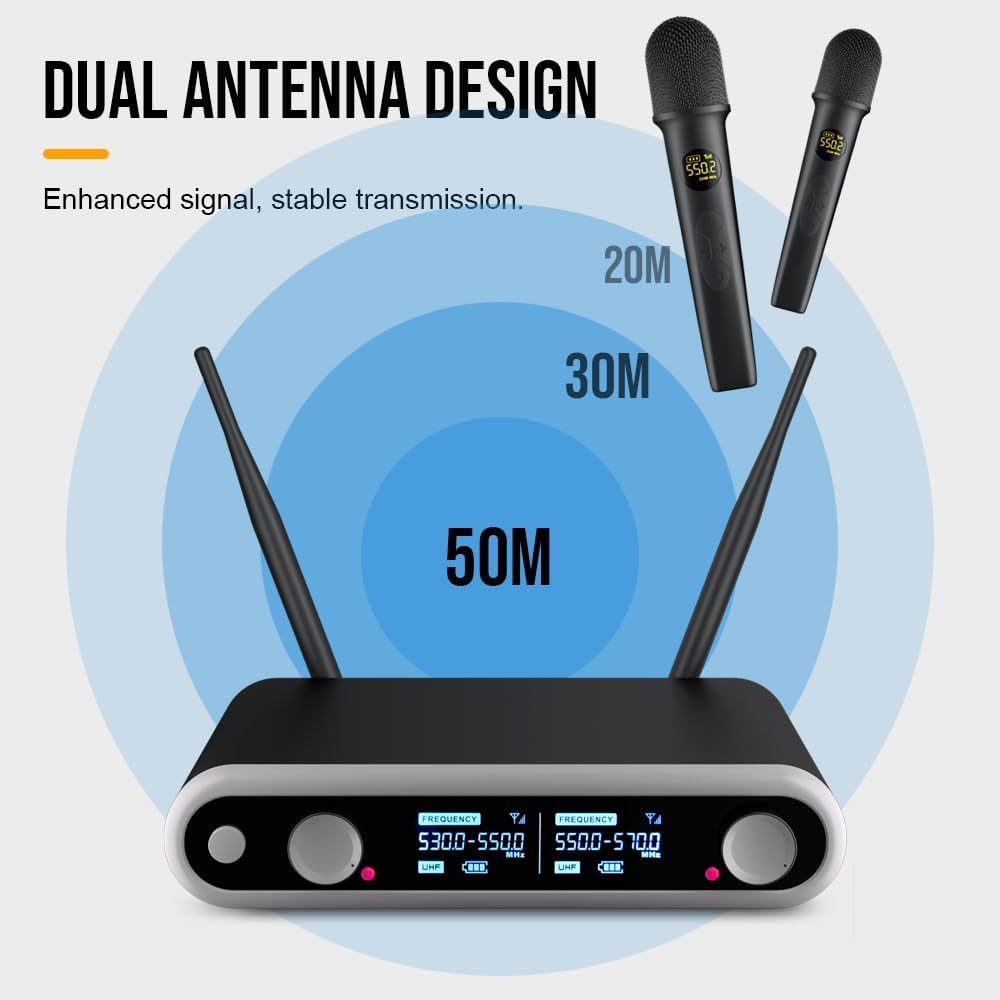
Figure 2.3: Illustration of the dual antenna design on the receiver base, which enhances signal stability and transmission range up to 50 meters.

Figure 2.4: The system utilizes UHF wireless technology for precise frequency control and stable, reliable operation, minimizing interference.
Components:
- Receiver Base: The central unit that receives audio signals from the microphones. Features dual antennas for enhanced signal reception and individual volume controls for each channel.
- Handheld Microphones (x2): Dynamic microphones with integrated transmitters. Each microphone features an LCD display for frequency and battery status, and a durable metal mesh head.
- Power Adapter: For the receiver base.
- Audio Cable: For connecting the receiver to an audio input device.
- AA Batteries (x4): Two for each microphone (included).
- Type-C Charging Cable: For recharging the microphones.
3. Setup Instructions
- Unpack Components: Carefully remove all items from the packaging and ensure all components listed in Section 2 are present.
- Install Batteries in Microphones: Open the battery compartment of each handheld microphone and insert two AA batteries, observing the correct polarity (+/-).
- Connect Receiver Power: Plug the provided power adapter into the DC IN port on the receiver base, then plug the adapter into a standard electrical outlet.
- Connect Receiver to Audio System: Use the supplied audio cable to connect the receiver's audio output (1/4" mono input) to your mixer, amplifier, active speaker, or other audio input device.
- Position Antennas: Extend and position the receiver's antennas vertically for optimal signal reception.
- Power On: Turn on the receiver base using its power button. The display screens on the receiver should illuminate.
- Power On Microphones: Turn on each handheld microphone. The microphone's LCD screen should display its frequency and battery level. The microphones should automatically pair with the receiver.

Figure 3.1: The NG-88 system is compatible with a wide range of audio equipment, including professional mixers, effects processors, power amplifiers, active speakers, announcer sound cards, desktop PCs, and home theatre systems.
4. Operating Instructions
4.1 Basic Operation
- Power On/Off: Use the power buttons on the receiver and microphones to turn them on or off.
- Volume Adjustment: Adjust the individual volume knobs on the receiver base for each microphone channel to achieve the desired audio level.
- Frequency Display: The LCD screens on both the receiver and microphones display the current operating frequency (e.g., 530.0-550.0 MHz or 550.0-570.0 MHz).
4.2 Microphone Usage
- Hold the microphone approximately 2-6 inches from your mouth for optimal sound pickup.
- Avoid covering the microphone grille with your hand, as this can affect sound quality and signal transmission.
- The system is designed for a stable transmission range of up to 50 meters (approximately 164 feet) in open areas. Obstacles like walls can reduce this range.
4.3 Charging Microphones
The handheld microphones feature a built-in rechargeable lithium battery. When the battery indicator on the microphone's LCD screen shows low power, recharge them using the provided Type-C charging cable.

Figure 4.1: The microphone features a Type-C charging interface. A full charge provides approximately 3 hours of endurance, with a charging time of 2-3 hours. The battery supports over 3000 repeated uses.
- Connect the Type-C cable to the charging port on the microphone and the other end to a USB power source (e.g., computer USB port, USB wall adapter).
- The charging indicator on the microphone will show charging status.
- A full charge typically takes 2-3 hours and provides approximately 3 hours of continuous use.
5. Maintenance
- Cleaning: Use a soft, dry cloth to clean the surfaces of the receiver and microphones. Do not use liquid cleaners or abrasive materials.
- Storage: When not in use for extended periods, store the system in a cool, dry place, away from direct sunlight and extreme temperatures. Remove AA batteries from microphones if storing for more than a month to prevent leakage.
- Battery Care: For rechargeable microphone batteries, avoid fully discharging them regularly. Recharge them periodically even if not in frequent use to maintain battery health.
- Handle with Care: Avoid dropping the microphones or receiver, as this can damage internal components.
6. Troubleshooting
| Problem | Possible Cause | Solution |
|---|---|---|
| No sound from microphone | Microphone or receiver is off; Low microphone battery; Incorrect audio connection; Volume too low. | Ensure both microphone and receiver are powered on. Replace or recharge microphone batteries. Check audio cable connection to your sound system. Increase volume on receiver and connected audio device. |
| Interference or static | Other wireless devices nearby; Obstacles blocking signal; Microphone too far from receiver. | Move away from other electronic devices (Wi-Fi routers, cordless phones). Ensure clear line of sight between microphone and receiver. Reduce distance between microphone and receiver. |
| Low or distorted sound | Microphone battery low; Microphone too far from mouth; Input level too high/low. | Recharge or replace microphone batteries. Hold microphone closer to mouth. Adjust volume levels on receiver and connected audio device. |
| Microphone not pairing | Microphone or receiver not powered on correctly; Frequency mismatch (unlikely for fixed band). | Ensure both devices are fully powered on. If issues persist, power cycle both the receiver and microphones. |
7. Specifications
| Feature | Specification |
|---|---|
| Model Number | NG-88 |
| Brand | Yamnweo |
| Frequency Response | 500 MHz (UHF Fixed Dual Band) |
| Noise Level | 70 dB |
| Number of Channels | 2 |
| Audio Input (Receiver) | 1/4" mono input |
| Microphone Battery Type | Rechargeable Lithium (built-in) + 2 AA batteries (included for initial use/backup) |
| Microphone Endurance | Approx. 3 hours (per charge) |
| Microphone Charging Time | 2-3 hours |
| Product Dimensions (Receiver) | 10.75 x 3 x 12.75 inches |
| Item Weight (Total) | 1.79 pounds (0.81 Kilograms) |
| UPC | 762736654147 |
8. Warranty and Support
For warranty information and technical support, please refer to the official Yamnweo website or contact their customer service directly. Keep your purchase receipt as proof of purchase for any warranty claims.
Ask a question about this manual
Ask about setup, troubleshooting, compatibility, parts, safety, or missing instructions. Manuals+ will review the question and use this page’s manual context to help answer it.