
Introduction
This manual provides essential instructions for the safe and efficient operation, assembly, and maintenance of your Genérico Oakland POD-2017 Gasoline Lawn Mower. This 3-in-1 lawn mower features a 170cc, 6.5hp engine, a 21-inch cutting width, and 7 cutting height positions, designed for effective lawn care. Please read this manual thoroughly before using the equipment and keep it for future reference. Adhering to these instructions will ensure optimal performance and extend the life of your lawn mower.
Product Overview
The Genérico Oakland POD-2017 is a robust gasoline-powered lawn mower designed for residential lawn maintenance. Key components include the engine, cutting deck, grass collection bag, adjustable handle, and wheels.
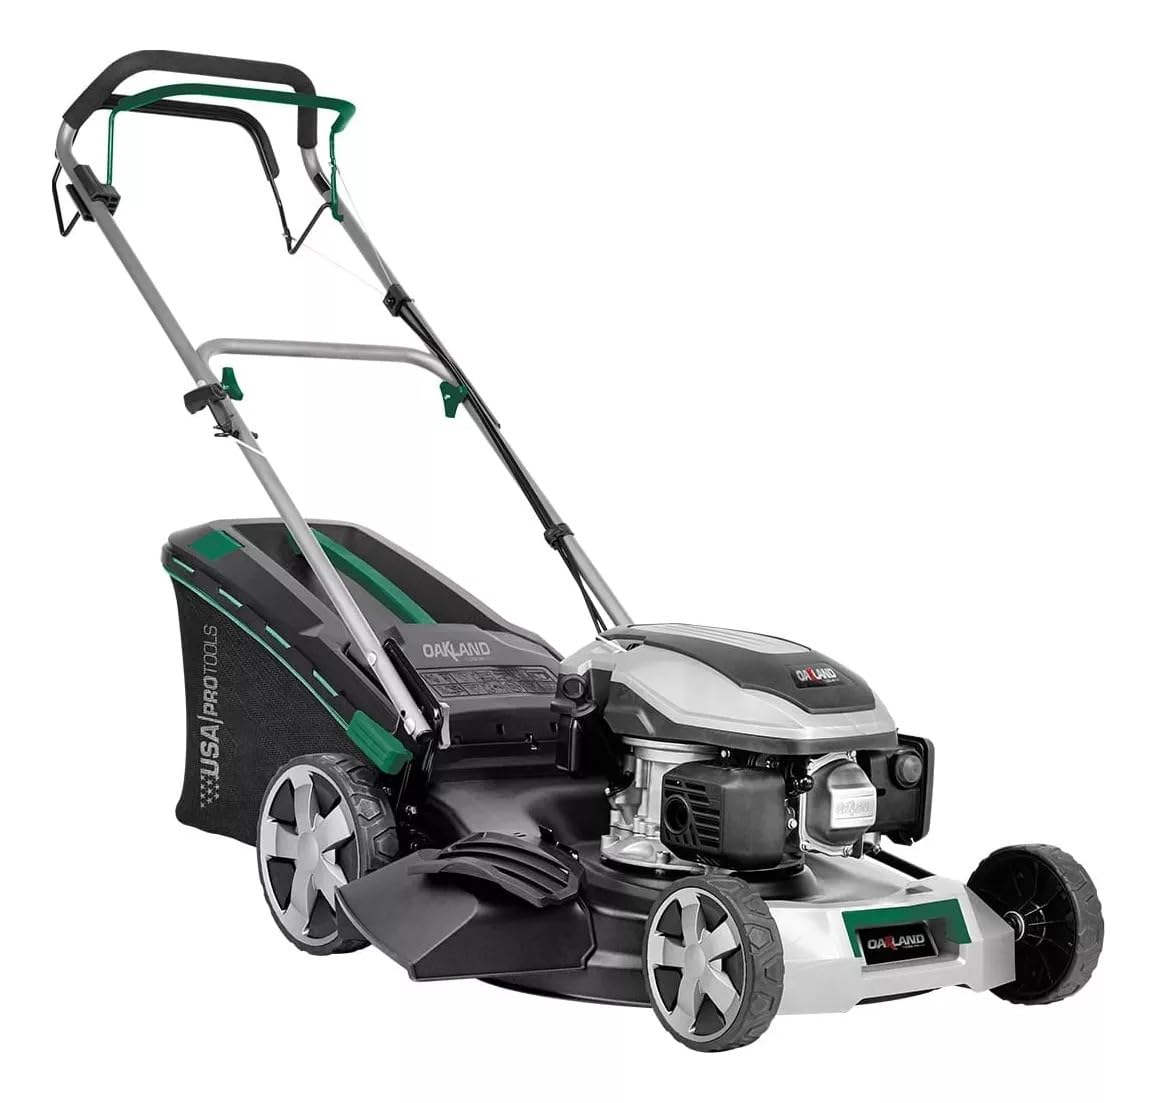
Figure 1: Genérico Oakland POD-2017 Gasoline Lawn Mower. This image shows the complete lawn mower from a front-left perspective, highlighting the engine, handle, wheels, and grass collection bag.
Key Features:
- Engine: 170cc, 6.5 horsepower gasoline engine.
- Cutting Width: 21 inches (53 cm) for efficient coverage.
- Cutting Height Adjustment: 7 positions to suit various grass lengths.
- Functionality: 3-in-1 system (bagging, mulching, side discharge).
- Collection Bag: 60-liter capacity grass collection bag.
Setup
1. Unpacking and Assembly
- Carefully remove all components from the packaging.
- Handle Assembly: Attach the upper and lower handle sections using the provided bolts and knobs. Ensure all connections are secure.
- Grass Collection Bag: Assemble the grass collection bag frame and attach the fabric bag. Securely hook the assembled bag onto the rear of the mower.
- Check for Damage: Inspect the mower for any signs of shipping damage. Do not operate if damage is found.
2. Fuel and Oil Filling
Important Safety Note: Always perform these steps in a well-ventilated area, with the engine off and cool. Avoid spilling fuel. Do not smoke or allow open flames near the mower.
- Engine Oil: The type of engine oil required is critical for engine longevity. This manual does not specify the oil type. Please consult the engine manufacturer's manual (if provided separately) or contact a qualified service technician for the correct oil type and capacity before first use. Operating the mower without proper oil will cause severe engine damage. Fill the engine crankcase to the recommended level using the dipstick.
- Fuel: Fill the fuel tank with fresh, unleaded gasoline (minimum 87 octane). Do not overfill. Leave space for fuel expansion.
3. Adjusting Cutting Height
The mower offers 7 cutting height positions. Locate the height adjustment levers on each wheel or a central lever (depending on the model design). Move the levers to the desired cutting height. Ensure all wheels are set to the same height for an even cut.
Operating Instructions
1. Pre-Operation Checklist
- Ensure the fuel tank is adequately filled.
- Check the engine oil level.
- Verify all nuts, bolts, and fasteners are tight.
- Clear the mowing area of any debris (stones, toys, wires, etc.).
- Wear appropriate safety gear, including eye protection, hearing protection, and sturdy footwear.
2. Starting the Engine
- Move the throttle lever (if present) to the "FAST" or "START" position.
- Press the primer bulb 3-5 times (if equipped) until fuel is visible in the bulb.
- Hold the engine brake lever (safety bar) against the handle. The engine will not start unless this lever is held.
- Pull the starter rope with a firm, steady motion until the engine starts. Do not pull the rope to its full extension.
- Once the engine starts, slowly release the starter rope.
3. Mowing
- Always push the mower forward. Do not pull it towards you.
- Overlap cutting swaths slightly to ensure an even cut.
- For best results, cut dry grass. Avoid mowing wet grass, as it can clog the mower and be slippery.
- If using the grass collection bag, monitor its fill level and empty it when full to maintain cutting efficiency.
- When mulching, ensure the mulching plug is installed and the side discharge chute is closed.
- When using side discharge, ensure the side discharge chute is open and the mulching plug is removed.
4. Stopping the Engine
To stop the engine, simply release the engine brake lever (safety bar). The engine will shut off automatically.
Maintenance
Regular maintenance is crucial for the performance and longevity of your lawn mower. Always ensure the engine is off and cool, and the spark plug wire is disconnected before performing any maintenance.
- After Each Use:
- Clean the underside of the cutting deck to prevent grass buildup.
- Empty and clean the grass collection bag.
- Wipe down the exterior of the mower.
- Engine Oil Change: Refer to the engine manufacturer's manual for recommended oil change intervals (typically after the first 5 hours, then every 25-50 hours of operation).
- Air Filter: Inspect and clean the air filter every 25 hours or more frequently in dusty conditions. Replace if damaged.
- Spark Plug: Inspect the spark plug annually or every 50 hours. Clean or replace as needed.
- Cutting Blade: Inspect the blade regularly for sharpness and damage. Sharpen or replace the blade as necessary. A dull or unbalanced blade can cause poor cutting performance and excessive vibration.
- Storage: For long-term storage, drain the fuel tank or use a fuel stabilizer. Clean the mower thoroughly and store it in a dry, protected area.
Troubleshooting
| Problem | Possible Cause | Solution |
|---|---|---|
| Engine will not start |
|
|
| Uneven cut |
|
|
| Excessive vibration |
|
|
Specifications
| Feature | Detail |
|---|---|
| Brand | Genérico |
| Model Number | POD-2017 |
| Engine Displacement | 170 cc |
| Engine Horsepower | 6.5 hp |
| Power Source | Gasoline |
| Cutting Width | 53 Centimeters (21 inches) |
| Cutting Positions | 7 |
| Collection Bag Capacity | 60 Liters |
| Operation Mode | Manual (Push) |
| Product Weight | 3 Kilograms (Note: This weight may refer to a specific component or be an error in the provided data, as typical gasoline lawn mowers are heavier.) |
Warranty and Support
For warranty information, technical support, or replacement parts, please contact the retailer where the product was purchased or the manufacturer directly. Keep your purchase receipt as proof of purchase for any warranty claims.