
Flysky FGR12B
Flysky FGR12B Receiver User Manual
Single Antenna 2.4GHz 12CH for AFHDS 3 Transmitters
1. Product Overview
The Flysky FGR12B is a compact and lightweight 12-channel receiver designed for use with AFHDS 3 compatible transmitters, including models like the PL18, NB4, and NB4 Lite. It operates on the 2.4GHz frequency band and utilizes Flysky's advanced third-generation Automatic Frequency Hopping Digital System (AFHDS 3) protocol, ensuring reliable and stable communication for RC cars, boats, and other models. This receiver provides multiple data output options including PWM, PPM, and i-bus in, offering versatility for various control setups.
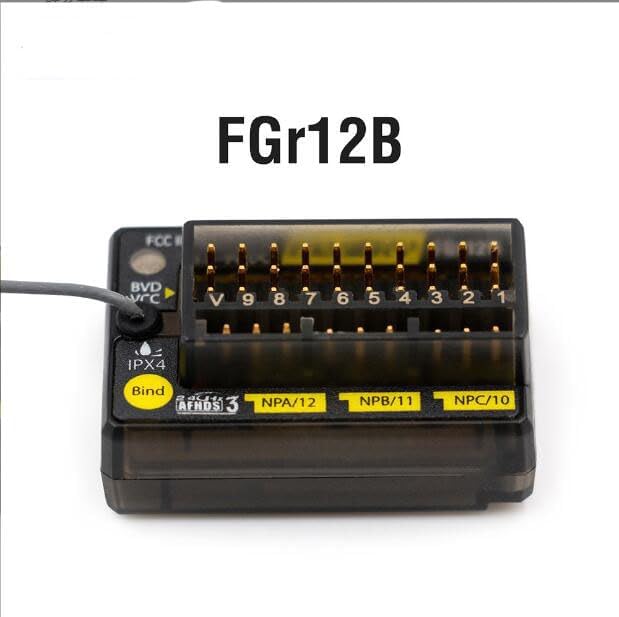
Figure 1: Front view of the Flysky FGR12B Receiver, highlighting its compact design and labeling.
2. Safety Information
This product is designed for safe operation when used as intended. Please observe the following safety guidelines:
- Ensure proper power input (3.5-9V) to prevent damage to the receiver.
- Avoid exposing the receiver to extreme temperatures outside the range of -10℃ to +60℃.
- Keep the receiver away from excessive humidity (above 95%) to prevent malfunction.
- Always connect components correctly according to the wiring diagrams to avoid short circuits or damage.
- Perform range checks before operating your model to ensure stable signal reception.
3. Product Features
- Adaptive Transmitter Compatibility: Fully compatible with all AFHDS 3 supporting transmitters (e.g., PL18, NB4, NB4 Lite).
- 12 PWM Channels: Provides 12 Pulse Width Modulation channels for extensive control capabilities.
- Compact and Lightweight Design: Optimized for space and weight-sensitive applications.
- AFHDS 3 Protocol: Utilizes Flysky's third-generation automatic frequency hopping digital system for robust and interference-resistant communication.
- Versatile Data Output: Supports PWM, PPM, and i-bus in data output for flexible integration with various flight controllers and servos.
- Single Antenna: Efficient single antenna design for reliable signal reception.
- Online Update Support: Firmware can be updated online for future enhancements and bug fixes.
4. Specifications
| Parameter | Value |
|---|---|
| Product Model | FGr12B |
| Adaptive Transmitter | All AFHDS 3 compatible (PL18, NB4, NB4 Lite, etc.) |
| Model Type | Car/Boat, etc. |
| PWM Channels | 12 |
| RF Frequency | 2.4GHz |
| 2.4G Protocol | AFHDS 3 |
| Antenna Type | Single Antenna |
| Input Power | 3.5-9V |
| Data Output | PWM, PPM, i-bus in |
| Temperature Range | -10℃ to +60℃ |
| Humidity Limit | 20%-95% |
| Online Update | Yes |
| Dimensions (L*W*H) | 37 x 25 x 17.5 mm (1.81 x 0.5 x 0.9 inches) |
| Weight | 11.2 g (0.4 oz) |
| Certifications | CE, FCC ID: N4ZFGR12B |
5. What's in the Box
Upon opening the package, you should find the following items:
- 1x Flysky FGR12B Receiver
- 1x Binding Cable
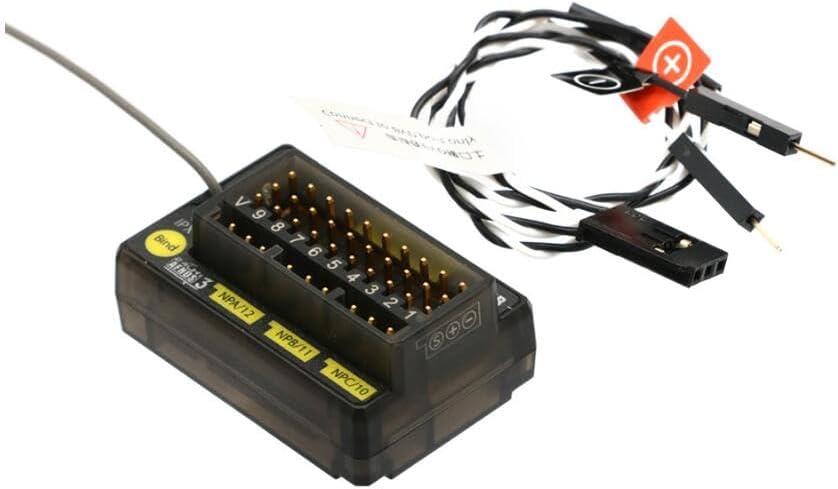
Figure 2: Contents of the Flysky FGR12B package, showing the receiver and connecting wires.
6. Setup Guide
6.1. Binding the Receiver
To establish communication between your Flysky FGR12B receiver and your AFHDS 3 compatible transmitter, you must perform a binding procedure:
- Ensure your transmitter is powered off.
- Connect the binding cable (included) to the 'Bind' port on the FGR12B receiver.
- Apply power to the receiver (3.5-9V). The receiver's LED should start flashing rapidly, indicating it is in binding mode.
- Turn on your transmitter and navigate to the binding menu (refer to your transmitter's manual for specific instructions).
- Initiate the binding process on your transmitter. The receiver's LED should turn solid, indicating a successful bind.
- Power off both the receiver and the transmitter.
- Remove the binding cable from the receiver.
- Power on the transmitter first, then the receiver. Verify that the receiver's LED is solid, confirming a successful connection.

Figure 3: Close-up view of the FGR12B receiver, showing the 'Bind' port and channel labels.
6.2. Connecting Servos and ESCs
Connect your servos, Electronic Speed Controllers (ESCs), and other components to the corresponding PWM channels on the receiver. Refer to your model's specific wiring diagram for correct connections.
- Channels are typically labeled 1-12.
- Ensure correct polarity when connecting (Signal, Positive, Negative).
- The 'VCC' or 'BVD' port can be used for voltage detection if supported by your transmitter.
7. Operating Instructions
Once the receiver is successfully bound and all components are connected, you can begin operating your RC model:
- Always power on your transmitter first.
- Then, power on your RC model (which powers the receiver).
- Verify that the receiver's LED is solid, indicating a stable connection.
- Perform a quick control check to ensure all channels respond correctly to transmitter inputs (e.g., steering, throttle, auxiliary functions).
- After operation, power off your RC model first, then your transmitter.
8. Maintenance
To ensure the longevity and optimal performance of your FGR12B receiver, follow these maintenance guidelines:
- Keep Clean: Regularly clean the receiver to prevent dust and debris buildup, which can affect performance. Use a soft, dry brush or compressed air.
- Protect from Elements: Avoid exposing the receiver to water, excessive moisture, or direct sunlight for prolonged periods.
- Secure Mounting: Ensure the receiver is securely mounted within your model to prevent vibrations from damaging internal components.
- Antenna Placement: Position the single antenna away from carbon fiber or metal parts that can shield the signal. Ensure it is not kinked or damaged.
- Inspect Connections: Periodically check all wire connections for looseness or corrosion.
9. Troubleshooting
If you encounter issues with your FGR12B receiver, consider the following troubleshooting steps:
- Receiver Not Binding:
- Ensure the binding cable is correctly inserted into the 'Bind' port.
- Verify that the receiver is receiving adequate power (3.5-9V).
- Confirm your transmitter is in binding mode and is AFHDS 3 compatible.
- Try moving the transmitter closer to the receiver during the binding process.
- No Control Response:
- Check if the receiver is successfully bound (solid LED). If not, re-bind.
- Verify all servo and ESC connections are correct and secure.
- Ensure your transmitter's battery is charged.
- Check for any physical damage to the receiver or its antenna.
- Intermittent Signal Loss:
- Check antenna placement; ensure it's not obstructed or damaged.
- Avoid operating in areas with high RF interference (e.g., near Wi-Fi routers, power lines).
- Ensure the receiver's power supply is stable and not fluctuating.
10. Warranty and Support
For warranty information and technical support, please refer to the official Flysky website or contact your authorized dealer. Keep your proof of purchase for any warranty claims.
Online Updates: The FGR12B receiver supports online firmware updates. Visit the official Flysky website for the latest firmware versions and update instructions to ensure optimal performance and access to new features.
For further assistance, you may visit the Flysky Official Website.
Related documentsFGR12B

Ask a question about this manual
Ask about setup, troubleshooting, compatibility, parts, safety, or missing instructions. Manuals+ will review the question and use this page’s manual context to help answer it.