
1. Introduction
Thank you for purchasing the JINBEI Hi5 Camera Flash Speedlite. This compact and versatile flash unit is designed to provide reliable and creative lighting solutions for various camera systems, including Sony, Canon, Nikon, Fuji, Panasonic, and Olympus. Its retro dial design offers intuitive control, while the built-in rechargeable battery ensures portability and extended use. Please read this manual thoroughly before use to ensure proper operation and to maximize the performance of your device.
2. Safety Information
Please observe the following safety precautions to prevent damage to the product or injury to yourself or others:
- Do not disassemble or modify the flash unit. This may cause electric shock or malfunction.
- Keep the unit dry. Do not expose it to rain, moisture, or high humidity.
- Avoid direct eye exposure to the flash. The intense light can cause temporary vision impairment.
- Do not operate the flash near flammable gases or liquids.
- Ensure the unit is securely mounted to your camera's hot shoe to prevent accidental drops.
- Use only the specified Type-C cable for charging.
- Keep out of reach of children.
3. Package Contents
Verify that all items listed below are included in your package:
- JINBEI Hi5 Flash Unit
- Carry Bag
- Diffuser
- Type-C USB Charging Cable
- PC Triggering Cable

Figure 3.1: Included Accessories. This image displays the JINBEI Hi5 flash unit alongside its standard accessories: a protective carry bag, a light diffuser, a Type-C USB cable for charging, and a PC sync cable for wired triggering.
4. Parts Identification
Familiarize yourself with the different parts of your JINBEI Hi5 flash unit:
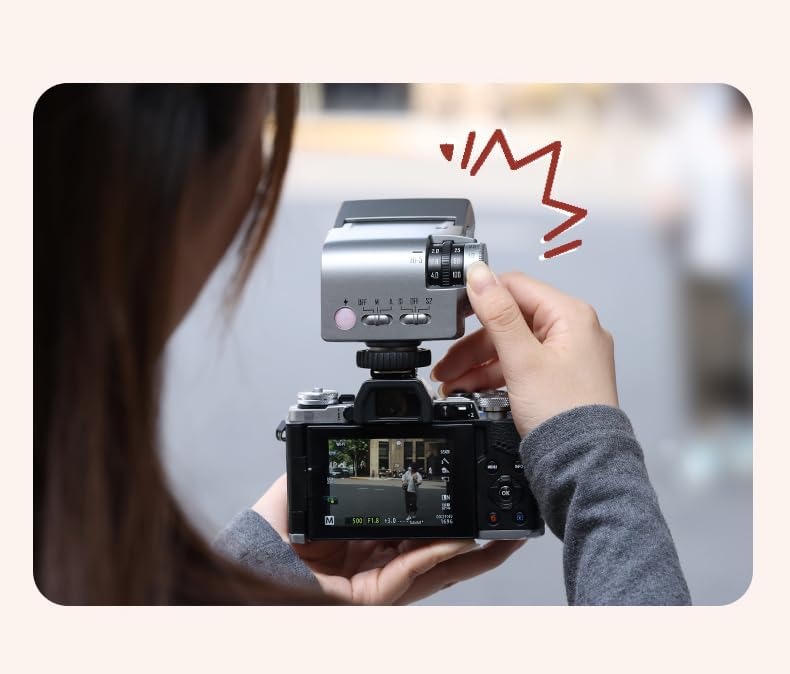
Figure 4.1: Front and Side View of the JINBEI Hi5. This diagram labels key components such as the Fresnel lens, SYNC port, Type-C charging slot, and hot shoe release mechanism.
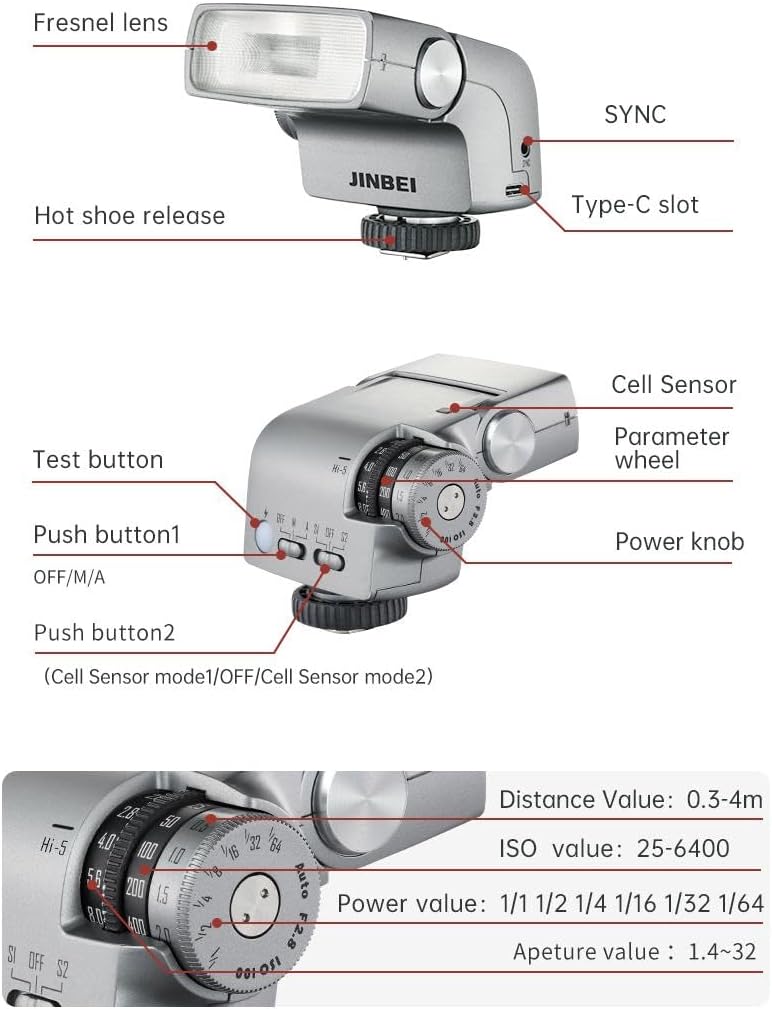
Figure 4.2: Top View of the JINBEI Hi5 Control Panel. This image highlights the parameter wheel and push buttons, indicating settings for Distance Value (0.3-4m), ISO value (25-6400), Power value (1/1 to 1/64), and Aperture value (1.4-32).
- Fresnel Lens: Emits the flash light.
- SYNC Port: For connecting a PC sync cable for wired triggering.
- Type-C Slot: For charging the internal battery.
- Hot Shoe Release: Secures the flash to the camera's hot shoe.
- Cell Sensor: Detects other flashes for optical slave modes (S1/S2).
- Parameter Wheel: Adjusts flash settings such as ISO, aperture, and power output.
- Test Button: Fires a test flash and indicates battery status.
- Power Knob: Turns the unit ON/OFF and selects operating modes (A/M/S1/S2).
- Push Button 1 (OFF/M/A): Selects between OFF, Manual (M), and Automatic (A) modes.
- Push Button 2 (Cell Sensor mode1/OFF/Cell Sensor mode2): Selects between S1, OFF, and S2 optical slave modes.
5. Setup
5.1 Charging the Battery
The JINBEI Hi5 has a built-in 2500mAh lithium battery. Before first use, fully charge the unit.
- Connect the supplied Type-C USB charging cable to the Type-C slot on the flash unit.
- Connect the other end of the cable to a USB power adapter (not included) or a computer's USB port.
- The charging indicator light will show the charging status. Once fully charged, the indicator will change (refer to LED indicator section for details).

Figure 5.1: Type-C Charging. The image shows the JINBEI Hi5 flash unit being charged via its Type-C port, connected to an external power bank.
5.2 Mounting to Camera
The JINBEI Hi5 features a universal hot shoe mount compatible with most cameras.
- Ensure the flash unit is turned OFF.
- Slide the flash's hot shoe foot into your camera's hot shoe slot.
- Tighten the hot shoe release mechanism (if applicable) to secure the flash firmly in place. Do not overtighten.

Figure 5.2: Flash Mounted on Camera. This image demonstrates the JINBEI Hi5 flash unit securely attached to a camera's hot shoe, illustrating its compact and retro design.
6. Operating Instructions
6.1 Powering On/Off and Mode Selection
Rotate the Power Knob to turn the unit ON or OFF and select the desired operating mode:
- OFF: Power off.
- A (Automatic Mode): The flash automatically adjusts its output based on ambient light and camera settings.
- M (Manual Mode): Allows manual control over flash power output.
- S1 (Optical Slave Mode 1): The flash fires in response to the first flash from a master flash.
- S2 (Optical Slave Mode 2): The flash fires in response to the second flash from a master flash, ignoring the pre-flash.
6.2 Adjusting Flash Settings (Manual Mode)
In Manual (M) mode, use the Parameter Wheel to adjust the flash power output.
- Power Value: Adjustable from 1/1 (full power) down to 1/64.
- ISO Value: Set to match your camera's ISO. Range: 25-6400.
- Aperture Value: Set to match your camera's aperture. Range: 1.4-32.
- Distance Value: Indicates the effective flash range based on current settings. Range: 0.3-4m.

Figure 6.1: Adjusting Settings. This image shows a user rotating the retro dial on the JINBEI Hi5 flash, demonstrating the intuitive control for adjusting flash parameters.
6.3 Using Optical Slave Modes (S1/S2)
The JINBEI Hi5 can be used as an off-camera slave flash, triggered by another flash unit.
- Mount the Hi5 flash on a light stand or place it in the desired position.
- Rotate the Power Knob to select S1 or S2 mode.
- Ensure the Cell Sensor on the Hi5 is facing the master flash.
- S1 Mode: For master flashes that do not emit a pre-flash. The Hi5 will fire upon detecting the first flash.
- S2 Mode: For master flashes that emit a pre-flash (e.g., TTL flashes). The Hi5 will ignore the pre-flash and fire on the main flash.

Figure 6.2: Off-Camera Flash Setup. This image illustrates the JINBEI Hi5 flash unit positioned on a light stand, demonstrating its use as an off-camera light source for creative photography.
6.4 Test Flash
Press the Test Button to fire a test flash and check the flash output. The indicator light on the test button also shows battery status and readiness.
7. Maintenance
- Cleaning: Use a soft, dry cloth to clean the flash unit. For stubborn dirt, use a slightly damp cloth and then dry thoroughly. Do not use solvents or abrasive cleaners.
- Storage: When not in use for extended periods, store the flash in its carry bag in a cool, dry place. It is recommended to charge the battery at least once every three months to maintain battery health.
- Battery Care: Avoid fully discharging the battery frequently. Charge the battery before it is completely depleted.
8. Troubleshooting
| Problem | Possible Cause | Solution |
|---|---|---|
| Flash does not fire. |
|
|
| Flash output is too weak/strong. |
|
|
| Optical slave (S1/S2) not triggering. |
|
|
9. Specifications
| Feature | Detail |
|---|---|
| Model | Hi5 |
| Guide Number (GN) | 16 |
| Power Output | 26Ws |
| Color Temperature | 6000K ± 200K |
| Flash Modes | A (Automatic), M (Manual), S1 (Optical Slave 1), S2 (Optical Slave 2) |
| Recycle Time (Full Power) | Approx. 1.6 seconds |
| Full Power Flashes | > 650 times |
| Flash Duration (T0.5) | 1/3000s - 1/49000s |
| Built-in Battery | 2500mAh Lithium Battery |
| Charging Port | Type-C USB |
| Compatible Cameras | Sony, Canon, Nikon, Fuji, Panasonic, Olympus (Universal Hot Shoe) |
10. Warranty and Support
The product comes with a manufacturer's warranty. Please refer to the warranty card included in your package for specific terms and conditions. For technical support or service inquiries, please contact your retailer or visit the official JINBEI website.
Manufacturer: Jinbei
ASIN: B0DFPQGHCN

