
1. Introduction and Safety Information
Thank you for choosing the Corberó CLH7BL1224 Front-Load Washing Machine. This manual provides essential information for the correct installation, safe operation, and proper maintenance of your appliance. Please read it thoroughly before using the washing machine and keep it for future reference.
1.1 General Safety Warnings
- Ensure the appliance is properly grounded.
- Do not allow children to play with or operate the washing machine.
- Do not touch the power plug with wet hands.
- Unplug the appliance before cleaning or performing any maintenance.
- Do not wash items that have been cleaned, washed, soaked, or dabbed with combustible or explosive substances.
- Keep pets away from the appliance.

2. Setup and Installation
2.1 Unpacking
Carefully remove all packaging materials. Check for any damage during transit. Keep packaging materials out of reach of children.
2.2 Removing Transit Bolts
Before operating the machine, you must remove the transit bolts located at the rear of the appliance. These bolts secure the drum during transport and must be removed to prevent damage during operation. Refer to the diagram below for their location.

2.3 Location and Leveling
Place the washing machine on a firm, level floor. Adjust the leveling feet to ensure the appliance is stable and does not wobble. Proper leveling reduces noise and vibration during operation.
2.4 Water and Drain Connections
- Connect the inlet hose to a cold water tap with a 3/4-inch thread. Ensure the connection is tight to prevent leaks.
- Position the drain hose into a standpipe or over the edge of a sink, ensuring it is securely fixed to prevent displacement during draining. The height of the drain hose should be between 60 cm and 100 cm from the floor.
2.5 Electrical Connection
Plug the power cable into a grounded electrical outlet. Ensure the voltage and frequency match the specifications on the rating label of the appliance.
3. Operating Instructions
3.1 Control Panel Overview

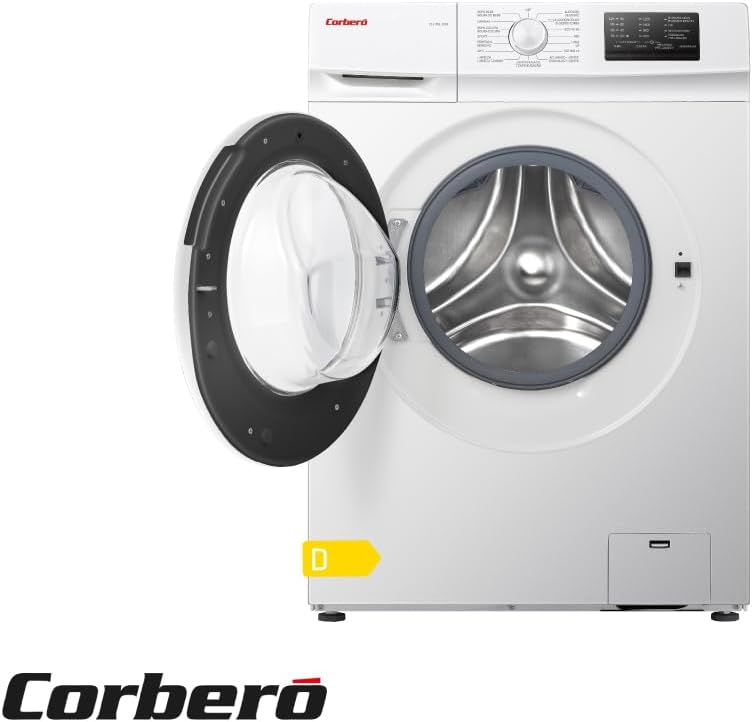
The control panel consists of a program selector dial, an LED display, and several function buttons:
- Program Selector Dial: Used to choose one of the 15 available washing programs.
- LED Display: Shows program duration, remaining time, error codes, and selected options.
- Temperature Button (TEMP.): Adjusts the wash water temperature.
- Spin Speed Button (CENTRIF.): Modifies the spin speed or selects no spin.
- Delayed Start Button (INICIO DIFERIDO): Sets a delay for the program start.
- Pre-wash Button (PRELAVADO): Adds a pre-wash cycle for heavily soiled items.
- Start/Pause Button (START/PAUSE): Starts, pauses, or cancels a washing program.
3.2 Loading Laundry
Open the washing machine door and load laundry loosely into the drum. Do not overload the machine; ensure there is enough space for clothes to tumble freely. Close the door firmly.
3.3 Adding Detergent and Additives
Pull out the detergent dispenser drawer. Add detergent to the main wash compartment and any fabric softener or pre-wash detergent to their respective compartments. Close the drawer gently.
3.4 Program Selection
Turn the program selector dial to choose the desired washing program. The machine offers 15 programs, including:
- Cotton: For durable cotton items.
- Eco 40-60: Energy-efficient program for normally soiled cotton items.
- Mix: For mixed loads of cotton and synthetics.
- Rapid 15: Quick wash for lightly soiled items.
- Delicates: For delicate fabrics.
- Wool: Specific program for woolens.
- Rinse & Spin: For rinsing and spinning items separately.
- Drum Clean: For cleaning the washing machine drum.
3.5 Adjusting Options
After selecting a program, you can adjust the temperature, spin speed, or activate functions like Delayed Start or Pre-wash using the corresponding buttons. The LED display will show the selected options and estimated program duration.
3.6 Starting the Wash Cycle
Press the Start/Pause button to begin the selected program. The door will lock, and the machine will start filling with water.
3.7 Ending the Wash Cycle
Once the program is complete, the machine will signal with an audible alert, and the display will show 'End'. The door will unlock after a short delay. Open the door and remove your laundry.
4. Maintenance and Care
Regular maintenance ensures the longevity and optimal performance of your washing machine.
4.1 Cleaning the Detergent Dispenser
Periodically remove the detergent dispenser drawer and rinse it under running water to remove any detergent residue. Use a brush if necessary.
4.2 Cleaning the Drum
Use the 'Drum Clean' program regularly (e.g., once a month) to clean the interior of the drum and prevent odors. You can add a washing machine cleaner for better results.
4.3 Cleaning the Door Seal
After each wash, wipe the rubber door seal with a damp cloth to remove any lint, dirt, or moisture. This helps prevent mold and unpleasant odors.
4.4 Cleaning the Pump Filter
The pump filter should be cleaned every few months or if you notice issues with water drainage. Locate the filter cover at the bottom front of the machine, open it, and carefully unscrew the filter. Remove any debris and rinse it clean before reassembling.
4.5 External Cleaning
Wipe the exterior of the washing machine with a soft, damp cloth. Do not use abrasive cleaners or solvents.
5. Troubleshooting
If you encounter any issues, consult this section before contacting customer service.
| Problem | Possible Cause | Solution |
|---|---|---|
| Machine does not start | Power cord unplugged, door not closed, program not selected, Start/Pause not pressed. | Check power, close door firmly, select program, press Start/Pause. |
| No water intake | Water tap closed, inlet hose kinked, water supply cut off. | Open water tap, straighten hose, check water supply. |
| Water not draining | Drain hose kinked or blocked, pump filter clogged. | Straighten/clear drain hose, clean pump filter. |
| Excessive vibration/noise | Transit bolts not removed, machine not level, uneven load. | Remove transit bolts, adjust leveling feet, redistribute laundry. |
| Door cannot be opened | Program still running, water inside drum, child lock active. | Wait for program to finish, drain water, deactivate child lock. |
6. Specifications
Technical data for the Corberó CLH7BL1224 Front-Load Washing Machine:
- Model: CLH7BL1224
- Capacity: 7 kg
- Maximum Spin Speed: 1200 RPM
- Number of Programs: 15
- Energy Efficiency Class: D
- Dimensions (Depth x Width x Height): 46 cm x 59.5 cm x 84.5 cm
- Product Weight: 72 kg
- Color: White
- Controls: Push button and Rotary dial
- Operating Mode: Fully automatic
- Components Included: Power cable

7. Warranty and Support
Your Corberó CLH7BL1224 washing machine comes with a manufacturer's warranty. Please refer to the warranty card provided with your purchase for specific terms and conditions, including the warranty period and coverage details.
For technical assistance, spare parts, or to report a fault, please contact Corberó customer service. Have your model number (CLH7BL1224) and purchase date ready when you call.
You can find more information and support on the official Corberó website or through your local authorized service center.


