
1. Important Safety Instructions
Always observe basic safety precautions when using electrical tools to reduce the risk of fire, electric shock, and personal injury. Read all instructions before operating this tool.
Work Area Safety
- Keep the work area clean and well-lit. Cluttered or dark areas invite accidents.
- Do not operate power tools in explosive atmospheres, such as in the presence of flammable liquids, gases, or dust. Power tools create sparks which may ignite the dust or fumes.
- Keep children and bystanders away while operating a power tool. Distractions can cause you to lose control.
Electrical Safety
- This tool is battery-powered. Ensure the battery pack is compatible with the tool and correctly inserted.
- Do not expose battery-powered tools to rain or wet conditions. Water entering a power tool will increase the risk of electric shock.
- Use only with the specified battery pack and charger (not included with this product).
Personal Safety
- Stay alert, watch what you are doing, and use common sense when operating a power tool. Do not use a power tool while you are tired or under the influence of drugs, alcohol, or medication.
- Use personal protective equipment. Always wear eye protection. Protective equipment such as dust mask, non-skid safety shoes, hard hat, or hearing protection used for appropriate conditions will reduce personal injuries.
- Prevent unintentional starting. Ensure the switch is in the off-position before connecting to battery pack, picking up or carrying the tool.
- Remove any adjusting key or wrench before turning the power tool on. A wrench or a key left attached to a rotating part of the power tool may result in personal injury.
- Dress properly. Do not wear loose clothing or jewelry. Keep your hair and clothing away from moving parts. Loose clothes, jewelry, or long hair can be caught in moving parts.
Power Tool Use and Care
- Do not force the power tool. Use the correct power tool for your application.
- Do not use the power tool if the switch does not turn it on and off. Any power tool that cannot be controlled with the switch is dangerous and must be repaired.
- Disconnect the battery pack from the power tool before making any adjustments, changing accessories, or storing power tools.
- Store idle power tools out of the reach of children and do not allow persons unfamiliar with the power tool or these instructions to operate the power tool.
- Maintain power tools and accessories. Check for misalignment or binding of moving parts, breakage of parts, and any other condition that may affect the power tool’s operation. If damaged, have the power tool repaired before use.
- Use the power tool, accessories, and tool bits in accordance with these instructions, taking into account the working conditions and the work to be performed.
2. Product Overview
The LEEIKOO 21V Cordless Drill Driver (Model JRJK00030-EU) is designed for drilling into wood, metal, and plastics, as well as for driving and removing screws. This product includes the drill driver body. Please note that a compatible 21V battery pack and charger are required for operation and are sold separately.
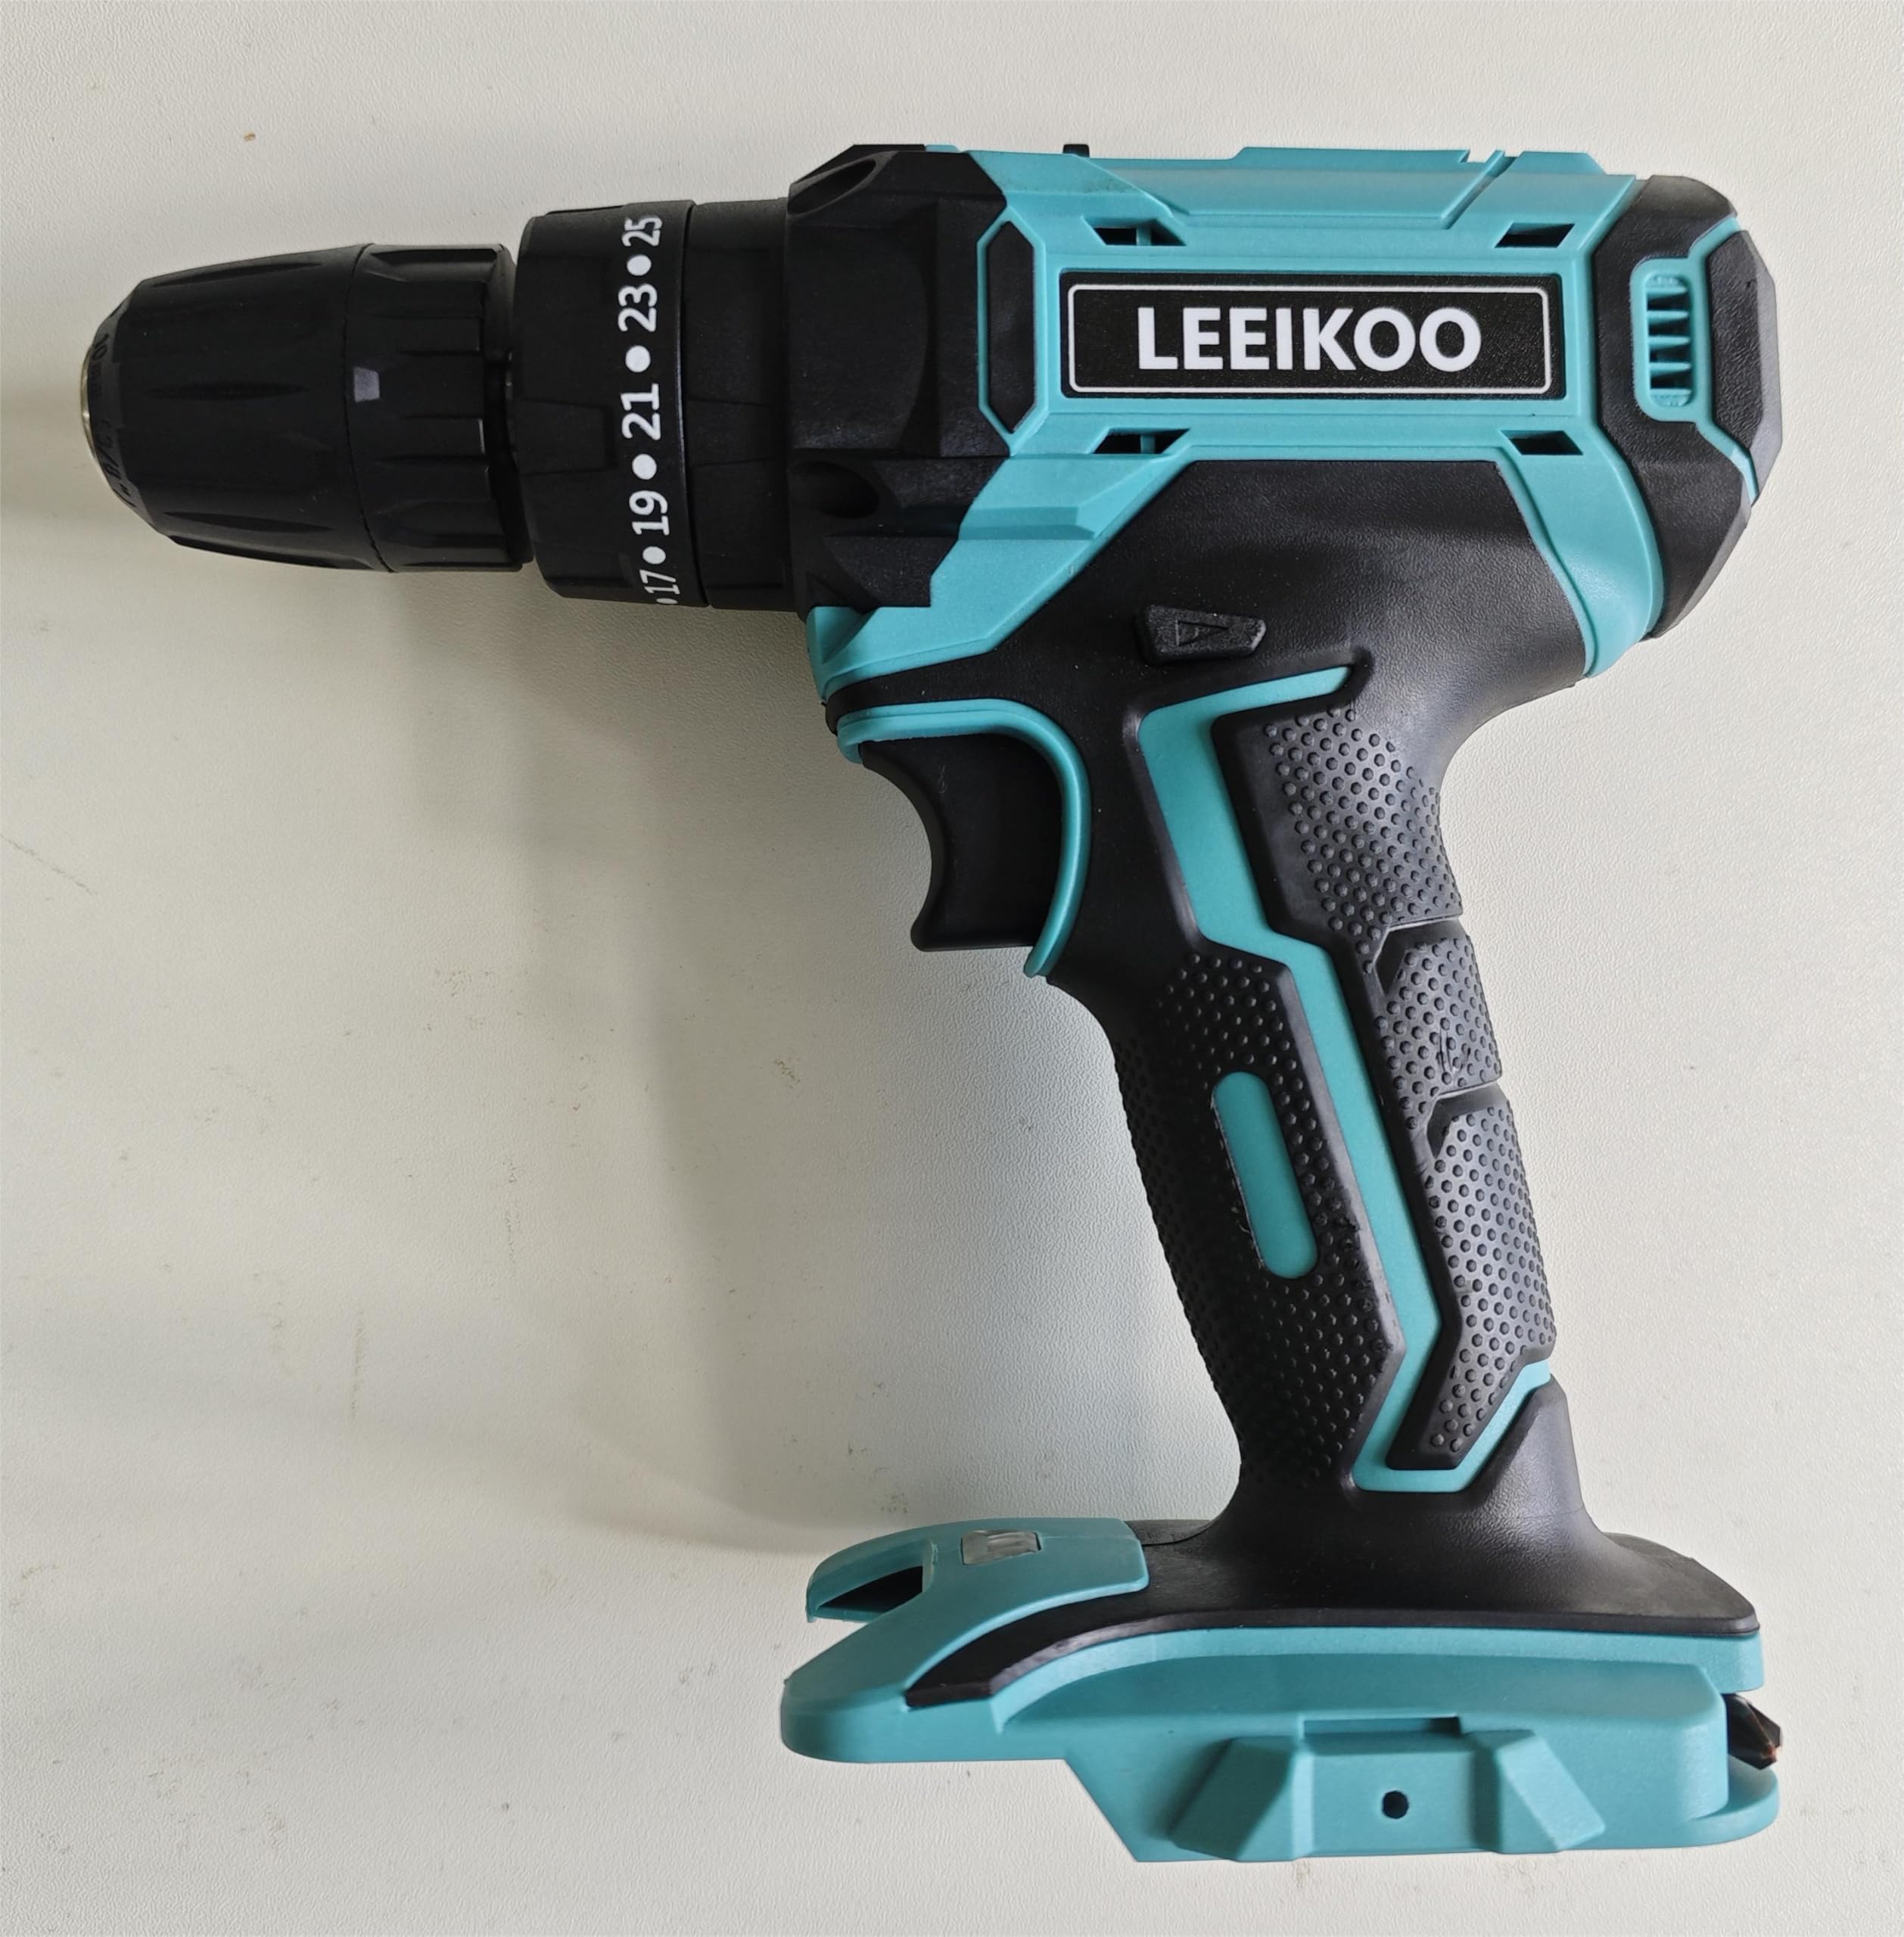
An image showing the LEEIKOO 21V Cordless Drill Driver body from a front-side angle. The drill features a black and red color scheme, a comfortable grip, and a chuck for holding drill bits. Note that the battery and charger are sold separately.
Components
- Drill Driver Body: The main unit of the tool.
- Chuck: Used to hold drill bits and screwdriver bits.
- Torque Adjustment Ring: Allows selection of torque settings for driving screws and a drill mode for drilling.
- Speed Selector Switch: For high or low-speed operation.
- Forward/Reverse Switch: Controls the direction of rotation.
- Trigger Switch: Activates the tool and controls speed.
- Battery Port: For inserting a compatible 21V battery pack (not included).
3. Setup
Battery Installation (Battery not included)
- Ensure the drill driver is switched off and the forward/reverse switch is in the center (locked) position.
- Align the compatible 21V battery pack with the battery port on the base of the drill driver.
- Slide the battery pack into the port until it clicks securely into place. Do not force the battery.
- To remove the battery, press the release button(s) on the battery pack and slide it out.
Attaching Drill Bits/Accessories
- Ensure the battery pack is removed from the tool for safety.
- Hold the rear part of the chuck firmly with one hand.
- Rotate the front part of the chuck counter-clockwise to open the chuck jaws.
- Insert the desired drill bit or screwdriver bit into the chuck jaws, ensuring it is centered and inserted as far as possible.
- Rotate the front part of the chuck clockwise to tighten the jaws securely around the bit. Hand-tighten firmly.
- Pull on the bit to ensure it is securely fastened before use.
4. Operating Instructions
Powering On/Off and Speed Control
- To turn the tool on, press the trigger switch. The speed is variable depending on how far the trigger is pressed.
- To turn the tool off, release the trigger switch.
Forward/Reverse Rotation
- The forward/reverse switch is located above the trigger.
- Push the switch to the left for forward (clockwise) rotation, suitable for drilling and driving screws.
- Push the switch to the right for reverse (counter-clockwise) rotation, suitable for removing screws or freeing jammed bits.
- When the switch is in the center position, the trigger is locked, preventing accidental starting.
Speed Settings
The drill driver typically features a two-speed gearbox:
- Low Speed (Gear 1): For high torque applications such as driving large screws or drilling large holes.
- High Speed (Gear 2): For faster drilling of smaller holes.
Adjust the speed selector switch (usually located on top of the drill) to the desired setting before starting the tool.
Torque Adjustment
The torque adjustment ring allows you to select the amount of torque applied. This is crucial for driving screws to prevent overtightening or stripping screw heads.
- Rotate the torque adjustment ring to select a numbered setting. Lower numbers indicate lower torque, suitable for smaller screws or softer materials. Higher numbers indicate higher torque, for larger screws or harder materials.
- For drilling, set the ring to the drill symbol (usually a drill bit icon) for maximum torque without clutch engagement.
Drilling and Driving Techniques
- Always hold the tool firmly with both hands if possible.
- Apply steady, even pressure. Do not force the drill.
- For drilling, start with a slow speed to create a pilot hole, then increase speed as needed.
- For driving screws, select an appropriate torque setting. Start slowly to engage the screw, then increase speed.
5. Maintenance
Regular maintenance ensures the longevity and safe operation of your LEEIKOO drill driver.
Cleaning
- Always remove the battery pack before cleaning.
- Use a soft, damp cloth to wipe down the exterior of the tool. Do not use harsh chemicals or abrasive cleaners.
- Clear any dust or debris from the ventilation openings using compressed air or a soft brush.
- Clean the chuck jaws regularly to ensure proper grip on bits.
Storage
- Store the drill driver in a dry, secure location out of reach of children.
- Remove the battery pack from the tool before storing for extended periods.
- Avoid storing in direct sunlight or areas with extreme temperatures.
Inspection
- Before each use, inspect the tool for any signs of damage, loose parts, or wear.
- Check the chuck for proper operation and ensure it tightens securely.
- If any damage is found, do not use the tool. Contact customer support for assistance.
6. Troubleshooting
This section addresses common issues you might encounter with your drill driver.
| Problem | Possible Cause | Solution |
|---|---|---|
| Drill does not start | Battery not inserted correctly Battery discharged Forward/Reverse switch in center (locked) position Faulty trigger switch | Ensure battery is fully seated Charge battery (if applicable) Move switch to forward or reverse position Contact customer support |
| Loss of power during operation | Battery low or discharged Overload protection activated | Charge battery Reduce pressure on the tool; allow it to cool down |
| Bit slips in chuck | Chuck not tightened sufficiently Bit shank is dirty or damaged | Retighten chuck firmly Clean or replace the bit |
| Excessive vibration or noise | Damaged bit Loose components Internal fault | Replace bit Inspect tool for loose parts; tighten if possible Discontinue use and contact customer support |
7. Specifications
Technical specifications for the LEEIKOO 21V Cordless Drill Driver (Model JRJK00030-EU).
- Model Number: JRJK00030-EU
- Brand: LEEIKOO
- Voltage: 21V (DC)
- Power Source: Battery Powered (Battery not included)
- Product Dimensions (L x W x H): 21 x 7 x 19 cm (8.27 x 2.76 x 7.48 inches)
- Product Weight: 1 kg (2.2 lbs)
- Included Components: Drill Driver Body
8. Warranty and Support
LEEIKOO products are manufactured to high-quality standards. This product is covered by a limited warranty against defects in materials and workmanship under normal use. Specific warranty terms and duration may vary by region and retailer.
For warranty claims, technical assistance, or general inquiries, please refer to the contact information provided by your retailer or visit the official LEEIKOO website.
Please retain your proof of purchase for any warranty claims.