
1. Introduction
This manual provides essential information for the safe and effective operation of your Heltec HT-CC20ABP Charge/Discharge Capacity Tester. This device is designed for testing the charge and discharge capacity of various battery types, including Lipo, LiFePO4, and Lead Acid battery packs, within a voltage range of 9-99V and a current capacity of 20A.
Please read this manual thoroughly before using the product to ensure proper setup, operation, and maintenance.
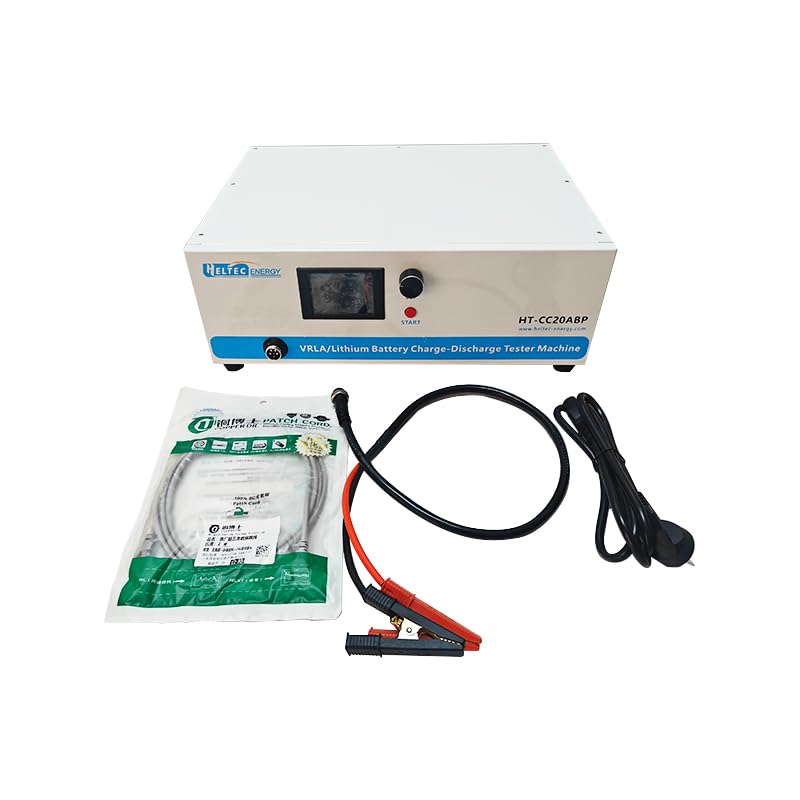
Figure 1: Heltec HT-CC20ABP Capacity Tester and accessories, including power cable and battery connection cables.
2. Product Overview
2.1 Key Features
- Model: HT-CC20ABP
- Charging Test Cut-off Voltage: 9-99V
- Charging Test Voltage: 9-99V
- Discharge Current: 0.5V-20A
- Charge Current: 0.1-10A
- Charge Stepping Current: 0.1A
- Discharge Stepping Current: 0.1A
2.2 Components and Controls
The Heltec HT-CC20ABP features a clear LCD display, control knob, and essential ports for operation.

Figure 2: Front and Back Panel Illustration. Key components include Output Port, LCD, Start Button, Switching/Setting Button, Power Socket, and Switch.

Figure 3: Front view of the tester, showing the display, control knob, and connection port.

Figure 4: Rear view of the tester, highlighting the cooling fans for heat dissipation during operation.
3. Setup
3.1 Unpacking and Inspection
Carefully unpack the capacity tester and all accessories. Verify that all components listed in the 'What's in the Box' section are present and undamaged. If any items are missing or damaged, contact customer support immediately.
3.2 Connecting the Tester
- Place the tester on a stable, flat surface with adequate ventilation.
- Connect the provided power cable to the power socket on the rear of the tester and then to a suitable power outlet.
- Connect the battery connection cables (red for positive, black for negative) to the battery pack you intend to test. Ensure a secure connection.
- Connect the other end of the battery connection cables to the output port on the front of the tester. Observe polarity carefully.

Figure 5: The capacity tester connected to a battery pack, ready for testing.
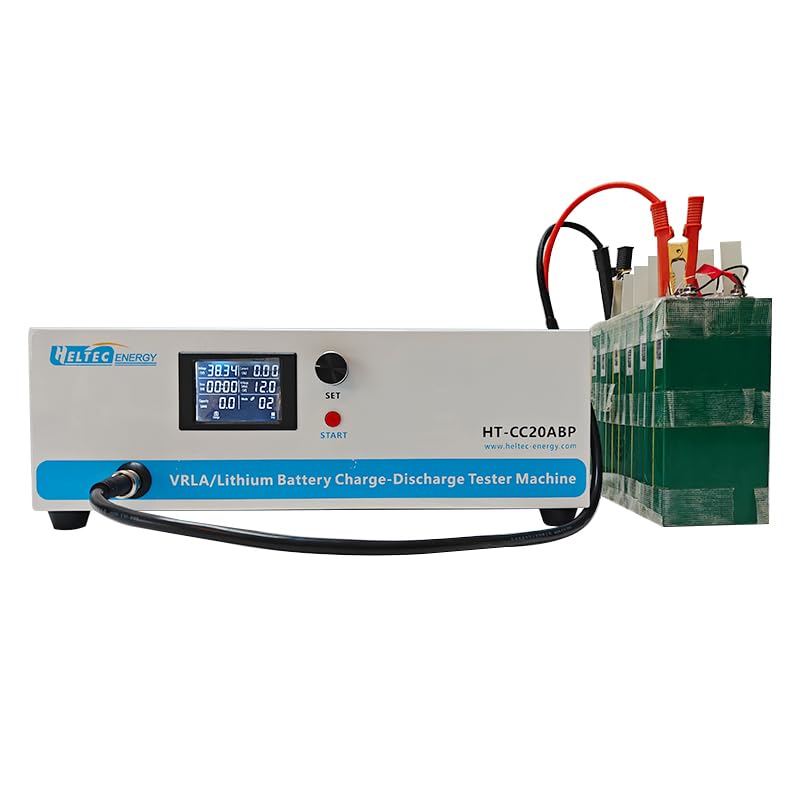
Figure 6: Close-up of the tester's connection cables and clamps, illustrating proper attachment points.
4. Operating Instructions
4.1 Powering On and Initial Display
After connecting the power and battery, switch on the tester using the power switch on the rear panel. The LCD display will illuminate, showing initial parameters.

Figure 7: Detailed view of the LCD screen, showing current voltage, current, time, and capacity readings.
4.2 Setting Test Parameters
- Use the 'SET' button and control knob to navigate through the menu and adjust parameters such as charging voltage, discharge cut-off voltage, charge current, and discharge current.
- Refer to the battery manufacturer's specifications for appropriate voltage and current settings.
- Confirm settings before starting any test.
4.3 Starting a Test
Once parameters are set, press the 'START' button to begin the charge or discharge cycle. The display will show real-time data including current voltage, current, elapsed time, and accumulated capacity.
4.4 Monitoring and Data Logging
The tester can be connected to a computer for advanced monitoring and data logging using dedicated software. This allows for detailed analysis of battery performance over time.

Figure 8: Software interface displaying real-time test data in a list format.

Figure 9: Software interface providing data analysis and summary, including graphical representations of test results.
5. Maintenance
5.1 Cleaning
Regularly clean the exterior of the tester with a soft, dry cloth. Do not use abrasive cleaners or solvents. Ensure no liquids enter the device.
5.2 Ventilation
Ensure that the cooling vents on the rear of the unit are not obstructed. Proper airflow is crucial for maintaining optimal operating temperature and preventing overheating.
5.3 Storage
When not in use, store the tester in a cool, dry place away from direct sunlight and extreme temperatures. Disconnect all cables before storage.
6. Troubleshooting
6.1 No Power
- Check if the power cable is securely connected to both the tester and the power outlet.
- Ensure the power switch on the rear panel is in the 'ON' position.
- Verify that the power outlet is functional by testing it with another device.
6.2 Incorrect Readings
- Ensure battery connection cables are correctly attached with proper polarity (red to positive, black to negative).
- Check for loose connections at both the battery and the tester's output port.
- Verify that the test parameters (voltage, current) are set correctly according to the battery specifications.
6.3 Tester Overheating
- Ensure the tester is placed in a well-ventilated area.
- Check that the cooling vents on the rear are not blocked.
- Reduce the test current if possible, especially during prolonged discharge cycles.
7. Specifications
| Parameter | Value |
|---|---|
| Model Number | HT-CC20ABP |
| Charging Test Cut-off Voltage | 9-99V |
| Charging Test Voltage | 9-99V |
| Discharge Current | 0.5V-20A |
| Charge Current | 0.1-10A |
| Charge Stepping Current | 0.1A |
| Discharge Stepping Current | 0.1A |
| Item Weight | 19 Kilograms (41.89 Pounds) |
| Color | White |
| UPC | 762716254350 |
7.1 What's in the Box
- Heltec HT-CC20ABP Capacity Tester
- Power Cable
- Battery Connection Cables with Clamps
8. Warranty and Support
For warranty information and technical support, please refer to the official Heltec BMS website or contact your authorized dealer. Keep your purchase receipt as proof of purchase.
Manufacturer: heltec bms
Date First Available: August 28, 2024
