1. Introduction
This manual provides detailed instructions for the assembly, operation, and maintenance of your Greesum 6X4FT All-Weather Resin Outdoor Storage Shed. Please read all instructions carefully before beginning assembly and retain this manual for future reference.
The Greesum 6X4FT Outdoor Storage Shed is designed to provide a durable and weather-resistant solution for organizing your garden tools, backyard equipment, pool supplies, or as a utility room or pet house. Constructed from eco-friendly polyethylene resin plastic, it offers UV resistance and waterproof properties.
2. Safety Information
WARNING: Failure to follow these safety instructions may result in injury or damage to the product.
- Team Assembly: Assembly requires 2-3 people. Handle heavy components with care during assembly.
- Protective Gear: Wear gloves to prevent injuries during installation.
- Stable Surface: Ensure the shed is assembled on a level and stable surface. Consider anchoring the shed for additional stability, especially in windy conditions.
- Children and Pets: Keep children and pets away from the assembly area.
- Tool Use: Use appropriate tools as recommended in the assembly instructions. A rubber mallet and battery screw gun may be useful.
3. Package Contents
Your Greesum Outdoor Storage Shed is shipped in two separate boxes due to the number of accessories. Please ensure you have received both packages before starting assembly. Each accessory is labeled with a corresponding number to facilitate the installation process.
Upon receipt, carefully unpack all components and verify them against the parts list provided in the separate detailed instruction manual included with your product. If any parts are missing or damaged, please contact customer support.
4. Setup and Assembly Instructions
The assembly process is designed to be straightforward with detailed instructions provided. Follow the steps carefully, referring to the numbered accessories.
4.1. Site Preparation
Choose a flat, level area for your shed. A solid foundation (e.g., concrete slab, paved area, or a reinforced wooden base) is recommended for optimal stability and longevity. Clear the area of any debris or obstacles.
4.2. Unpacking and Part Identification
Open both boxes and lay out all parts. Identify each component using the provided parts list and ensure all pieces are present and undamaged. Keep small parts organized to prevent loss.
4.3. Base and Floor Assembly
Assemble the base frame and floor panels according to the instructions. Ensure the floor is securely attached and level. The shed includes a floor, but for gravel bases, adding a plywood layer underneath may enhance strength.
4.4. Wall Panel Assembly
Attach the wall panels to the base. The panels are made of double-layer resin material, designed to be durable and resist distortion. Ensure panels are correctly oriented and securely fastened.
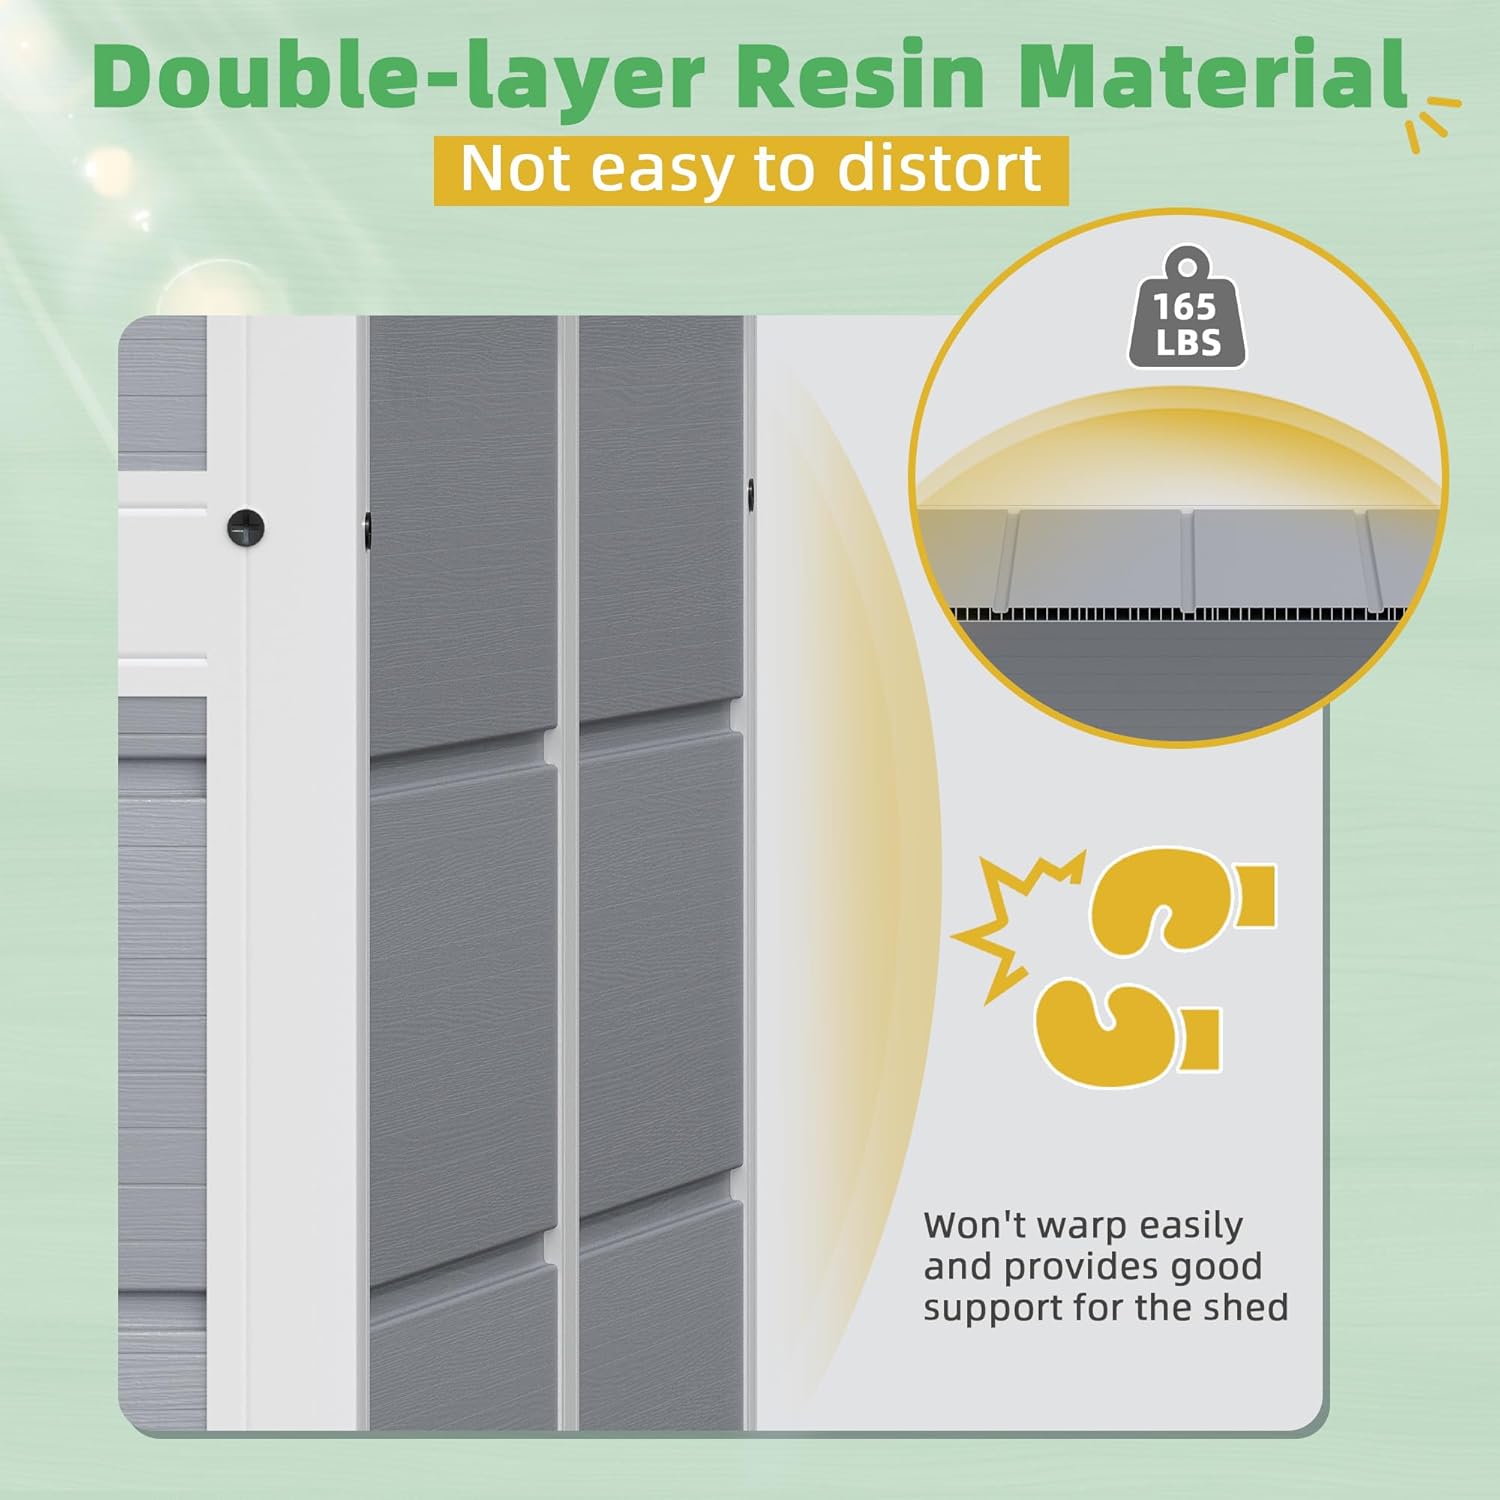
Image: Double-layer resin material provides structural integrity and resistance to distortion.
4.5. Roof Installation
The roof panels can be challenging to install. It is recommended to have at least two people for this step. Start by positioning the interior lip of the roof panels, then move to the outside to secure the exterior lip. Work systematically around the shed, ensuring all panels are properly seated in their channels. The tilted roof design helps prevent water and snow accumulation.
4.6. Door and Window Installation
Install the single hinged doors and the translucent window. Ensure the doors operate smoothly and the lockable latch mechanism is correctly installed. The translucent window allows for natural lighting inside the shed, and vents promote air circulation.

Image: Key features including corner protection, bright window, lockable door, and resin material.
4.7. Final Checks
After assembly, check all connections and fasteners to ensure they are tight and secure. Confirm that doors open and close freely and the locking mechanism functions correctly.

Image: Fully assembled Greesum 6X4FT Outdoor Storage Shed.

Image: Shed with doors open, showcasing interior storage capacity.
5. Operating Instructions
5.1. Accessing the Shed
To open the shed, unlatch the door lock mechanism and pull the doors open. To close, push the doors shut and engage the latch. Ensure the doors are fully closed and locked to protect contents from weather and unauthorized access.
5.2. Ventilation
The shed is equipped with vents to promote air circulation. Ensure these vents are not obstructed to maintain proper airflow and prevent moisture buildup inside the shed.
6. Maintenance
Regular maintenance will help prolong the life and appearance of your Greesum storage shed.
- Cleaning: Clean the shed periodically with mild soap and water. Avoid using abrasive cleaners or harsh chemicals, as these can damage the resin material. Rinse thoroughly with clean water.
- Weather Resistance: The shed is made of all-weather resin material, offering waterproof and UV-resistant properties. However, regular inspection for any signs of wear or damage is recommended, especially after severe weather conditions.
- Door and Latch: Periodically check the door hinges and latch for proper function. Lubricate if necessary to ensure smooth operation.
- Snow and Water Accumulation: The tilted roof design helps prevent accumulation. In areas with heavy snowfall, it is advisable to gently remove excessive snow from the roof to prevent undue stress on the structure.
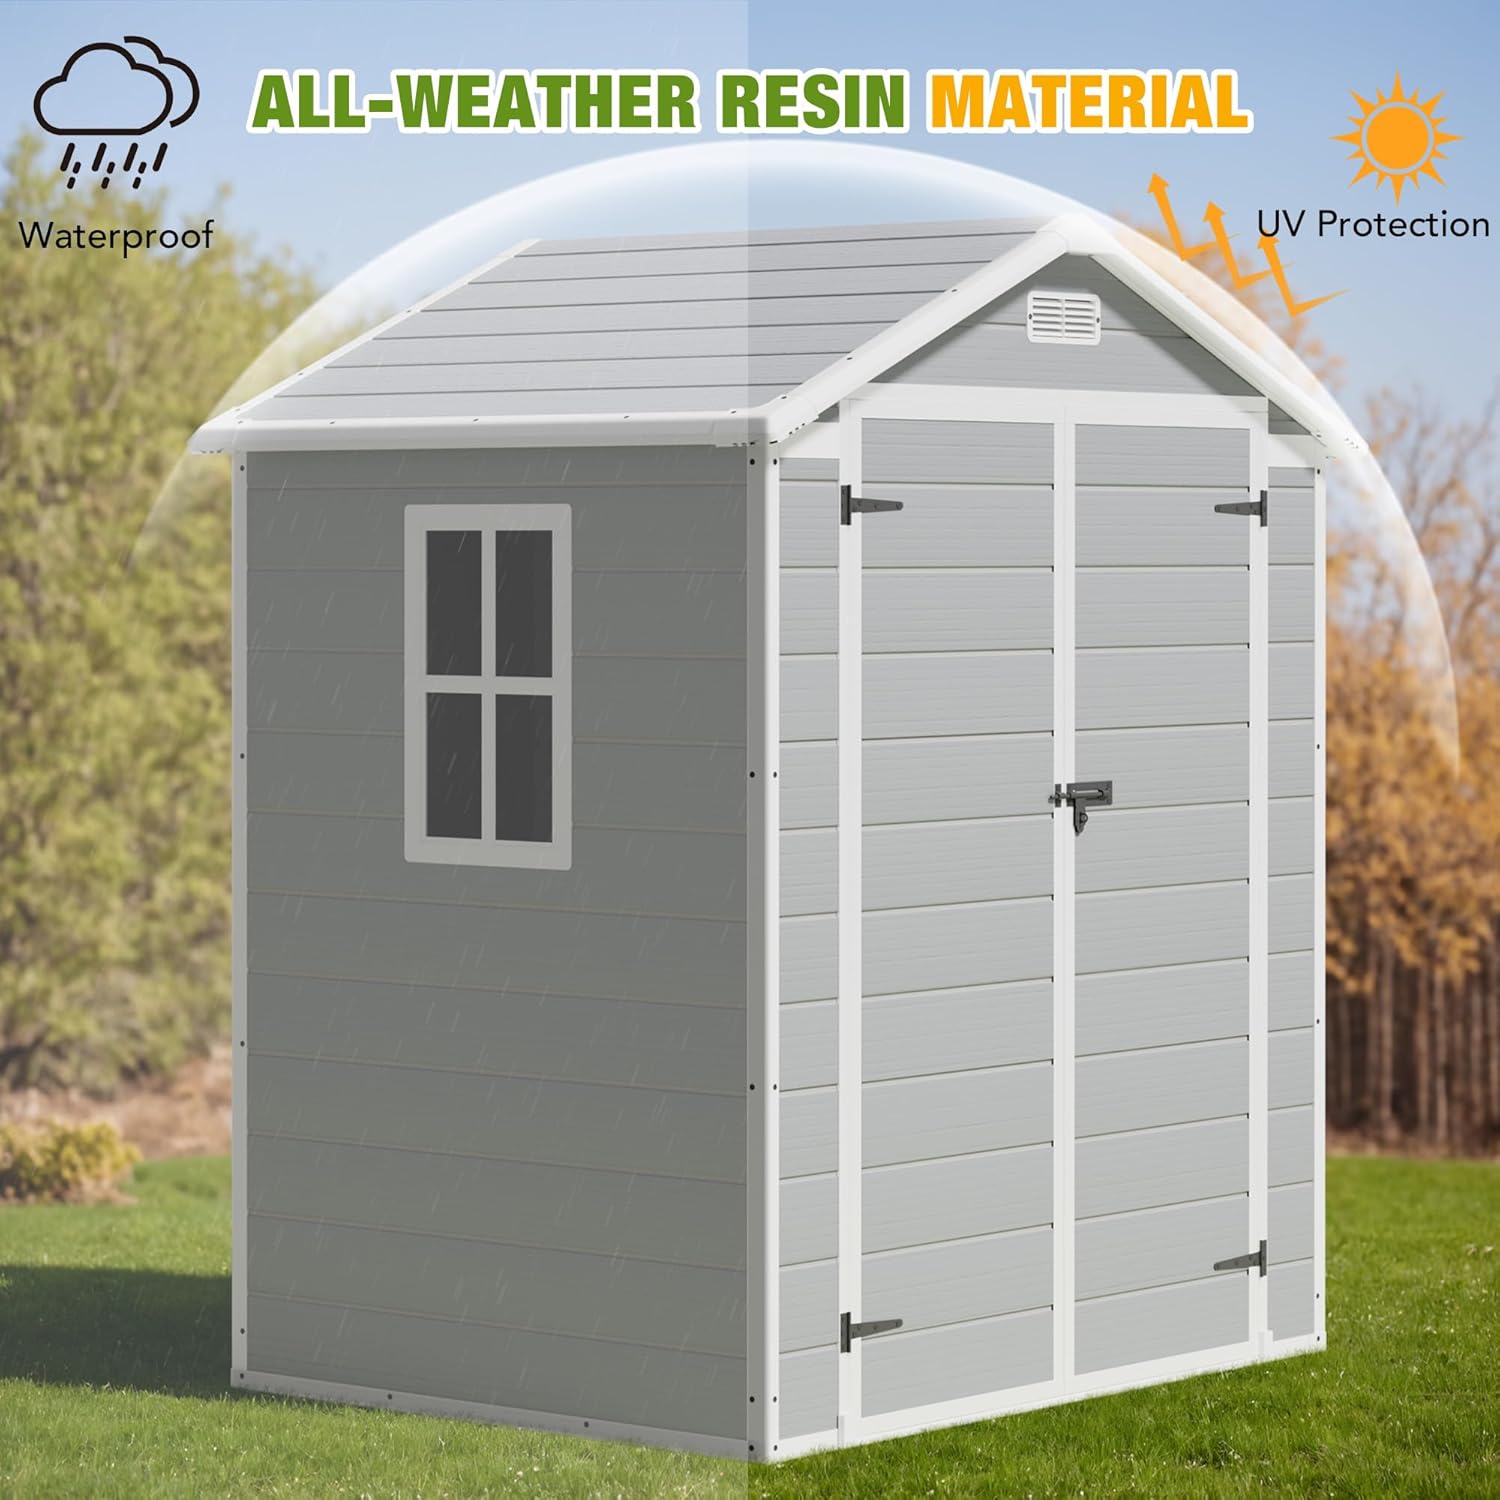
Image: All-weather resin material provides waterproof and UV protection.
7. Troubleshooting
- Difficulty during Assembly: If you encounter difficulties, re-read the specific step in the instruction manual. Ensure all parts are correctly oriented and that you are using the correct fasteners. Having a second person assist can significantly ease the process, especially for roof installation.
- Missing Parts: If parts are missing upon delivery, first check both shipping boxes thoroughly. If still missing, contact customer support with your product model and a description of the missing parts.
- Shed Instability: Ensure the shed is placed on a completely level surface. If the ground is uneven, this can cause panels to misalign or the structure to feel unstable. Anchoring the shed to the ground or a solid foundation is recommended for enhanced stability.
- Doors Not Closing Properly: Check for any obstructions in the door frame or hinges. Ensure the shed is level, as an uneven base can cause door misalignment. Adjust hinges if necessary according to the assembly instructions.
8. Specifications
| Feature | Detail |
|---|---|
| Brand | Greesum |
| Model Number | GS-PS031405GY |
| Color | Light Grey |
| Material | Polyethylene Resin Plastic |
| Product Dimensions (D x W x H) | 67.1" x 48.8" x 82.2" |
| Item Weight | 47.85 Pounds |
| Style | 6X4FT |
| Base Material | Plastic |
| Top Material Type | Plastic |
| Water Resistance Level | Waterproof |
| Frame Material | Polyethylene Resin Plastic |
| Door Style | Single Hinged, Lockable |
| Assembly Required | Yes |
| Door Height | 82.2 Inches |
| UPC | 760606140028 |

Image: Product dimensions for the 6X4FT shed.
9. Customer Support
For any questions, concerns, or assistance with your Greesum Outdoor Storage Shed, please refer to the contact information provided at your point of purchase or visit the official Greesum website. Please have your model number (GS-PS031405GY) and purchase details ready when contacting support.
The product is eligible for 30-day easy returns. For return procedures, please consult the retailer's return policy.


