
1. Safety Information
Please read all instructions carefully before using your Bukumo Home Safe Box. Keep this manual for future reference.
- Do not store backup keys inside the safe. Keep them in a secure, separate location.
- Ensure the safe is securely anchored to a wall or floor to prevent unauthorized removal.
- Keep the safe away from moisture and direct heat sources.
- Do not attempt to force the safe open if the battery is dead or the code is forgotten. Use the backup keys.
- Change the default password immediately after initial setup.
- This safe is designed for security against theft. It is not certified as fireproof or waterproof.
2. Package Contents
Verify that all items listed below are included in your package:
- Bukumo Home Safe Box (1)
- Spare Key (2)
- User Manual (1)
- Expansion Screw (4)
- Inner Mat (1)

Figure 2.1: Included Accessories
3. Product Overview
The Bukumo YS-HLAH-YFBW 3.1 Cub Home Safe Box is designed to secure your valuables with advanced features and robust construction.
3.1 Key Features
- Large Capacity: External dimensions of 13.78'' (W) x 12.20'' (D) x 17.72'' (H) provide ample storage.
- Steel Construction: Features a 1.7'' (45mm) thickened alloy steel door with 3 x 0.7'' (20mm) solid steel structure locks.
- Anti-Pry Hinge: Hidden hinges prevent external damage and enhance security.
- Dual Unlocking Methods: Access via a programmable electronic keypad or two backup keys.
- External Battery Case: Convenient design for easy battery replacement without opening the safe.
- Alarm System: Activates after multiple incorrect password attempts, with a mute function.
- Removable Shelf: Adjustable internal storage to accommodate various item sizes.
- Built-in LED Light: Sensor-activated LED illuminates the interior in low-light conditions.
- Anchoring Design: Pre-drilled holes and included bolts for secure mounting to a wall or floor.

Figure 3.1: Safe Box Internal Capacity and Dimensions

Figure 3.2: Steel Construction and Locking Bolts
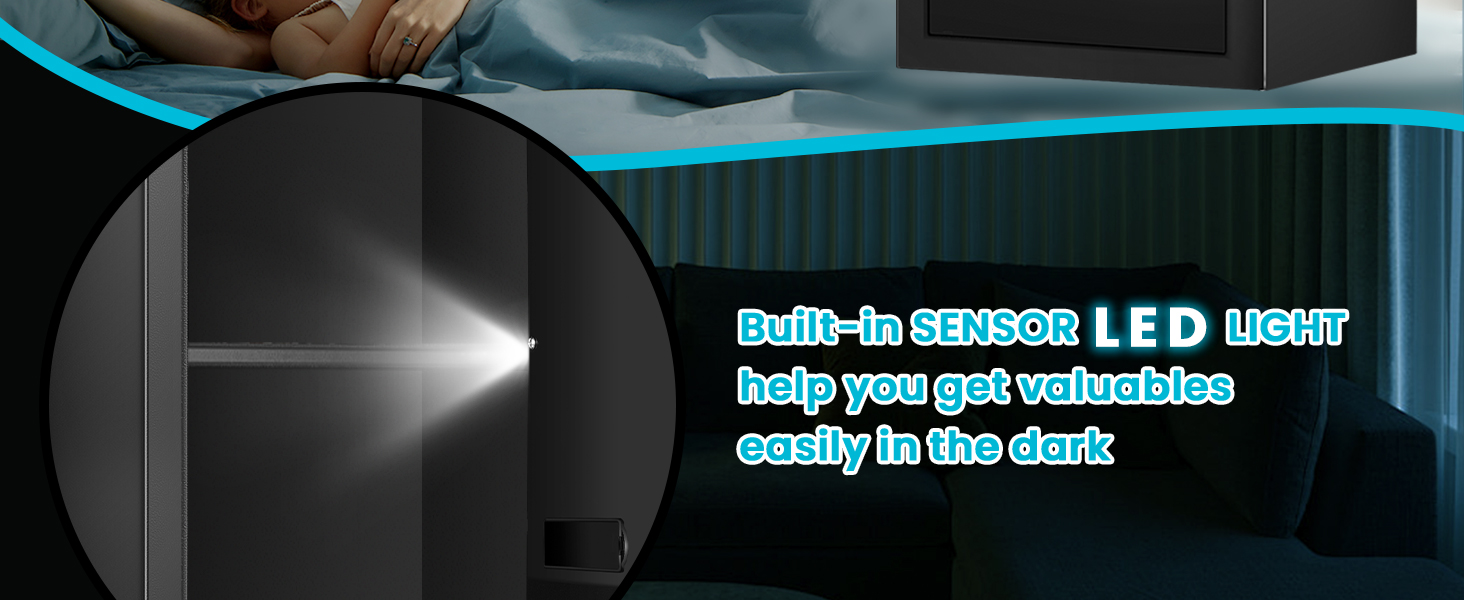
Figure 3.3: Built-in Sensor LED Light
4. Setup
4.1 Battery Installation
The electronic keypad requires batteries to operate. The external battery case design allows for easy replacement.
- Locate the external battery case on the keypad unit.
- Open the battery case cover.
- Insert the required number of AA batteries (not included), ensuring correct polarity.
- Close the battery case cover securely.

Figure 4.1: External Battery Box Design
4.2 Anchoring the Safe
For enhanced security, it is recommended to anchor the safe to a wall or floor using the provided expansion screws.
- Choose a suitable location for the safe, such as a closet or against a sturdy wall.
- Mark the positions for drilling through the pre-drilled holes on the back or bottom of the safe.
- Drill pilot holes in the wall or floor at the marked positions.
- Align the safe with the drilled holes and secure it using the expansion screws.

Figure 4.2: Wall or Closet Mounting Steps

Figure 4.3: Pre-drilled Holes and Mounting Hardware
5. Operating Instructions
5.1 Initial Opening and Setting Your Password
Upon first use, the safe can be opened with the backup key or the default password "159". It is crucial to change this default password immediately.
- Using the Backup Key: Insert one of the spare keys into the keyhole, turn it clockwise, and then turn the handle to open the safe door.
- Using the Keypad (Default Password): Enter "159" on the keypad, then turn the handle to open the safe door.
- Setting a New Password:
- With the safe door open, press the red reset button located on the inside of the door.
- Enter your new 3-8 digit password on the keypad.
- Press the "#" button to confirm. The indicator light will flash, confirming the new password is set.

Figure 5.1: Two Unlocking Ways (Keypad and Key)

Figure 5.2: Password and Key Unlocking Modes
5.2 Locking the Safe
To lock the safe, simply close the door and turn the handle counter-clockwise until it is fully engaged. The electronic lock will automatically secure the bolts.
5.3 Alarm System and Mute Function
The safe is equipped with an alarm system to deter unauthorized access.
- Wrong Access Alarm: If an incorrect password is entered three consecutive times, the safe will emit a continuous warning sound for 60 seconds. If six consecutive incorrect passwords are entered, the keypad will lock for 5 minutes. The alarm can be stopped by removing batteries.
- Mute Function: To turn off the alarm sound (silent mode), long press the "1" button on the keypad. Long press "1" again to reactivate the sound.
- Low Battery Reminder: The safe will indicate low battery status, prompting you to replace the batteries.

Figure 5.3: Anti-Theft Alarm System Features

Figure 5.4: Dual Alarm System Details
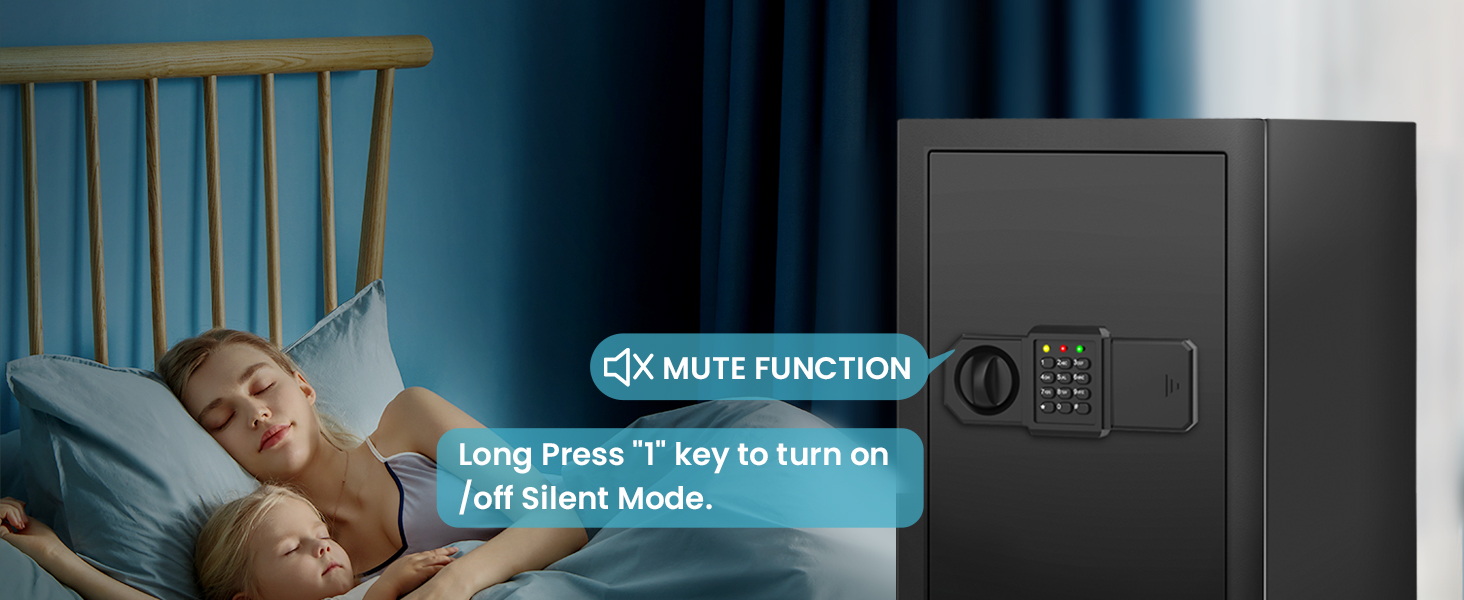
Figure 5.5: Mute Function for Silent Operation
5.4 Removable Shelf
The safe includes a removable shelf to help organize your valuables. You can adjust its position or remove it entirely to accommodate larger items.

Figure 5.6: Removable Shelf for Organization

Figure 5.7: Safe Interior With and Without Shelf
6. Maintenance
- Cleaning: Wipe the safe's exterior with a soft, damp cloth. Avoid abrasive cleaners or solvents.
- Battery Replacement: Replace batteries promptly when the low battery indicator appears to ensure continuous operation of the electronic lock.
- Key Maintenance: Keep backup keys clean and dry. Do not lubricate the keyhole.
- Regular Checks: Periodically check the locking bolts and hinges for any signs of wear or damage.
7. Troubleshooting
| Problem | Possible Cause | Solution |
|---|---|---|
| Safe does not open with keypad. | Incorrect password entered. Batteries are low or dead. Keypad is locked due to multiple incorrect attempts. | Re-enter the correct password. Replace batteries in the external battery case. Wait 5 minutes for the keypad to unlock, or use the backup key. |
| Alarm sounds unexpectedly. | Multiple incorrect password entries. Safe was tampered with. | Enter the correct password. Check the safe for signs of forced entry. |
| Safe door does not close properly. | Obstruction in the door frame. Locking bolts are not retracting fully. | Remove any obstructions. Ensure the handle is fully turned to retract bolts. If issue persists, contact customer support. |
| LED light not working. | Batteries are low or dead. Sensor malfunction. | Replace batteries. Contact customer support if the issue persists after battery replacement. |
8. Specifications
| Feature | Detail |
|---|---|
| Brand | Bukumo |
| Model Number | YS-HLAH-YFBW |
| External Dimensions (D x W x H) | 12.2" x 13.78" x 17.72" (31cm x 35cm x 45cm) |
| Capacity | 3.1 Cubic Feet (14 Kilograms) |
| Material | Alloy Steel |
| Lock Type | Electronic Combination Lock, Backup Key |
| Mounting Type | Wall/Floor Mount |
| Special Features | Alarm System, Anti-Theft, Removable Shelf, Sensor Light |
| Item Weight | 27.5 Pounds |
| Water Resistance Level | Water Resistant (Note: Not certified waterproof) |
| Batteries Required | Yes (AA, not included) |
9. Warranty and Support
9.1 Product Warranty
Bukumo offers a five-year free product warranty. During this period, if your product experiences any quality issues, we will provide repair services and supply necessary spare parts.
9.2 Free Replacement Policy
For products that arrive in damaged condition, please send us photos of the damaged safe. You will receive a free replacement without the need to return the original damaged item.
9.3 Customer Support
If you encounter any problems while using our products, please feel free to contact us. We are committed to providing a satisfying solution within 24 hours.
For support, please visit the Bukumo Store on Amazon or refer to the contact information provided with your purchase.