Introduction
Welcome to the user manual for your UMIDIGI G9 Tab 11-inch Android 14 Tablet. This guide provides essential information on setting up, operating, maintaining, and troubleshooting your device to ensure optimal performance and user experience. Please read this manual thoroughly before using your tablet.
1. Getting Started: Setup
1.1. What's in the Box
Upon unboxing your UMIDIGI G9 Tab, please verify that all the following items are included:
- UMIDIGI G9 Tab Tablet
- TPU Tri-Fold Stand Protective Cover
- Protective Film (pre-applied)
- Passive Capacitive Stylus
- Type-C Cable
- Power Adapter
- SIM Tray Ejector
- Quick Start Guide

Image: UMIDIGI G9 Tab tablet shown with its stylus, protective case, and charging cable.
1.2. Initial Charging
Before first use, it is recommended to fully charge your tablet.
- Connect the Type-C cable to the tablet's charging port.
- Connect the other end of the cable to the provided power adapter.
- Plug the power adapter into a wall outlet.
- The charging indicator will appear on the screen. Allow the tablet to charge completely.
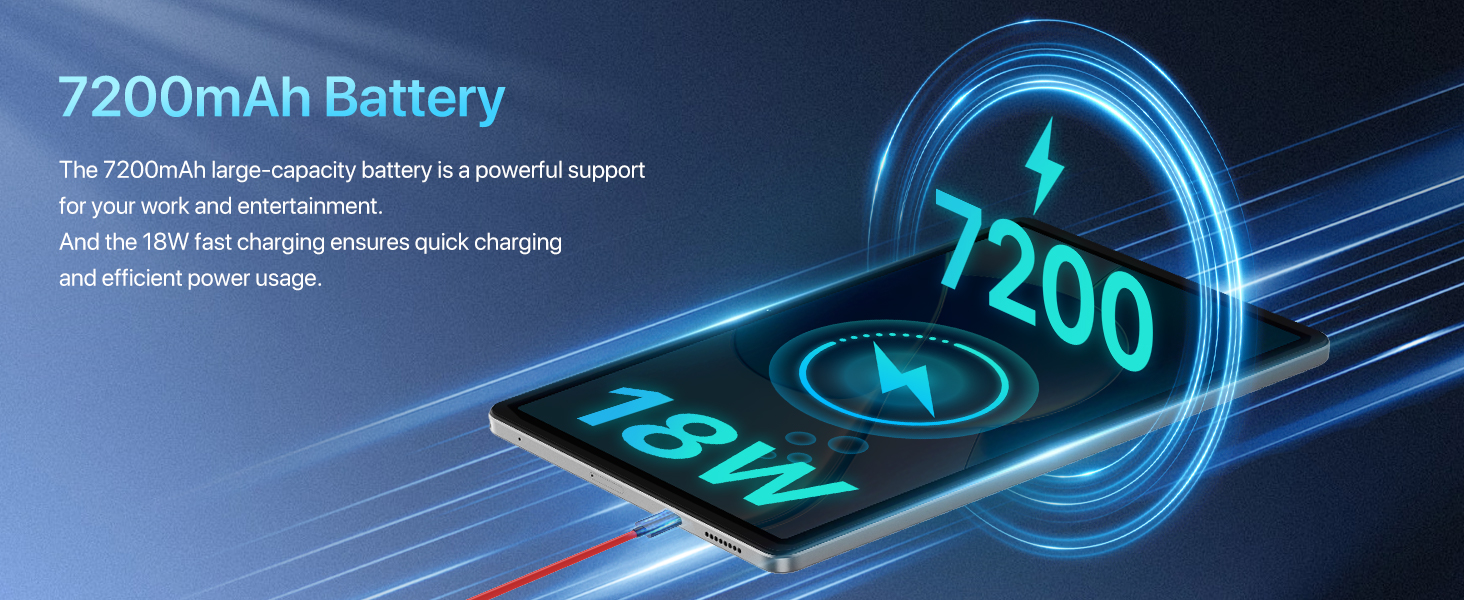
Image: The UMIDIGI G9 Tab connected to its charger, illustrating the 18W fast charging capability.
1.3. Power On/Off
- To Power On: Press and hold the Power button located on the side of the tablet until the UMIDIGI logo appears.
- To Power Off: Press and hold the Power button, then select "Power off" from the options that appear on the screen.
1.4. SIM Card and TF Card Installation
Your UMIDIGI G9 Tab supports dual Nano SIM cards or one Nano SIM card and one TF (microSD) card for expanded storage.
- Locate the SIM card tray on the side of the tablet.
- Insert the SIM tray ejector tool into the small hole next to the tray and press gently until the tray pops out.
- Carefully pull out the SIM tray.
- Place your Nano SIM card(s) and/or TF card into the designated slots on the tray. Ensure the gold contacts are facing down and the cards are correctly oriented.
- Gently push the tray back into the tablet until it clicks into place.
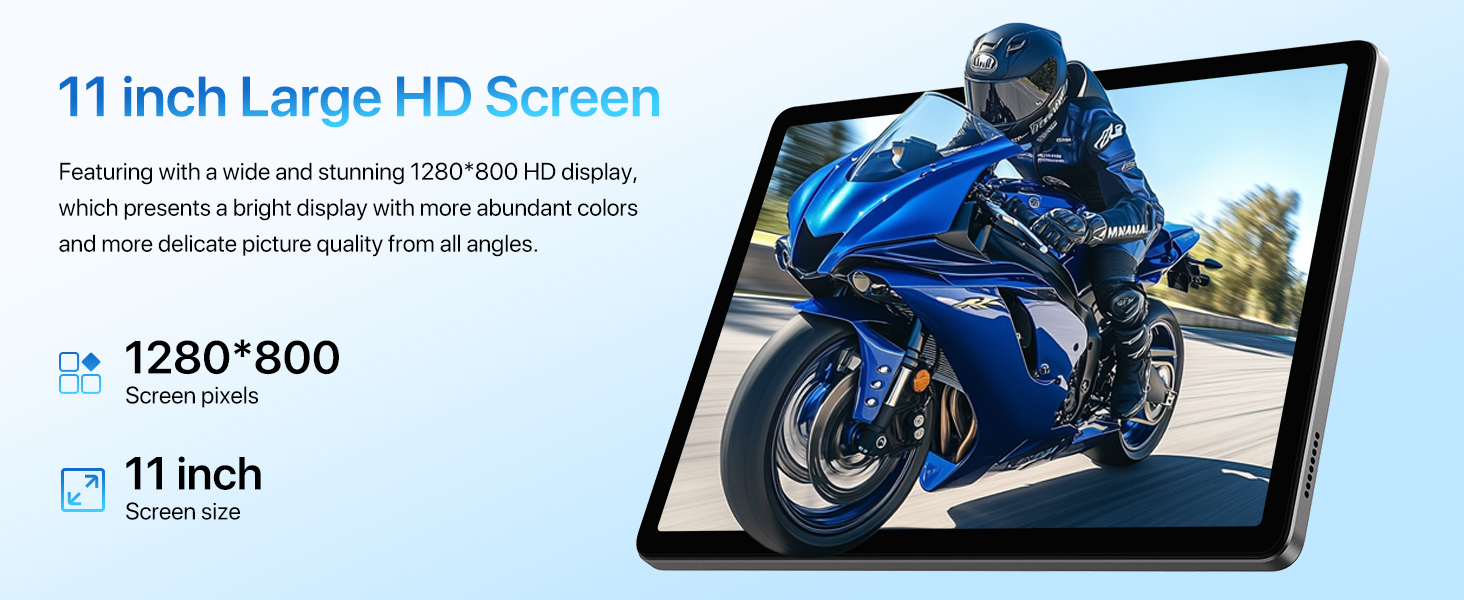
Image: Diagram showing how to insert dual Nano SIM cards or a Nano SIM and a TF card into the tablet's tray.
2. Operating Your Tablet
2.1. Android 14 Operating System
Your UMIDIGI G9 Tab runs on Android 14, offering an intuitive and secure user experience.
- Navigation: Use gestures or the traditional navigation bar (Back, Home, Recents) to move between apps and screens.
- Notifications: Swipe down from the top of the screen to access notifications and quick settings.
- App Drawer: Swipe up from the bottom of the screen to view all installed applications.
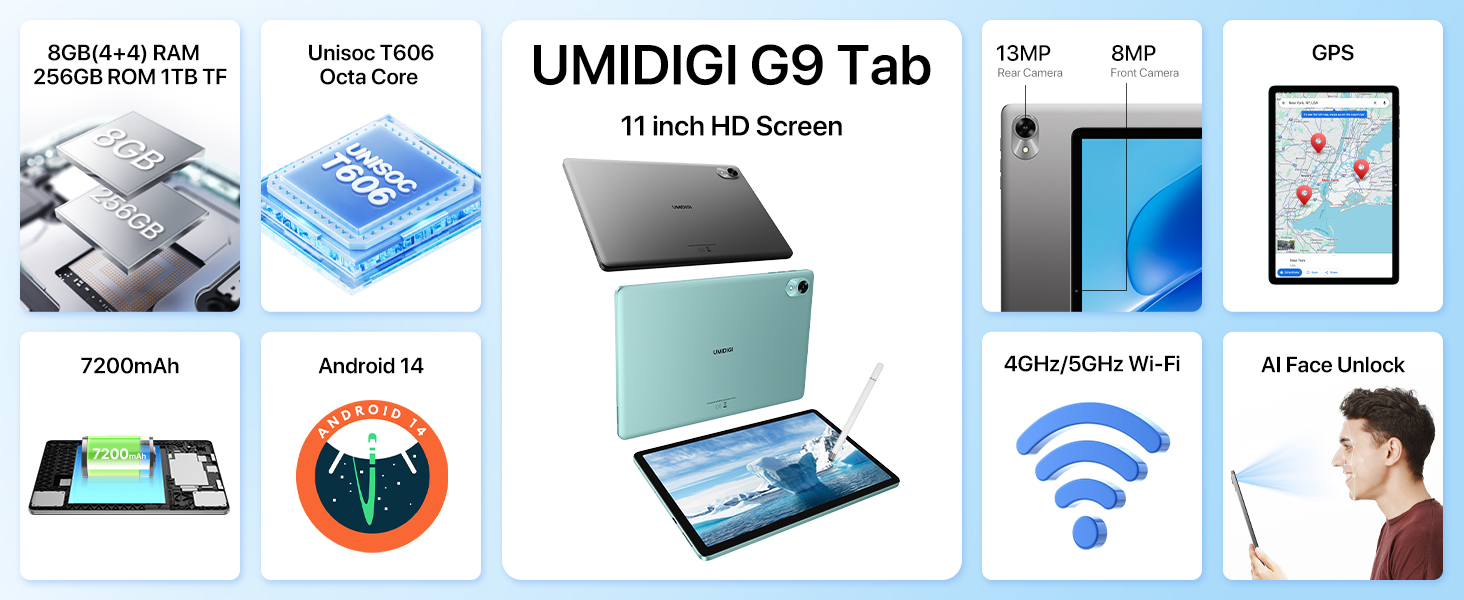
Image: Visual representation of the Android 14 operating system features on the UMIDIGI G9 Tab, highlighting privacy, efficiency, performance, and updates.
2.2. Connectivity
- Wi-Fi: Go to Settings > Network & internet > Wi-Fi to connect to available Wi-Fi networks. Supports 2.4GHz and 5GHz bands for faster transfer speeds.
- Mobile Data (4G LTE): If a SIM card is installed, enable mobile data in Settings > Network & internet > Mobile network. The tablet supports 4G/3G/2G mobile phone calls and 4G LTE network.
- Bluetooth 5.0: Pair with Bluetooth devices (headphones, speakers, etc.) via Settings > Connected devices > Bluetooth.
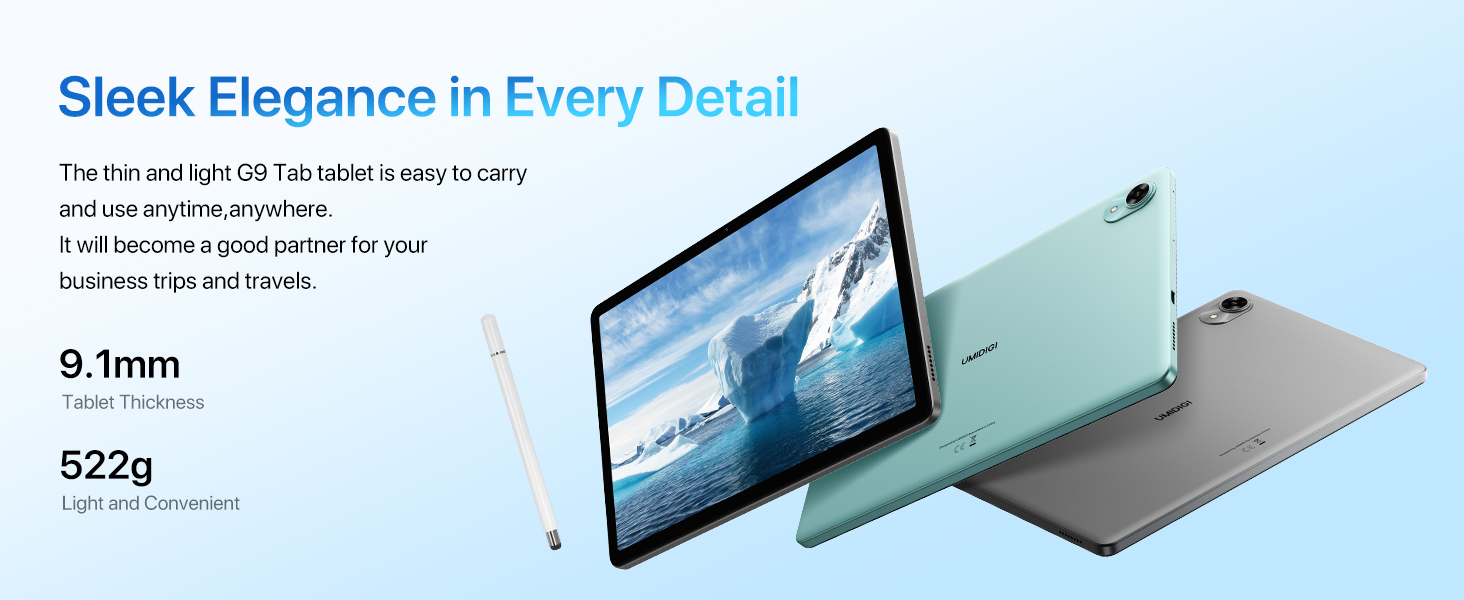
Image: Icons representing 2.4GHz/5GHz Wi-Fi and Bluetooth 5.0, indicating the tablet's wireless connectivity options.
2.3. Face Unlock
For convenient and secure unlocking, your tablet features Face Unlock.
- Go to Settings > Security & privacy > Device unlock > Face unlock.
- Follow the on-screen instructions to register your face.
- Ensure good lighting conditions during registration and use.
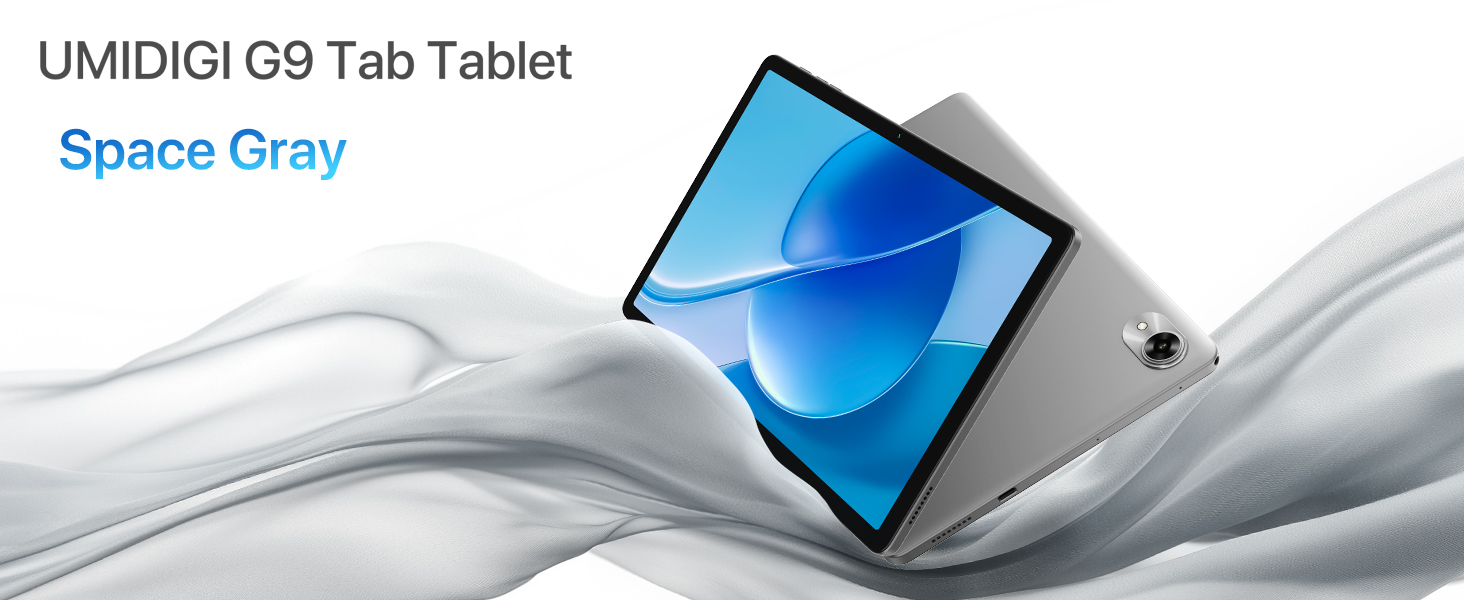
Image: A woman demonstrating the face unlock feature on the UMIDIGI G9 Tab.
2.4. Camera Usage
The UMIDIGI G9 Tab is equipped with a 13MP rear camera and an 8MP front camera for capturing photos and videos.
- Open the Camera app from your home screen or app drawer.
- Tap the shutter button to take a photo.
- Switch between front and rear cameras using the camera icon.
- Explore different modes like video, portrait, or panorama if available.

Image: The UMIDIGI G9 Tab highlighting its 13MP rear and 8MP front cameras, with sample images.
2.5. Stylus Functionality
The included passive capacitive stylus can be used for precise navigation, drawing, and note-taking on the tablet's screen. No pairing is required.
2.6. GPS Navigation
The tablet features built-in GPS, GLONASS, and Galileo for accurate location services and navigation.
- Ensure location services are enabled in Settings > Location.
- Use pre-installed map applications or download your preferred navigation app from the Google Play Store.
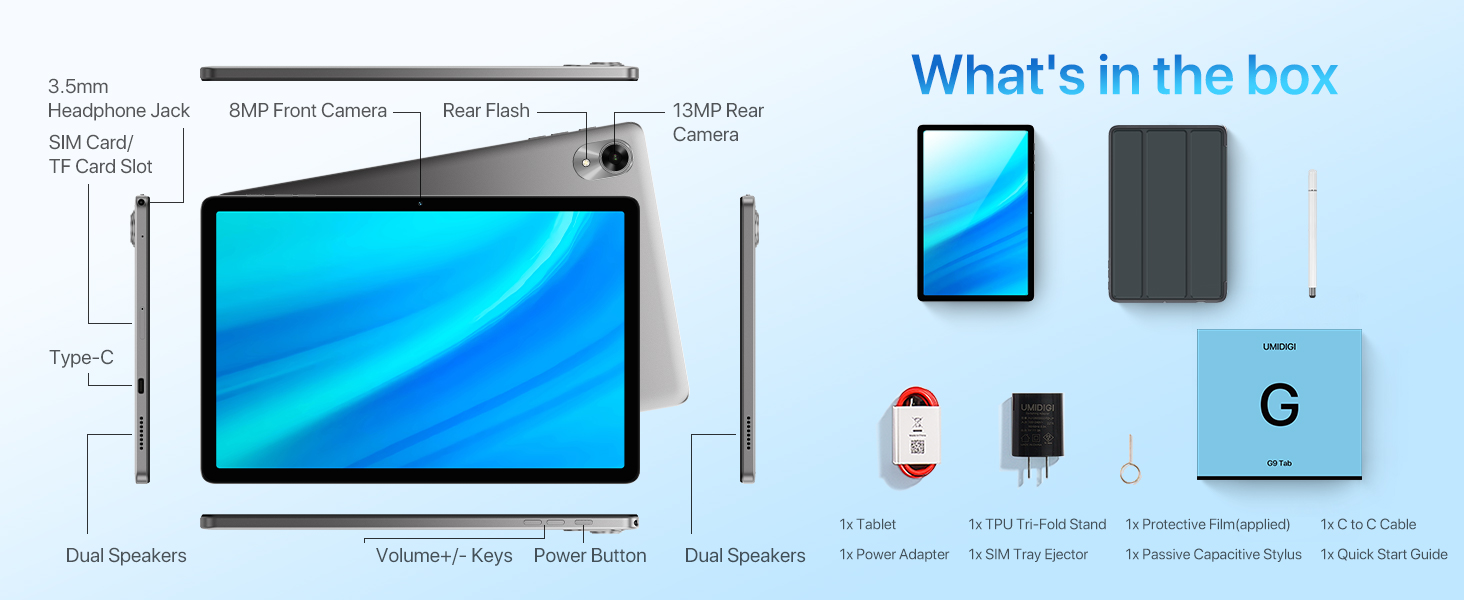
Image: The UMIDIGI G9 Tab showing a map application, with icons for GPS, GLONASS, and Galileo indicating navigation capabilities.
3. Maintenance
3.1. Battery Care
- Avoid extreme temperatures, as they can degrade battery life.
- Use only the provided charger and cable for optimal charging and safety.
- For long-term storage, charge the battery to around 50% and power off the device.
3.2. Cleaning Your Tablet
- Use a soft, lint-free cloth to clean the screen and body.
- For stubborn smudges, slightly dampen the cloth with water or a screen cleaner.
- Avoid harsh chemicals, abrasive materials, or excessive moisture.
3.3. Software Updates
Regularly check for and install software updates to ensure your tablet has the latest features, security patches, and performance improvements.
- Go to Settings > System > System update.
- Connect to a stable Wi-Fi network before downloading updates.
4. Troubleshooting
4.1. Tablet is Slow or Unresponsive
- Restart the tablet: A simple restart can often resolve temporary performance issues.
- Close background apps: Too many apps running simultaneously can consume resources. Close unnecessary applications.
- Clear cache: Go to Settings > Apps > [App Name] > Storage & cache > Clear cache for apps that are frequently used or causing issues.
- Check storage: Ensure you have sufficient free storage space. Go to Settings > Storage.
- Software update: Make sure your tablet's software is up to date.
4.2. Charging Issues
- Check cable and adapter: Ensure the Type-C cable and power adapter are securely connected and undamaged. Try using a different compatible cable and adapter if available.
- Clean charging port: Gently inspect the charging port for dust or debris. Use a soft, dry brush to clean it if necessary.
- Restart tablet: Sometimes a software glitch can affect charging.
4.3. Network Connectivity Problems (Wi-Fi/4G)
- Toggle Wi-Fi/Mobile Data: Turn off and then turn on Wi-Fi or mobile data in quick settings or network settings.
- Restart router/modem: For Wi-Fi issues, restart your Wi-Fi router.
- Check SIM card: Ensure the SIM card is correctly inserted and activated with your carrier.
- Reset network settings: Go to Settings > System > Reset options > Reset Wi-Fi, mobile & Bluetooth. Note: This will erase all saved Wi-Fi passwords and Bluetooth pairings.
5. Specifications
| Feature | Specification |
|---|---|
| Brand | UMIDIGI |
| Model Name | G9 Tab |
| Operating System | Android 14 |
| Screen Size | 11 Inches |
| Screen Resolution | 1280 x 800 Pixels |
| Processor | 1.6 GHz Octa-core (Unisoc T606) |
| Graphics Coprocessor | Mali-G57 |
| RAM | 8GB (4GB + 4GB extended memory) |
| Internal Storage | 256 GB |
| Expandable Storage | Up to 1TB via TF Card (not included) |
| Rear Camera | 13MP |
| Front Camera | 8MP |
| Battery Capacity | 7200mAh Lithium-Ion |
| Charging | 18W Fast Charging, Type-C port |
| Connectivity | 4G LTE, 5GHz/2.4GHz Wi-Fi (802.11ac, 802.11n), Bluetooth 5.0 |
| Navigation | GPS, GLONASS, Galileo, Beidou |
| Audio | Dual Speakers, 3.5mm Headphone Jack |
| Dimensions (LxWxH) | 9.64 x 6.39 x 0.37 inches |
| Weight | 1.27 pounds (522g) |
6. Warranty and Support
UMIDIGI provides a 1-year after-sales service and support for your G9 Tab tablet.
6.1. Contacting Support
If you encounter any issues or require assistance, you can contact UMIDIGI support through the following methods:
- Via Amazon Product Page:
- Go to the product page on Amazon.
- Click on the store name "UMIDIGI Store".
- Click on "Ask a question" in the upper right corner of the store page.
- Via Amazon Order History:
- Navigate to your order history.
- Select the applicable order for your UMIDIGI G9 Tab.
- Contact the seller directly through the order details.


