
1. Product Overview
The SUNLINKCO Model UCL01 is an 8-inch LED under cabinet light designed for indoor use. It features a motion sensor, rechargeable battery, and adjustable brightness levels. The light can be installed using magnetic attachment or adhesive tapes, making it suitable for various locations such as kitchens, closets, and hallways.

Image: Two 8-inch SUNLINKCO under cabinet lights with charging cables and magnetic mounting plates.
Key Features:
- Motion Sensor: Automatically turns on when motion is detected in low light conditions.
- Multiple Modes: Offers Always-ON, Always-OFF, and Auto ON/OFF (motion sensor) modes.
- Stepless Dimming: Adjustable brightness from 10% to 100%.
- Rechargeable Battery: Equipped with an 1100 mAh battery, charged via USB Type-C.
- Easy Installation: Magnetic attachment for metal surfaces or adhesive tapes with iron plates for non-metal surfaces.
- Eye Protection: Provides 6500K white light without glare or flicker.
- Battery Indicator: Three blue indicator lights show battery power levels (30%, 60%, 100%).
2. Setup and Installation
The under cabinet lights offer two primary installation methods to suit various surfaces.
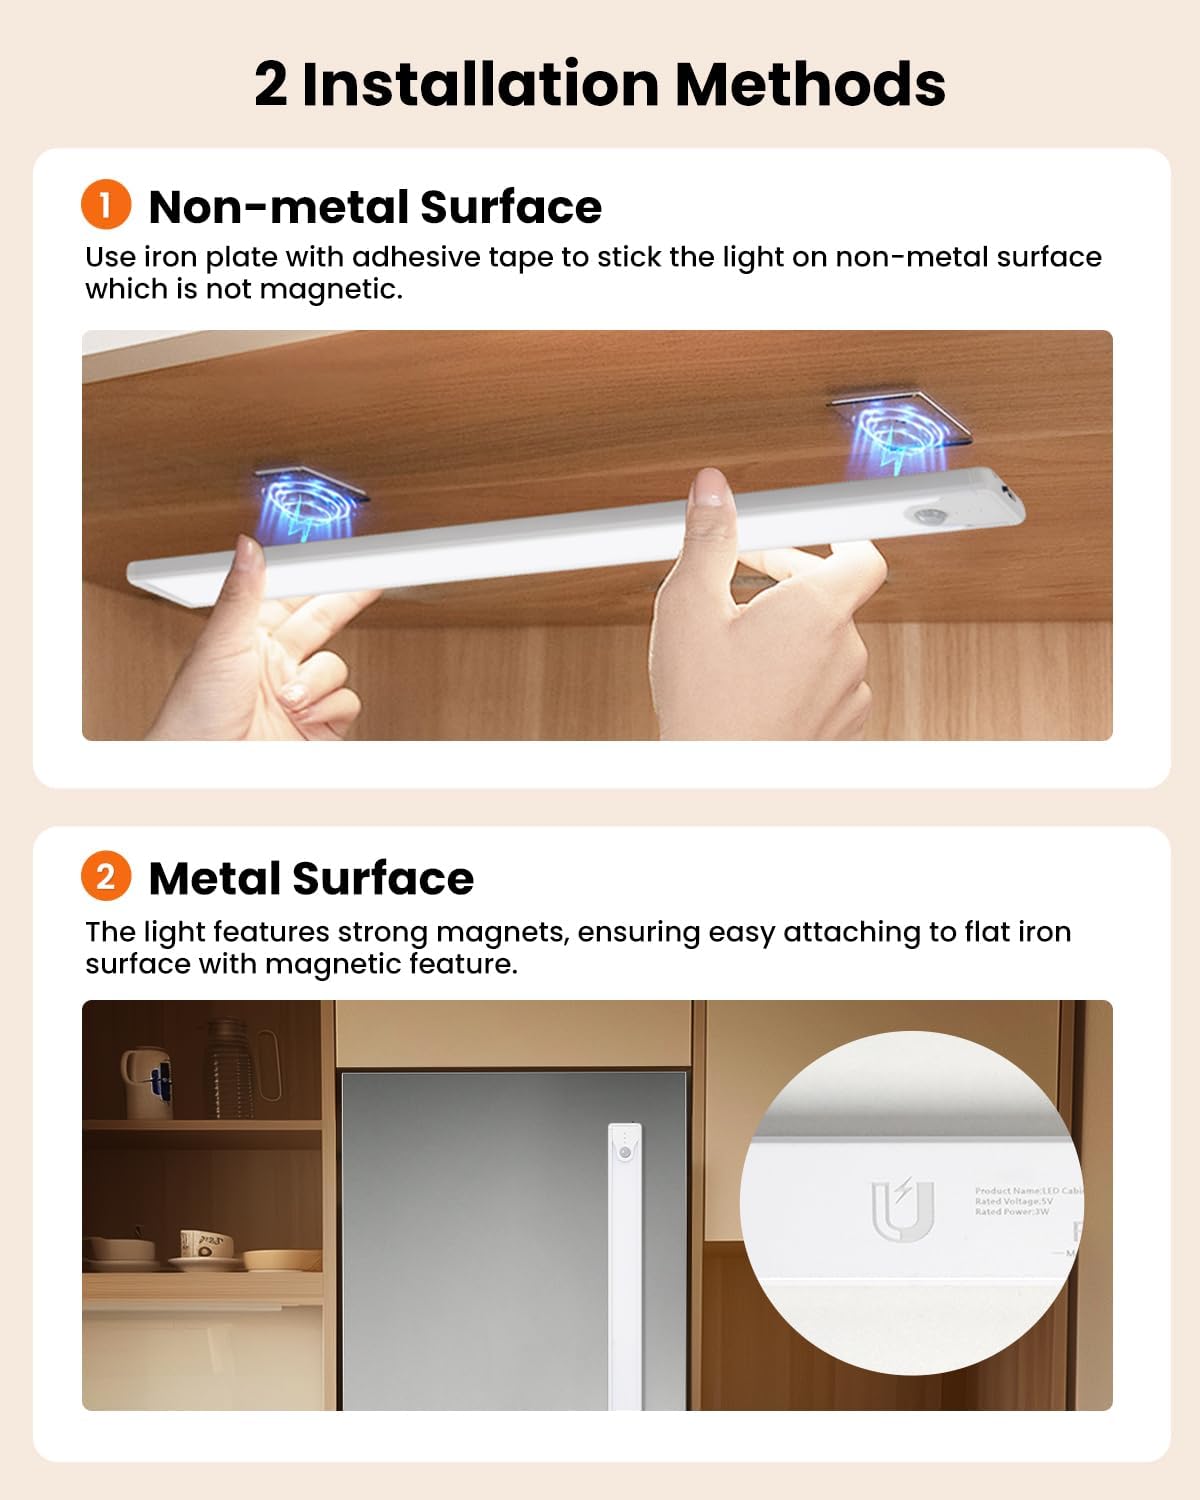
Image: Diagram illustrating magnetic and adhesive installation methods.
Installation Steps:
- Prepare the Surface: Ensure the installation surface is clean, dry, and smooth.
- Magnetic Surface Installation:
- The LED cabinet light has built-in strong magnets. Simply place the light directly onto any flat ironwork surface.
- The light can be easily detached for recharging.
- Non-Metal Surface Installation:
- Attach the provided iron plates to the desired position using the adhesive tapes.
- Peel off the protective film from the adhesive tape on the iron plates.
- Press the iron plates firmly onto the clean surface for a few seconds.
- Once the iron plates are securely attached, the magnetic light can be easily mounted onto them.
- The light can be removed from the magnetic plates for convenient recharging.
Video: Demonstration of under cabinet light installation and use by SUNLINKCO Lighting.
3. Operating Instructions
The SUNLINKCO under cabinet light offers versatile operating modes and brightness control.

Image: Three versatile operating modes.
Mode Selection:
Locate the power switch on the side of the light. Short press the switch to cycle through the following modes:
- Always-ON Mode: Provides continuous lighting.
- Always-OFF Mode: Keeps the light off, regardless of ambient light or motion.
- Auto ON/OFF Mode (Motion Sensor): The light automatically turns on when motion is detected within a 13-foot, 120° range in darkness or low light. It turns off after 20 seconds of no motion.

Image: Automatic human motion sensor functionality.
Stepless Dimming:
To adjust the brightness, long press the power switch. The brightness will cycle steplessly from 10% to 100%. Release the button when the desired brightness level is reached. The light features a memory function, retaining the last brightness setting when turned on again.
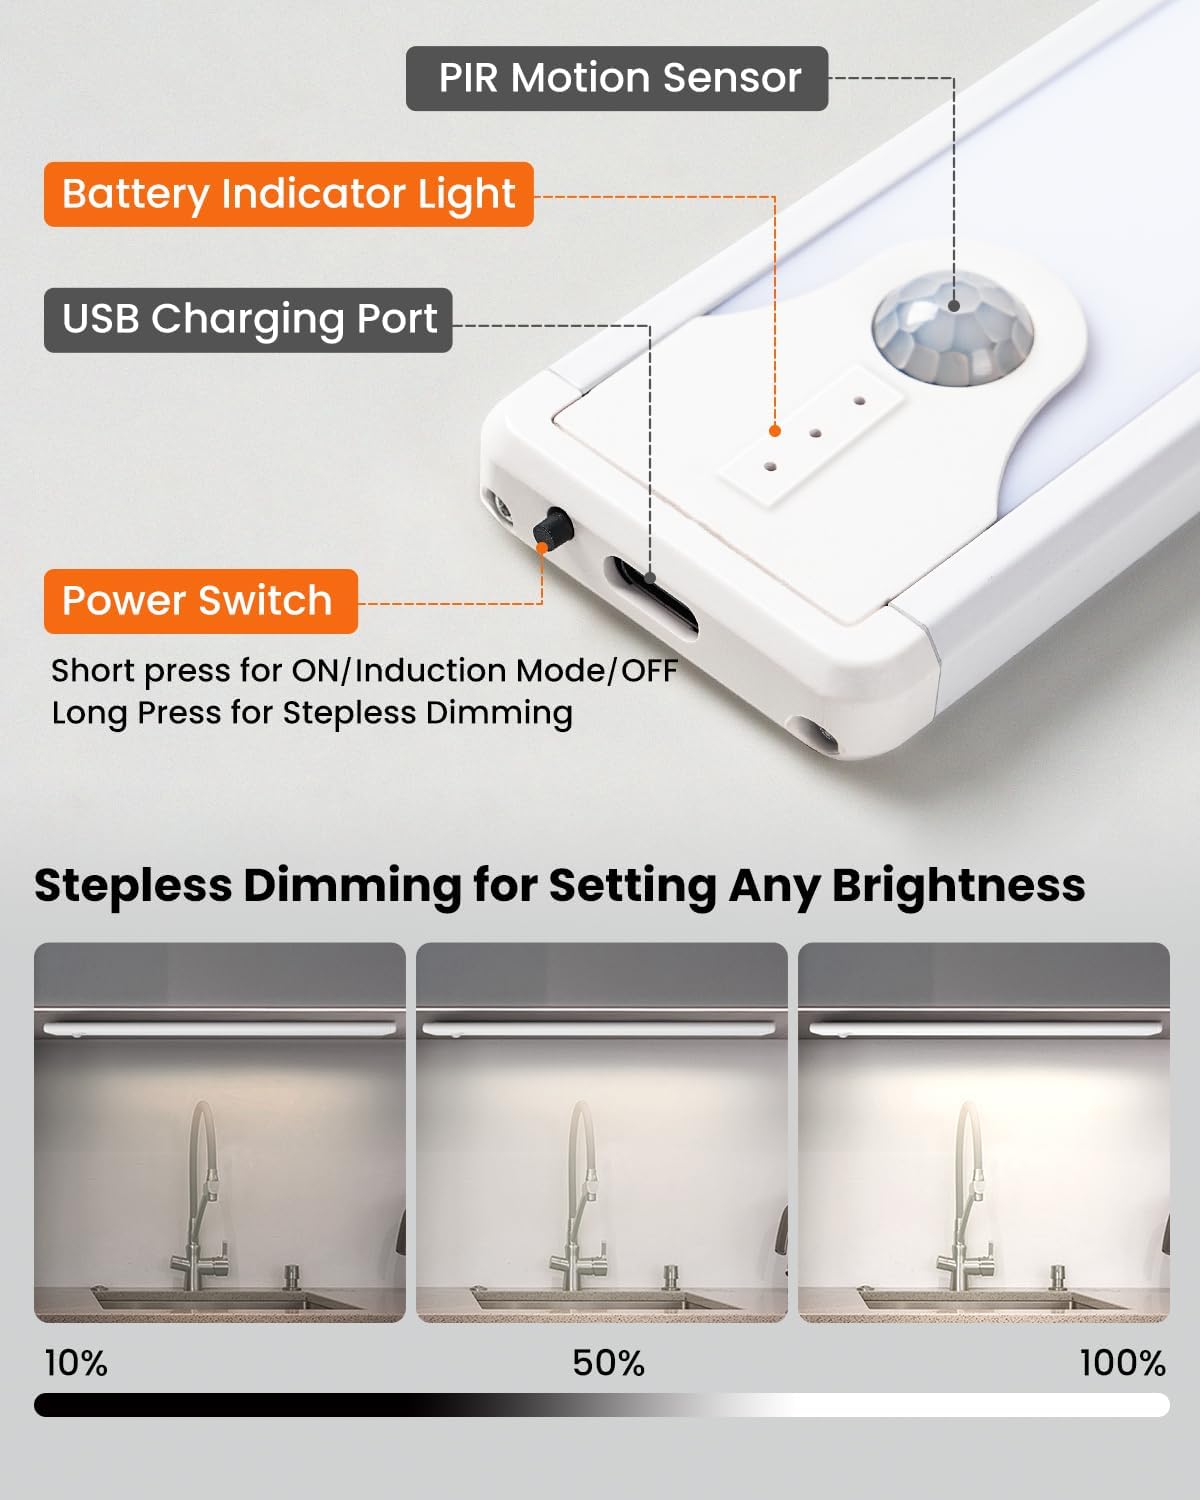
Image: Stepless dimming for setting any brightness.
4. Charging and Battery Life
The under cabinet light is powered by a rechargeable lithium-ion battery.
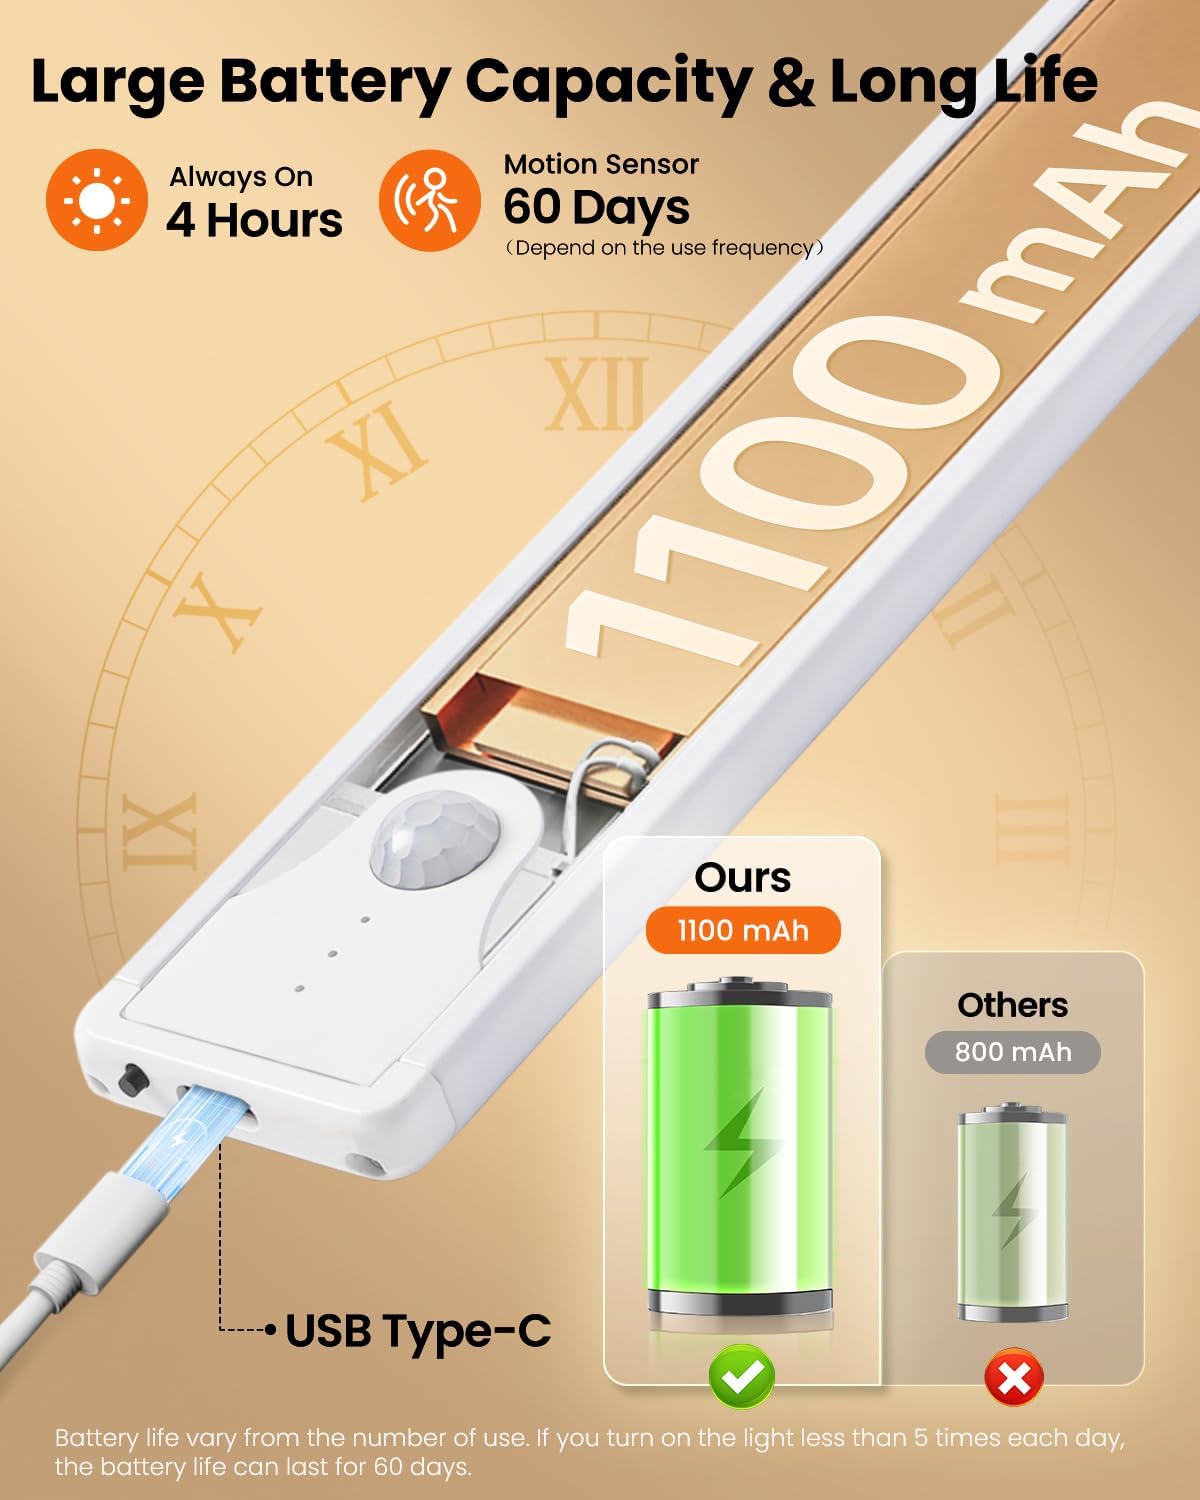
Image: Battery capacity and charging details.
Charging Instructions:
- Connect the provided USB Type-C charging cable to the charging port on the light.
- Plug the other end of the cable into a compatible USB power source (e.g., wall adapter, computer USB port).
- The battery indicator lights will flash during charging.
- Charging typically takes about 1 hour for a full charge.
- Once fully charged, all three indicator lights will remain steadily lit.
Battery Life:
- Always-ON Mode: Provides continuous lighting for approximately 4 hours at maximum brightness.
- Motion Sensing Mode: Can last up to 60 days, depending on usage frequency.
Battery Indicator Lights:
The three blue indicator lights display the current battery status:
- One light: Approximately 30% battery remaining.
- Two lights: Approximately 60% battery remaining.
- Three lights: Approximately 100% battery remaining.
5. Maintenance
- Cleaning: Wipe the light surface with a soft, dry cloth. Do not use abrasive cleaners or solvents.
- Water Resistance: This product is not water resistant. Avoid exposure to water or high humidity environments.
- Storage: If storing for an extended period, fully charge the battery and store in a cool, dry place. Recharge periodically to maintain battery health.
6. Troubleshooting
- Light does not turn on in Auto ON/OFF mode:
- Ensure the ambient light is low enough for the sensor to activate. The motion sensor only works in dark or low-light environments.
- Check if the battery is charged. Recharge if necessary.
- Verify that the light is set to Auto ON/OFF mode (indicated by a blinking light after a short press).
- Motion sensor is too sensitive or not sensitive enough:
- The sensing distance is approximately 10-13 feet. This distance can vary based on the environment and the position of the person relative to the sensor.
- Adjust the placement of the light to optimize motion detection for your specific area.
- Light does not stick to the surface:
- Ensure the surface is clean, dry, and free of dust or grease before applying adhesive tapes or magnetic plates.
- For non-metal surfaces, ensure the adhesive tapes are firmly pressed onto the iron plates and the surface for sufficient time.
7. Specifications
| Feature | Detail |
|---|---|
| Brand | SUNLINKCO |
| Model Name | UCL01 |
| Size | 8 inch (11.8"L x 1.57"W x 0.7"H) |
| Color | White Light-Motion Sensor |
| Material | Aluminum, Polycarbonate |
| Power Source | Battery Powered (1 Lithium Ion battery included) |
| Battery Capacity | 1100 mAh |
| Light Source Type | LED (41 pcs) |
| Light Color Temperature | 6500K |
| Voltage | 5 Volts (DC) |
| Wattage | 1 watts |
| Switch Type | Motion Sensor |
| Control Method | Manual / Motion Sensor |
| Installation Type | Under Cabinet Mount |
| Indoor/Outdoor Usage | Indoor |
| Water Resistance Level | Not Water Resistant |
8. What's in the Box
- Under Cabinet Light (x2)
- Adhesive Tape (x4)
- Metal Clip (x4)
- Type-C USB Cable (x2)
- Instruction Manual
9. Warranty and Support
For any product inquiries, technical support, or warranty information, please contact SUNLINKCO customer service through the retailer's platform or the official brand website. Please retain your proof of purchase for warranty claims.