
AEG AP31CB18IW
AEG AP31CB18IW Cordless Vacuum Cleaner User Manual
Model: AP31CB18IW
Introduction
Thank you for choosing the AEG AP31CB18IW Cordless Vacuum Cleaner. This manual provides essential information for the safe and efficient use, maintenance, and troubleshooting of your new appliance. Please read it thoroughly before first use and keep it for future reference.
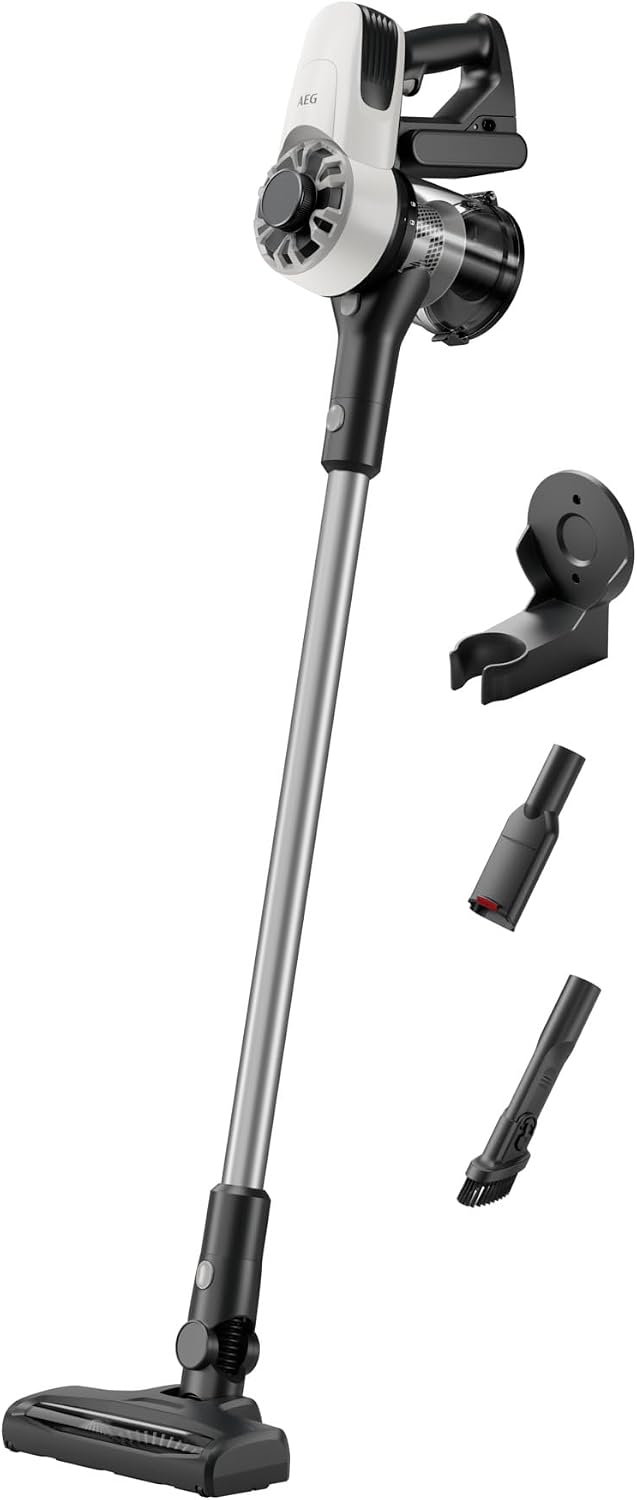
Image: The AEG AP31CB18IW Cordless Vacuum Cleaner, showcasing its sleek design and main components.
1. Setup and Assembly
1.1 Unpacking
Carefully remove all components from the packaging. Ensure all parts listed in the packing contents are present and undamaged. Retain packaging for future storage or transport.
1.2 Assembling the Vacuum Cleaner
- Attach the Extension Wand: Insert the extension wand into the main motor unit until it clicks securely into place.
- Attach the Floor Nozzle: Connect the floor nozzle to the other end of the extension wand, ensuring it locks firmly.
- Install the Battery: Slide the 18V Lithium-ion battery into the designated slot on the main motor unit until it clicks.

Image: The main vacuum unit, extension wand, floor nozzle, and various accessories laid out for assembly.
1.3 Charging the Battery
- Connect the charger to a power outlet.
- Attach the charger to the battery. The battery indicator lights will show the charging status.
- Allow approximately 5 hours for a full charge. A fully charged battery provides up to 30 minutes of runtime on low speed.

Image: A hand holding the removable battery pack, ready to be charged or inserted into the vacuum cleaner.
1.4 Attaching Accessories
The vacuum cleaner comes with three interchangeable accessories for versatile cleaning:
- Multi-use Brush: Designed for various floor types.
- 2-in-1 Crevice Tool: Ideal for narrow spaces and dusting.
- Upholstery Nozzle: For cleaning fabric surfaces and upholstery.
To attach an accessory, simply push it onto the end of the main unit or the extension wand until it fits snugly.

Image: A detailed view of the included accessories: multi-use brush, 2-in-1 crevice tool, upholstery nozzle, and the wall-mount bracket.
2. Operating Instructions
2.1 Powering On and Off
Press the power button located on the handle to turn the vacuum cleaner on. Press it again to turn it off. The vacuum cleaner may have different power modes; refer to the specific controls on your unit to adjust suction power if available.
2.2 General Cleaning
- For general floor cleaning, use the main floor nozzle with the extension wand.
- The lightweight and compact design allows for easy maneuverability around furniture and into tight spaces.

Image: A user demonstrating the lightweight and easy-to-handle nature of the vacuum cleaner, making it comfortable for extended use.
2.3 Using Accessories for Specific Tasks
- Crevice Tool: Use for cleaning corners, edges, and other hard-to-reach areas.
- Upholstery Nozzle: Ideal for cleaning sofas, chairs, and car interiors.
- Multi-use Brush: Can be used for delicate surfaces or to dislodge stubborn dirt.

Image: The vacuum cleaner being used with an accessory to clean under furniture, demonstrating its versatility.

Image: The vacuum cleaner head transitioning from a hard floor to a carpeted area, illustrating its effectiveness on various surfaces.
3. Maintenance
Regular maintenance ensures optimal performance and extends the lifespan of your vacuum cleaner.
3.1 Emptying the Dustbin
- Press the dustbin release button to detach the dustbin from the main unit.
- Open the dustbin lid and empty the contents into a waste bin.
- Close the lid and reattach the dustbin to the main unit, ensuring it clicks into place.
- It is recommended to empty the 0.5L dustbin after each use or when it reaches the MAX fill line.
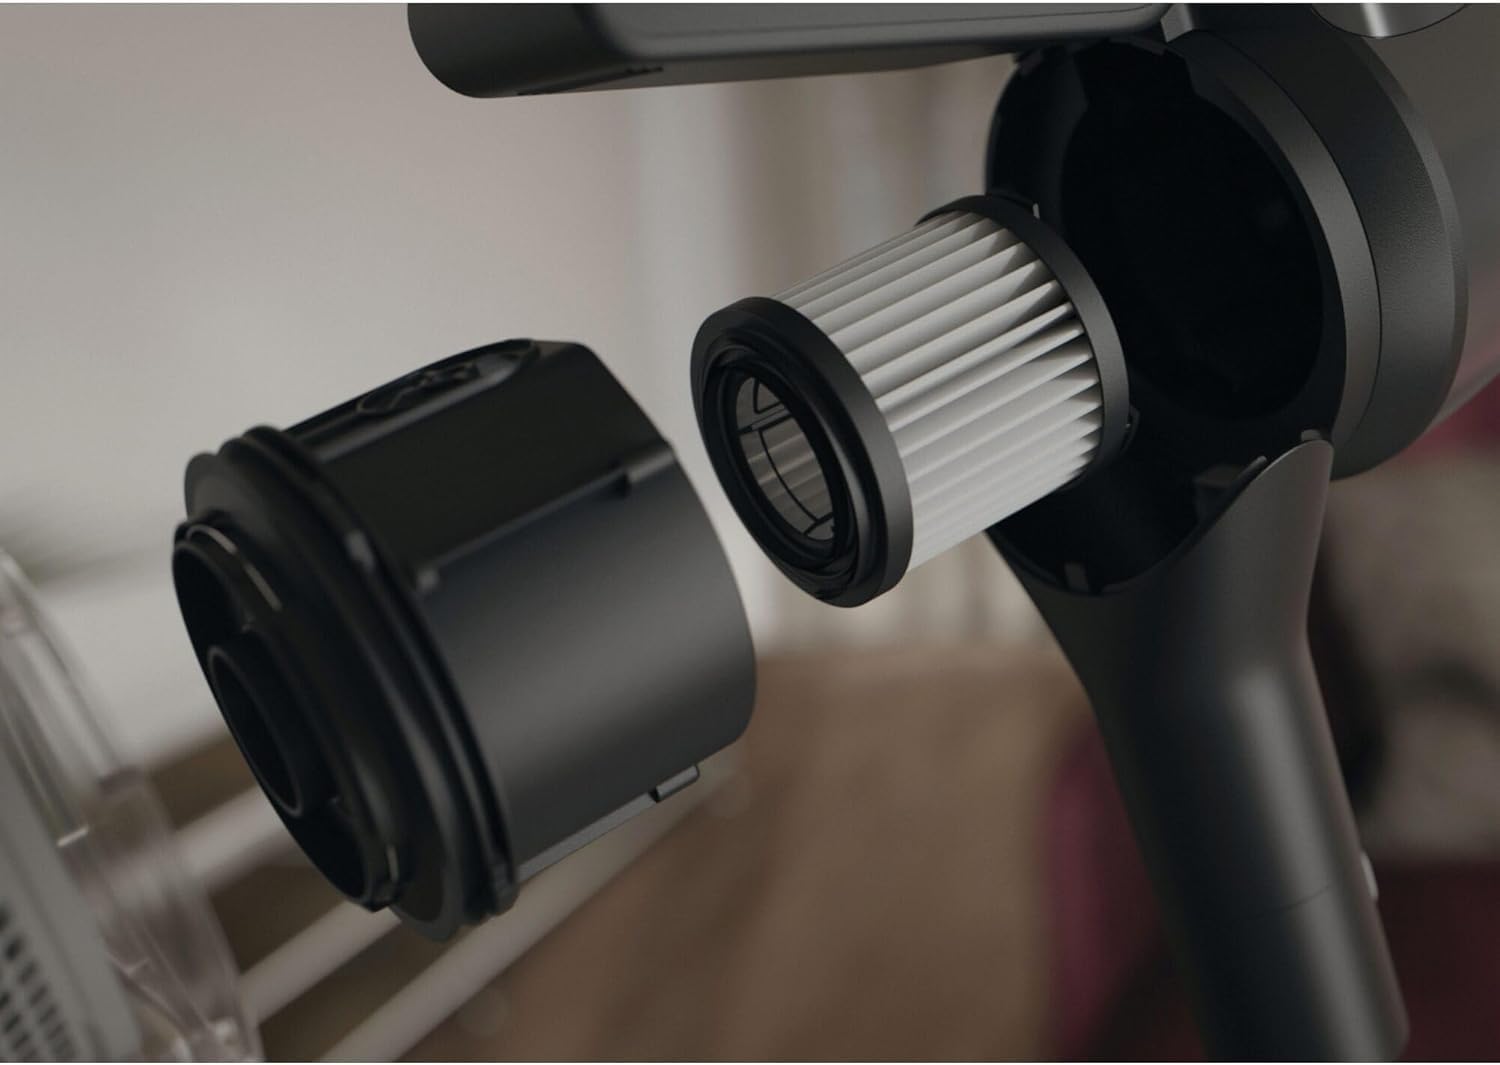
Image: The transparent dustbin being emptied, showing accumulated dust and debris, highlighting the easy-to-clean design.
3.2 Cleaning the Filters
The AEG AP31CB18IW features two-step washable filters for effective dust capture.
- Remove the dustbin as described above.
- Carefully remove the filters from the dustbin assembly.
- Rinse the filters under cold running water until the water runs clear. Do not use detergents.
- Allow the filters to air dry completely for at least 24 hours before reinserting them. Do not use a dryer or direct heat.
- Reassemble the filters and dustbin, then reattach to the vacuum cleaner.

Image: A close-up view of the washable filter being removed from the dustbin, illustrating the two-step filtration system.
3.3 Battery Care
- Always use the original charger provided with the appliance.
- Do not expose the battery to extreme temperatures.
- If storing the vacuum for an extended period, ensure the battery is partially charged (around 50%) and store in a cool, dry place.
4. Troubleshooting
| Problem | Possible Cause | Solution |
|---|---|---|
| Vacuum does not turn on. | Battery is not charged or not properly inserted. | Charge the battery fully. Ensure the battery is securely clicked into place. |
| Reduced suction power. | Dustbin is full, filters are clogged, or an attachment is blocked. | Empty the dustbin. Clean or wash the filters. Check for blockages in the nozzle, wand, or accessories. |
| Short operating time. | Battery not fully charged or battery degradation. | Ensure battery is fully charged (5 hours). If issue persists, contact customer support for battery replacement options. |
5. Specifications
| Feature | Detail |
|---|---|
| Model Number | AP31CB18IW |
| Brand | AEG |
| Voltage | 18 Volts |
| Power | 18 Watts |
| Battery Type | Lithium-ion (1 included) |
| Runtime | Up to 30 minutes (on low speed) |
| Charge Time | Approximately 5 hours |
| Dustbin Capacity | 0.5 Liters |
| Filter Type | Washable HEPA filter |
| Dimensions (L x W x H) | 25 x 22.2 x 112.8 cm |
| Weight | 2.36 Kilograms |
| Special Features | Washable filter, Lightweight, Portable, Cordless, Bagless |
| Included Components | 3 interchangeable accessories |
6. Warranty and Support
For warranty information, technical support, or to purchase replacement parts, please refer to the warranty card included with your product or visit the official AEG website. You can also visit the AEG Brand Store for more product information.
Related documentsAP31CB18IW


Ask a question about this manual
Ask about setup, troubleshooting, compatibility, parts, safety, or missing instructions. Manuals+ will review the question and use this page’s manual context to help answer it.