
Rockland ATV Rack (Model 1002)
Rockland Heavy Duty Steel ATV Cargo Carrier Instruction Manual
Model: ATV Rack (Model 1002)
Introduction
The Rockland Heavy Duty Steel ATV Cargo Carrier is designed to provide a robust and reliable solution for transporting gear on your ATV. With a substantial 300 lbs load capacity, this carrier is ideal for various outdoor activities, including camping, hunting, and general hauling. Its durable steel construction and rust-resistant finish ensure long-lasting performance in diverse conditions. This manual provides essential information for the safe assembly, installation, operation, and maintenance of your cargo carrier.
Safety Information
Please read and understand all safety warnings and instructions before assembling, installing, or operating the cargo carrier. Failure to follow these instructions may result in property damage, personal injury, or death.
- Maximum Load Capacity: Do not exceed the stated maximum load capacity of 300 lbs (136 kg). Overloading can lead to structural failure and loss of control of the vehicle.
- Secure Cargo: Always ensure all cargo is securely fastened to the carrier using appropriate tie-downs, straps, or nets. Loose cargo can shift during transit, causing instability or falling off the carrier.
- Proper Installation: Ensure the carrier is correctly installed and securely attached to a compatible 2-inch Class III or IV hitch receiver. Verify all bolts and fasteners are tightened according to instructions.
- Weight Distribution: Distribute the load evenly across the carrier surface. Uneven weight distribution can affect vehicle handling and stability.
- Regular Inspection: Before each use, inspect the carrier for any signs of damage, wear, or loose components. Do not use the carrier if any damage is found.
- Vehicle Clearance: Be aware of the increased length and width of your vehicle when the carrier is installed, especially when turning, backing up, or navigating tight spaces.
- Off-Road Use: Exercise extreme caution when using the carrier on uneven or rough terrain. Reduce speed and avoid sudden maneuvers.
Package Contents
Verify that all components are present and undamaged before beginning assembly. If any parts are missing or damaged, please contact customer support.
- Main Cargo Basket Frame
- Hitch Receiver Shank
- Mounting Hardware (Bolts, Washers, Nuts)
- Instruction Manual
Assembly Instructions
Assembly requires basic hand tools (not included), such as a wrench or socket set. It is recommended to assemble the carrier on a flat, stable surface.
- Unpack all components and lay them out to ensure all parts are accounted for.
- Align the Hitch Receiver Shank with the designated mounting points on the underside of the Main Cargo Basket Frame.
- Insert the provided bolts through the aligned holes. Place washers and nuts onto the bolts.
- Hand-tighten all nuts initially to ensure proper alignment.
- Using appropriate tools, fully tighten all nuts and bolts. Ensure all connections are secure but do not overtighten, which could strip threads.
- Once assembled, visually inspect the carrier to confirm all components are correctly installed and tightened.
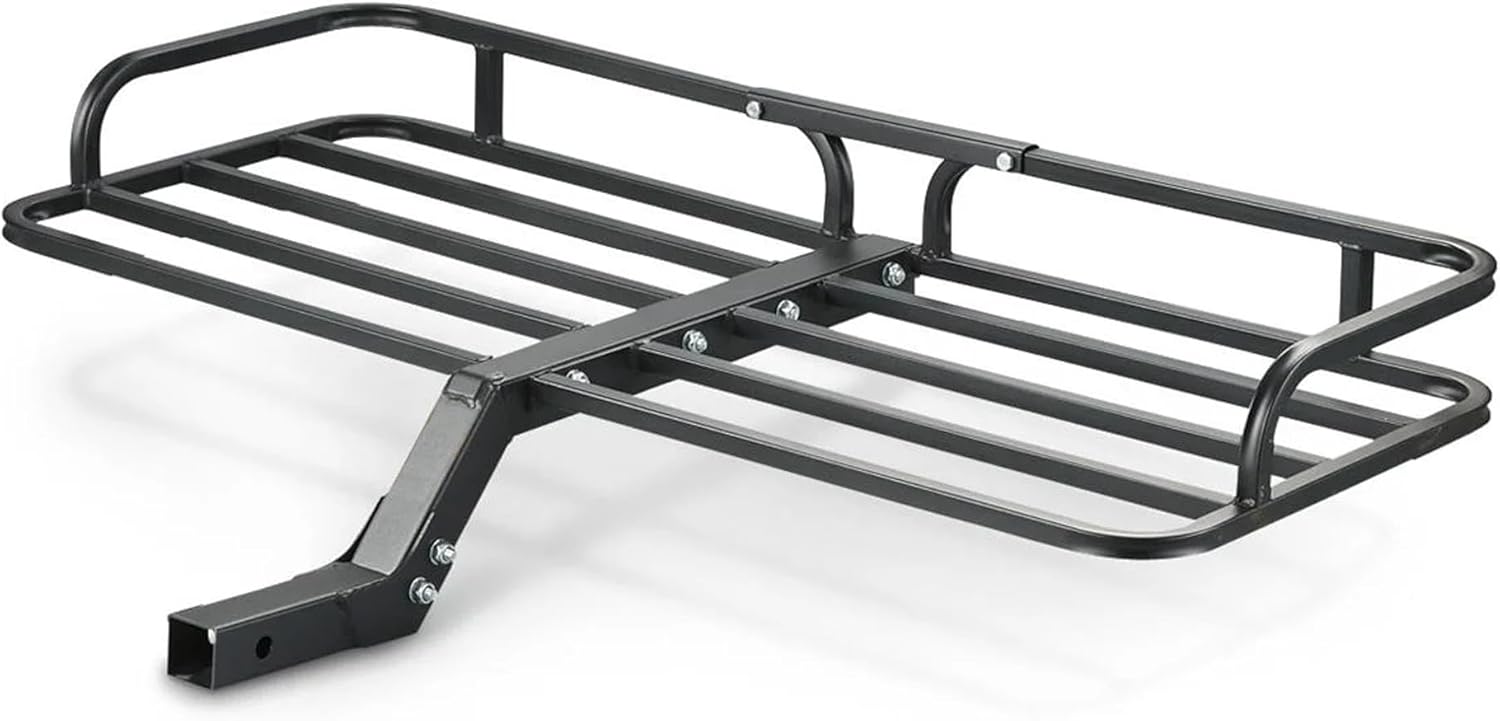
Image: The fully assembled Rockland ATV Cargo Carrier, ready for installation onto a hitch receiver. This image shows the main cargo basket and the integrated hitch shank.
Installation
The Rockland ATV Cargo Carrier is designed for quick and easy installation onto any standard 2-inch hitch receiver, compatible with Class III and IV hitches.
- Slide the Hitch Receiver Shank of the assembled cargo carrier into your ATV's 2-inch hitch receiver.
- Align the pinhole on the shank with the pinhole on your ATV's receiver.
- Insert your hitch pin (not included) through the aligned holes and secure it with a clip or lock.
- Gently pull on the carrier to ensure it is firmly seated and secured in the hitch receiver.

Image: Illustration demonstrating the quick removal and installation process of the cargo carrier from an ATV's hitch receiver. The angled shank provides additional ground clearance.
Operating Instructions
Proper loading and securing of cargo are crucial for safe operation and to prevent damage to the carrier or your vehicle.
- Loading Cargo: Place items onto the carrier, ensuring the total weight does not exceed 300 lbs. Distribute the weight as evenly as possible across the carrier's surface to maintain vehicle balance.
- Securing Cargo: Utilize the carrier's design and your own tie-down points to secure all items. Use high-quality straps, bungee cords, or cargo nets to prevent shifting, bouncing, or falling during transit. Ensure straps are tight and secure.
- Load Balancing: For optimal stability, place heavier items closer to the center of the carrier and lower to the platform. This minimizes leverage and reduces stress on the hitch receiver.
- Pre-Trip Check: Before each trip, double-check that all cargo is securely fastened and that the carrier is firmly attached to the hitch receiver.

Image: The cargo carrier mounted on an ATV, demonstrating its 300 lbs loading capacity with a chainsaw and a bag. This setup frees up space inside the vehicle.

Image: The cargo carrier easily carrying a large water tank, secured with straps, illustrating its utility for various cargo types.
Maintenance
Regular maintenance will extend the life of your Rockland ATV Cargo Carrier and ensure its continued safe operation.
- Cleaning: After use, especially in dirty or muddy conditions, clean the carrier with water and mild soap. Rinse thoroughly and dry to prevent rust.
- Inspection: Periodically inspect all welds, bolts, and structural components for signs of wear, cracks, bends, or corrosion. Pay close attention to the hitch receiver shank and its connection points.
- Fastener Check: Re-tighten all bolts and nuts as needed. Vibrations during travel can cause fasteners to loosen over time.
- Rust Prevention: The carrier features an e-coating and powder coating for rust resistance. If the coating is scratched or damaged, touch up with rust-inhibiting paint to prevent corrosion.
- Storage: When not in use, store the carrier in a dry, sheltered location to protect it from the elements.

Image: Close-up view highlighting the heavy-duty steel construction and the e-coating/powder coating, which ensures long-lasting durability and rust resistance.
Troubleshooting
This section addresses common issues you might encounter with your cargo carrier.
- Carrier Wobbles/Sways:
- Ensure the hitch pin is fully inserted and secured.
- Verify all assembly bolts are tightened.
- Check for excessive play in the hitch receiver itself.
- Ensure cargo is evenly distributed and securely fastened.
- Difficulty Inserting into Hitch:
- Check for any obstructions inside the hitch receiver.
- Ensure the hitch receiver is clean and free of debris or rust.
- Verify the hitch receiver is a standard 2-inch size.
- Unusual Noises During Travel:
- Re-check all fasteners for tightness.
- Ensure cargo is not loose or shifting.
- Inspect for any bent or damaged components.
Specifications
| Feature | Detail |
|---|---|
| Brand | Rockland |
| Model | ATV Rack (Model 1002) |
| Material | Heavy-Duty Steel |
| Color | Black |
| Load Capacity | 300 Pounds (136 kg) |
| Dimensions (L x W x H) | 48 x 19.5 x 5 inches (121.9 x 49.5 x 12.7 cm) |
| Item Weight | 24.2 pounds (10.98 kg) |
| Mounting Type | 2" Receiver |
| Hitch Compatibility | Class III & IV Hitches |
| Finish | Rust-Resistant E-coating and Powder Coating |
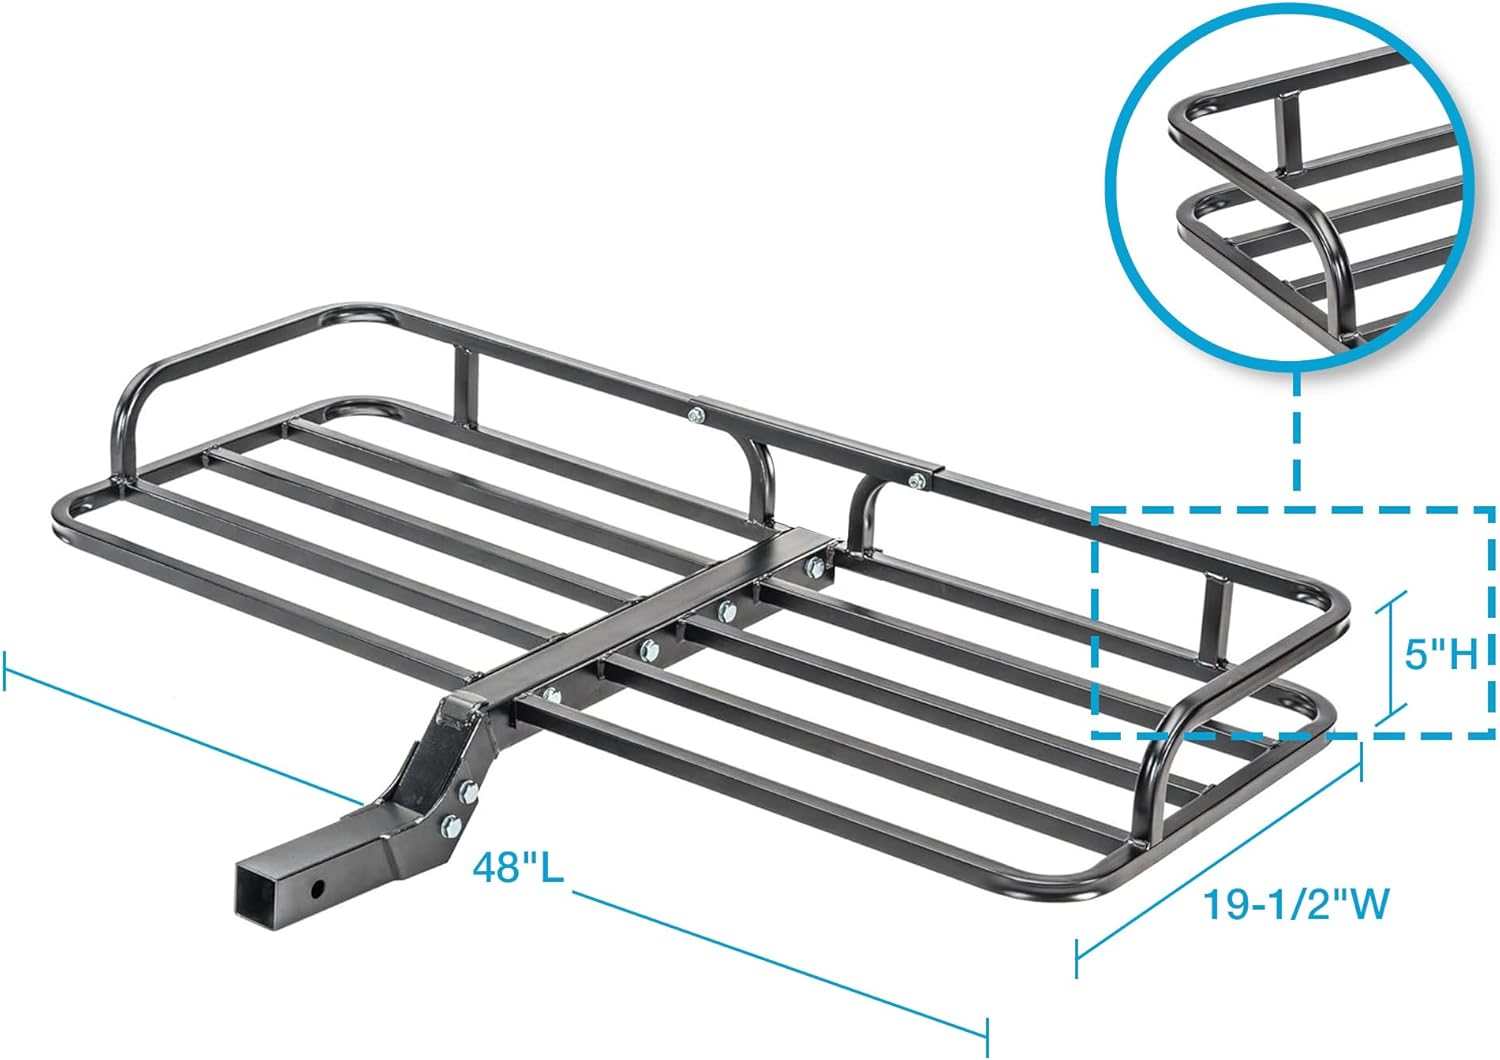
Image: Diagram illustrating the key dimensions of the cargo carrier: 48 inches in length, 19.5 inches in width, and 5 inches in height.
Warranty and Support
Rockland stands behind the quality of its products. For any questions regarding assembly, operation, troubleshooting, or warranty claims, please contact our customer support team.
Email: ecommerce@forcome.com
Please have your product model number (ATV Rack / 1002) and purchase information ready when contacting support.
Ask a question about this manual
Ask about setup, troubleshooting, compatibility, parts, safety, or missing instructions. Manuals+ will review the question and use this page’s manual context to help answer it.