1. Introduction
Welcome to the Gofunly H3 Kids Instant Print Camera user manual. This document provides essential information for setting up, operating, and maintaining your new digital camera. Please read these instructions carefully to ensure proper use and longevity of the product.
What's in the Box:
- 1x Gofunly H3 Kids Instant Print Camera
- 3x Print Paper Rolls
- 1x USB Charging Cable
- 1x 32GB SD Card
- 1x Lanyard
- 1x User Manual

Image: The Gofunly H3 Kids Instant Print Camera and its included accessories.
2. Product Overview
The Gofunly H3 Kids Instant Print Camera is designed for young users, offering a blend of digital photography and instant thermal printing. It features a durable design and an easy-to-use interface.
Key Features:
- Instant Print Function: Print black and white photos instantly using thermal printing technology.
- 1080P HD Video Recording: Capture high-definition videos.
- 10X Digital Zoom: Magnify subjects for detailed shots.
- 2.4-inch Large Screen: View photos and videos clearly.
- Built-in 1000mAh Rechargeable Battery: Provides 4-5 hours of continuous use.
- Creative Options: Includes 21 cute frames, 8 mirror effects, and 6 filters.
- Additional Functions: Time-lapse, burst shooting, DIY coloring, MP3 playback, and built-in games.
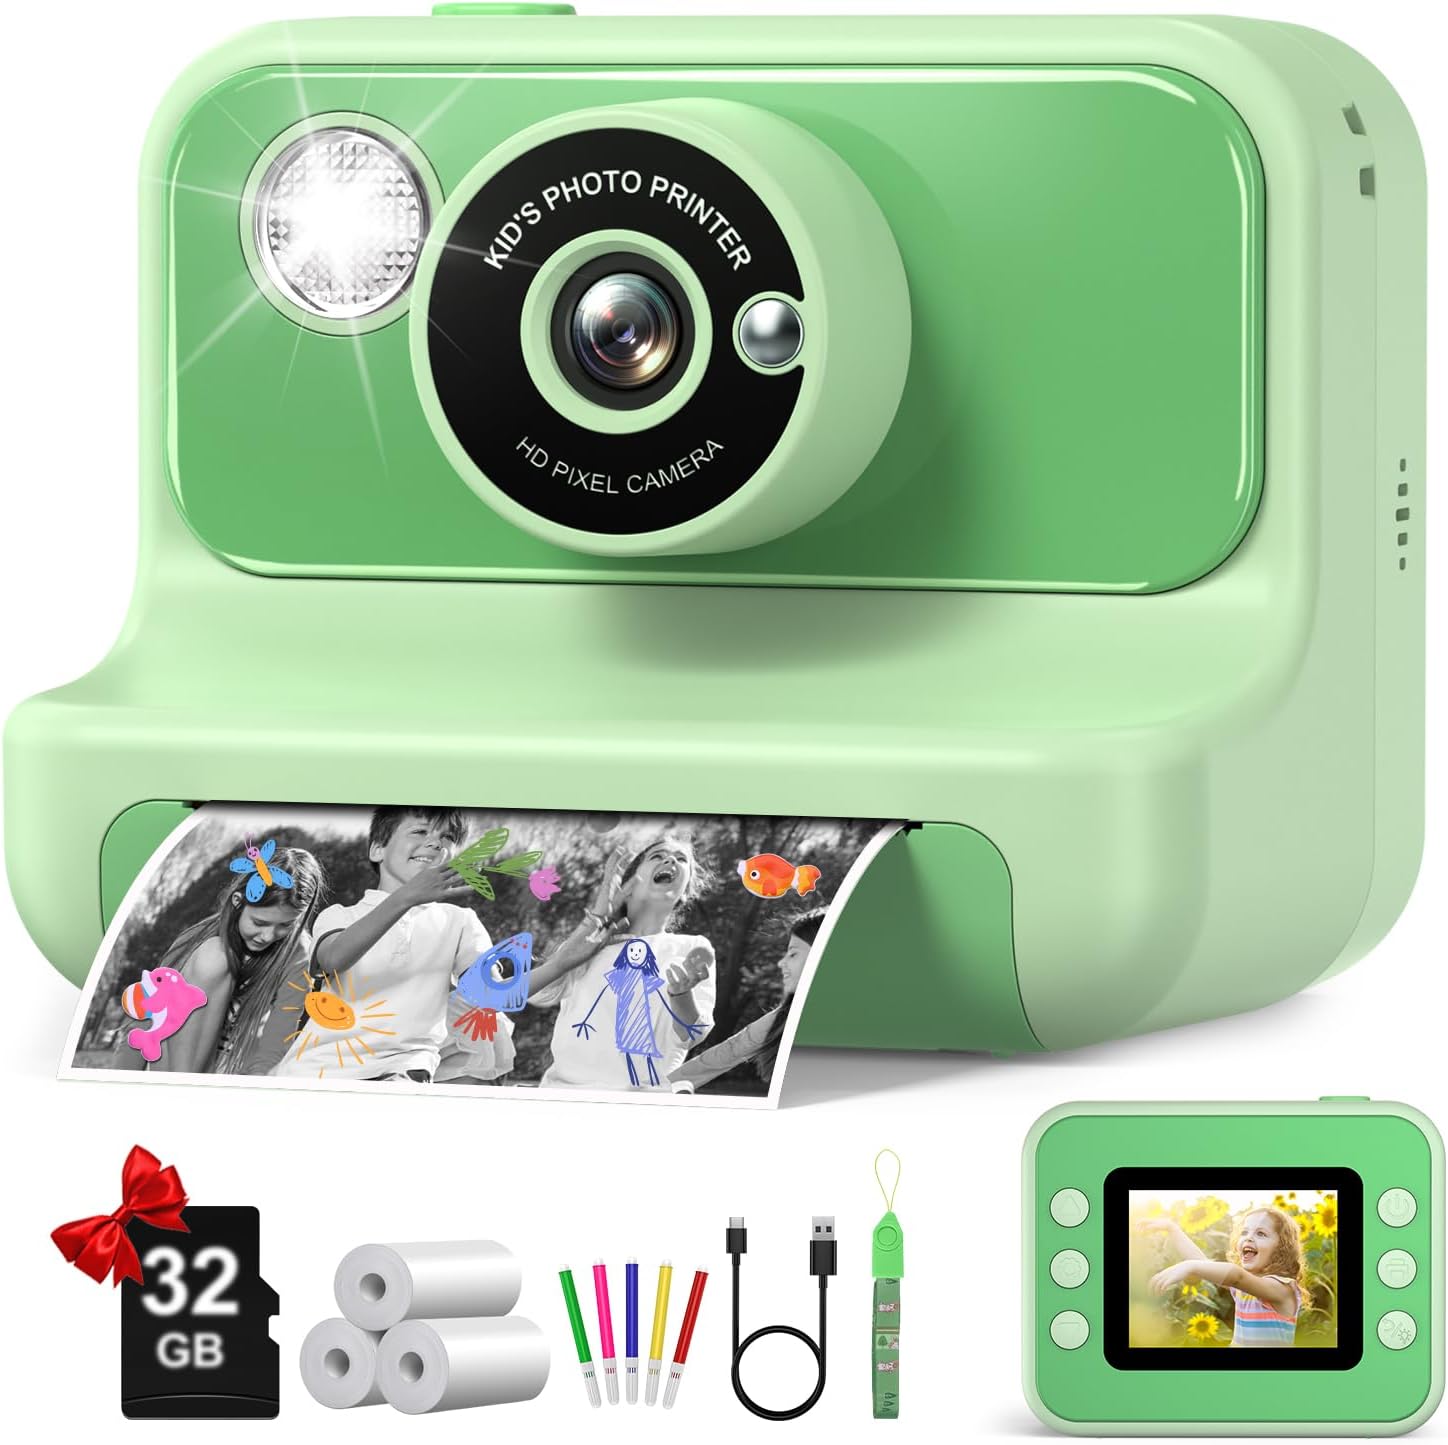
Image: The Gofunly H3 Kids Instant Print Camera.

Image: Overview of camera features.
3. Setup
3.1 Charging the Camera
Before first use, fully charge the camera using the provided USB charging cable. Connect the cable to the camera's charging port and a compatible USB power source. The built-in 1000mAh battery provides 4-5 hours of continuous photography when fully charged.

Image: Charging the camera.
3.2 Inserting Print Paper
- Open the paper slot cover by sliding it downward in the direction of the arrow.
- Place a roll of print paper into the paper slot, ensuring the paper feeds out correctly.
- Close the paper slot lid tightly.

Image: Steps for inserting print paper.
3.3 Inserting SD Card
Locate the SD card slot on the side of the camera. Insert the provided 32GB SD card until it clicks into place. This card stores all your digital photos and videos.
4. Operating the Camera
4.1 Power On/Off
Press and hold the power button (usually located on the top or side) for a few seconds to turn the camera on or off.
4.2 Navigation
Use the directional buttons (up, down, left, right) to navigate through the menu options on the 2.4-inch screen. Press the 'OK' button to select an option.
4.3 Taking Photos
Select the 'Camera' mode from the main menu. Frame your shot using the screen. Press the shutter button (usually a dedicated button on top) to capture a photo. You can use the 10X digital zoom to get closer to your subject.

Image: Capturing 1080P HD video.
4.4 Video Recording
Select the 'Video' mode from the main menu. Press the shutter button to start and stop recording 1080P HD videos.
4.5 Using Filters and Frames
In 'Camera' mode, use the directional buttons to browse through the 21 cute frames, 8 mirror effects, and 6 filters to add creative touches to your photos before capturing them.

Image: Creative filters and frames.
4.6 Instant Printing
The camera supports instant thermal printing. After taking a photo, it will automatically print a black and white version. You can choose between grayscale and dot matrix printing modes, and adjust 3 types of color depth in the settings.
4.7 Games and Music Playback
The camera includes built-in games for entertainment. You can also load MP3 files onto the SD card and use the camera as a music player by selecting the 'Music' option from the main menu.
4.8 Printing Saved Photos
Access previously taken photos and videos through the 'Playback' option. You can select any saved photo and choose to print it again, allowing for multiple copies or reprinting if an initial print was damaged.
5. Maintenance
5.1 Replacing Print Paper
When the print paper runs out, follow the steps in section 3.2 to replace the roll. Ensure the paper is correctly aligned for smooth printing.
5.2 Charging
Recharge the camera when the battery indicator is low. Use only the provided USB charging cable to prevent damage to the device.
5.3 Cleaning
Wipe the camera's exterior with a soft, dry cloth. Avoid using liquid cleaners or abrasive materials that could damage the screen or casing.
6. Troubleshooting
If you encounter any issues with your Gofunly H3 Kids Instant Print Camera, please refer to the user manual for common solutions. For further assistance, contact Gofunly customer support.
7. Specifications
| Feature | Specification |
|---|---|
| Brand | Gofunly |
| Model Name | H3 |
| Screen Size | 2.4 Inches |
| Video Resolution | 1080p |
| Optical Zoom | 10 x |
| Battery Capacity | 1000 Milliamp Hours |
| Battery Average Life | 4 Hours |
| Memory Storage Capacity | 32 GB |
| Supported File Format | JPEG, MP4 |
| Image Stabilization | Digital |
| Color | Green |
8. Warranty & Support
The product's warranty information indicates 'no' specific warranty. For any questions about our products or services, please contact Gofunly customer support for prompt and effective solutions.


