
HEAPETS P326
HEAPETS P326 Dog Hair Clippers and Grooming Kit Instruction Manual
Introduction
Thank you for choosing the HEAPETS P326 Dog Hair Clippers and Grooming Kit. This comprehensive kit is designed to provide a safe, efficient, and comfortable grooming experience for your pets, including dogs and cats. It features a main hair clipper, a paw trimmer, and a nail grinder, all with low noise and cordless operation for ease of use. This manual provides detailed instructions for the proper setup, operation, maintenance, and troubleshooting of your grooming kit.
Safety Information
Always unplug the trimmer when not in use. Keep it away from water sources. Do not use on infants or children. Keep blades away from eyes and face. Always follow recommended cleaning and maintenance procedures.
- Ensure the device is fully charged before use to avoid power interruptions during grooming.
- Do not attempt to disassemble or repair the unit yourself. Contact customer support for assistance.
- Store the grooming kit in a dry place, out of reach of children and pets.
- If your pet has long or thick hair, pre-trimming with scissors may be necessary to prevent the clippers from jamming.
- Always use the appropriate guide comb to avoid cutting hair too short or injuring your pet's skin.
Package Contents
Your HEAPETS P326 Grooming Kit includes the following items:

Image: Complete HEAPETS P326 Grooming Kit with all included accessories.
- Main Hair Clipper
- Paw Trimmer Attachment
- Nail Grinder Attachment
- 6 Guide Combs (3mm, 6mm, 9mm, 12mm, 15mm, 18mm)
- USB Charging Cables (2)
- Stainless Steel Grooming Comb
- Grooming Scissors
- Cleaning Brush
- Lubricating Oil
Product Overview
The HEAPETS P326 grooming kit offers a versatile 3-in-1 solution for your pet's grooming needs, combining a body clipper, a precision trimmer for delicate areas, and a nail grinder.
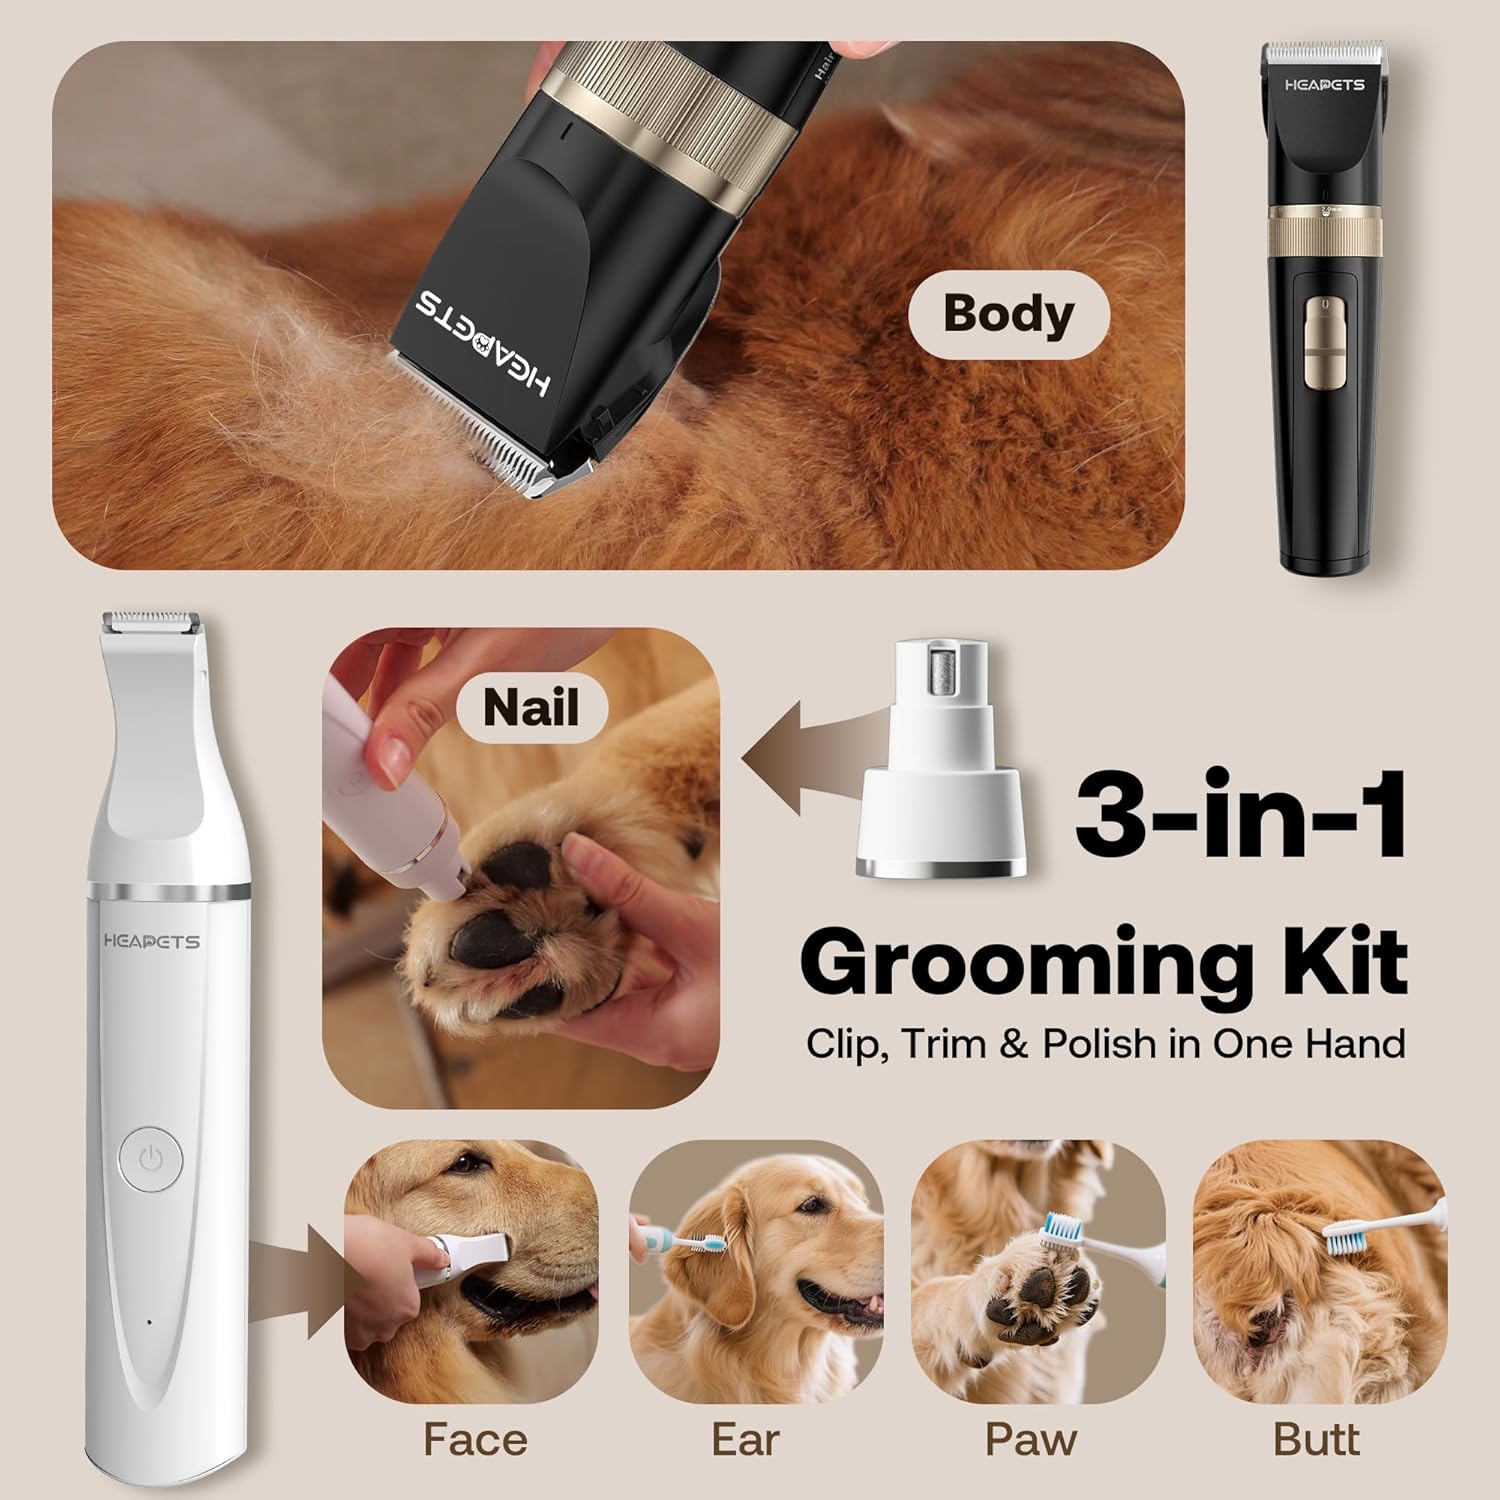
Image: The 3-in-1 grooming kit highlighting its uses for body clipping, precision trimming, and nail grinding.
Dimensions

Image: Visual representation of the dimensions for the main clipper, paw trimmer, and nail grinder.
- Main Hair Clipper: 7.28 inches (length) x 1.77 inches (width)
- Paw Trimmer: 7.02 inches (length) x 1.28 inches (width)
- Nail Grinder: 6.48 inches (length) x 1.28 inches (width)
Setup and Charging
Charging the Device
The HEAPETS grooming tools are rechargeable and cordless, offering flexibility during grooming. Before first use, fully charge both the main clipper and the paw trimmer/nail grinder unit.
- Connect the provided USB charging cable to the charging port on each device.
- Plug the other end of the USB cable into a compatible USB power adapter (not included) or a computer USB port.
- The indicator light will show charging status (refer to device for specific light behavior).
- A full charge provides approximately 180 minutes of runtime for the main clipper and 80 minutes for the paw trimmer/nail grinder.

Image: Cordless operation of the clippers, emphasizing long battery life for extended grooming sessions.
Attaching/Detaching Blades and Guide Combs
The blades and attachments are designed for easy changing and cleaning.
For Main Hair Clipper Blade:
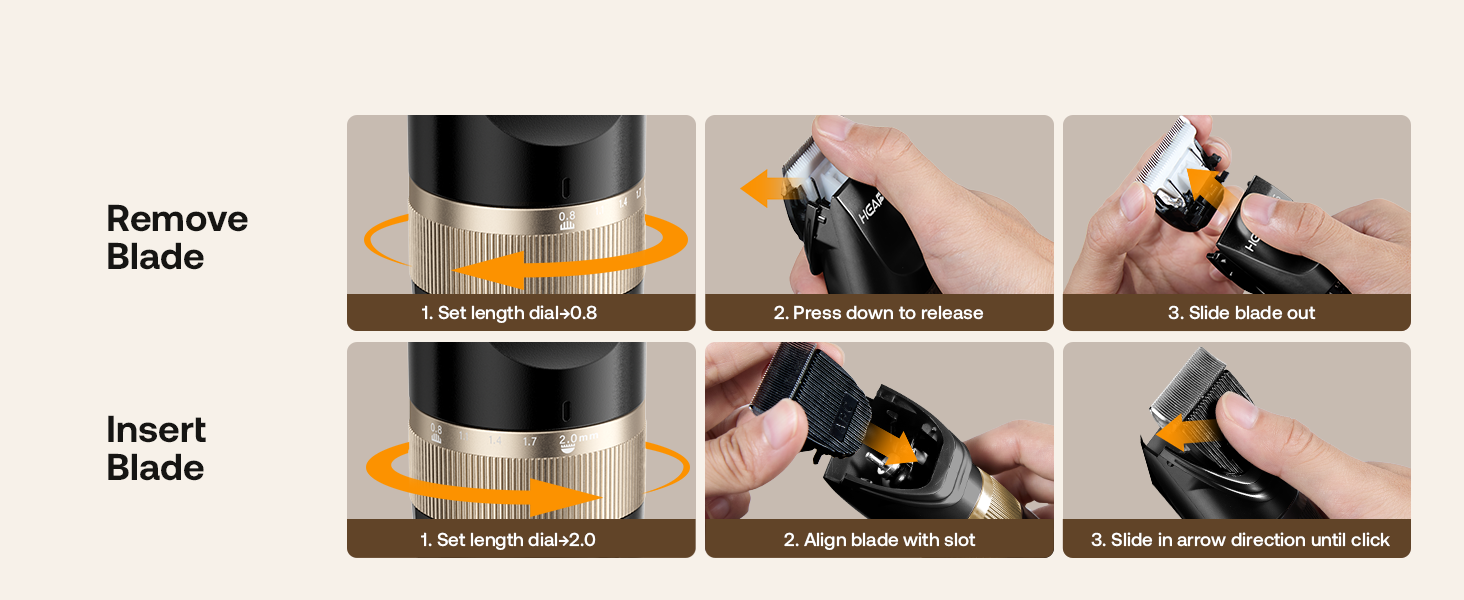
Image: Step-by-step guide for removing and inserting the main clipper blade.
- To Remove: Set the length dial to 0.8mm. Press down on the blade to release it, then slide the blade out.
- To Insert: Set the length dial to 2.0mm. Align the blade with the slot and slide it in the direction of the arrow until it clicks into place.
For Paw Trimmer / Nail Grinder Attachments:
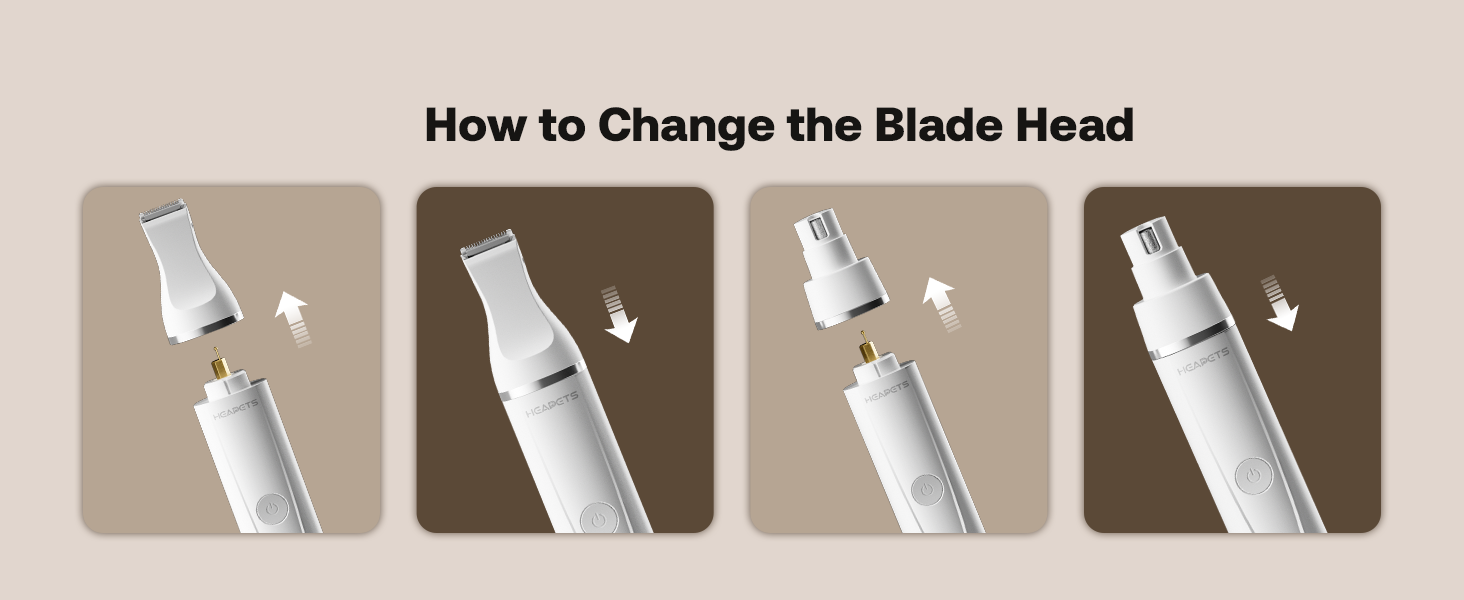
Image: Visual guide for attaching and detaching the paw trimmer and nail grinder heads.
- To Change: Gently twist and pull the current attachment head upwards to remove it.
- Align the desired attachment (paw trimmer or nail grinder) with the main unit and push down until it securely clicks into place.
Attaching Guide Combs:
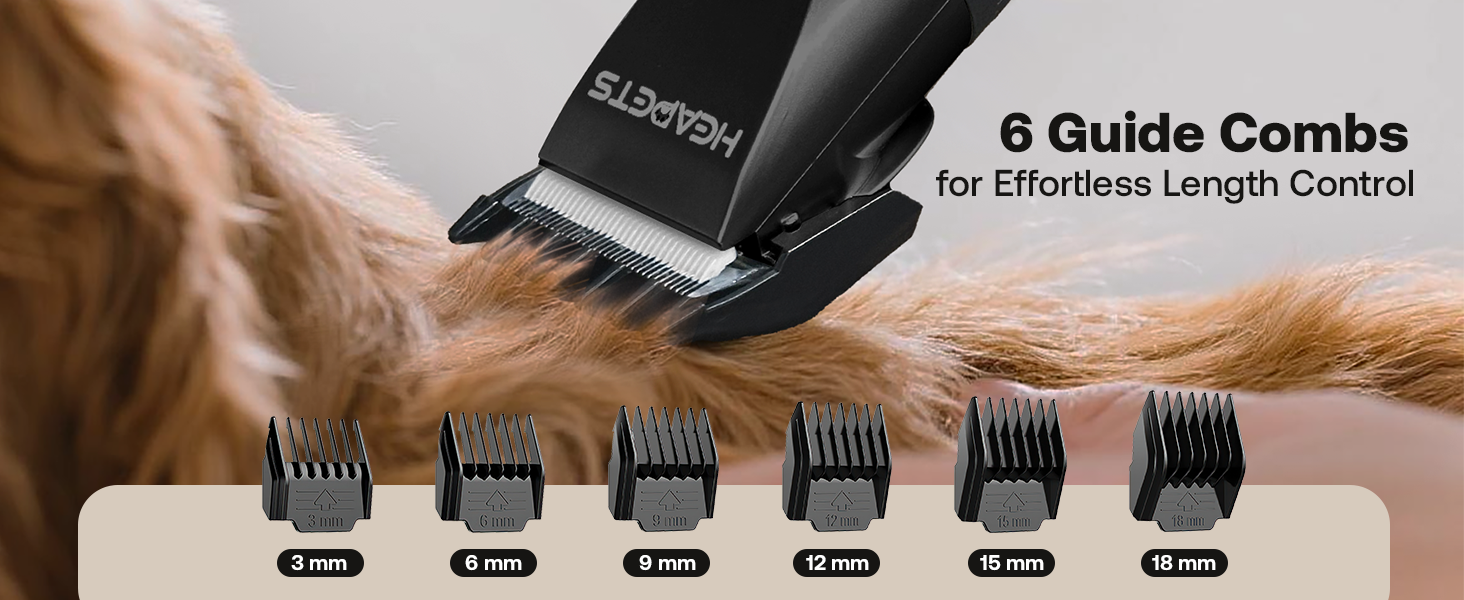
Image: Illustration of the six guide comb sizes and how they attach to the clipper for different hair lengths.
- Select the desired guide comb (3mm, 6mm, 9mm, 12mm, 15mm, or 18mm).
- Align the comb with the clipper blade and slide it on until it snaps securely into place.
- Ensure the comb is firmly attached before operating the clipper.
Operating Instructions
Pre-Grooming Preparation
- Bathe and dry your pet thoroughly.
- Brush your pet's coat to remove tangles and loose hair. This prevents blades from jamming.
- Ensure your pet is calm and comfortable. The low noise and vibration design of HEAPETS clippers helps keep pets relaxed.

Image: The low noise and vibration feature helps keep pets calm during grooming.
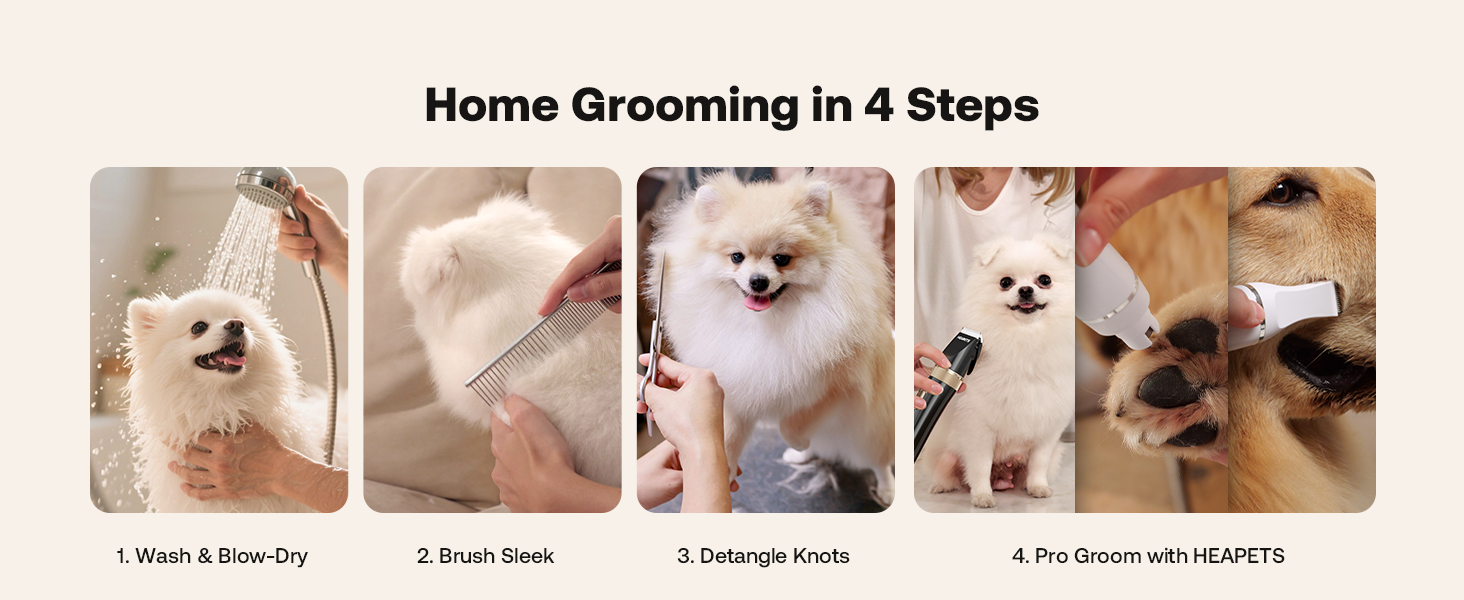
Image: Recommended 4-step home grooming process for optimal results.
Using the Main Hair Clipper
- Attach the desired guide comb for the appropriate hair length.
- Turn on the clipper.
- Hold the clipper firmly and move it in the direction of hair growth.
- Use smooth, even strokes. Do not press too hard against the pet's skin.
- For areas with thicker hair, consider using a longer comb first, then gradually reducing the length.
Using the Paw Trimmer
The paw trimmer is ideal for delicate areas such as the face, ears, paws, and rump.
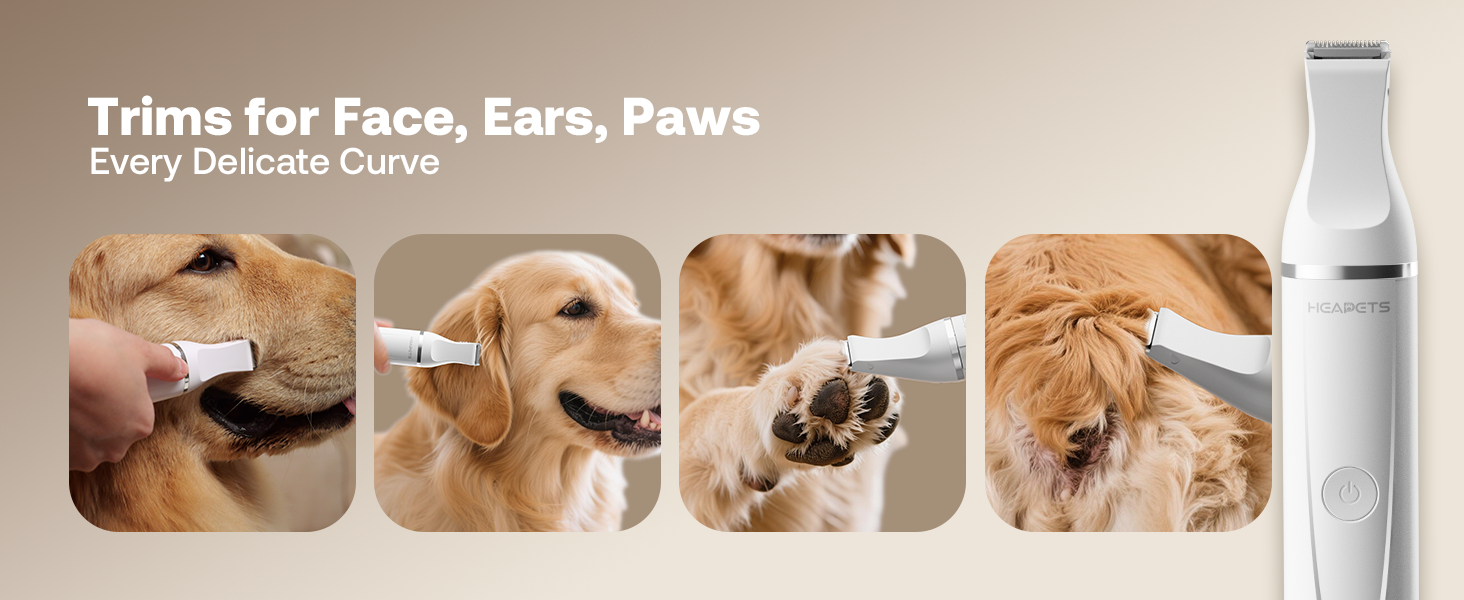
Image: Precision trimming for sensitive areas like face, ears, and paws.
- Ensure the paw trimmer attachment is securely in place.
- Turn on the trimmer.
- Carefully trim hair in small sections, being extra cautious around eyes, ears, and paw pads.
- Use the grooming scissors for any stubborn or matted areas that the trimmer cannot easily handle.
Using the Nail Grinder
The nail grinder helps to safely and smoothly shorten your pet's nails, reducing the risk of over-clipping.
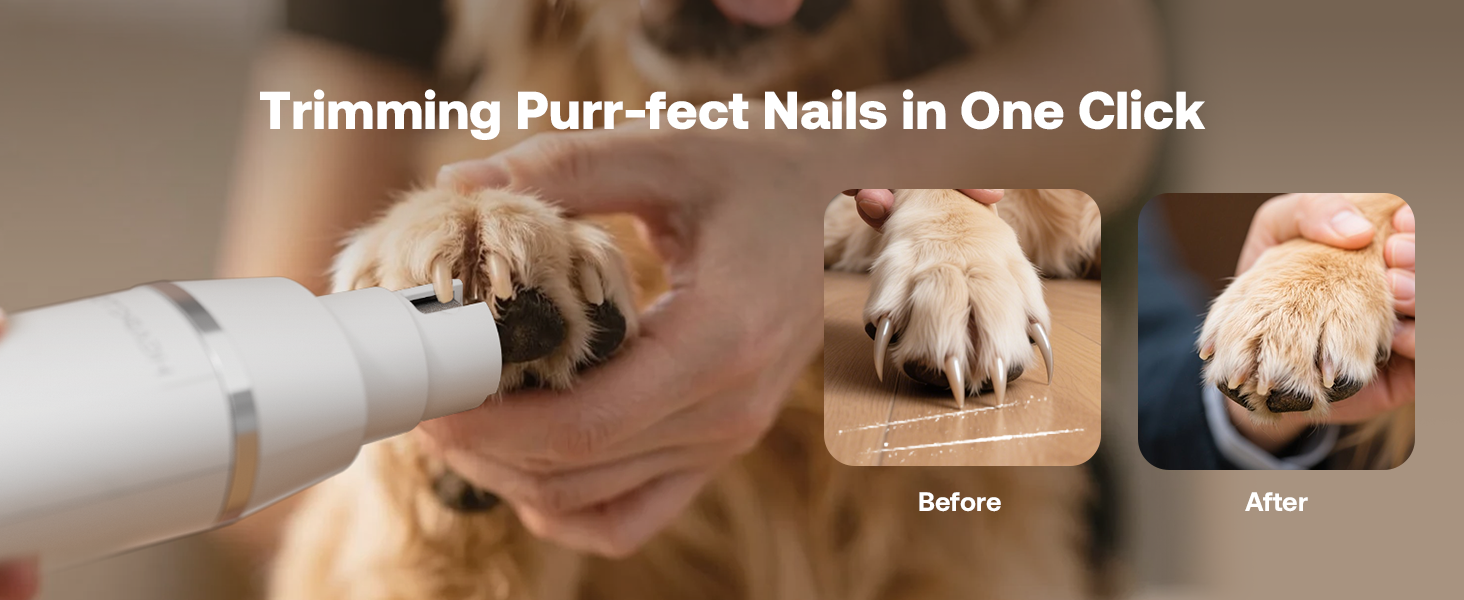
Image: Before and after comparison of pet nails after using the nail grinder.
- Ensure the nail grinder attachment is securely in place.
- Turn on the grinder.
- Gently introduce your pet's nail to the grinding wheel.
- Grind a small amount at a time, checking frequently to avoid grinding too far and hitting the quick.
- Repeat for all nails until desired length and smoothness are achieved.
Maintenance
Regular cleaning and maintenance will prolong the life and performance of your grooming kit.
Cleaning the Blades
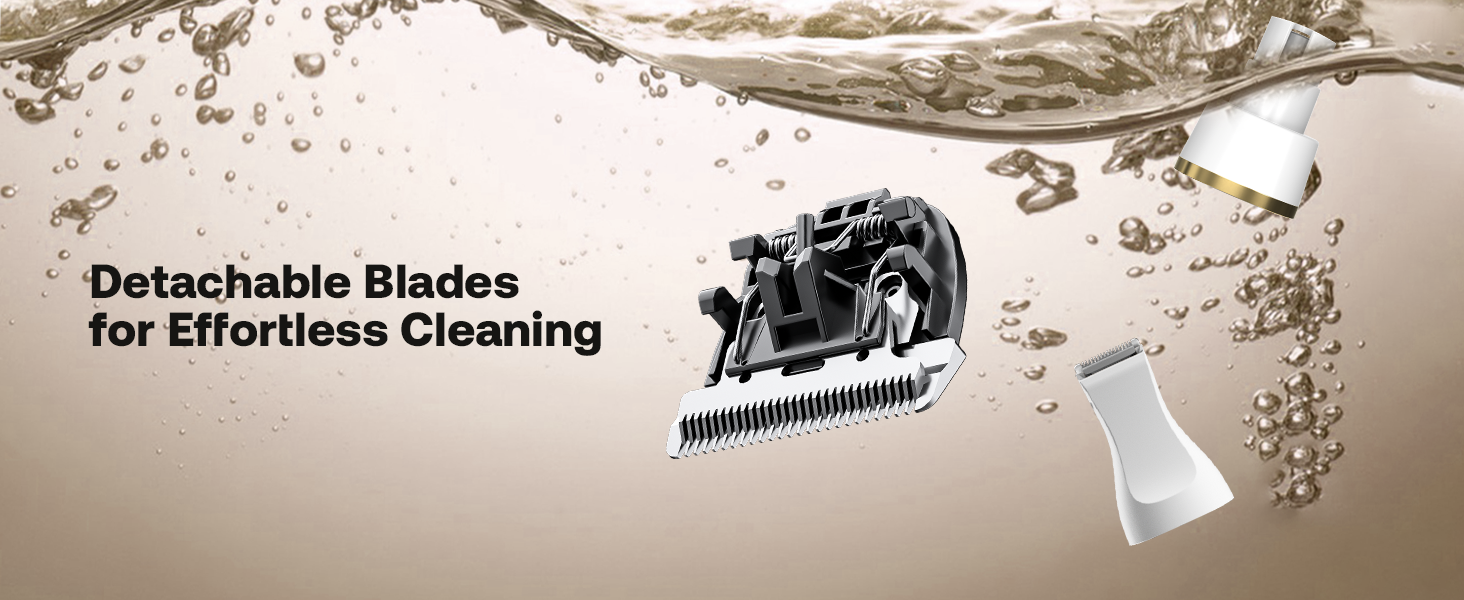
Image: Detachable blades for easy cleaning under water.
- After each use, turn off the device and detach the blade/attachment head.
- Use the provided cleaning brush to remove any trapped hair from the blades and inside the housing.
- The detachable blades can be rinsed under running water. Ensure they are completely dry before reattaching or storing.
Oiling the Blades

Image: Essential accessories including oil for blade maintenance.
- After cleaning and drying, apply a few drops of the provided lubricating oil to the blades.
- Turn on the clipper for a few seconds to distribute the oil evenly.
- Wipe off any excess oil. Oiling helps maintain blade sharpness and smooth operation.
Storage
- Store the grooming kit and all accessories in a clean, dry place.
- Keep the devices charged periodically to maintain battery health, even when not in regular use.
Troubleshooting
| Problem | Possible Cause | Solution |
|---|---|---|
| Clipper/Trimmer not turning on. | Low battery. | Charge the device fully. |
| Clipper/Trimmer not cutting effectively or jamming. | Blades are dull or clogged with hair. Pet's hair is too long or matted. | Clean the blades thoroughly. Oil the blades. Pre-trim long or matted hair with scissors before using the clipper. |
| Nail Grinder is slow or ineffective. | Grinding head is worn or clogged. Low battery. | Clean the grinding head. Ensure the device is fully charged. |
| Excessive noise or vibration. | Blades are not properly aligned or oiled. | Ensure blades are correctly attached and oiled. If problem persists, contact customer support. |
Specifications
- Model Name: P326
- Brand: HEAPETS
- Power Source: Battery Powered (Rechargeable)
- Material: Stainless Steel (Blades)
- Item Weight: 1.43 pounds (total package)
- Noise Level: Approximately 55 dB
- Main Clipper Runtime: Up to 180 minutes
- Paw Trimmer/Nail Grinder Runtime: Up to 80 minutes
- Included Guide Combs: 3mm, 6mm, 9mm, 12mm, 15mm, 18mm
Warranty and Support
HEAPETS products are manufactured with quality and customer satisfaction in mind. For specific warranty details, please refer to the product packaging or contact HEAPETS customer support directly. If you encounter any issues or have questions regarding your grooming kit, please reach out to our support team for assistance.
Contact Information: Please visit the official HEAPETS website or your retailer's support page for the most current contact information.
Ask a question about this manual
Ask about setup, troubleshooting, compatibility, parts, safety, or missing instructions. Manuals+ will review the question and use this page’s manual context to help answer it.