
1. Introduction
Thank you for choosing the HOSTACK 71" Pantry Cabinet with Charging Station. This manual provides essential information for the safe assembly, operation, and maintenance of your new furniture. Please read these instructions carefully before beginning assembly and retain them for future reference.
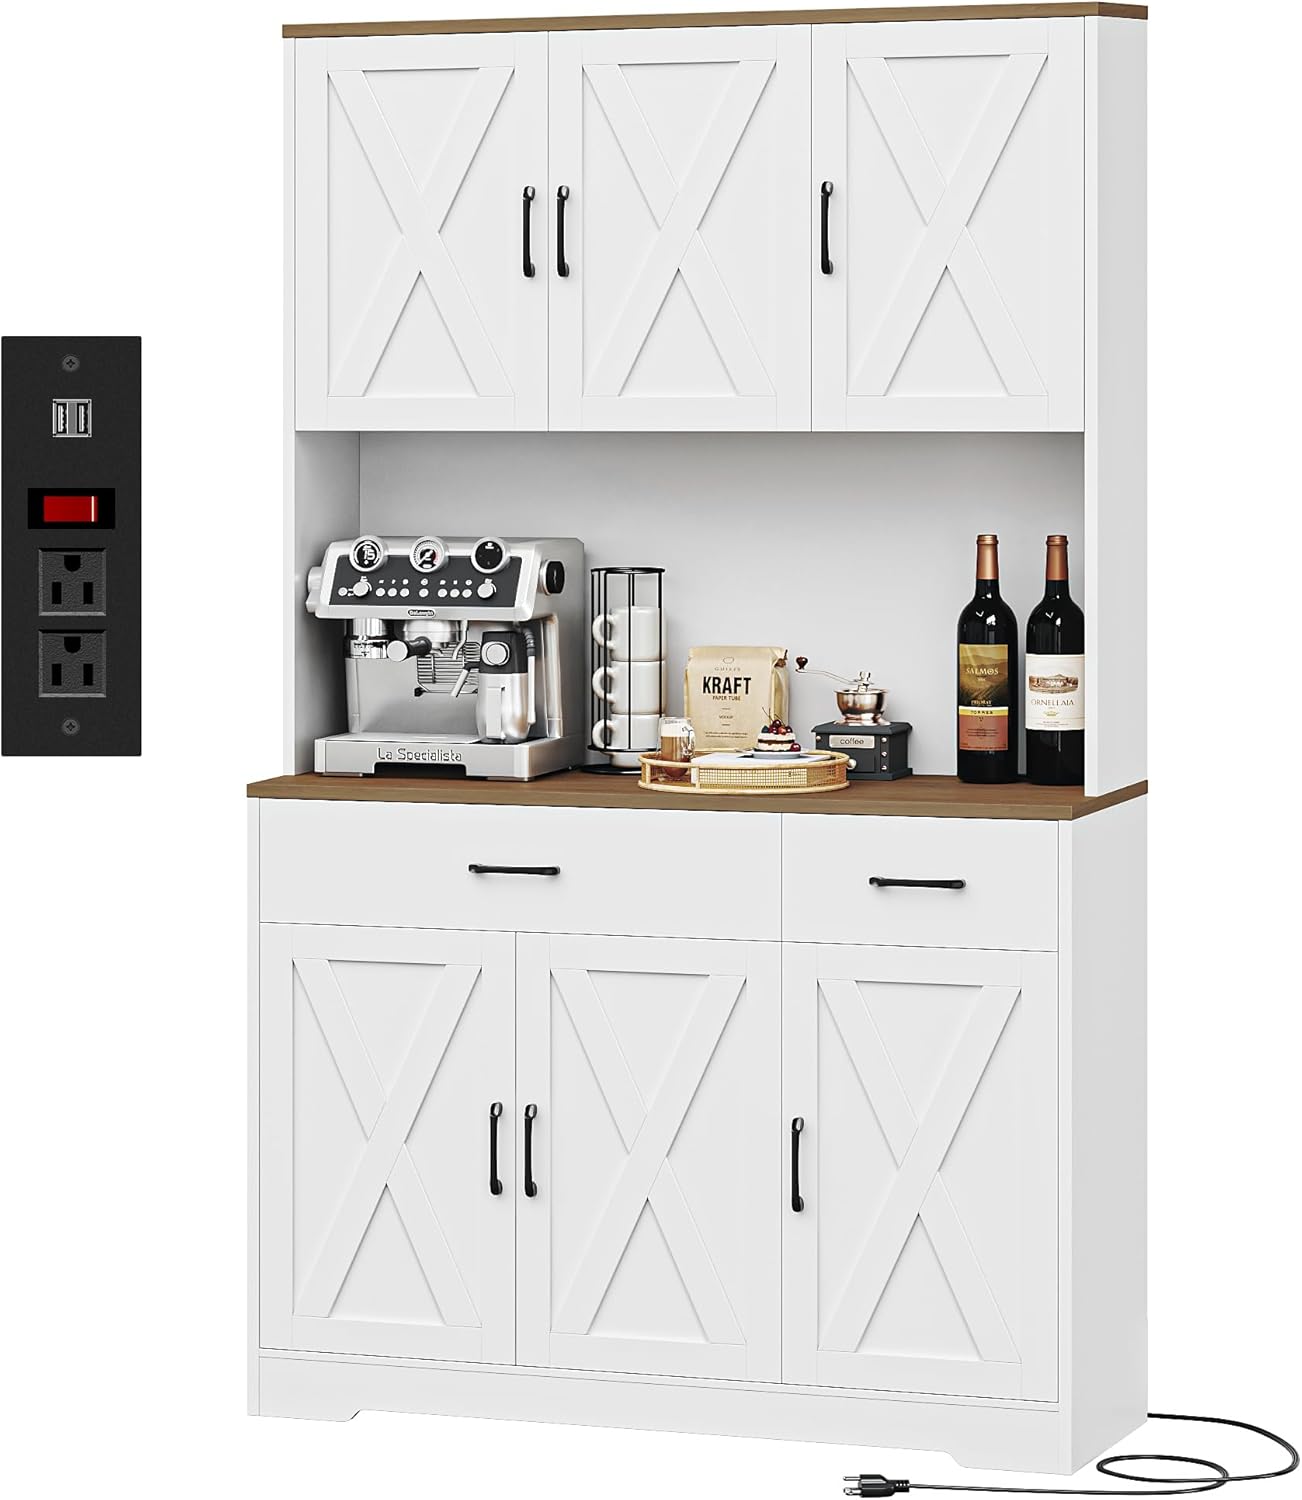
Image 1.1: The HOSTACK 71" Pantry Cabinet with Charging Station in a kitchen setting.
2. Important Safety Information
To ensure safe use and prevent damage, please observe the following:
- Always assemble and mount the cabinet according to the provided instructions.
- Keep the cabinet away from heat sources and ensure it is stable and secure before use.
- Be cautious when opening and closing the doors and drawers to prevent pinching or injury.
- Always unplug the charging station before cleaning or performing any maintenance.
- An anti-tipping device is included. It is crucial to install this device to prevent accidental tipping, especially in households with children or pets.
3. Package Contents
Before assembly, verify that all parts and hardware are present. Refer to the detailed parts list included in your assembly guide. If any components are missing or damaged, please contact customer support.
4. Setup and Assembly
Assembly of the HOSTACK Pantry Cabinet requires careful attention to the provided step-by-step instructions. All parts are labeled for ease of identification.
4.1 Assembly Steps
- Unpack all components and lay them out on a clean, soft surface to prevent scratches.
- Identify each part using the labels and the assembly diagram.
- Follow the numerical sequence in the included assembly manual to connect components.
- Secure all fasteners tightly, but do not overtighten.
- Install the anti-tipping device to a wall stud using the provided hardware. This step is critical for safety.
4.2 Dimensions
Refer to the diagram below for detailed product dimensions to ensure proper placement and fit within your space.

Image 4.1: Detailed dimensions of the pantry cabinet.
5. Operating Instructions
This section details the functionality of your HOSTACK Pantry Cabinet.
5.1 Storage Compartments and Adjustable Shelves
The cabinet features multiple storage compartments and adjustable shelves to accommodate various item sizes. To adjust a shelf, remove any items, lift the shelf, and reposition the shelf pegs to the desired height. Ensure the shelf is securely seated before placing items on it.

Image 5.1: Interior view demonstrating storage capacity and adjustable shelves.
5.2 Charging Station
The integrated charging station provides convenient power access for your appliances. It includes 2 AC outlets (120V/12A) and 2 USB ports (5V/2A), controlled by an on-off switch. Connect the cabinet's power cord to a standard wall outlet. Use the switch to power the outlets on or off as needed.

Image 5.2: Detail of the charging station with AC outlets, USB ports, and power switch.
5.3 Drawers
The cabinet includes smooth-gliding drawers for organized storage of smaller items. Ensure drawers are closed completely after use.

Image 5.3: Drawers for organized storage.
6. Maintenance
Proper care will extend the life and appearance of your cabinet.
- Cleaning: Wipe surfaces with a soft, damp cloth. Avoid harsh chemicals or abrasive cleaners that may damage the finish. For the charging station, always unplug the unit from the wall outlet before cleaning.
- Hardware: Periodically check all screws and fasteners to ensure they remain tight. Retighten as necessary.
- Spills: Clean up spills immediately to prevent staining or damage to the wood finish.
7. Troubleshooting
This section addresses common issues you might encounter.
7.1 Crooked Doors or Drawers
If doors or drawers appear crooked or do not close properly, adjustments can often be made using the hinges. Most cabinet hinges have adjustment screws that allow for minor alignment corrections. Refer to the specific hinge adjustment instructions in your assembly manual or consult online resources for common hinge types.
7.2 Charging Station Not Working
- Ensure the cabinet's power cord is securely plugged into a functional wall outlet.
- Verify that the on-off switch on the charging station is in the 'on' position.
- Check if the wall outlet itself is working by plugging in another device.
- If the issue persists, discontinue use and contact customer support.
8. Specifications
| Feature | Detail |
|---|---|
| Brand | HOSTACK |
| Color | White/Rustic Brown |
| Product Dimensions | 14.96"D x 41.73"W x 70.86"H |
| Special Features | Adjustable Shelves, Charging Station (2 AC Outlets, 2 USB Ports, On-Off Switch), Power Cable: 4.8ft |
| Mounting Type | Freestanding |
| Room Type | Dining Room, Entryway, Hallway, Kitchen, Living Room |
| Door Style | Barn Doors |
| Weight Limit | 450 Pounds |
| Included Components | Shelves |
| Finish Type | Painted |
| Number of Shelves | 3 |
| Item Weight | 114 Pounds |
| Top Material Type | Engineered Wood |
| Handle Material | Metal |
| Frame Material | Engineered Wood |
| Number of Compartments | 8 |
| Assembly Required | Yes |
9. Warranty and Support
For information regarding product warranty, please refer to the documentation included with your purchase or visit the official HOSTACK website. For any questions, missing parts, or assistance with assembly, please contact HOSTACK customer support via the "Contact Seller" option on Amazon. Our support team is available to assist you.
Optional protection plans are available for purchase separately to extend coverage beyond the standard warranty period. These plans typically offer 2-year or 3-year coverage options.