
ATTACK SHARK X3MAX
ATTACK SHARK X3MAX Wireless Gaming Mouse User Manual
Model: X3MAX | Brand: ATTACK SHARK
1. Introduction
The ATTACK SHARK X3MAX is a high-performance wireless gaming mouse designed for precision and versatility. It features a PixArt PAW3950 flagship sensor, offering up to 42,000 DPI, and supports tri-mode connectivity (Wired, 2.4GHz Wireless, and Bluetooth 5.2). Its ultralight design, durable optical microswitches, and customizable functions provide an optimized gaming experience.

Image 1.1: The ATTACK SHARK X3MAX Wireless Gaming Mouse, coiled cable, and USB receiver.

Image 1.2: Overview of the ATTACK SHARK X3MAX mouse highlighting its super light design and key specifications.
2. Package Contents
Please verify that all items are present in your package:
- ATTACK SHARK X3MAX Wireless Gaming Mouse
- USB-C to USB-A Coiled Cable (for wired connection and charging)
- 2.4GHz USB Receiver (located in a compartment on the mouse bottom)
- Mouse Grip Stickers
- Extra PTFE Mouse Skates
- User Manual (this document)
3. Product Overview
Familiarize yourself with the various components and controls of your X3MAX mouse.

Image 3.1: Multi-function buttons and indicators on the ATTACK SHARK X3MAX mouse.

Image 3.2: Detailed view of the mouse dimensions and button layout, including the mode switch and receiver compartment.
Mouse Components:
- Left Button: Primary click function.
- Right Button: Secondary click function.
- Scroll Wheel: For scrolling and middle-click function.
- Forward Button: Navigates forward in web browsers or applications.
- Backward Button: Navigates backward in web browsers or applications.
- DPI Button: Cycles through DPI sensitivity levels.
- DPI Indicator Light: Shows current DPI setting.
- Mode Switch Button (Bottom): Toggles between 2.4G Wireless, OFF, and Bluetooth modes.
- USB-C Port: For wired connection and charging.
- USB Receiver Compartment (Bottom): Stores the 2.4GHz USB receiver.
4. Setup Instructions
4.1 Charging the Mouse
Connect the supplied USB-C cable to the mouse's USB-C port and the other end to a powered USB-A port on your computer or a USB charger. The charging indicator light will show the charging status.
4.2 Wired Mode Connection
- Connect the USB-C end of the cable to the mouse and the USB-A end to your computer.
- Set the mode switch on the bottom of the mouse to the 'OFF' position. The mouse will operate in wired mode.
4.3 2.4GHz Wireless Mode Connection

Image 4.1: The ATTACK SHARK X3MAX mouse demonstrating 2.4GHz wireless connectivity with its USB receiver.
- Locate the 2.4GHz USB receiver in the compartment on the bottom of the mouse.
- Plug the USB receiver into an available USB-A port on your computer.
- Set the mode switch on the bottom of the mouse to the '2.4G' position. The mouse should automatically connect.
4.4 Bluetooth Mode Connection
- Set the mode switch on the bottom of the mouse to the 'BT' position.
- To switch Bluetooth channels: Short press the mode switching key (located near the mode switch on the bottom).
- To enter pairing mode: Press and hold the mode switching key for 3 seconds. The mode indicator light will flash, indicating it is ready for pairing.
- On your computer or device, open Bluetooth settings and search for 'ATTACK SHARK X3MAX'. Select it to pair.
5. Operating Instructions
5.1 DPI Adjustment
Press the DPI button (located on the top of the mouse, behind the scroll wheel) to cycle through the 6 adjustable DPI levels. The DPI indicator light will change to reflect the current setting:
- Level 1: 1200 DPI
- Level 2: 2400 DPI
- Level 3: 3200 DPI
- Level 4: 5600 DPI
- Level 5: 8000 DPI
- Level 6: 42000 DPI
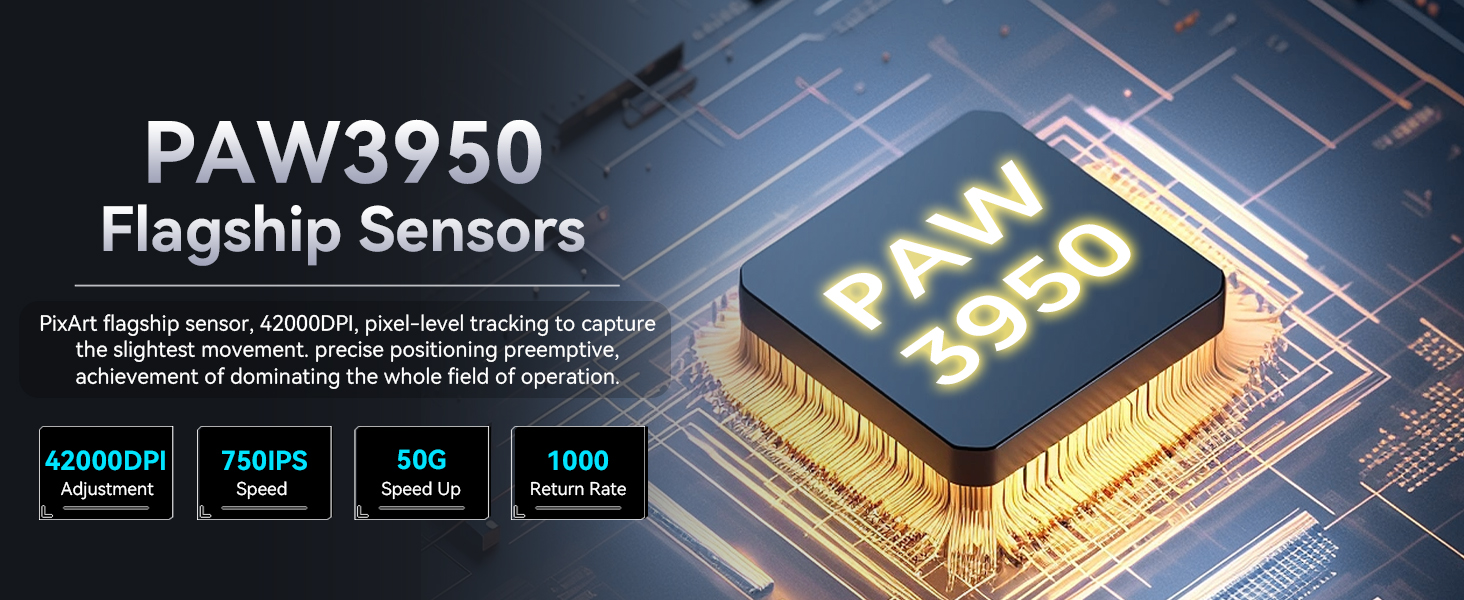
Image 5.1: The PixArt PAW3950 sensor provides high precision with adjustable DPI up to 42,000.
5.2 Customization Software (Web Driver)
The X3MAX mouse features a fully customizable design. You can personalize your gaming experience by adjusting settings such as button functions, DPI sensitivity, polling rate, and lift-off distance via the dedicated web driver. Access the web driver online to configure your mouse settings.

Image 5.2: Interface of the customization software, showing options for button assignments, DPI settings, and other parameters.

Image 5.3: The macro driver software allows for one-click skill configurations and detailed customization.
5.3 Battery Management
The X3MAX mouse is optimized for long-lasting power, offering approximately 200 hours of continuous working life on a full charge. Monitor the charging indicator for battery status.
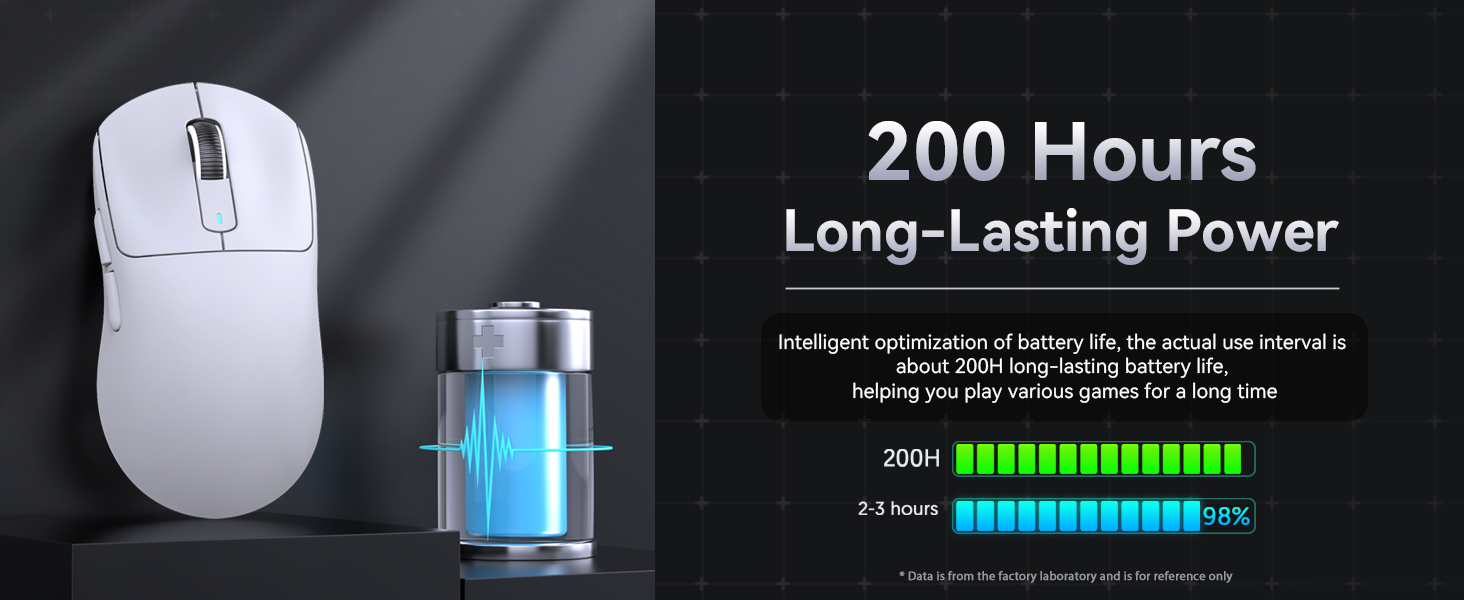
Image 5.4: Illustration of the mouse's long-lasting battery performance.
6. Maintenance
To ensure optimal performance and longevity of your ATTACK SHARK X3MAX mouse, follow these maintenance guidelines:
- Cleaning: Use a soft, dry cloth to wipe the mouse surface. For stubborn dirt, slightly dampen the cloth with water. Avoid harsh chemicals or abrasive materials.
- Sensor Care: Keep the optical sensor on the bottom of the mouse clean and free from dust or debris to maintain tracking accuracy.
- PTFE Feet: The mouse is equipped with 100% pure PTFE feet for smooth gliding. Avoid using the mouse on rough surfaces that could damage the feet. Replacement skates are included in the package.

Image 6.1: The underside of the mouse, highlighting the 100% virgin grade PTFE feet for consistent glide.
7. Troubleshooting
If you encounter issues with your ATTACK SHARK X3MAX mouse, refer to the following common problems and solutions:
| Problem | Possible Cause | Solution |
|---|---|---|
| Mouse is unresponsive in wireless mode. | Low battery, incorrect mode selected, receiver not connected, pairing issue. | Charge the mouse. Ensure the mode switch is set to '2.4G' or 'BT'. Verify the USB receiver is securely plugged in. For Bluetooth, re-enter pairing mode and reconnect. |
| Mouse lags or stutters when connected via cable. | Cable connection issue, driver conflict. | Ensure the USB-C cable is fully inserted into both the mouse and the computer. Try a different USB port. Ensure the mouse is fully charged. Update mouse drivers if available. |
| DPI setting does not change. | DPI button malfunction, software override. | Ensure you are pressing the correct DPI button. Check the customization software to see if DPI settings are locked or overridden. |
| Buttons are not performing assigned functions. | Customization software settings. | Access the web driver customization software to verify button assignments. Reset to default settings if necessary. |
8. Specifications
Key technical specifications for the ATTACK SHARK X3MAX Wireless Gaming Mouse:
- Model: X3MAX
- Connectivity: Tri-mode (Wired, 2.4GHz Wireless, Bluetooth 5.2)
- Sensor: PixArt PAW3950 Flagship Sensor
- DPI: Up to 42000 DPI (6 adjustable levels: 1200/2400/3200/5600/8000/42000)
- Tracking Speed: 750 IPS
- Acceleration: 50G
- Polling Rate: 1000Hz
- Microswitches: Optical Microswitches, 100 Million Clicks Lifespan
- Encoder: F-Switch Encoder
- Weight: Approximately 49g (without USB receiver)
- Dimensions: 118.5mm x 61mm x 39.7mm
- Feet: 100% Virgin Grade PTFE
- Battery Life: Up to 200 hours (continuous working life)

Image 8.1: Exploded diagram illustrating the internal components and structure of the X3MAX mouse.
9. Warranty and Support
For warranty information, technical support, or customer service inquiries regarding your ATTACK SHARK X3MAX Wireless Gaming Mouse, please refer to the official ATTACK SHARK website or contact their customer support directly. Keep your proof of purchase for any warranty claims.
Related documentsX3MAX


Ask a question about this manual
Ask about setup, troubleshooting, compatibility, parts, safety, or missing instructions. Manuals+ will review the question and use this page’s manual context to help answer it.