
1. Product Overview
The TECBOT 2-in-1 Robot Vacuum Cleaner is designed to provide efficient cleaning for various floor types, combining vacuuming and mopping functionalities. This manual provides essential information for the proper setup, operation, and maintenance of your device.
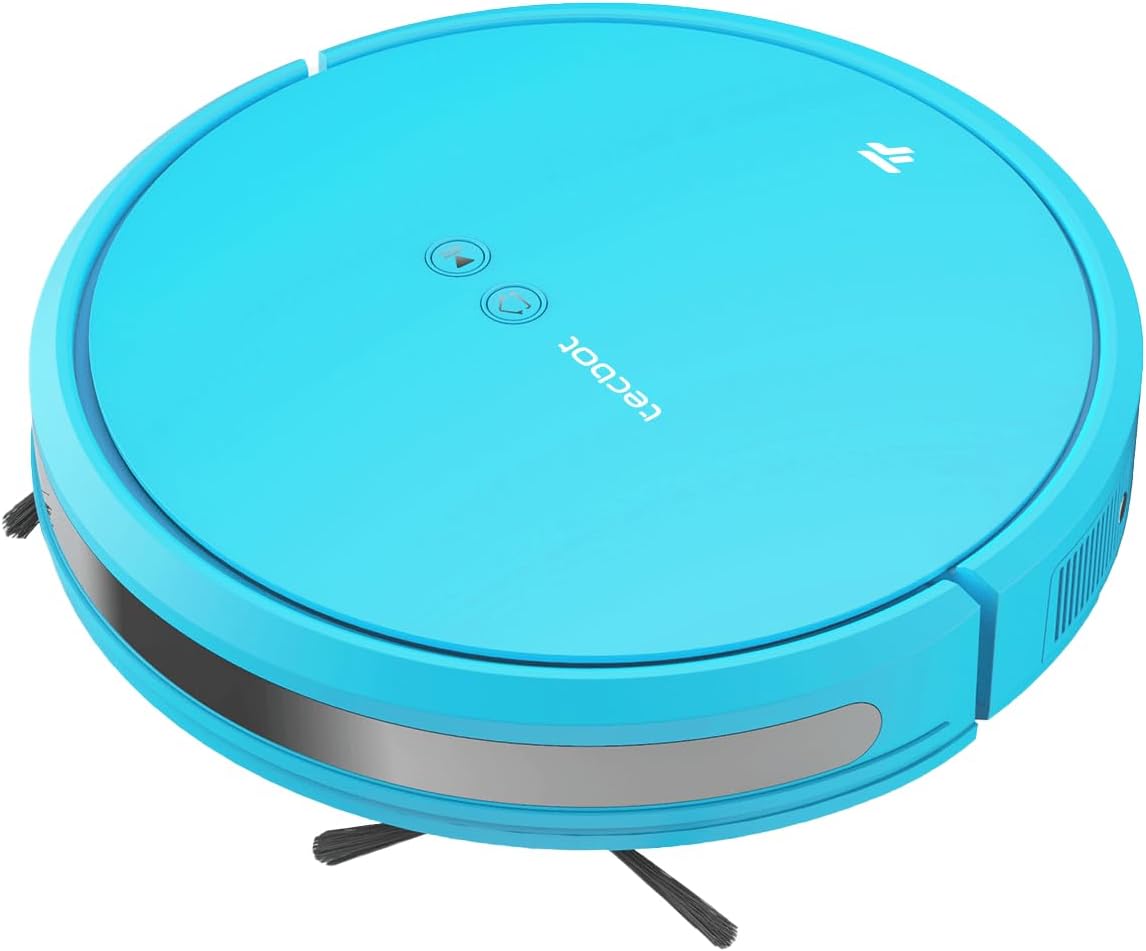
Image 1.1: Top view of the TECBOT 2-in-1 Robot Vacuum Cleaner, showcasing its slim profile and control buttons.

Image 1.2: Detailed view of the robot vacuum's underside, highlighting cliff detect sensors, dual side brushes, multi-surface brushroll, and the easy-empty dustbin.
2. Setup
2.1 Unboxing and Component Check
Carefully remove all components from the packaging. Ensure all items listed in the packing list are present. These typically include the robot vacuum, charging dock, power adapter, remote control, side brushes, cleaning tool, dustbin, and water tank.
2.2 Charging Dock Placement
- Place the charging dock against a wall in an open area, ensuring there are no obstacles within 1 meter (3 feet) to the front and 0.5 meters (1.5 feet) to the sides.
- Connect the power adapter to the charging dock and plug it into a wall outlet. Ensure the power cord is neatly arranged to prevent entanglement.
2.3 Initial Charging
Place the robot vacuum onto the charging dock. Ensure the charging contacts on the robot align with those on the dock. The indicator light on the robot will show charging status. For first-time use, fully charge the robot for at least 5-6 hours.
2.4 App Connection (Tuya Smart App)
- Download the 'Tuya Smart' app from your mobile device's app store.
- Register or log in to your account.
- Follow the in-app instructions to add your TECBOT robot vacuum cleaner. This typically involves putting the robot into pairing mode (refer to the robot's specific pairing instructions) and connecting it to your home Wi-Fi network.
3. Operating Instructions
3.1 Powering On/Off
- To power on, press and hold the power button on the robot or use the remote control/app.
- To power off, press and hold the power button until the indicator lights turn off.
3.2 Control Methods
Your robot vacuum can be controlled via:
- Physical Buttons: Two clear buttons on the top allow for starting/pausing cleaning and sending the robot back to the charging dock.
- Remote Control: Use the included remote to select cleaning modes, start/stop cleaning, and direct the robot.
- Tuya Smart App: The app provides comprehensive control, including scheduling, mode selection, real-time cleaning status, and more.
- Voice Control: Compatible with Amazon Echo for voice commands (requires app setup).

Image 3.1: Illustration of button control, remote control, and app interface for the robot vacuum.
3.3 Cleaning Modes
The robot offers four cleaning modes:
- Auto Cleaning: The robot automatically cleans the entire area, adjusting its path as needed.
- Spot Cleaning: Focuses on a specific dirty area, cleaning in a spiral pattern.
- Edge Cleaning: Cleans along walls and furniture edges.
- Zigzag Cleaning: Cleans in a systematic back-and-forth pattern, ideal for larger open areas.

Image 3.2: Visual representation of the four available cleaning modes.
3.4 Scheduling
You can set a cleaning schedule using the Tuya Smart App. This allows the robot to automatically start cleaning at predetermined times, ensuring your floors are consistently maintained.

Image 3.3: Example of scheduling cleaning times for the robot vacuum.
3.5 Mopping Function
To use the mopping function, replace the dust tank with the 300ml water tank. Fill the water tank with clean water (do not use cleaning solutions that may clog the nozzles). Attach the mopping cloth to the water tank. The robot will then vacuum and mop simultaneously or sequentially depending on the selected mode.
3.6 Self-Charging
When the battery level is low, the robot will automatically return to its charging dock to recharge. Ensure the charging dock is accessible and unobstructed.
4. Maintenance
Regular maintenance ensures optimal performance and extends the lifespan of your robot vacuum.
4.1 Emptying the Dustbin
- Press the dustbin release button and pull out the dustbin.
- Open the dustbin cover and empty its contents into a trash bin.
4.2 Cleaning the HEPA Filter
- Remove the HEPA filter from the dustbin.
- Tap the filter gently to remove dust. Do not wash the HEPA filter with water.
- Replace the HEPA filter every 3-6 months, depending on usage.
4.3 Cleaning the Main Brush
- Turn the robot over and remove the main brush cover.
- Lift out the main brush.
- Use the provided cleaning tool to remove hair and debris tangled around the brush.
4.4 Cleaning Side Brushes
- Gently pull the side brushes to remove them.
- Remove any hair or debris. If brushes are damaged, replace them.
4.5 Cleaning Sensors and Charging Contacts
- Wipe the cliff sensors (located on the bottom) and anti-collision sensors (on the bumper) with a clean, dry cloth.
- Clean the charging contacts on both the robot and the charging dock with a dry cloth.
4.6 Water Tank and Mopping Cloth Maintenance
- After each mopping session, empty any remaining water from the tank.
- Wash the mopping cloth thoroughly and allow it to air dry before next use.

Image 4.1: Underside view of the robot vacuum, illustrating the location of the main brush and side brushes for maintenance.
5. Troubleshooting
If you encounter issues with your robot vacuum, refer to the following common problems and solutions:
| Problem | Possible Cause | Solution |
|---|---|---|
| Robot does not power on | Low battery; Power button not pressed correctly | Charge the robot; Press and hold the power button for a few seconds |
| Robot does not charge | Charging contacts dirty; Charging dock not powered; Robot not properly docked | Clean charging contacts; Ensure dock is plugged in; Re-dock the robot |
| Poor suction or cleaning performance | Dustbin full; Filter clogged; Main brush or side brushes tangled | Empty dustbin; Clean/replace filter; Clean main and side brushes |
| Robot gets stuck frequently | Obstacles on floor; Cliff sensors dirty | Clear floor of cables/small items; Clean cliff sensors |
| Mopping function not working | Water tank empty; Water outlet clogged; Mopping cloth not attached | Fill water tank; Clean water tank nozzles; Attach mopping cloth correctly |
6. Specifications
Key technical specifications for the TECBOT 2-in-1 Robot Vacuum Cleaner:
- Brand: TECBOT
- Model Name: 2-in-1
- Special Feature: Pet Hair Pick Up
- Product Dimensions: 13.8"L x 13.8"W x 2.9"H
- Included Components: Dusting Brush, Side Brush, Water Tank
- Filter Type: Sponge (HEPA filter included with dust tank)
- Battery Life: Up to 120 minutes (2600mAh high-capacity battery)
- Power Source: Battery Powered
- Batteries Included: Yes (1 Lithium Ion battery)
- Compatible Devices: Amazon Echo
- UPC: 755793719324
- Item Weight: 6.8 pounds

Image 6.1: Illustration of the robot vacuum's 2600mAh battery capacity, providing extended runtime.
7. Warranty and Support
7.1 Warranty Information
Your TECBOT 2-in-1 Robot Vacuum Cleaner is covered by a manufacturer's warranty. Please refer to the warranty card included in your product packaging for specific terms and conditions, including coverage duration and limitations. Keep your proof of purchase for warranty claims.
7.2 Customer Support
For technical assistance, troubleshooting not covered in this manual, or warranty inquiries, please contact TECBOT customer support. You can find contact information on the official TECBOT website or through the retailer where you purchased the product. For more information, you may also visit the TECBOT Store on Amazon.