
Gaimoo GM500
Gaimoo GM500 Projector User Manual
Model: GM500
Brand: Gaimoo
1. Introduction
This manual provides comprehensive instructions for the setup, operation, and maintenance of your Gaimoo GM500 Projector. Please read this manual thoroughly before using the product to ensure proper functionality and to maximize your viewing experience. Keep this manual for future reference.

Image: The Gaimoo GM500 Projector, showcasing its sleek design along with the included remote control and wireless mouse.
2. Package Contents
Verify that all items listed below are included in your package. If any items are missing or damaged, please contact customer support.
- 1 x Gaimoo GM500 Projector
- 1 x User Manual
- 1 x HDMI Cable
- 1 x Power Adapter with Cable
- 1 x Wireless Mouse
- 1 x Mouse Receiver (USB dongle)
- 1 x Remote Control
3. Setup Guide
3.1 Placement
The Gaimoo GM500 Projector is designed for tabletop mounting. Ensure the projector is placed on a stable, flat surface. For optimal viewing, position the projector directly in front of your projection surface (wall or screen).


Images: The projector's compact size allows for easy portability, and it can be set up in various indoor environments for a home theater experience.
3.2 Power Connection
- Connect the power adapter cable to the DC IN port on the projector.
- Plug the power adapter into a standard electrical outlet.
- The power indicator light on the projector will illuminate.
3.3 Initial Setup and Image Adjustment
Upon first power-on, the projector will guide you through initial setup steps, including network connection and image adjustments.
- Automatic Keystone Correction: The projector automatically recognizes and adjusts the image to a rectangular shape, ensuring a clear and undistorted picture even if the projector is not perfectly aligned.
- Motorized Focus: Use the remote control to quickly adjust the focus for a sharp image. This feature allows for precise focusing without manually touching the lens.
- Zoom Function: The projector supports a 40%-100% zoom function, allowing you to adjust the screen size without moving the projector.

Image: Visual representation of the projector's electric focus and auto keystone correction capabilities, ensuring a clear and perfectly shaped image.
4. Operating Instructions
4.1 Power On/Off
- To power on, press the power button on the projector or the remote control.
- To power off, press the power button again. Confirm shutdown when prompted.
4.2 Navigation and Control
The GM500 projector supports dual control modes: remote control and wireless mouse.
- Remote Control: Use the directional buttons, OK button, and menu buttons to navigate the interface.
- Wireless Mouse: Plug the mouse receiver into a USB port on the projector. Use the mouse to navigate the Android TV interface, similar to a computer.

Image: The projector's smart interface can be controlled conveniently using either the included remote control or the wireless mouse.
4.3 Input Sources and Connectivity
The projector offers multiple connectivity options for various devices:
- HDMI: Connect gaming consoles (PS5), TV Boxes, TV Sticks, laptops, or Blu-ray players.
- USB: Connect USB drives for media playback.
- AV: Connect older devices using an AV cable.
- 3.5mm Jack: Connect headphones or external audio systems.
- WiFi 6: Connect to your home network for streaming and online content. Provides faster and more stable transmission.
- Bluetooth 5.2: Connect to Bluetooth speakers, headphones, or use the projector as a Bluetooth speaker for your smartphone/tablet.

Image: The projector's versatile connectivity options, including HDMI, USB, AV, and headphone ports, allow connection to a wide range of devices like TV sticks, gaming consoles, and laptops.

Image: The projector utilizes WiFi 6 technology for high-speed, stable wireless connectivity, ideal for streaming and online gaming.

Image: Bluetooth 5.2 enables the projector to function as a standalone Bluetooth speaker or to connect wirelessly to external audio devices for enhanced sound.
4.4 Smart Features and Applications
The GM500 projector features a built-in Android TV app, providing direct access to popular streaming services.
- Pre-installed Apps: Access Netflix, Prime Video, Hulu, and YouTube directly from the projector's interface.
- Google Play Store: Download additional applications to expand your entertainment options.
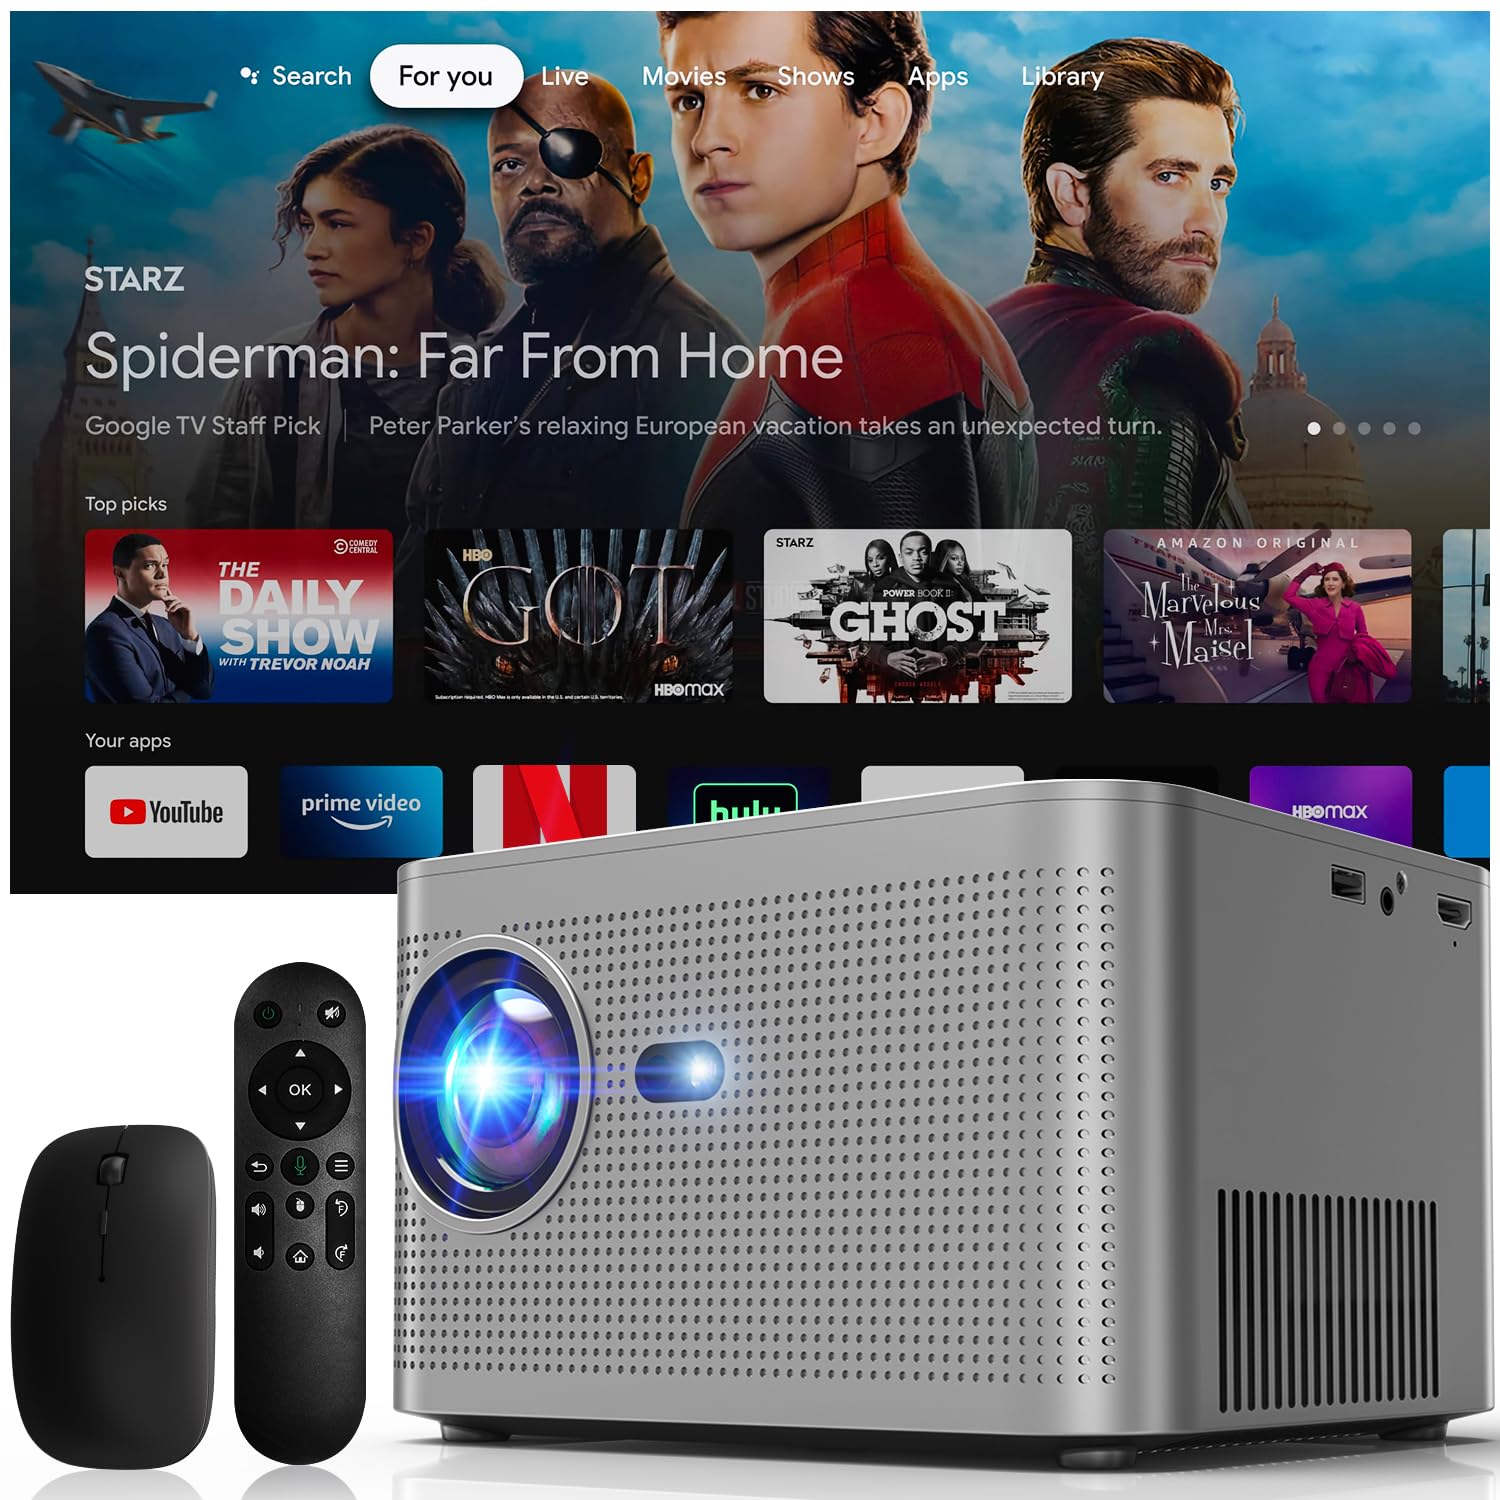
Image: The projector's integrated Android TV interface provides direct access to popular streaming applications, offering a wide range of content.
4.5 Audio Features
The projector is equipped with advanced audio capabilities for an immersive sound experience.
- 36W Dual Speakers: Powerful built-in speakers deliver clear and robust sound.
- Dolby Audio Support: Experience enhanced sound quality with Dolby Audio, providing crisp highs, powerful mids, and loud lows.

Image: The projector features powerful 36W speakers and supports Dolby Audio, delivering a rich and immersive sound experience.
5. Maintenance
5.1 Cleaning the Lens
Use a soft, lint-free cloth specifically designed for optical lenses to gently wipe the projector lens. Do not use abrasive cleaners or excessive force, as this can scratch the lens.
5.2 Cleaning the Projector Body and Vents
Wipe the exterior of the projector with a soft, dry cloth. Ensure that the ventilation vents are clear of dust and debris to prevent overheating. Do not spray cleaning liquids directly onto the projector.
5.3 Storage
When not in use for extended periods, store the projector in a cool, dry place, away from direct sunlight and extreme temperatures. It is recommended to use the original packaging or a protective case to prevent dust accumulation and physical damage.
6. Troubleshooting
This section addresses common issues you might encounter with your Gaimoo GM500 Projector. For problems not listed here, please contact customer support.
| Problem | Possible Cause | Solution |
|---|---|---|
| No image or dim image |
|
|
| Blurry or distorted image |
|
|
| No sound or low sound |
|
|
| Wi-Fi or Bluetooth connection issues |
|
|
7. Specifications
| Feature | Detail |
|---|---|
| Brand | Gaimoo |
| Model | GM500 |
| Native Resolution | 1920 x 1080 Pixels (Full HD) |
| 4K Support | Yes |
| Display Technology | LCD |
| Image Contrast Ratio | 1000:1 |
| Connectivity Technology | Mouse, HDMI, WiFi, USB, Memory Stick, 3.5mm Jack, BT 5.2 |
| Wireless Connectivity | WiFi 6, Bluetooth 5.2 |
| Special Features | 1920*1080 Native FHD, Portable, Built-in Speaker, Lightweight, Digital Keystone Correction, Bluetooth 5.2, Motorized Focus, Android TV App (Netflix, Prime Video, Hulu, YouTube) |
| Audio Output | 36W Dual Speakers with Dolby Audio |
| Zoom Function | 40%-100% |
| Recommended Projection Size | 50-300 inches |
| Compatible Devices | Laptops, smartphones, tablets, gaming consoles (PS5), Blu-ray players, TV Box, TV Stick, USB Media Player |
| Dimensions (L x W x H) | 25.5 x 19.1 x 15 cm |
| Weight | 1.3 kg |

Image: The projector supports 4K resolution and offers vibrant, realistic colors for an enhanced viewing experience.

Image: The projector can project an adjustable screen size from 50 to 300 inches, creating a cinematic experience.
8. Warranty and Support
Gaimoo is committed to providing excellent customer service and technical support for your GM500 Projector.
- Technical Support: If you encounter any problems during use, please feel free to contact Gaimoo customer support.
- Contact Information: Refer to the contact details provided in the product packaging or on the official Gaimoo website for support.

Image: Gaimoo offers professional services and lifetime technical support for its products.
Related documentsGM500


Ask a question about this manual
Ask about setup, troubleshooting, compatibility, parts, safety, or missing instructions. Manuals+ will review the question and use this page’s manual context to help answer it.