
1. Introduction
Thank you for purchasing the Gelielim Portable CD Player Boombox. This versatile audio system is designed to provide high-quality sound and multiple playback options, including CD, cassette, AM/FM radio, USB, SD, and AUX input. Please read this manual thoroughly before use to ensure proper operation and to maximize your listening experience.
2. Safety Information
- Do not expose the unit to rain or moisture to prevent fire or electric shock.
- Do not open the cabinet. Refer servicing to qualified personnel only.
- Avoid placing the unit near heat sources or in direct sunlight.
- Ensure proper ventilation; do not block ventilation openings.
- Use only the specified power adapter.
- Remove batteries if the unit will not be used for an extended period.
- Keep out of reach of children.
3. Package Contents
- Gelielim Portable CD Player Boombox (Model: CD-9225MUC)
- AC Power Cord
- Instruction Manual
4. Product Features
- Clear Stereo Sound: Built-in dual speakers deliver smooth stereo audio for various environments.
- Multi-functional Playback: Supports CD, cassette tapes (playback and recording), AM/FM radio, USB, SD card, and MP3 formats.
- User-Friendly Design: Features large buttons and a backlit LCD display for easy readability and simple operation.
- Dual Power Options: Operates on AC power for indoor use or batteries (sold separately) for portability.
- Headphone Jack: Includes a 3.5mm headphone jack for private listening.
5. Setup
5.1 Power Supply
The unit can be powered by either AC power or batteries.
AC Power Operation:
- Ensure the unit is turned off.
- Connect the supplied AC power cord to the AC IN jack on the back of the unit.
- Plug the other end of the AC power cord into a standard wall outlet (AC 100V, 50/60Hz).
Battery Operation:
(Batteries are not included and must be purchased separately.)
- Ensure the unit is turned off and disconnected from AC power.
- Open the battery compartment cover on the bottom of the unit.
- Insert 8 x 1.5V D-size batteries, ensuring correct polarity (+/-).
- Close the battery compartment cover securely.
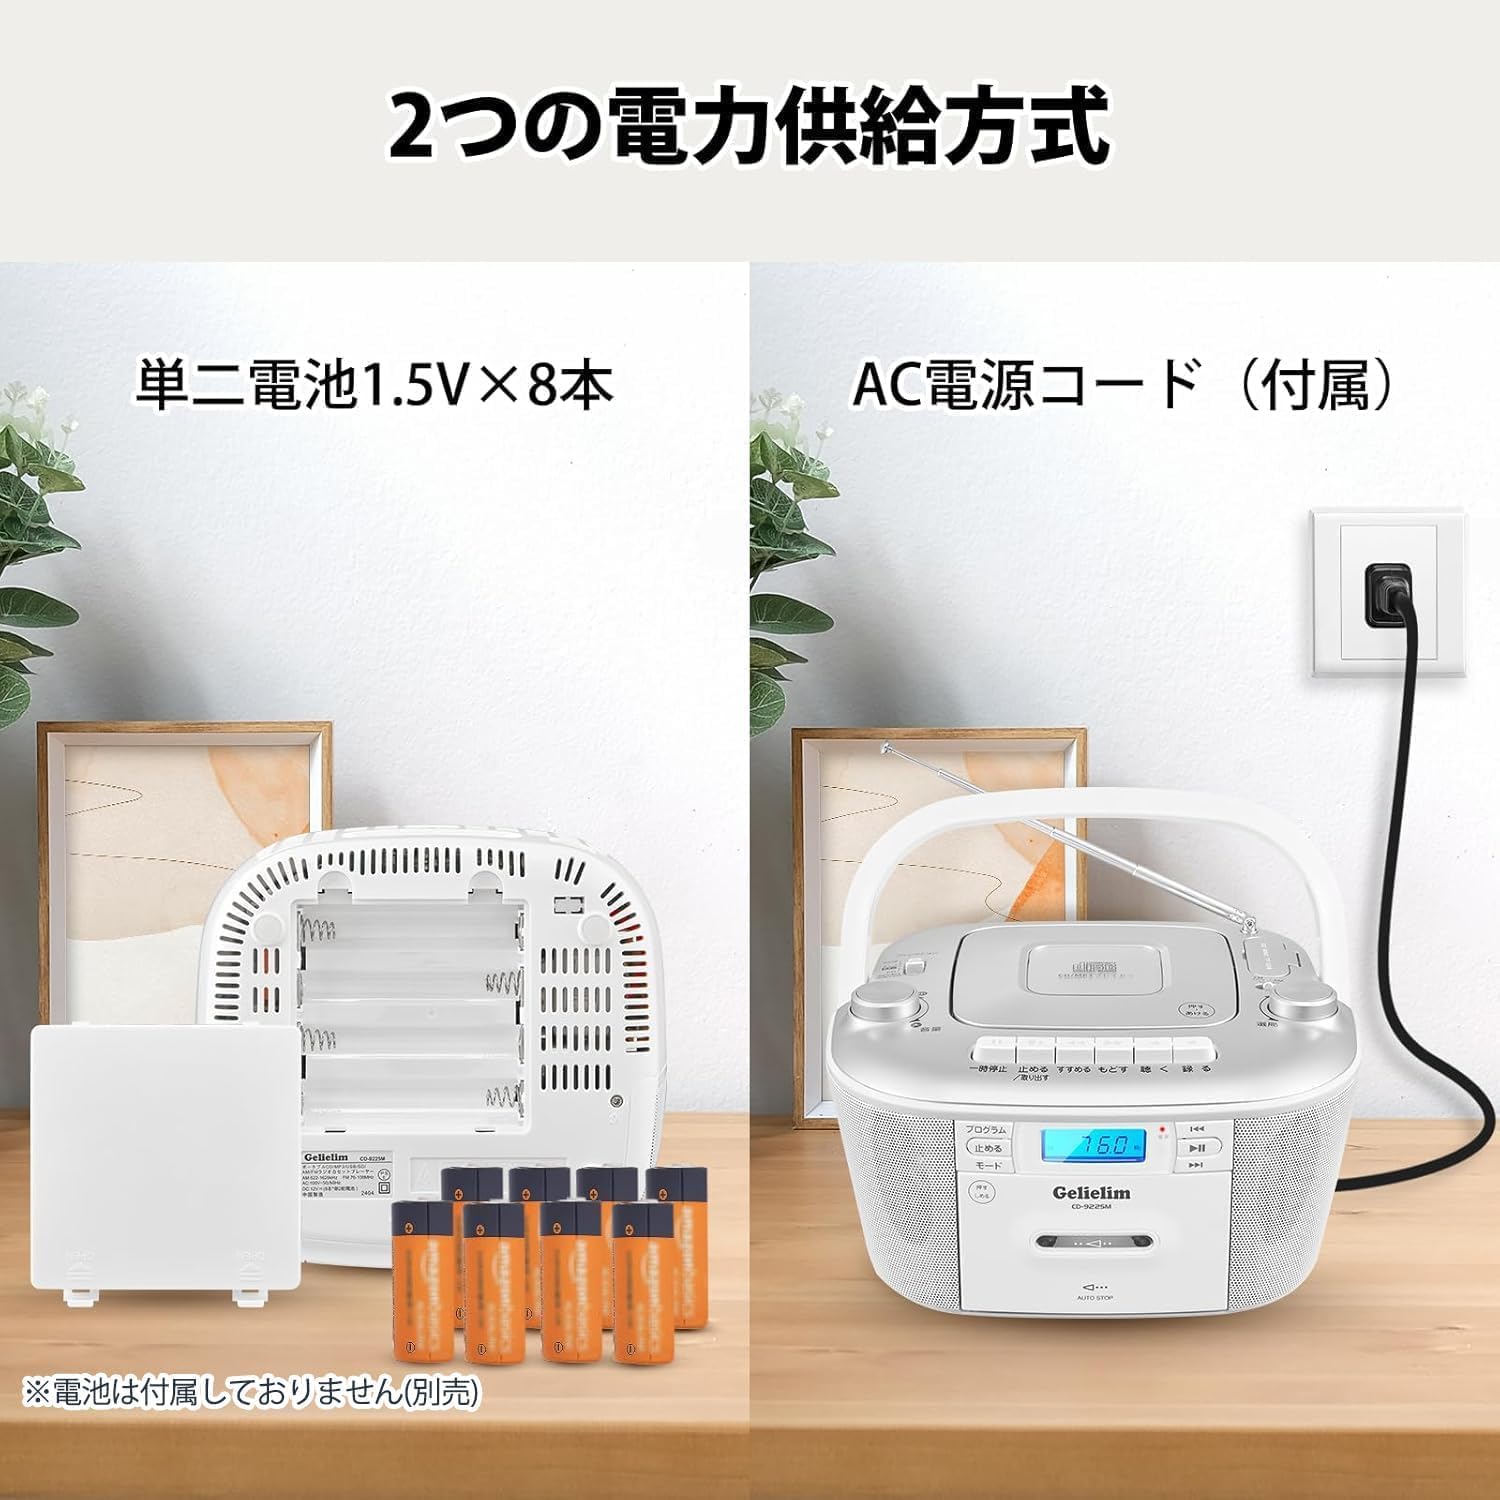
Figure 5.1: Power Supply Options (AC cord included, batteries sold separately)
5.2 Antenna
For optimal FM radio reception, extend the telescopic FM antenna. For AM reception, the unit has a built-in ferrite bar antenna; rotate the unit for best reception.
6. Operating Instructions
6.1 General Controls
Familiarize yourself with the control buttons and ports on the unit:
- POWER button: Turns the unit on/off.
- MODE button: Selects between CD, Radio, Cassette, USB, SD, and AUX modes.
- VOLUME knob: Adjusts the audio output level.
- LCD Display: Shows current mode, track number, radio frequency, etc.
6.2 CD Playback
The unit supports CD, CD-R, CD-RW, and CD-MP3 discs.
- Press the POWER button to turn on the unit.
- Press the MODE button to select CD mode.
- Open the CD compartment cover by gently lifting it.
- Place a CD onto the spindle with the label side facing up.
- Close the CD compartment cover. The disc will spin, and playback will start automatically or after a few seconds.
- Use the PLAY/PAUSE, STOP, SKIP FORWARD, and SKIP BACKWARD buttons to control playback.

Figure 6.1: Top-Loading CD Player
6.3 Cassette Playback and Recording
Cassette Playback:
- Press the POWER button to turn on the unit.
- Press the MODE button to select Cassette mode.
- Press the STOP/EJECT button to open the cassette compartment.
- Insert a cassette tape with the open edge facing you.
- Close the cassette compartment.
- Press the PLAY button to start playback.
- Use the STOP, FAST FORWARD, and REWIND buttons to control playback.

Figure 6.2: Cassette Tape Drive
Cassette Recording:
You can record from CD, Radio, USB/SD, or AUX input to a cassette tape.
- Insert a blank or recordable cassette tape into the cassette compartment.
- Select the desired source (CD, Radio, USB/SD, or AUX) using the MODE button.
- Start playback on the source (e.g., play a CD track, tune to a radio station).
- Press the RECORD button on the cassette deck. The PLAY button will also engage. Recording will begin.
- To stop recording, press the STOP button.
6.4 Radio Operation (AM/FM)
- Press the POWER button to turn on the unit.
- Press the MODE button to select Radio mode.
- Use the BAND button to switch between AM and FM bands.
- Rotate the TUNING knob to search for your desired radio station. The frequency will be displayed on the LCD.
- Adjust the FM telescopic antenna or rotate the unit for optimal reception.

Figure 6.3: AM/FM Stereo Radio with LED Display
6.5 USB/SD/MP3 Playback
- Press the POWER button to turn on the unit.
- Insert a USB flash drive into the USB port or an SD/TF card into the SD card slot.
- Press the MODE button to select USB or SD mode. The unit will automatically detect and start playing MP3 files.
- Use the PLAY/PAUSE, STOP, SKIP FORWARD, and SKIP BACKWARD buttons to control playback.

Figure 6.4: AUX Input and USB/SD/MMC Ports
6.6 AUX Input
- Press the POWER button to turn on the unit.
- Press the MODE button to select AUX mode.
- Connect an external audio device (e.g., smartphone, MP3 player) to the 3.5mm AUX IN jack using an audio cable (not included).
- Play audio from your external device. The sound will be output through the boombox speakers.
6.7 Headphone Use
For private listening, connect 3.5mm stereo headphones (not included) to the HEADPHONE jack. The sound from the speakers will be muted automatically.
7. Maintenance
7.1 Cleaning
- Wipe the exterior of the unit with a soft, dry cloth.
- Do not use abrasive cleaners, waxes, or solvents.
- For the CD lens, use a specialized CD lens cleaner.
- Regularly clean the cassette head and pinch roller with a cotton swab lightly dampened with isopropyl alcohol.
7.2 Storage
- Store the unit in a cool, dry place away from direct sunlight and extreme temperatures.
- If storing for an extended period, remove all batteries.
8. Troubleshooting
| Problem | Possible Cause | Solution |
|---|---|---|
| No power | AC cord not connected; Batteries depleted or incorrectly inserted. | Check AC cord connection; Replace batteries or ensure correct polarity. |
| No sound | Volume too low; Incorrect mode selected; Headphones connected. | Increase volume; Select correct mode; Disconnect headphones. |
| CD skips or does not play | CD dirty or scratched; CD inserted incorrectly; Unit is vibrating. | Clean or replace CD; Insert CD correctly; Place unit on a stable surface. |
| Poor radio reception | Antenna not extended/positioned; Weak signal. | Extend and adjust FM antenna; Rotate unit for AM reception; Try moving the unit to a different location. |
| Cassette tape not playing/recording | Tape damaged; Incorrect buttons pressed. | Check tape condition; Ensure correct playback/record buttons are pressed. |
9. Specifications
| Feature | Specification |
|---|---|
| Brand | Gelielim |
| Model Number | CD-9225MUC |
| Color | White |
| Product Weight | 1.82 kg |
| Speakers | 2 x 7.6cm (4Ω) |
| Output Power | 1.5W + 1.5W (JEITA) |
| Power Consumption | 15W |
| CD Playback | CD, CD-R, CD-RW, CD-MP3 |
| Radio Frequency | FM: 76 ~ 108MHz, AM: 522 ~ 1629KHz |
| Antenna | FM: Rod antenna, AM: Built-in ferrite bar antenna |
| Cassette Type | Standard Cassette |
| Input/Output | 3.5mm Headphone Jack, 3.5mm AUX Input, USB Port, SD Card Slot |
| Power Source | AC 100V 50/60Hz, DC 12V (8 x D-size batteries, not included) |
| Dimensions (W x D x H) | Approx. 241mm x 222mm x 141mm |
| AC Cord Length | 1.4m |

Figure 9.1: Detailed Product Specifications
10. Warranty and Support
This product comes with a 1-year quality guarantee from the date of purchase. All units undergo thorough inspection before shipment to ensure product quality.
In the unlikely event that you are not satisfied with the product, we offer return, exchange, and refund services. Please contact our customer support team via email (refer to the contact information in your purchase documentation) for assistance. When contacting support, please have your model number and purchase date ready.