
1. Introduction
Thank you for choosing the TESSAN WP6 Smart Plug. This device allows you to control your home appliances remotely, set schedules, monitor power consumption, and use voice commands for a more convenient and energy-efficient lifestyle. Please read this manual carefully before use to ensure proper operation and safety.

Image: The TESSAN WP6 Smart Plug, a compact device designed for smart home integration.
2. Safety Information
- Do not exceed the maximum load current of 10A.
- Do not use in wet environments or near water. This product has an IP00 waterproof rating, meaning it is not protected against water.
- Do not disassemble or modify the device.
- Keep out of reach of children.
- Ensure the plug is fully inserted into the outlet.
- For indoor use only.
3. Package Contents
- TESSAN WP6 Smart Plug (1 unit)
- User Manual (This document)
4. Product Overview
The TESSAN WP6 Smart Plug features a compact design with a single power outlet, a manual control button, and an indicator light.

Image: Front view of the TESSAN WP6 Smart Plug, showing the outlet and indicator light.
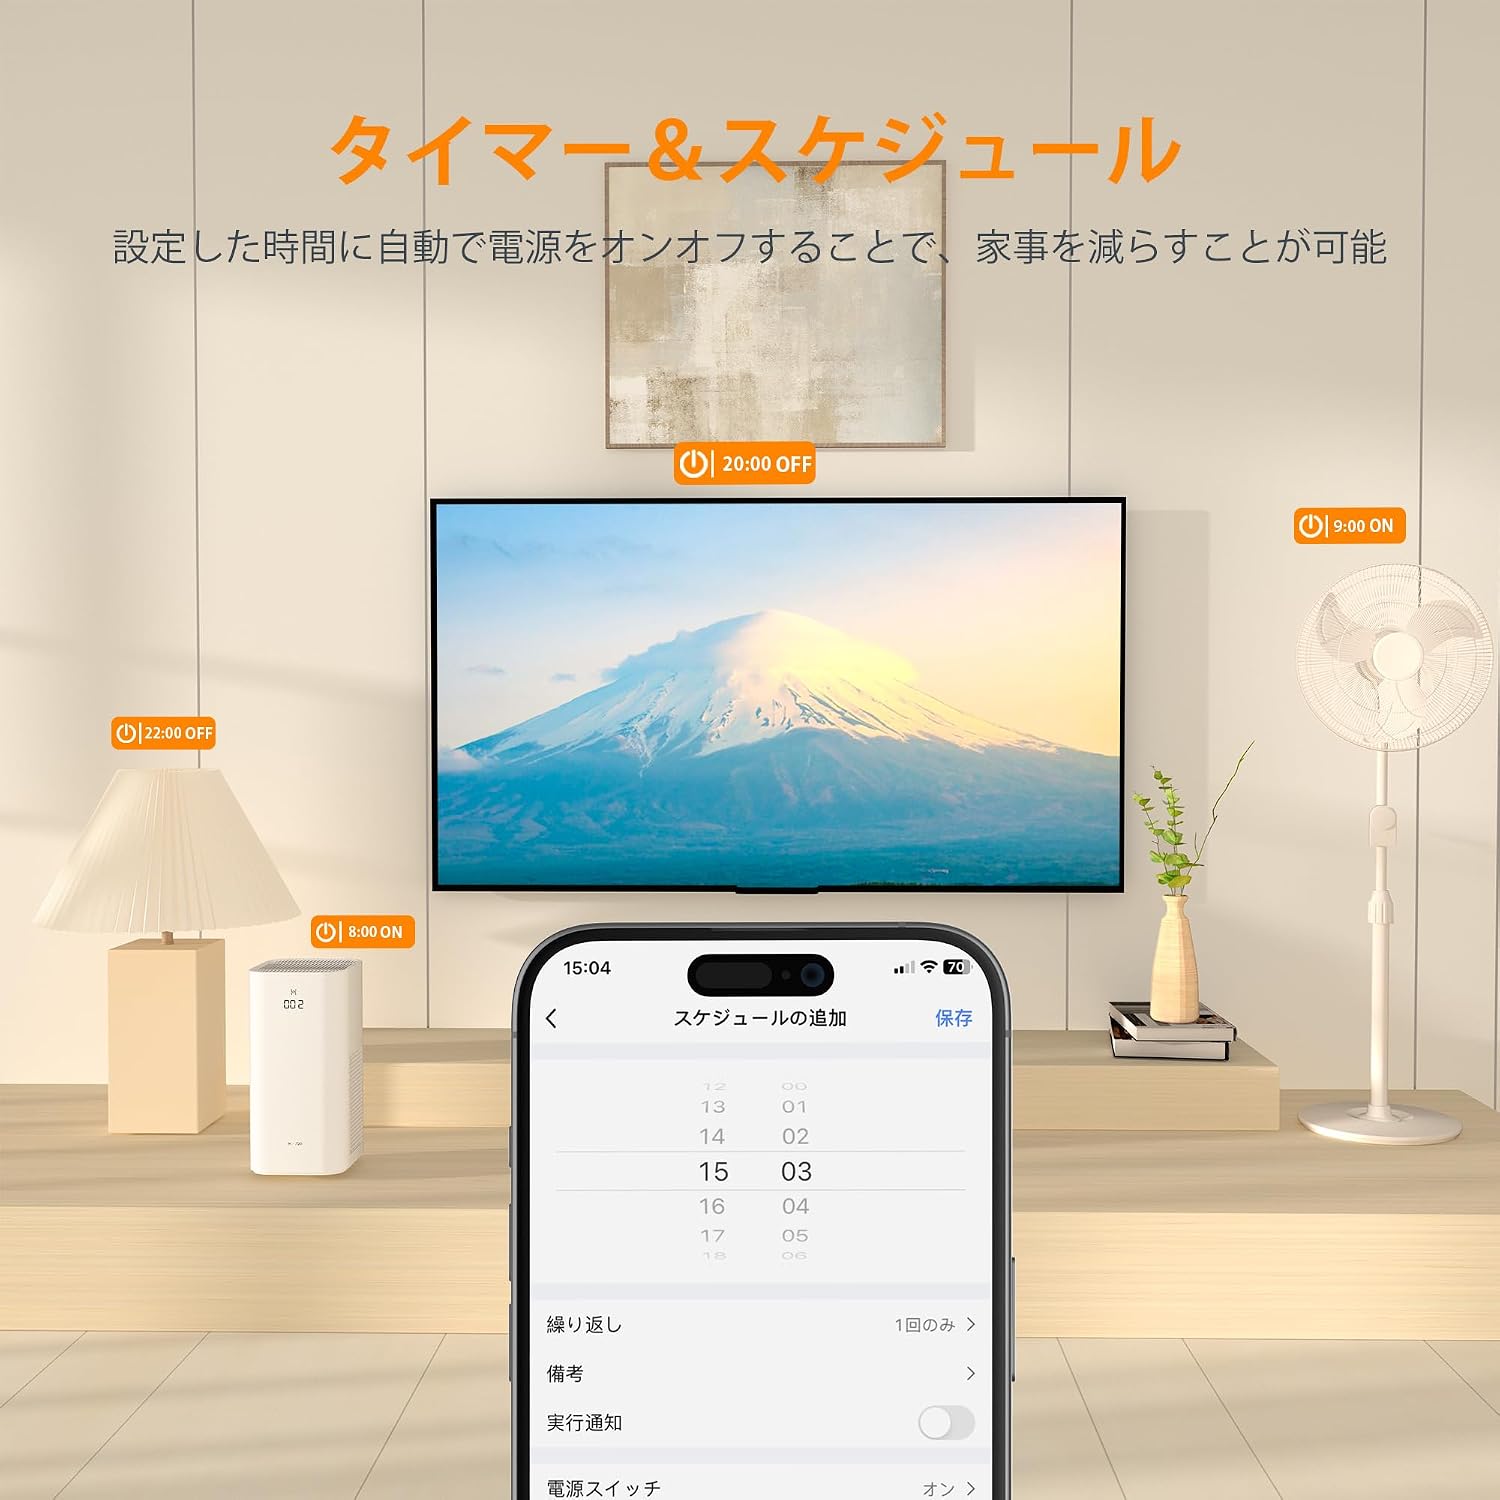
Image: Side view of the TESSAN WP6 Smart Plug, highlighting its compact profile.

Image: Back view of the TESSAN WP6 Smart Plug, showing the electrical prongs.
Key Components:
- Power Outlet: Connect your appliance here.
- Indicator Light: Shows the status of the smart plug (e.g., connected, disconnected, on/off).
- Control Button: Press to manually turn the plug on/off. Press and hold for pairing mode.
5. Setup Guide
Step 1: Download the Smart Life App
Search for "Smart Life" in your smartphone's app store (App Store for iOS or Google Play Store for Android) and download the application. Register or log in to your account.
Step 2: Plug in the Smart Plug
Plug the TESSAN WP6 Smart Plug into a wall outlet. The indicator light should start blinking rapidly, indicating it's in pairing mode. If it's not blinking, press and hold the control button for 5-10 seconds until it blinks rapidly.
Step 3: Connect to Wi-Fi Network
Open the Smart Life app. Tap the "+" icon in the top right corner to add a device. Select "Electrical Outlet" or "Smart Plug" from the device list. Follow the on-screen instructions to connect the smart plug to your 2.4GHz Wi-Fi network. Note: The smart plug only supports 2.4GHz Wi-Fi networks.
Step 4: Rename the Device (Optional)
Once connected, you can rename the smart plug within the app (e.g., "Living Room Lamp," "Coffee Maker") for easier identification and voice control.
6. Operating Instructions
6.1 Manual ON/OFF Control
Press the physical button on the smart plug to manually turn the connected appliance on or off.
6.2 Remote Control via App
Open the Smart Life app, select your TESSAN WP6 Smart Plug, and tap the power icon to turn the connected appliance on or off from anywhere with an internet connection.

Image: A user remotely controlling an appliance connected to the smart plug using a smartphone app.
6.3 Scheduling and Timer Functions
Within the Smart Life app, you can set schedules for your appliances to turn on or off automatically at specific times or days. The timer function allows you to set a countdown for the appliance to switch off after a set duration.

Image: Illustration of various appliances turning on and off at scheduled times, controlled via the Smart Life app.
6.4 Voice Control (Alexa/Google Home)
The TESSAN WP6 Smart Plug is compatible with Amazon Alexa and Google Home. Link your Smart Life account to your Alexa or Google Home app. Then, use voice commands such as "Alexa, turn on the fan" or "Hey Google, turn off the lamp" to control your connected devices.

Image: A person using voice commands with Alexa to control a lamp connected to the smart plug.
6.5 Power Consumption Monitoring
The Smart Life app allows real-time monitoring of the power consumption of connected appliances. View electricity usage data in graphs to help adjust appliance operating times and frequency, contributing to energy saving.

Image: A smartphone screen displaying a power consumption graph, with the smart plug connected to an appliance.
7. Maintenance
- Clean the smart plug with a dry, soft cloth. Do not use liquid cleaners.
- Store the device in a cool, dry place when not in use.
- Avoid exposing the device to extreme temperatures or direct sunlight.
8. Troubleshooting
Issue: Smart plug cannot connect to Wi-Fi.
- Ensure your Wi-Fi network is 2.4GHz. The smart plug does not support 5GHz networks.
- Check if the Wi-Fi signal is strong enough where the smart plug is located.
- Make sure your Wi-Fi password is entered correctly.
- Reset the smart plug by unplugging it and plugging it back in, then try pairing again.
- Ensure the indicator light is blinking rapidly before attempting to pair. If not, press and hold the control button for 5-10 seconds.
Issue: Remote control is not working.
- Verify that your smartphone has an active internet connection.
- Check if the smart plug is still connected to your home Wi-Fi network (indicator light status).
- Restart the Smart Life app.
Issue: Voice control is not responding.
- Ensure your Smart Life account is correctly linked to your Alexa or Google Home app.
- Check if the device name in the Smart Life app matches the name you are using in your voice commands.
- Verify that your Alexa or Google Home device is online and functioning correctly.
9. Specifications
| Feature | Specification |
|---|---|
| Brand | TESSAN |
| Model Number | WP6 |
| Operating Mode | ON-OFF |
| Current Rating | 10 Amperes |
| Operating Voltage | 120 Volts (AC) |
| Contact Type | a-contact |
| Plug Type | Standard 2-prong plug |
| Switch Type | Push Button |
| Terminal Type | Screw |
| Material | ABS |
| Product Dimensions (LxWxH) | 9 x 5.3 x 3.9 cm |
| Color | White |
| Item Weight | 0.07 Kilograms |
| Waterproof Rating | IP00 (Not waterproof) |
| Country of Origin | China |
10. Warranty and Support
TESSAN products are designed to provide reliable performance. For warranty information or technical support, please refer to the contact details provided on the product packaging or visit the official TESSAN website. Please retain your proof of purchase for warranty claims.
