
1. Introduction
This manual provides essential information for the safe installation, operation, and maintenance of your BTF-LIGHTING RGB WS2811 Smart IC FCOB COB LED Strip. Please read this manual thoroughly before installation and retain it for future reference.
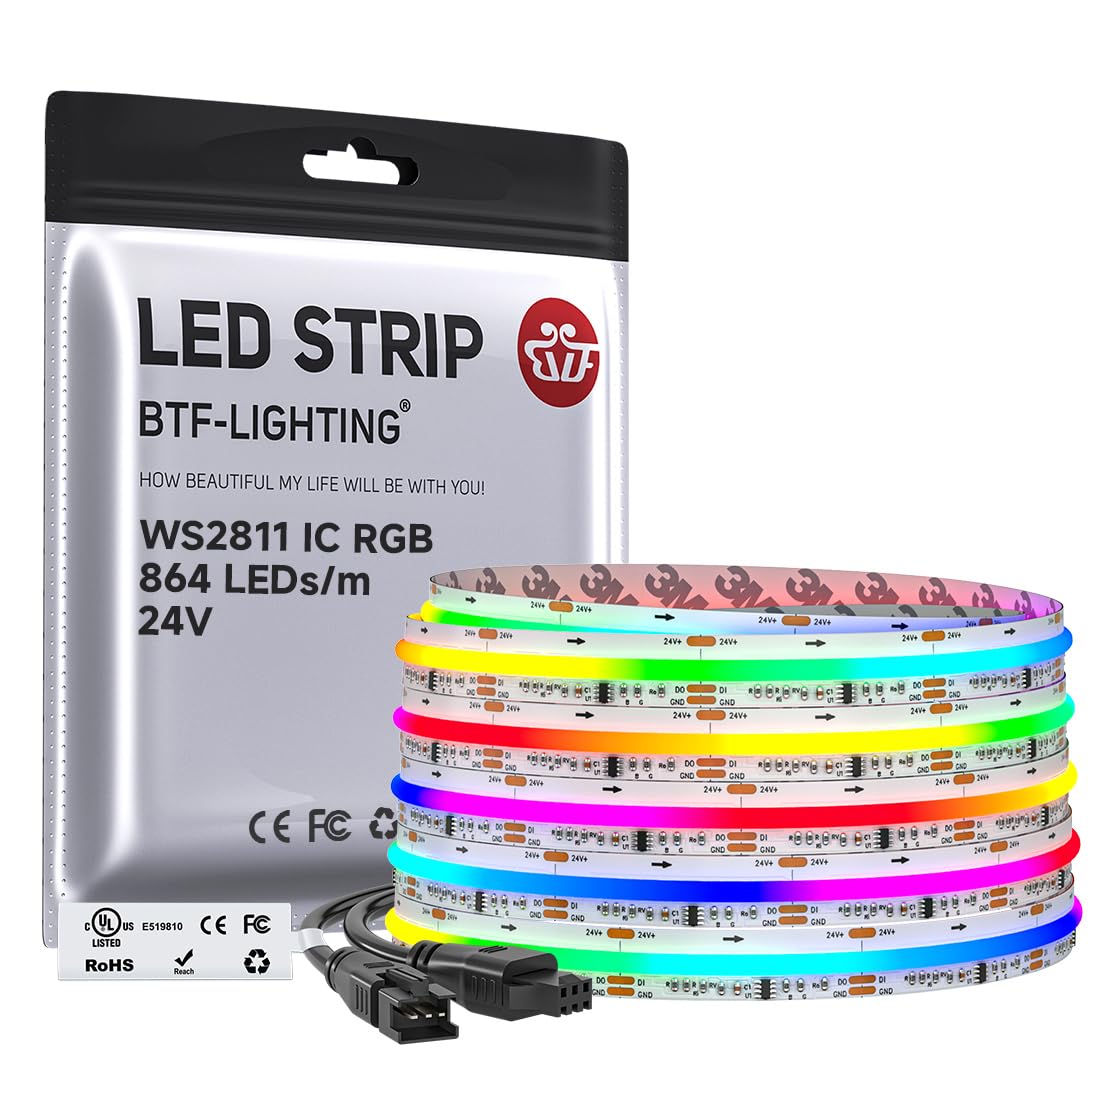
Figure 1: BTF-LIGHTING RGB WS2811 Smart IC FCOB COB LED Strip.
The BTF-LIGHTING FCOB LED strip features addressable WS2811 IC chips, allowing for dynamic multi-color chasing effects. With 864 LEDs per meter, it provides uniform and bright illumination. This product is designed for indoor use and requires a separate 24V DC power supply and a compatible controller for operation.

Figure 2: Comparison illustrating the uniform light distribution of FCOB WS2811 IC technology versus traditional WS2811 IC strips.
The FCOB (Flip-Chip On Board) technology ensures a continuous, dot-free light output, which is smoother and more uniform compared to traditional SMD LED strips. This design also offers a wider beam angle for broader illumination.

Figure 3: Beam angle comparison showing the 180-degree illumination of FCOB LED strips against the 120-degree of standard SMD strips.
2. Safety Information
Your safety is paramount. Please observe the following precautions:
- This LED strip is UL Listed, ensuring it meets recognized safety standards.
- Operate only with a DC24V power supply. Using an incorrect voltage will damage the strip and may pose a fire hazard.
- This product is rated IP30, meaning it is non-waterproof and intended for indoor use only. Do not expose to moisture or wet environments.
- Ensure the power supply is disconnected before installation, cutting, or making any connections.
- Do not bend the LED strip sharply or apply excessive force, as this may damage the internal circuitry.
- Ensure proper heat dissipation. Do not install the strip in enclosed spaces without adequate ventilation.
- Keep out of reach of children.

Figure 4: Overview of safety features including UL Listing and product longevity.

Figure 5: Details regarding the UL Listed safety certification, emphasizing professional grade quality.
3. Package Contents
The package includes:
- 1 x BTF-LIGHTING RGB WS2811 Smart IC FCOB COB LED Strip (24FT, DC24V, IP30, 864LEDs/m)
Note: A power supply and a compatible controller are NOT included and must be purchased separately.
4. Specifications
| Feature | Specification |
|---|---|
| Model Number | FCOB-24V-864L-W-IP30-SPI |
| LED Type | FCOB RGB with WS2811 IC |
| Voltage | DC24V |
| LED Density | 864 LEDs/meter |
| Length | 24 feet (approx. 7.3 meters) |
| Width | 12mm |
| Ingress Protection (IP) Rating | IP30 (Non-waterproof) |
| Cuttable Segments | Every 1.64 inches (41.6mm) |
| Special Features | Addressable WS2811 IC Chip, Chasing LED Strip, Dimmable, Flexible, Uniform Light |
| Certifications | UL Listed |
5. Installation Guide
5.1 Pre-Installation Checklist
- Ensure you have a compatible DC24V power supply (sufficient wattage for the strip length).
- Obtain a compatible WS2811/SPI controller (e.g., Tuya DR03W, SP530E, SP630E, SP611E, SP602E, SP608E, WLED ESP32 SP803E, SP805E).
- Gather necessary tools: scissors (if cutting), measuring tape, cleaning cloth.
- Test the LED strip before permanent installation by connecting it to a power supply and controller to ensure it functions correctly.
5.2 Mounting the LED Strip
- Clean the Surface: Ensure the installation surface is clean, dry, and free of dust or grease.
- Measure and Cut (if needed): Measure the desired length. The strip can be cut at designated marks (every 1.64 inches / 41.6mm). Use sharp scissors for a clean cut.
- Apply: Peel off the backing from the 3M self-adhesive tape on the back of the LED strip. Carefully press the strip onto the desired surface, ensuring firm and even contact.
- Secure (Optional): For added security, especially on textured or vertical surfaces, use mounting clips (not included) to further secure the strip.

Figure 6: Visual guide for cutting, securing with clips, adhesive application, and different connection methods.

Figure 7: Step-by-step visual installation process.
5.3 Connecting the Controller and Power Supply
Follow the data direction arrows on the LED strip. The data input (DI) side connects to the controller.

Figure 8: Basic wiring diagram showing connections between power supply, controller, and LED strip, along with examples of compatible controllers.
5.4 Wiring Diagrams
Ensure correct polarity (V+ to V+, GND to GND, Data to Data) and data direction.
Series Connection

Figure 9: Diagram illustrating series connection of multiple LED strips to a single controller and power supply.
Parallel Connection

Figure 10: Diagram illustrating parallel connection of multiple LED strips, often requiring a signal amplifier for longer runs or more strips.
5.5 Connectors
Various connectors (single end, dual end, transparent middle, 0-360° corner) are available and sold separately to facilitate different installation needs. Ensure connectors are fully clamped and respect data direction.

Figure 11: Examples of different connector types for LED strips.
6. Operation
6.1 Compatible Controllers
This LED strip is compatible with various WS2811/SPI controllers. Popular options include:
- Tuya DR03W Wi-Fi, Bluetooth, Alexa, Google Home & RF controllers
- BanlanX APP compatible controllers (e.g., SP530E, SP630E, SP611E, SP602E, SP608E)
- WLED ESP32 compatible controllers (e.g., SP803E, SP805E)
- Other DIY controllers (e.g., Arduino, Raspberry Pi)
Refer to your specific controller's manual for detailed operating instructions.
6.2 Dynamic Lighting Effects
The addressable WS2811 IC chips allow for a wide range of dynamic lighting effects, including:
- Color chasing sequences
- Multiple colors displayed simultaneously
- Color curtain, flowing water, raindrops, and jumping flashes
- Customizable patterns and colors via controller software/app
Video 1: Overview of FCOB WS2811 IC RGB LED Strip Light features and dynamic effects, provided by BTF-Lighting.
Video 2: Comparison demonstrating the uniformity and brightness of FCOB WS2811 IC RGB 864L LED strips versus 630L LED strips, provided by BTF-Lighting.
7. Maintenance
The BTF-LIGHTING LED strip requires minimal maintenance.
- Cleaning: Ensure the power is off. Gently wipe the strip with a soft, dry, or slightly damp cloth. Do not use harsh chemicals or abrasive cleaners.
- Inspection: Periodically check connections for any signs of wear or damage.
- Environment: Maintain a dry, indoor environment to prevent damage to the IP30 rated strip.
8. Troubleshooting
| Problem | Possible Cause | Solution |
|---|---|---|
| LED strip does not light up | No power, incorrect voltage, faulty connection, faulty controller. | Check power supply connection and output. Ensure 24V DC. Verify all wiring connections. Test controller functionality. |
| Only part of the strip lights up | Damaged segment, poor connection between segments, data signal issue. | Inspect the unlit section for physical damage. Re-check connections between strip segments. Ensure data direction is correct. |
| Colors are incorrect or flickering | Loose data connection, controller settings, power supply instability. | Secure data wire connections. Check controller settings (e.g., LED type, number of LEDs). Ensure power supply is stable and sufficient. |
| Controller not responding | Controller not powered, incorrect pairing, faulty controller. | Ensure controller is powered. Refer to controller manual for pairing instructions. Replace controller if faulty. |
9. Warranty and Support
BTF-LIGHTING provides dedicated customer support for DIY design, installation assistance, troubleshooting, and after-sales warranty service. For any issues or inquiries, please contact BTF-LIGHTING customer service through your purchase platform or the official BTF-LIGHTING website.

