
1. Introduction
This manual provides detailed instructions for the safe installation, operation, and maintenance of your MENCOLULU 22-inch Farmhouse Chandelier (Model: CH001-WD-4). This 4-light hanging pendant fixture features a distressed wood oak orb design, suitable for various indoor spaces such as dining rooms, kitchen islands, living rooms, bedrooms, foyers, entryways, and hallways. Please read this manual thoroughly before installation and retain it for future reference.
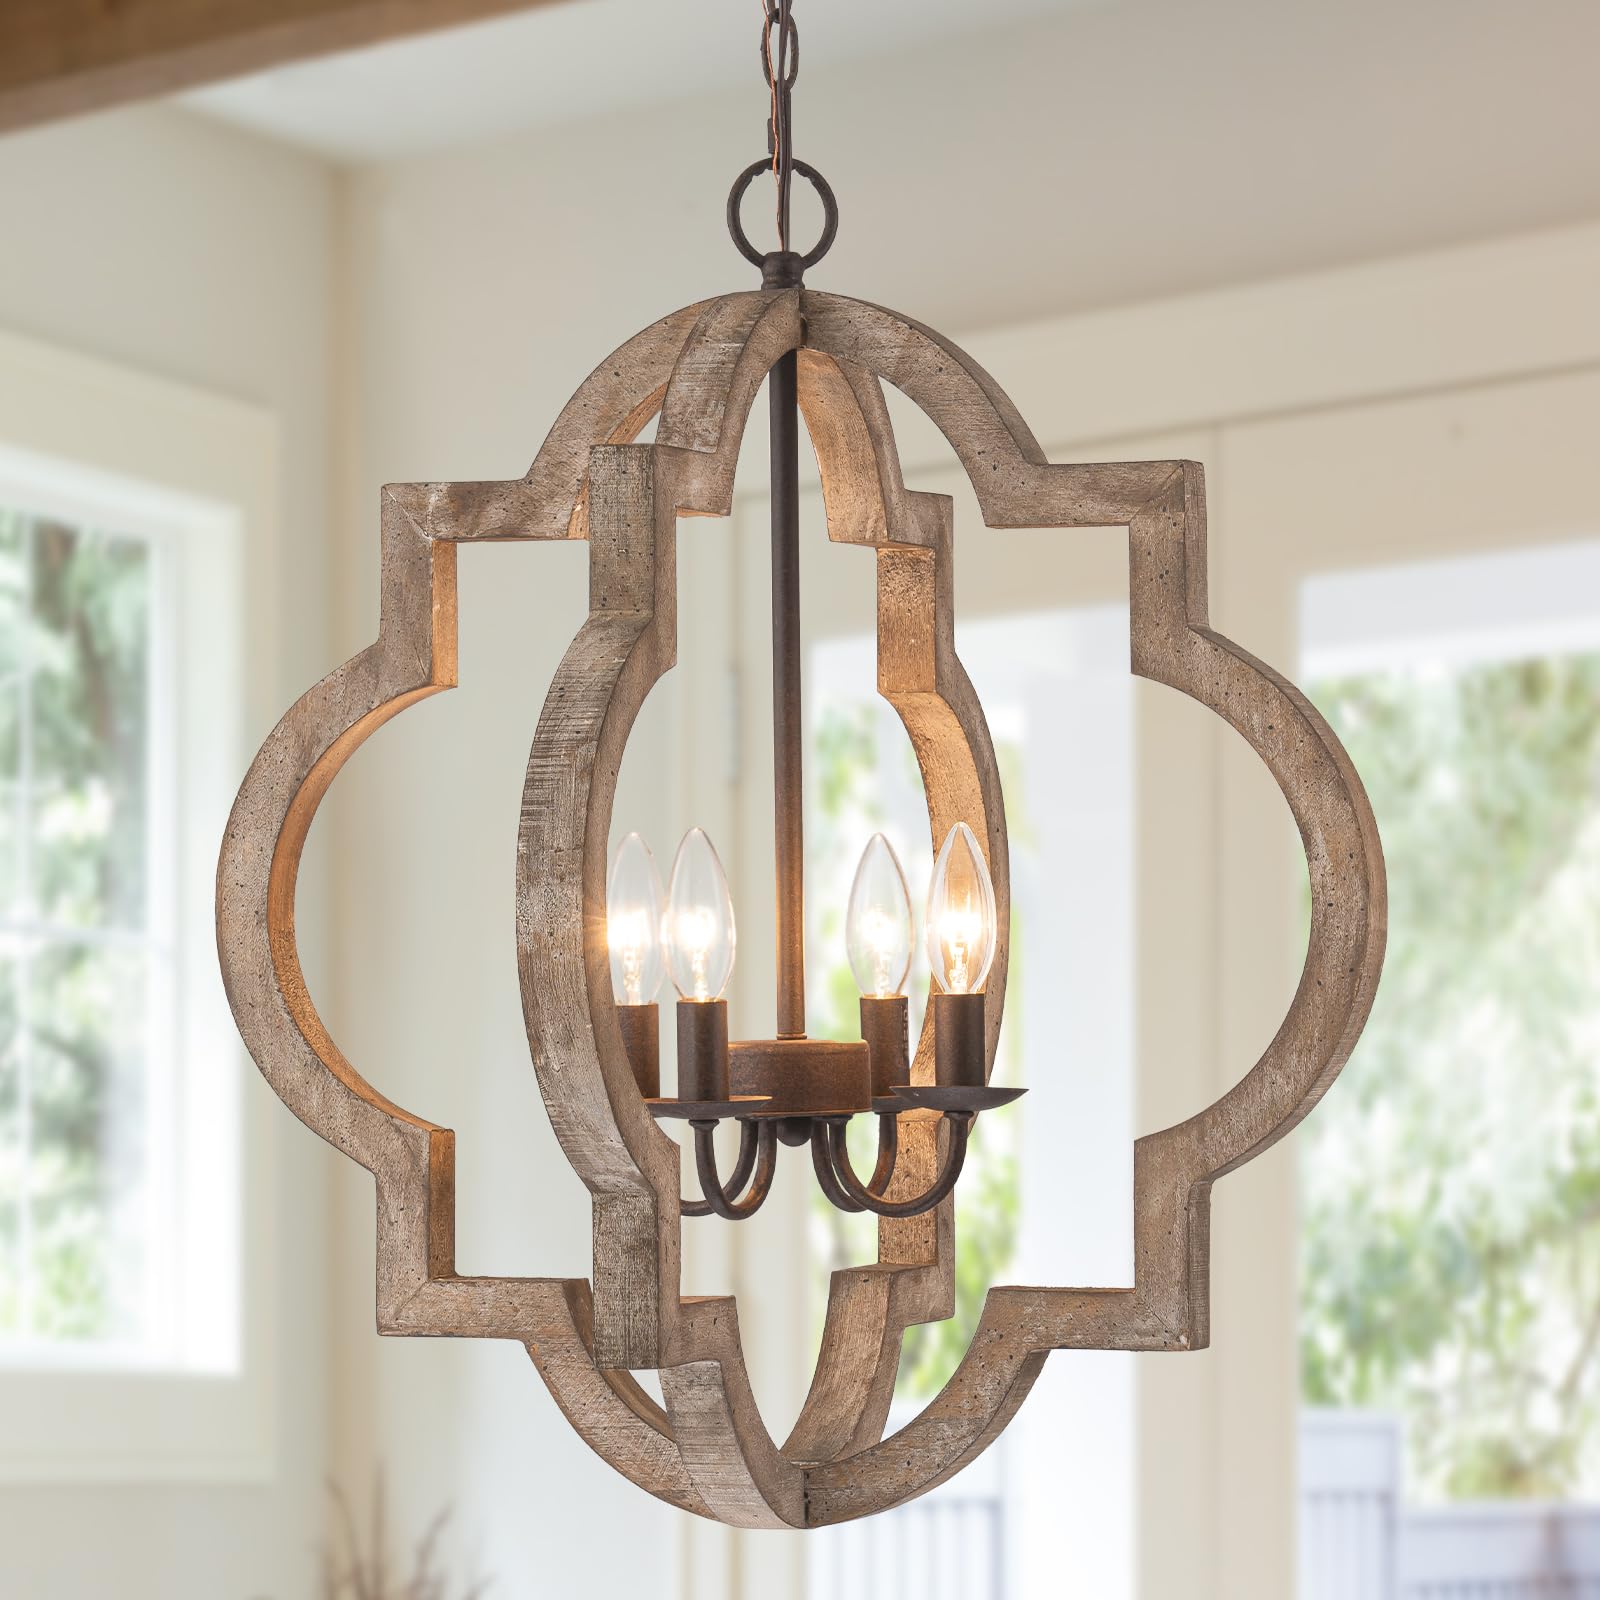
Figure 1: MENCOLULU 22-inch Farmhouse Chandelier, Distressed Oak Large.
2. Safety Information
WARNING: To reduce the risk of fire, electric shock, or personal injury, always follow these safety precautions:
- Always disconnect power at the main circuit breaker before installation, removal, or servicing.
- Installation must be performed by a qualified electrician or a person familiar with the construction and operation of the product and the hazards involved.
- Ensure all electrical connections comply with local codes and ordinances, as well as the National Electrical Code (NEC).
- Do not install this fixture in wet or damp locations. It is designed for indoor use only.
- Use only the specified bulb type and wattage (4 x E12, Max 40W per bulb). Exceeding the maximum wattage may cause overheating and damage.
- Handle the fixture with care. Avoid dropping or striking it.
- Do not connect the fixture to an ungrounded electrical system.
- Keep flammable materials away from the light bulbs.
3. Package Contents
Verify that all components are present and undamaged before beginning installation. If any parts are missing or damaged, contact customer support.
- Chandelier Body (Distressed Oak Orb)
- Mounting Canopy
- Adjustable Hanging Chain (59 inches)
- Mounting Hardware (Crossbar, Screws, Wire Nuts)
- Instruction Manual
4. Specifications
| Brand | MENCOLULU |
| Model Number | CH001-WD-4 |
| Dimensions (L x W x H) | 21.7"L x 21.7"W x 84.6"H (Max Height) |
| Size | 21.7 Inch Diameter |
| Material | Metal, Wood (Distressed Oak) |
| Color | Distressed Oak Large |
| Light Source | 4 x E12 Bulbs (Not Included) |
| Max Wattage per Bulb | 40W |
| Voltage | 110 Volts |
| Adjustable Height | Yes, Max 85 inches (with 59-inch chain) |
| Mounting Type | Hanging, Semi Flush Mount |
| Compatible Ceiling Types | Flat, Sloped, Vaulted |
| Control Method | App (requires compatible smart bulbs/system) |
| Indoor/Outdoor Usage | Indoor Only |

Figure 2: Chandelier dimensions and ceiling compatibility.

Figure 3: Detail of solid wood distressed oak and rust brown finish.
5. Setup and Installation
Before installation, ensure the power is turned off at the circuit breaker. It is recommended to have two people for installation. This fixture comes with pre-assembled wiring for simplified setup.
- Prepare the Mounting Location: Turn off power at the main circuit breaker. Ensure the junction box is securely mounted and capable of supporting the fixture's weight.
- Install the Mounting Crossbar: Attach the mounting crossbar to the junction box using the provided screws.
- Adjust Chain Length: Determine the desired hanging height for your chandelier. The chain is adjustable up to 59 inches. Use pliers to open and remove excess chain links as needed. Thread the electrical wires through the chain and canopy.
- Make Electrical Connections: Connect the fixture's wires to the corresponding wires from the junction box using the provided wire nuts. Connect the black wire (live) to the black wire, the white wire (neutral) to the white wire, and the ground wire to the ground wire. Ensure all connections are secure.
- Secure the Canopy: Carefully push the canopy up to the ceiling, covering the junction box and wiring. Secure it in place with the provided screws or nuts.
- Install Bulbs: Screw four E12 base bulbs (not included) into the sockets. Do not exceed 40W per bulb.
- Restore Power: Once installation is complete, turn the power back on at the circuit breaker.
For a visual guide to the installation process, please refer to the video below:
Video 1: Installation guide for the Farmhouse Chandelier. This video demonstrates the steps for assembling and mounting the light fixture.
6. Operating Instructions
Once installed and powered, the chandelier operates via your standard wall switch. For dimming functionality, ensure you use dimmable E12 bulbs and a compatible dimmer switch (both sold separately). The fixture supports various E12 bulb types including LED, CFL, Edison, and Smart bulbs.
If using smart bulbs with app control, follow the instructions provided with your smart bulbs for pairing and operation.
Video 2: Product overview of the Wood Farmhouse Chandelier. This video highlights key features and design aspects of the light fixture.
7. Maintenance
Regular maintenance helps prolong the life and appearance of your chandelier.
- Cleaning: Before cleaning, ensure the power is off. Wipe the fixture with a soft, dry cloth. Do not use abrasive cleaners, solvents, or polishes as they may damage the finish.
- Bulb Replacement: Always turn off power before replacing bulbs. Allow bulbs to cool completely before touching. Replace with E12 base bulbs, not exceeding 40W.
- Inspection: Periodically check all connections and mounting hardware to ensure they remain secure.
8. Troubleshooting
If you encounter issues with your chandelier, refer to the following common problems and solutions:
| Problem | Possible Cause | Solution |
|---|---|---|
| Light does not turn on | 1. Power is off 2. Loose wiring connection 3. Faulty bulb | 1. Check circuit breaker and wall switch 2. Turn off power, check all wire connections 3. Replace bulb with a new one |
| Light flickers | 1. Loose bulb 2. Incorrect bulb type for dimmer 3. Loose wiring | 1. Tighten bulb 2. Ensure dimmable bulbs are used with a dimmer switch 3. Turn off power, check wire connections |
| Humming noise | Incompatible dimmer switch or bulbs | Ensure dimmer switch and bulbs are compatible with each other and the fixture. Consult a qualified electrician if needed. |
9. Warranty and Support
This MENCOLULU product is covered by a 1-year manufacturer's warranty from the date of purchase. This warranty covers defects in materials and workmanship under normal use.
For warranty claims, technical support, or any questions regarding your product, please contact MENCOLULU customer service. Keep your proof of purchase for warranty validation.


