
Introduction
This manual provides essential instructions for the setup, operation, and maintenance of your VitalKos HY2025RX-SE JR1839 WH Remote Control and Receiver. This product is designed for use with compatible 12V kids' ride-on cars, allowing for external control of the vehicle. Please read these instructions carefully before use to ensure proper function and safety.
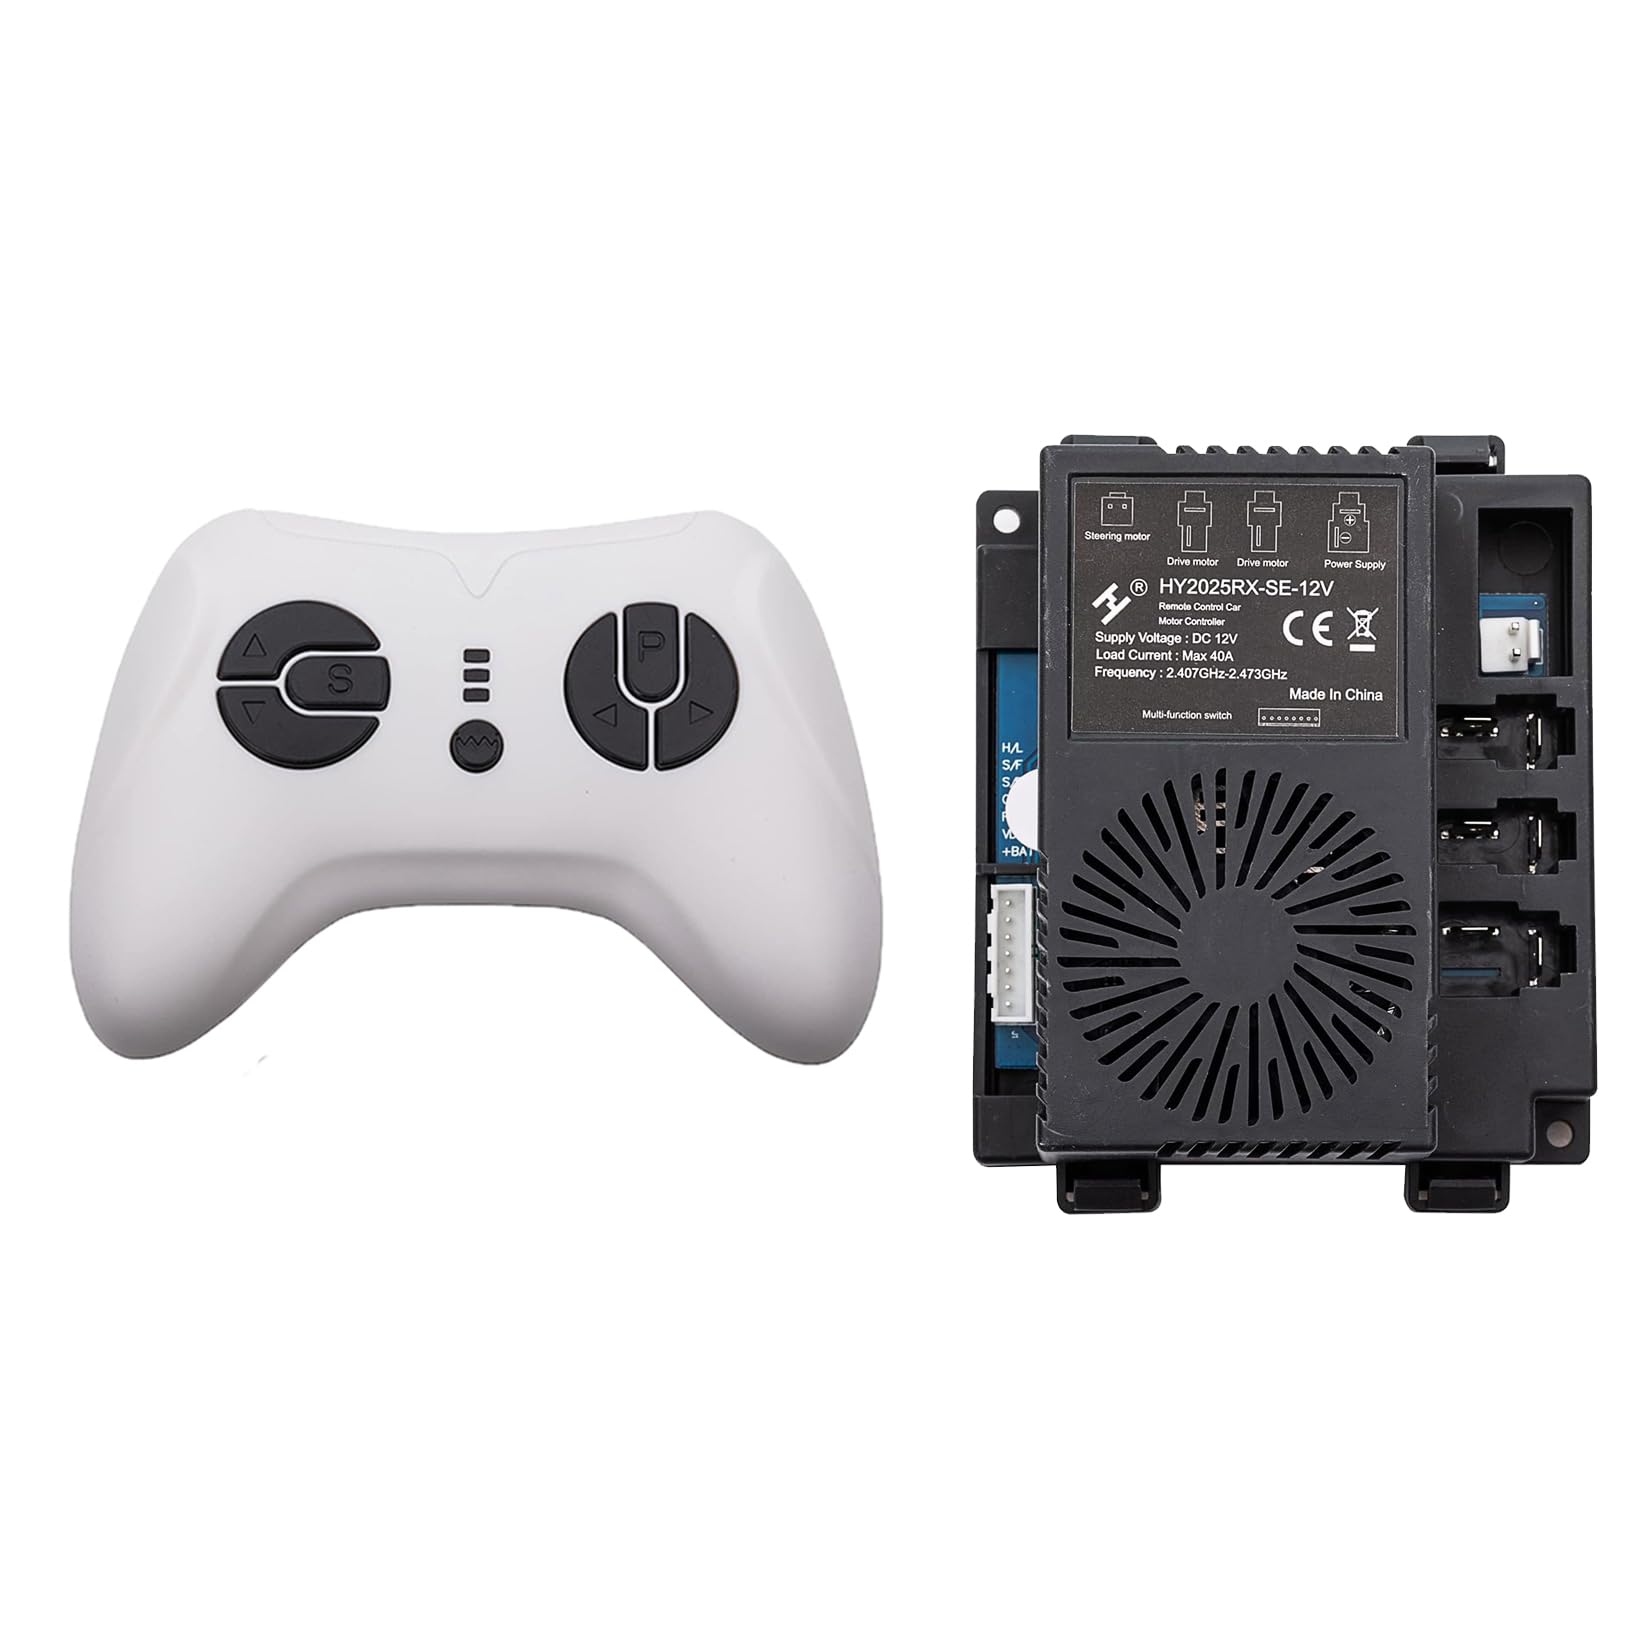
Image: Front view of the VitalKos HY2025RX-SE JR1839 WH remote control, showing the directional and speed/brake buttons.
Setup
1. Compatibility Check
Before attempting to install or pair, ensure your ride-on car's receiver model is consistent with the HY2025RX-SE JR1839 WH remote control. Incompatibility can prevent normal operation.

Image: Visual guide indicating compatibility with JR/HY series receivers. Ensure your receiver matches the compatible models shown.
2. Battery Installation
The remote control requires two (2) 1.5V AAA batteries (not included). Open the battery compartment on the back of the remote and insert the batteries, observing correct polarity. The remote control has a memory function, so replacing batteries does not require re-pairing.

Image: Back view of the remote control, displaying the battery compartment cover and regulatory markings.
3. Pairing Instructions
Follow these steps to pair the remote control with your ride-on car:
- Ensure the ride-on car is powered off.
- On the remote control, press and hold the Back (▼) and Advance (▲) buttons simultaneously for 3 seconds. The first LED indicator on the remote will begin to flicker.
- While the LED is flickering, turn on the power switch of the ride-on car.
- The red indicator light on the remote control should stop flashing, indicating successful pairing.
- If pairing fails, repeat steps 2-4.
The remote control will enter standby mode if no buttons are pressed for 10 seconds. Press any key to wake it up.
Operating Instructions
The remote control allows you to operate the ride-on car with the following functions:
- Forward (▲): Moves the car forward.
- Back (▼): Moves the car backward.
- Left (◀): Turns the car left.
- Right (▶): Turns the car right.
- Speed (S): Press the 'S' button to cycle through speed settings.
- One LED lit: Low speed.
- Two LEDs lit: Medium speed.
- Three LEDs lit: High speed.
Note: When moving backward, the car operates only at low speed.
- Brake (P): Press and hold the 'P' button to engage the brake. All LED indicators will flicker while the brake is active.
The remote controller should only be used under adult guidance.

Image: A scanned instruction sheet detailing button functions and pairing steps for the JR1839FCC remote control.
Maintenance
To ensure the longevity and proper functioning of your remote control and receiver, follow these maintenance guidelines:
- Keep the remote control and receiver clean and dry. Avoid exposure to water or excessive moisture.
- Clean the surfaces with a soft, dry cloth. Do not use harsh chemicals or abrasive cleaners.
- Store the remote control in a cool, dry place away from direct sunlight when not in use.
- If the remote control will not be used for an extended period, remove the batteries to prevent leakage.
Troubleshooting
Pairing Issues
- If the remote control fails to pair with the ride-on car, ensure the receiver model is compatible.
- Repeat the pairing steps carefully, ensuring the car's power is turned on after the remote's LED starts flickering.
- Check the remote control batteries and replace them if necessary.
Interference
This device complies with Part 15 of the FCC Rules. Operation is subject to the following two conditions: (1) This device may not cause harmful interference, and (2) This device must accept any interference received, including interference that may cause undesired operation.
If this equipment causes harmful interference to radio or television reception, which can be determined by turning the equipment off and on, the user is encouraged to try to correct the interference by one or more of the following measures:
- Reorient or relocate the receiving antenna.
- Increase the separation between the equipment and receiver.
- Connect the equipment into an outlet on a circuit different from that to which the receiver is connected.
- Consult the dealer or an experienced radio/TV technician for help.
Warning: Changes or modifications to this unit not expressly approved by the party responsible for compliance could void the user's authority to operate the equipment.
Specifications
| Model | HY2025RX-SE JR1839 WH |
| Brand | VitalKos |
| Product Dimensions | 5 x 4 x 1 inches |
| Item Weight | 6.4 ounces |
| Recommended Age | 36 months - 6 years |
| Supply Voltage | DC 3.0V (2 x 1.5V AAA batteries) |
| Frequency | 2.407GHz - 2.473GHz |
| Peak Output Power | 5dBm |
Warranty and Support
Specific warranty information for the VitalKos HY2025RX-SE JR1839 WH Remote Control and Receiver is not provided in this manual. For warranty details or technical support, please contact VitalKos directly through their official website or the retailer where the product was purchased.
For further assistance, you may also refer to the product listing on Amazon: VitalKos HY2025RX-SE JR1839 WH on Amazon.