
Introduction
This manual provides detailed instructions for the FIDECO M.2 NVMe SATA SSD Cloner Dock. This versatile device supports both M.2 NVMe and SATA SSDs, offering high-speed data transfer and convenient offline cloning capabilities. Please read this manual thoroughly before use to ensure proper operation and maximize the product's potential.
Key Features
- Wide SSD Compatibility: Supports M-Key or M+B Key M.2 PCIe NVMe SSDs and M+B Key M.2 SATA SSDs. Compatible with 2230/2242/2260/2280/22110 M.2 SSD sizes.
- High-Speed Data Transfer: Utilizes USB 3.2 Gen 2 standard with UASP support, achieving theoretical speeds up to 20Gbps.
- Offline Cloning Function: Allows direct SSD-to-SSD cloning without a computer.
- Plug and Play: Driver-free operation for Windows, Mac OS, and Linux systems.
- Universal Connectivity: Includes a USB-C to USB-C/A cable for compatibility with various devices.
- Aluminum Design: Durable and efficient heat dissipation.
Package Contents
- FIDECO M.2 NVMe SATA SSD Cloner Dock
- USB-C to USB-C/A Cable
- Power Adapter
- User Manual (this document)
Product Overview
Familiarize yourself with the components of your FIDECO M.2 NVMe SATA SSD Cloner Dock.

Figure 1: Product Diagram - This image shows the top and side views of the FIDECO M.2 NVMe SATA SSD Cloner Dock, highlighting key components such as SSD indicators, SSD slots (A and B), PC mode indicator, Clone mode indicator, Clone button, Power switch, USB-C port, and DC 5V power port. Dimensions are also indicated.
- SSD Slot A (Source): Insert the source M.2 SSD here for cloning or data access.
- SSD Slot B (Target): Insert the target M.2 SSD here for cloning or data access.
- SSD Indicators (25%, 50%, 75%, 100%): Show cloning progress or SSD activity.
- PC Mode Indicator: Lights up when connected to a computer.
- Clone Mode Indicator: Lights up when in offline cloning mode.
- Clone Button: Initiates the offline cloning process.
- OFF/ON Switch: Powers the device on or off.
- USB-C Port: Connects the dock to your computer.
- DC 5V Power Port: Connects to the power adapter.
Setup
Connecting to a Computer (PC Mode)
- Ensure the FIDECO dock is powered off using the OFF/ON switch.
- Insert your M.2 NVMe or SATA SSD(s) into the appropriate slots (A and/or B). Ensure they are fully seated.
- Connect the power adapter to the DC 5V port on the dock and plug it into a power outlet.
- Connect the USB-C cable from the dock's USB-C port to an available USB-C or USB-A port on your computer.
- Turn on the FIDECO dock using the OFF/ON switch. The PC mode indicator light will illuminate.
- Your computer should automatically detect the SSD(s). For new SSDs, you may need to initialize and format them through Disk Management (Windows) or Disk Utility (Mac OS) before use.

Figure 2: PC Mode Connectivity - This image illustrates how to connect the FIDECO dock to both a laptop via USB-C for 20Gbps transfer and a desktop PC via USB-A for 10Gbps transfer, demonstrating its versatile connectivity options.
Operating Instructions
Offline Cloning
The offline cloning function allows you to duplicate an SSD without connecting to a computer. This is ideal for system backups or drive upgrades.
Important Note:
- The target SSD (Slot B) capacity must be equal to or greater than the source SSD (Slot A) capacity.
- Do not mix NVMe and SATA SSDs during offline cloning or data transfer. Only clone NVMe to NVMe, or SATA to SATA. If you insert both NVMe and SATA SSDs simultaneously, only SSD A will be recognized.
- All data on the target SSD (Slot B) will be erased during the cloning process. Please back up any important data before proceeding.
- Ensure the FIDECO dock is powered off.
- Insert the source SSD (the drive you want to copy from) into Slot A.
- Insert the target SSD (the drive you want to copy to) into Slot B.
- Connect the power adapter to the DC 5V port on the dock and plug it into a power outlet. Do NOT connect the USB cable to a computer for offline cloning.
- Turn on the FIDECO dock using the OFF/ON switch. The white indicator lights for SSD A and SSD B, and the blue clone indicator light, will illuminate.
- Press and hold the Clone button for approximately 5 seconds until the 25% indicator light starts blinking blue. This confirms the cloning process has started.
- The 25%, 50%, 75%, and 100% indicator lights will progressively illuminate and blink to show the cloning progress.
- Once all four blue lights are solid (not blinking), the cloning process is complete. If all four blue lights are blinking, it indicates a cloning failure.
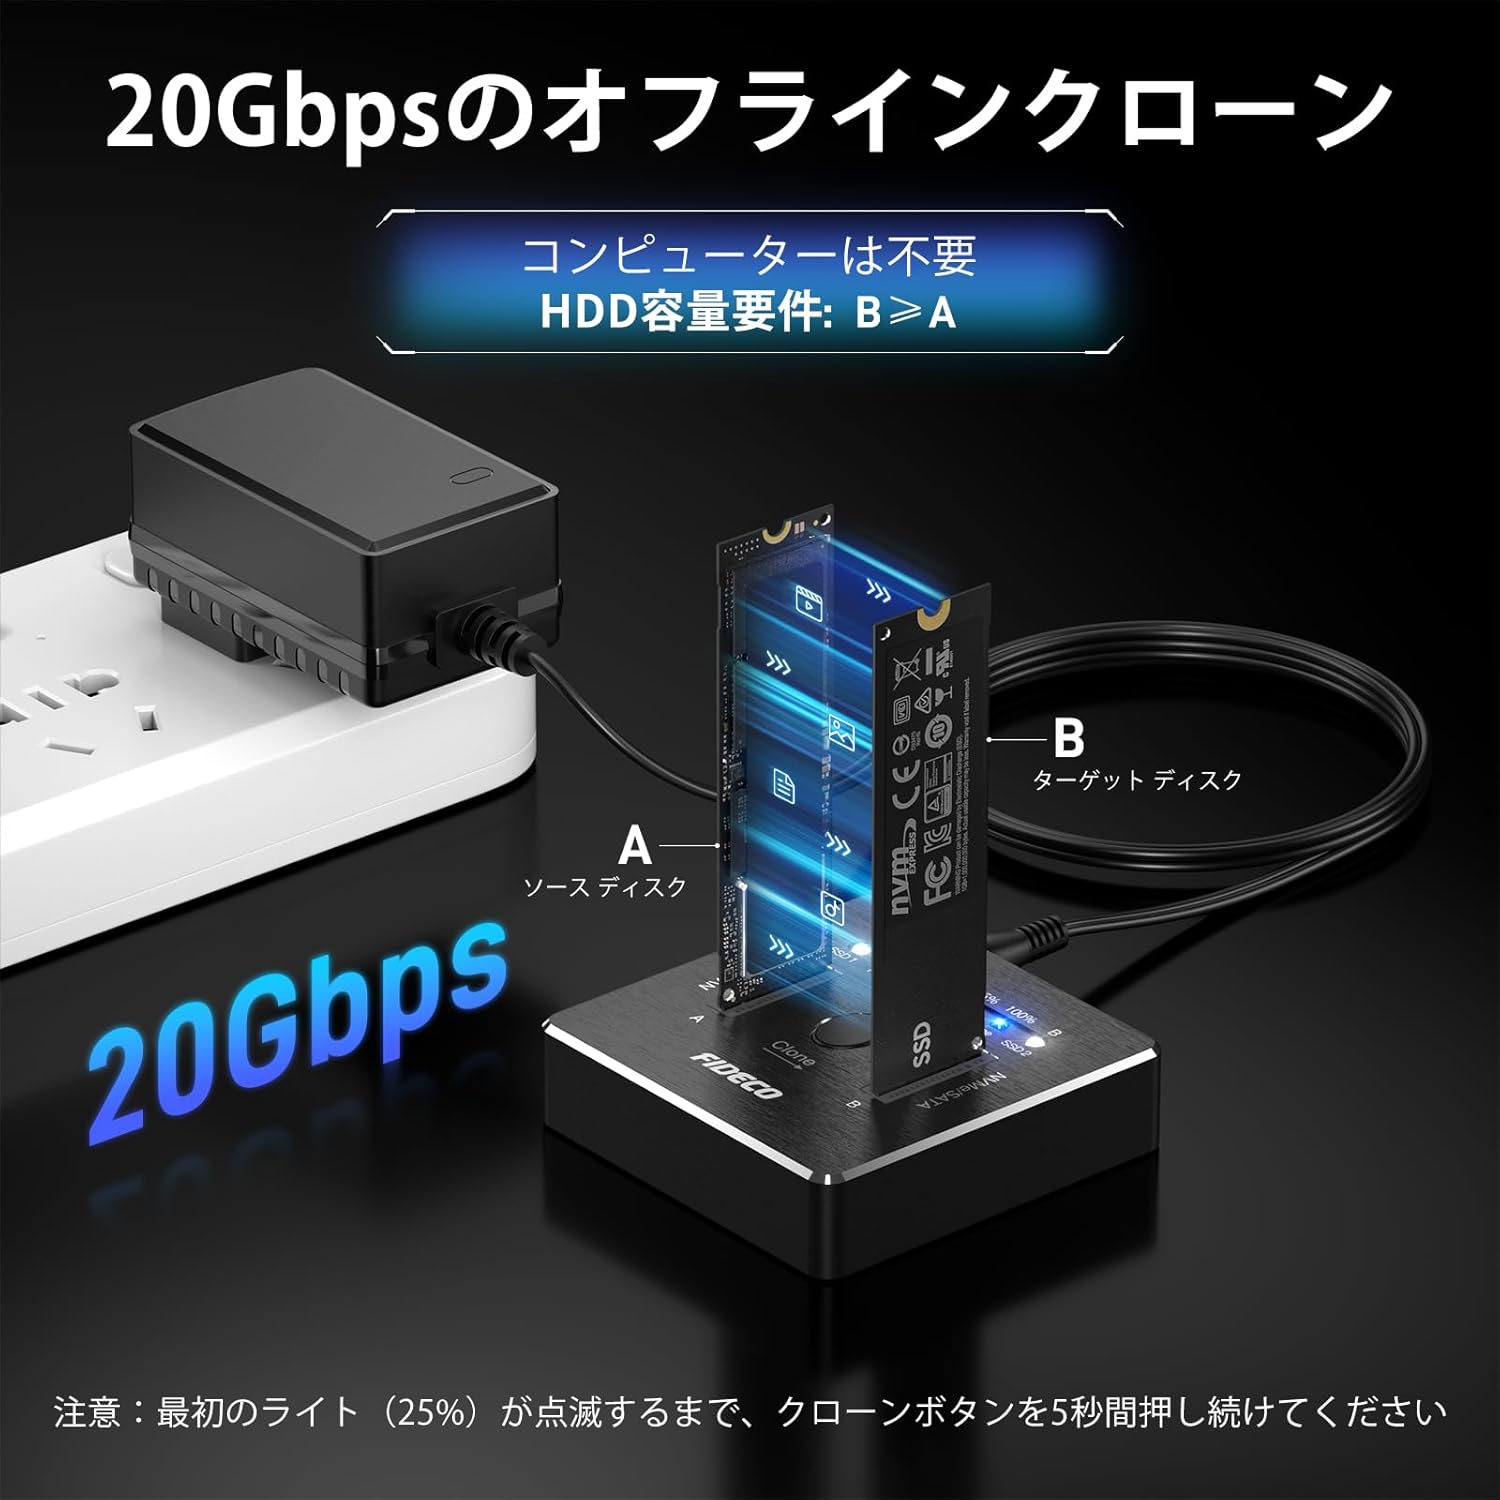
Figure 3: Offline Cloning Setup - This image demonstrates the setup for offline cloning, showing the FIDECO dock connected only to its power adapter, with a source SSD in slot A and a target SSD in slot B. The 20Gbps speed is highlighted, and a note indicates that no computer is required and target capacity must be greater than or equal to source capacity.

Figure 4: Offline Cloning Steps - This image provides a visual step-by-step guide for the offline cloning process, including checking disk management, inserting SSDs, connecting power, holding the clone button, and interpreting the progress lights.
Maintenance
- Keep the device clean and free from dust. Use a soft, dry cloth for cleaning.
- Avoid exposing the device to extreme temperatures, humidity, or direct sunlight.
- Do not touch the SSDs during operation, as they may become warm due to heat dissipation.
- Store the device in a cool, dry place when not in use.

Figure 5: Efficient Heat Dissipation - This image illustrates the efficient heat dissipation design of the FIDECO dock, with a note advising not to touch the SSDs during operation due to potential warmth.
Troubleshooting
| Problem | Possible Cause / Solution |
|---|---|
| New SSD not recognized by computer. | New HDDs/SSDs need to be initialized and formatted before they can be recognized by your computer. Use Disk Management (Windows) or Disk Utility (Mac OS). |
| Offline cloning fails (all 4 blue lights blinking). |
|
| Only one SSD is recognized in PC mode when two are inserted. | This device does not support simultaneous recognition of M.2 NVMe and M.2 SATA SSDs in PC mode. Ensure both SSDs are of the same type (both NVMe or both SATA) if you intend to access both simultaneously, or access them one at a time. |
| Slow transfer speeds. |
|
Specifications
| Feature | Detail |
|---|---|
| Brand | FIDECO |
| Model Number | M2288 |
| Supported SSD Types | M.2 NVMe (M-Key, M+B Key), M.2 SATA (M+B Key) |
| Supported M.2 SSD Sizes | 2230, 2242, 2260, 2280, 22110 |
| Interface | USB 3.2 Gen 2 Type-C |
| Transfer Speed | Up to 20Gbps (theoretical) |
| Features | Offline Clone, UASP, TRIM |
| Compatibility | Windows, Mac OS, Linux |
| Product Dimensions | 6.8 x 6.8 x 1.75 cm |
| Product Weight | 0.34 kg |
Warranty and Support
FIDECO products come with a standard manufacturer's warranty. For firmware updates, technical support, or any other inquiries, please contact FIDECO customer service at support@fideco.cn.

