1. Introduction
The Satlink ST-5032 is a portable digital satellite signal detector designed for the installation and verification of digital television services in residential homes or apartment buildings. It is fully compatible with DVB-S2/S, ISDB-T, and J83B standards, offering a compact size, lightweight design, and an intuitive user interface.
This manual provides detailed instructions on how to set up, operate, and maintain your ST-5032 device to ensure optimal performance and longevity.
2. Safety Information
Please read all safety instructions before using the device. Failure to follow these instructions may result in electric shock, fire, or damage to the device.
- Do not expose the device to rain or moisture.
- Do not disassemble the device. Refer all servicing to qualified personnel.
- Use only the provided power adapter.
- Keep the device away from extreme temperatures and direct sunlight.
- Ensure proper ventilation to prevent overheating.
3. Package Contents
Verify that all items are present in your package:
- Satlink ST-5032 Digital Satellite Signal Detector
- Power Adapter (EU Plug)
- USB Cable
- Shoulder Strap
- User Manual (this document)
- Software CD (optional, for PC connection)
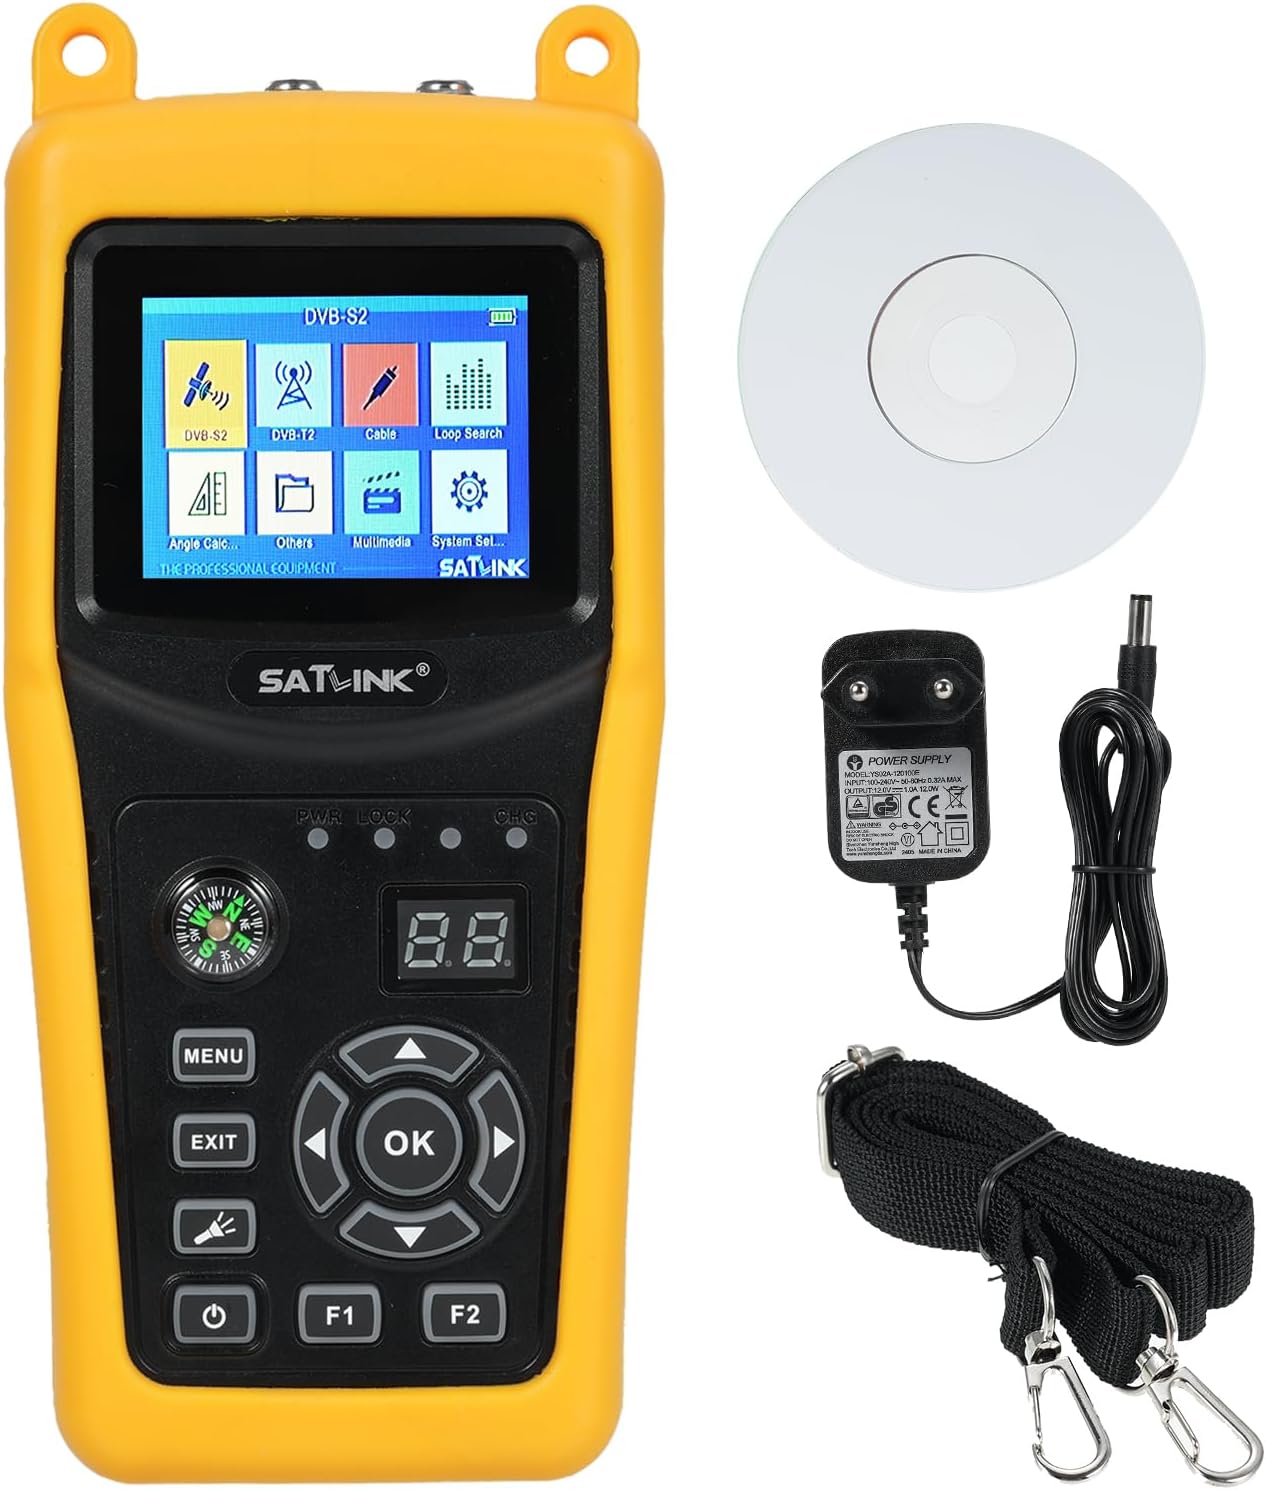
Image 3.1: Satlink ST-5032 device with power adapter, USB cable, shoulder strap, and software CD.
4. Device Overview
Familiarize yourself with the various parts and controls of your ST-5032 device.
4.1 Front Panel

Image 4.1: Front view of the Satlink ST-5032, displaying the 2.4-inch TFT LCD screen and control buttons.
- 2.4" TFT LCD Screen: Displays menus, signal information, and video.
- Compass: Integrated for easier and faster position adjustment of the satellite dish.
- MENU Button: Accesses the main menu.
- EXIT Button: Returns to the previous screen or exits a menu.
- OK Button: Confirms selections or enters sub-menus.
- Directional Buttons (Up/Down/Left/Right): Navigate through menus and adjust settings.
- Power Button: Turns the device on/off.
- F1/F2 Buttons: Function keys, their purpose may vary depending on the current menu.
- PWR/LOCK/CHG Indicators: LED indicators for power, signal lock, and charging status.
4.2 Top and Bottom Panels

Image 4.2: Top and bottom views of the Satlink ST-5032, highlighting the F-type connectors for satellite and antenna inputs.
- F-Type Connectors: For connecting to the LNB of a satellite dish or a terrestrial antenna.
4.3 Side Panels

Image 4.3: Side views of the Satlink ST-5032, showing the USB port and power input jack.
- USB Port: For software updates and data transfer.
- DC Power Input: For connecting the power adapter to charge the device or operate it directly.
5. Setup
5.1 Initial Charging
Before first use, fully charge the device's internal Li-ion battery. Connect the provided power adapter to the DC power input on the side of the device and plug it into a wall outlet. The CHG indicator will illuminate during charging and turn off when fully charged.
5.2 Powering On/Off
Press and hold the Power button for a few seconds to turn the device on or off.
5.3 Connecting to a Satellite Dish or Antenna
Connect the LNB cable from your satellite dish to the "Satellite" F-type connector on the top of the device. For terrestrial signals (ISDB-T/J83B), connect your antenna cable to the "Antenna" F-type connector.
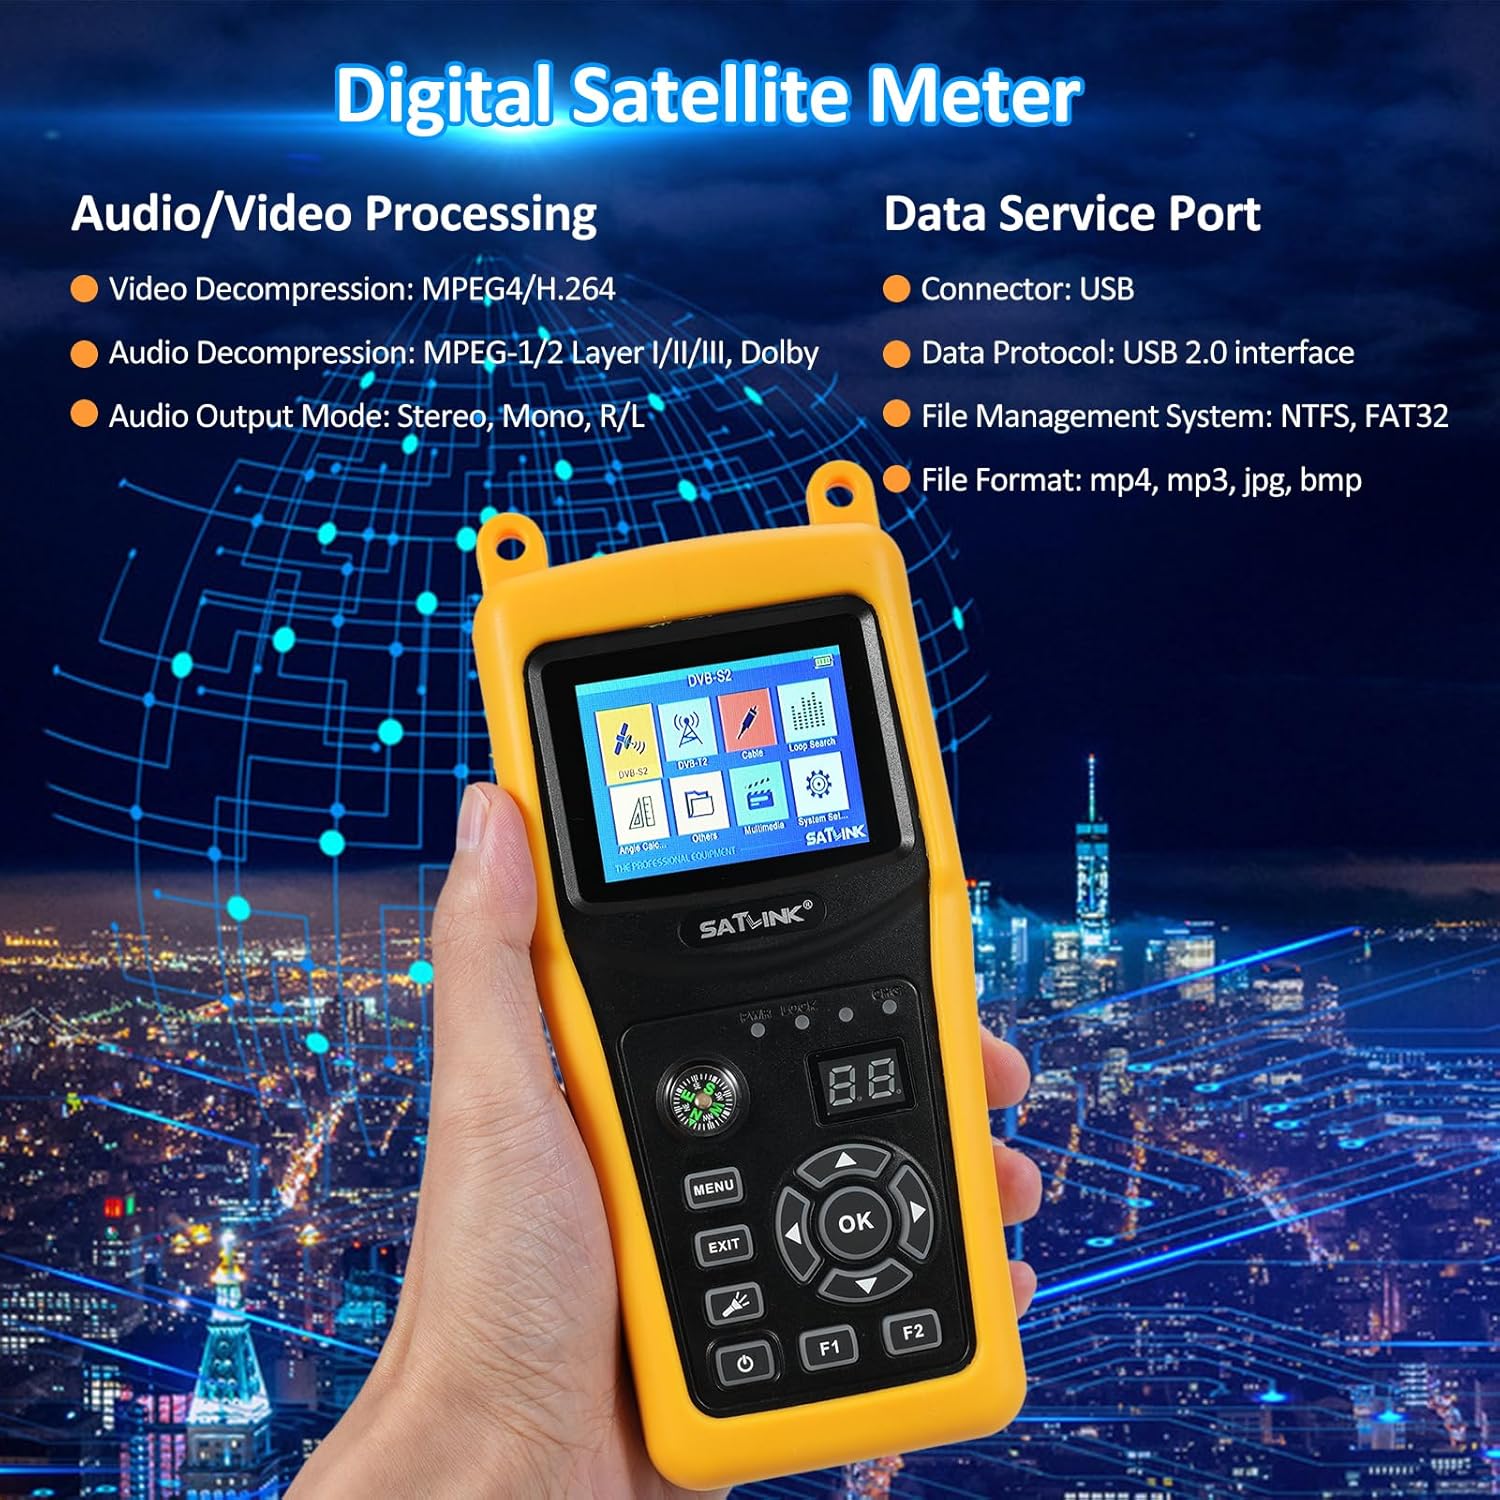
Image 5.1: Diagram illustrating the dimensions of the ST-5032 and how to connect satellite and antenna cables.
6. Operating Instructions
6.1 Main Menu Navigation
After powering on, the device will display the main menu. Use the directional buttons to navigate between icons and press the OK button to select an option.
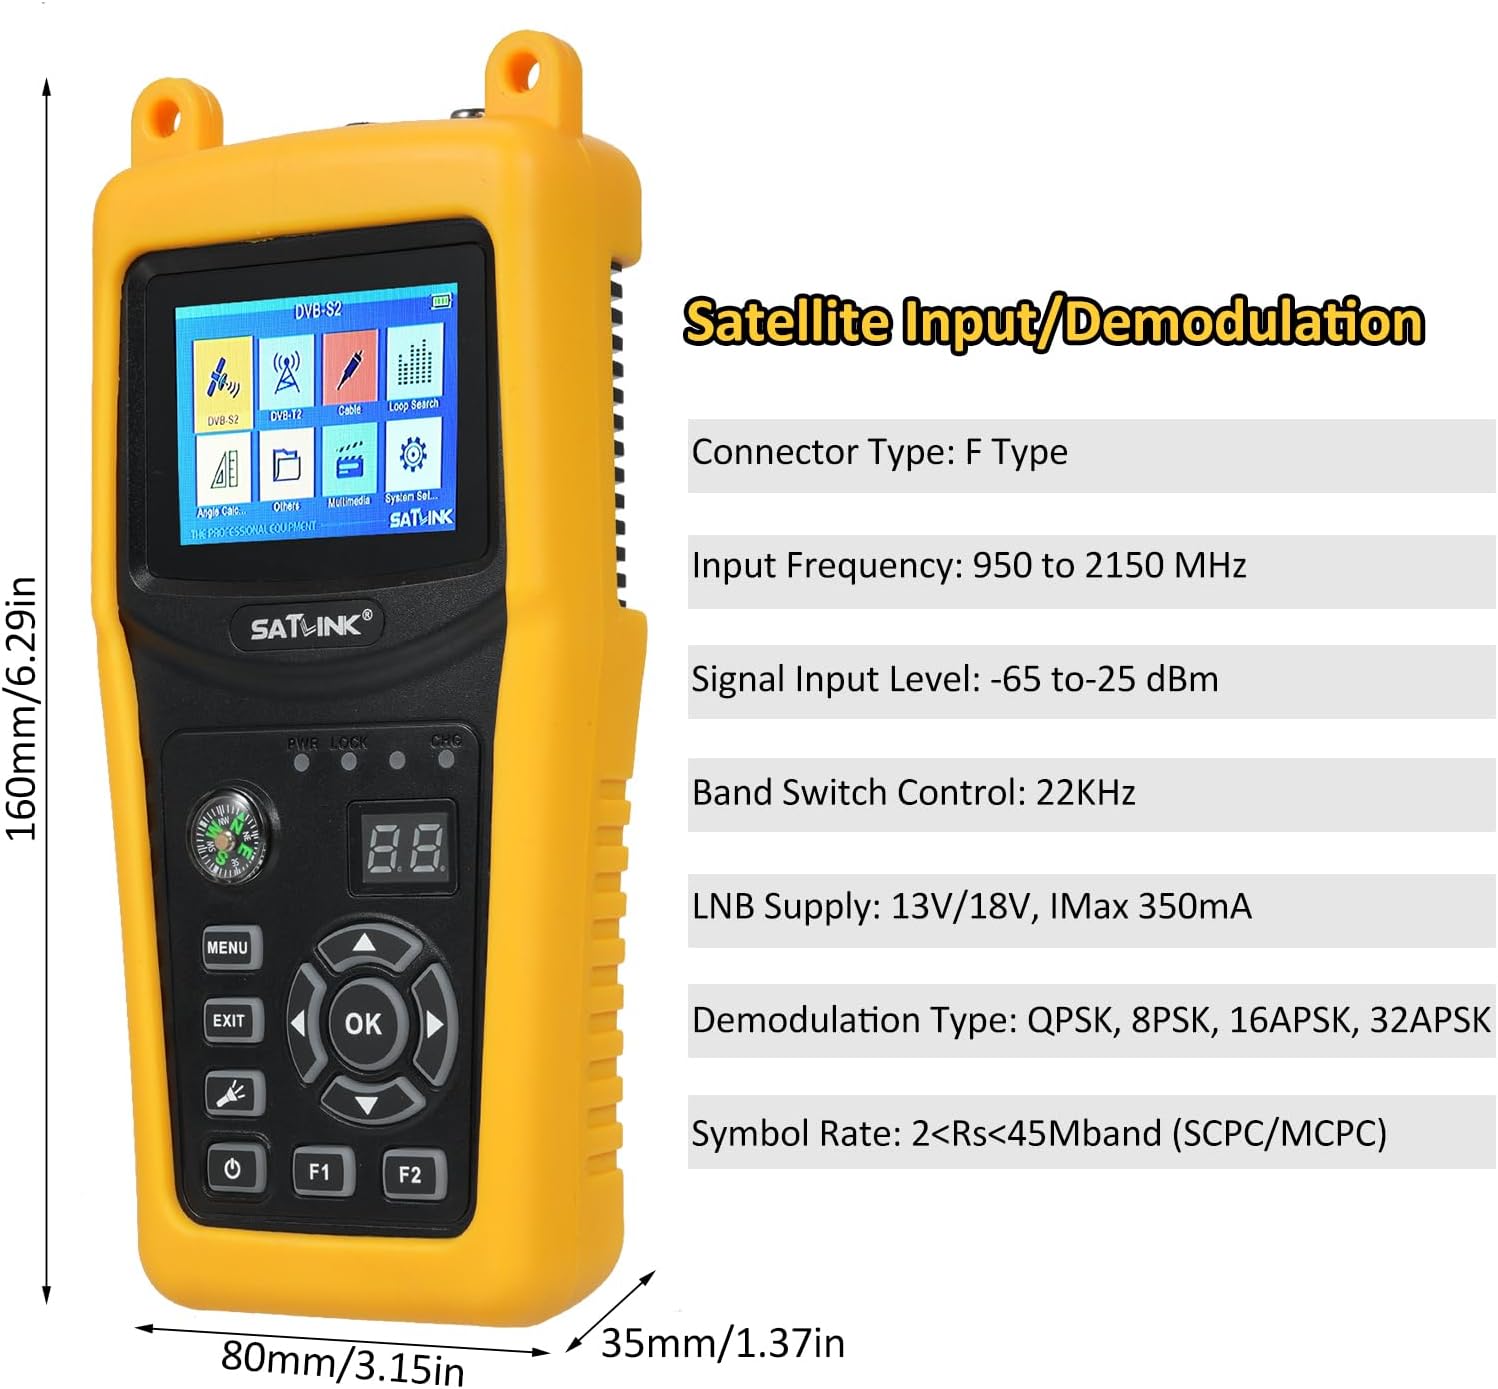
Image 6.1: The main menu of the Satlink ST-5032, showing options like DVB-S2, DVB-T, Cable, Loop Search, Angle Calc, Others, Multimedia, and System Set.
6.2 Satellite Signal Detection (DVB-S2/S)
- From the main menu, select "DVB-S2" or "DVB-S".
- Choose the desired satellite from the list or add a new one.
- Enter the Transponder (TP) frequency, symbol rate, and polarization.
- Adjust your satellite dish using the integrated compass and observe the signal strength and quality bars on the screen.
- Fine-tune the dish position until the signal strength and quality are maximized. The LOCK indicator will illuminate when a signal is acquired.
6.3 Terrestrial Signal Detection (ISDB-T/J83B)
- From the main menu, select "DVB-T" (for ISDB-T) or "Cable" (for J83B).
- Select the appropriate region/channel plan or manually enter the channel frequency.
- Adjust your terrestrial antenna and monitor the signal strength and quality indicators.
- Optimize antenna position for the best signal reception.
6.4 System Settings
Access the "System Set" menu to configure language, backlight, time, factory reset, and other system parameters.
7. Maintenance
7.1 Cleaning
Wipe the device with a soft, dry cloth. Do not use liquid cleaners or solvents.
7.2 Battery Care
To prolong battery life, avoid fully discharging the battery frequently. If storing the device for an extended period, charge it to approximately 50% and recharge every few months.
7.3 Storage
Store the device in a cool, dry place, away from direct sunlight and extreme temperatures.
8. Troubleshooting
| Problem | Possible Cause | Solution |
|---|---|---|
| Device does not power on. | Battery is depleted. | Connect the power adapter and charge the device. |
| No signal detected. | Incorrect satellite/transponder settings; cable not connected properly; LNB/antenna issue. | Verify settings; check cable connections; inspect LNB/antenna. |
| Poor signal quality. | Dish/antenna misalignment; interference; faulty cable. | Fine-tune dish/antenna position; check for obstructions; replace cable if damaged. |
| Screen is blank or frozen. | Software glitch. | Press and hold the power button to force a restart. If issue persists, perform a factory reset (refer to System Settings). |
9. Specifications

Image 9.1: Detailed technical specifications of the Satlink ST-5032, including transmission standards, input/demodulation, LCD features, audio/video processing, data service port, power supply, and physical characteristics.
| Model | ST-5032 |
| Manufacturer | Irfora |
| Dimensions (L x W x H) | 21.5 x 17 x 5.2 cm (8.46 x 6.69 x 2.05 inches) |
| Net Weight | Approx. 0.7 kg |
| Connector Type | F Type |
| Input Frequency | 950 to 2150 MHz |
| Signal Input Level | -65 to -25 dBm |
| Band Switch Control | 22KHz |
| LNB Supply | 13V/18V, IMax 350mA |
| Demodulation Type | QPSK, 8PSK, 16APSK, 32APSK |
| Symbol Rate | 2<Rs<45Mband (SCPC/MCPC) |
| Connector Type | F Type |
| Input Frequency | 48 to 862 MHz |
| Signal Input Level | -80dBm (ISDB-T), -67dBm (J83B) |
| Demodulation Type | 64QAM, 256QAM |
| LCD Type | TFT Transmissive |
| Number of Dots | 320 (RGB) x240 |
| LCD Screen Size | 2.4" |
| Video Decompression | MPEG4/H.264 |
| Audio Decompression | MPEG-1/2 Layer I/II/III, Dolby |
| Audio Output Mode | Stereo, Mono, R/L |
| Connector | USB2.0 interface |
| File Management System | NTFS, FAT32 |
| File Format | mp4, mp3, jpg, bmp |
| Li-ion Battery | 7.4V/2600mAh |
| Adapter | Output: DC12V/1A, Input: 100-240VAC 50/60Hz |
| Power Consumption | Max. 10W |
10. Warranty and Support
This product comes with a standard manufacturer's warranty. Please refer to the warranty card included in your package for specific terms and conditions. For technical support, troubleshooting assistance, or warranty claims, please contact your retailer or the manufacturer's customer service department.
Manufacturer: Irfora
Model Reference: LAKDEE25971EU


