
Introduction
This manual provides detailed instructions for the installation, operation, and maintenance of your BrickBling RC Version Light Kit, designed specifically for the Imperial Star Destroyer 75394 model. This kit enhances your model with dynamic lighting effects. Please note: The Imperial Star Destroyer 75394 model is NOT included with this light kit.
Safety Information
- Choking Hazard: This product contains small parts and is not suitable for children under 3 years of age. Adult supervision is recommended during installation and use.
- Electrical Safety: The light kit supports a USB cable for power. Ensure the power source provides less than 5V to prevent damage to the lights. Do not connect to power sources exceeding this voltage.
- Handling Wires: Avoid over-pulling, bending, or shaking the light wires during installation to prevent damage. Handle all components with care.
Package Contents
Before beginning installation, please verify that all components listed below are present and undamaged. If any parts are missing or faulty, please contact customer support.
- Light Kit components (various LED lights and connecting wires)
- Power Supply (USB cable)
- Remote Control
- Expansion Boards (various sizes)
- Connecting Cables (various lengths)

Figure 1: Overview of included light kit components and remote control.
Setup & Installation
The installation process involves carefully integrating the LED lights and wiring into your Imperial Star Destroyer 75394 model. It is recommended to follow the specific instructions provided with your physical light kit for precise placement, as this manual provides general guidance.
- Prepare Your Model: Ensure your Imperial Star Destroyer 75394 model is fully assembled and stable. Identify areas where lights will be installed, such as the bridge, engine thrusters, and hull sections.
- Connect Lights: Carefully attach the individual LED lights and light strips to the designated areas of your model. Use the provided connecting cables to link the lights to the expansion boards. Ensure connections are secure but do not force them.
- Route Wires: Route the wires discreetly through the model's structure. The light wires are designed to be lightweight and small, allowing them to be well-hidden. Avoid pinching wires between bricks or placing them in areas of high stress.
- Connect to Power: Once all lights are in place and connected to the expansion boards, connect the main power supply (USB cable) to an expansion board.
- Initial Test: Before fully securing all parts of your model, connect the USB cable to a power source (e.g., power bank, computer USB port, wall adapter with less than 5V output) and test if every lamp pellet lights up. This allows for easier troubleshooting if a connection is loose.
- Final Assembly: After confirming all lights function correctly, carefully reassemble any parts of your model that were temporarily removed or loosened during installation.
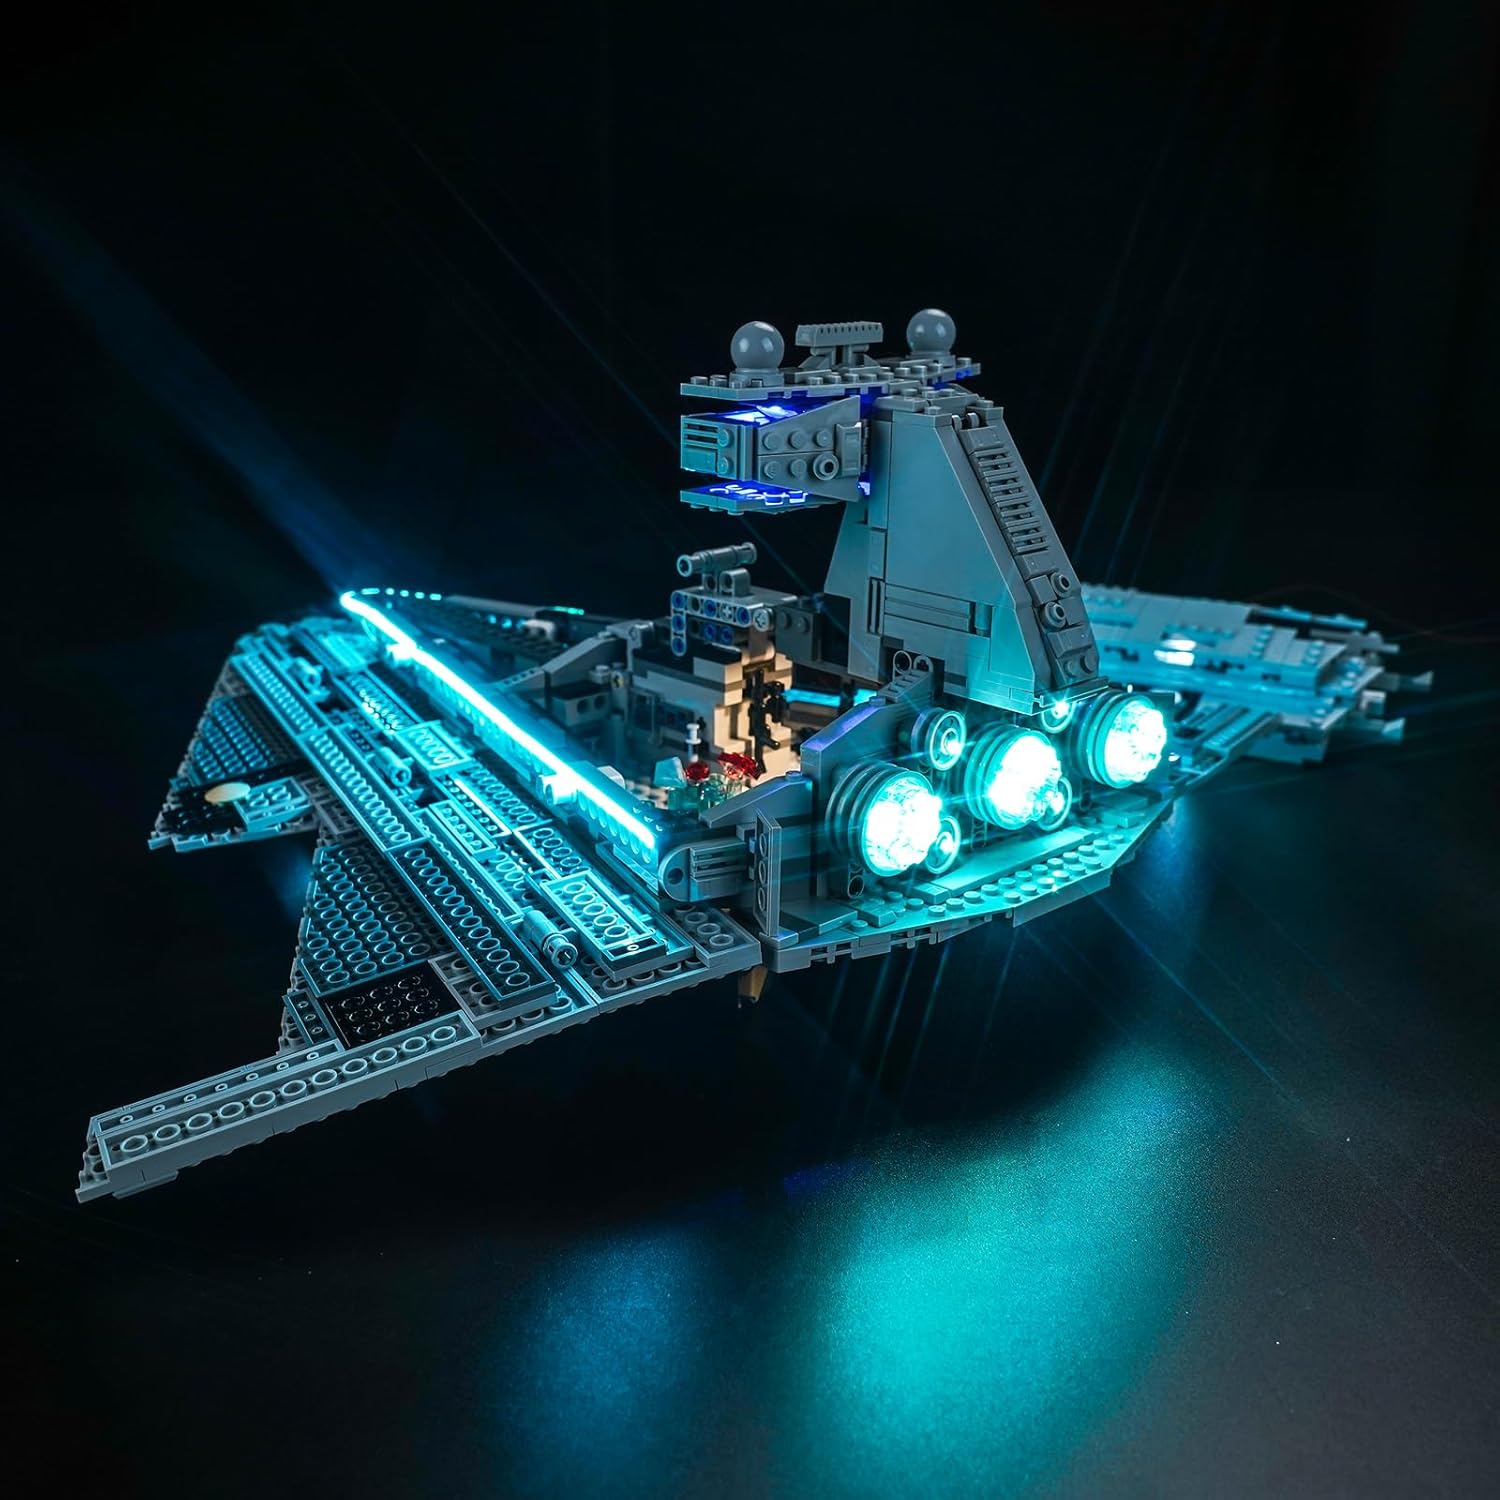
Figure 2: Illuminated Imperial Star Destroyer model (side view).

Figure 3: Detailed views of the light kit's effects on the model.
Operating Instructions
Your BrickBling RC Version Light Kit is controlled via a remote control, allowing you to customize the lighting effects.
- Power On/Off: Use the designated power button on the remote control to turn the lights on or off.
- Adjust Brightness: The remote control includes buttons to increase or decrease the brightness of the LED lights.
- Change Modes: Explore various lighting modes such as static, flash, or other dynamic effects using the mode selection buttons on the remote.
- Color Selection: If your kit supports multiple colors, use the color selection options on the remote to change the light color.

Figure 4: Imperial Star Destroyer with remote control for lighting adjustments.
Video 1: Demonstration of the BrickBling light kit for Imperial Star Destroyer 75394, showcasing various lighting effects and remote control functionality.
Maintenance
To ensure the longevity and optimal performance of your BrickBling Light Kit, follow these maintenance guidelines:
- Cleaning: Gently dust the lights and wires with a soft, dry cloth. Avoid using liquid cleaners directly on the electrical components.
- Wire Inspection: Periodically inspect wires for any signs of wear, fraying, or damage. If damage is found, discontinue use and contact customer support.
- Storage: If storing the model for an extended period, ensure the light kit is disconnected from power. Store in a cool, dry place away from direct sunlight.
Troubleshooting
If you encounter issues with your light kit, refer to the following common problems and solutions:
| Problem | Possible Cause | Solution |
|---|---|---|
| Lights do not turn on | No power, loose connection, faulty component | Check USB power connection. Ensure power source is active. Verify all wire connections are secure. Test individual lamp pellets if possible. |
| Some lights are not working | Loose connection, damaged wire/LED | Inspect connections to the non-working lights and their respective expansion board ports. Carefully check for any visible damage to the wires or LED. |
| Remote control not responding | Dead battery, obstruction, out of range | Replace remote control battery. Ensure no obstructions between remote and receiver. Move closer to the model. |
| Lights flicker or dim | Unstable power, loose connection | Ensure a stable power supply. Check all connections for tightness. |
If troubleshooting steps do not resolve the issue, please contact BrickBling customer support for further assistance.
Specifications
- Brand: BrickBling
- Model Compatibility: Imperial Star Destroyer 75394
- Style Name: RC Version Light
- Color: Warm White (LEDs may emit various colors depending on mode)
- Material: Acrylonitrile Butadiene Styrene (ABS)
- Light Source Type: Light Emitting Diode (LED)
- Power Source: Corded Electric (USB)
- Recommended Voltage: Less than 5V
- Maximum Compatible Light Source Wattage: 5 Watts
- Mounting Type: Internal Mount
- Batteries Included: No (for remote control, typically AAA or CR2032 not included)
- Included Components: Light Kit, Power Supply (USB cable), Remote Control
Warranty & Support
BrickBling is committed to providing high-quality products. For any questions, concerns, or issues regarding your light kit, please contact BrickBling customer support directly. Please refer to your purchase documentation for specific warranty terms and contact information.
You can visit the official BrickBling store for more information and support: BrickBling Store on Amazon


