
1. Introduction
This manual provides detailed instructions for the assembly, operation, and maintenance of your DWVO Rustic Kitchen Island with Power Strip. Please read all instructions carefully before assembly and use to ensure safe and proper functionality of the product.

Image 1.1: The DWVO Rustic Kitchen Island with Power Strip, featuring its dark wood finish and functional design in a kitchen environment.
2. Safety Information
Please observe the following safety guidelines to prevent injury or damage to the product:
- Always use both hands when lifting the trash cans.
- Keep hands and fingers away from moving parts during assembly and use.
- Do not overload the cabinet.
- Always unplug the cabinet from the power source before cleaning or performing any maintenance.
- Always follow the assembly instructions carefully to avoid injury.
- This product includes wall mounting hardware to ensure safety and stability. It is recommended to use this hardware to prevent tipping.
3. Setup & Assembly
The DWVO Rustic Kitchen Island requires assembly. Please ensure all parts are present before beginning. Refer to the included assembly guide for detailed step-by-step instructions.
3.1 Product Dimensions
Familiarize yourself with the overall dimensions of the kitchen island to ensure it fits your intended space.

Image 3.1: Detailed product dimensions including overall width, depth, height, and internal shelf measurements. The power cord length is also indicated.
3.2 Power Strip Installation
The kitchen island features a built-in power strip. Ensure it is properly connected to a wall outlet after assembly.
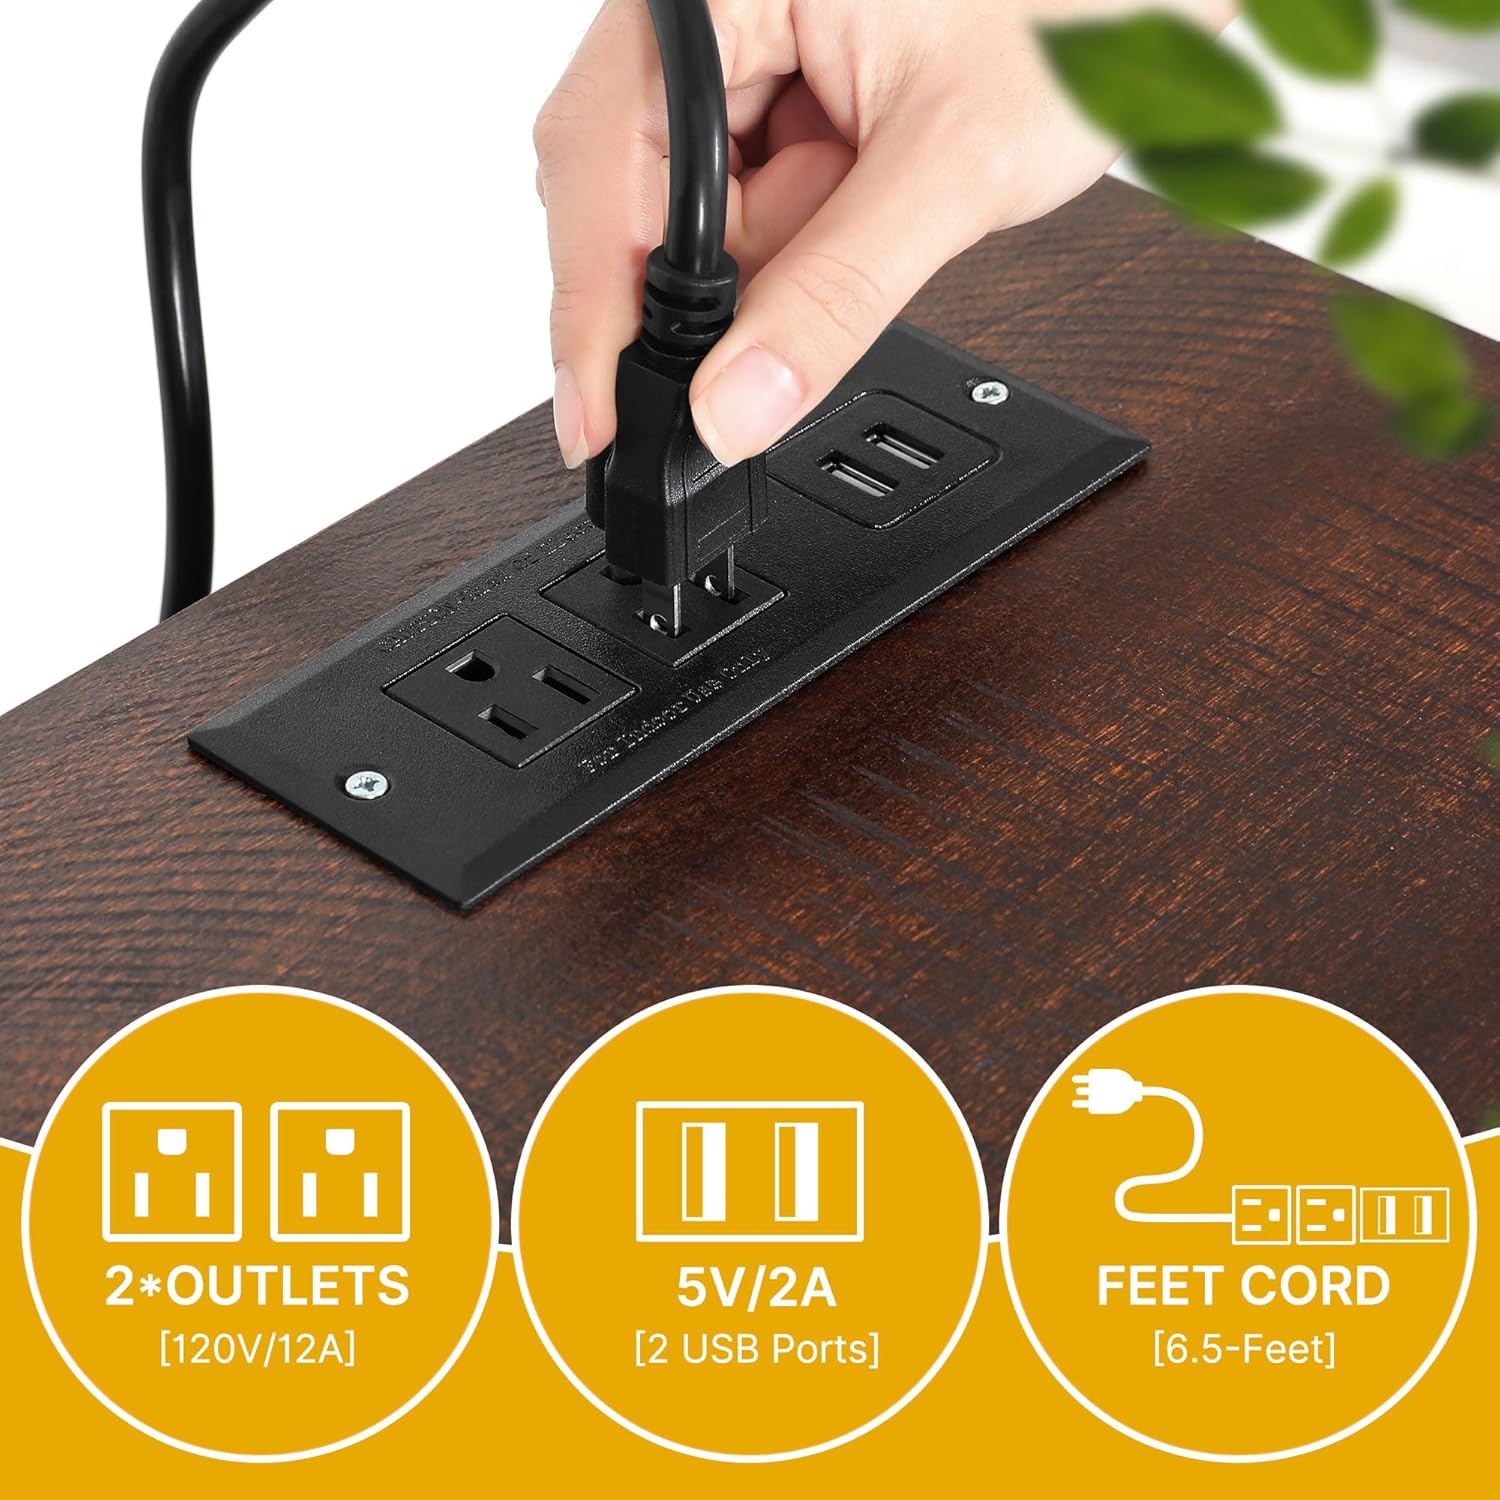
Image 3.2: The integrated power strip provides two 120V/12A outlets and two 5V/2A USB ports for convenient charging of kitchen devices. The power cord is 6.5 feet long.
3.3 Anti-Toppling Device
For enhanced safety, especially in homes with children or pets, install the provided anti-toppling device to secure the island to a wall.

Image 3.3: The anti-toppling device prevents the product from tipping over, ensuring stability and safety.
3.4 Adjustable Shelves
The side storage cabinet includes adjustable shelves. Customize their height to accommodate various items.

Image 3.4: The shelf height can be adjusted according to the size of items, providing flexible storage options.
4. Operation
4.1 Using the Tilt-Out Trash Compartments
The kitchen island features two tilt-out doors designed to conceal 13-gallon trash bins (not included). To use, simply pull the handle to tilt the door forward.
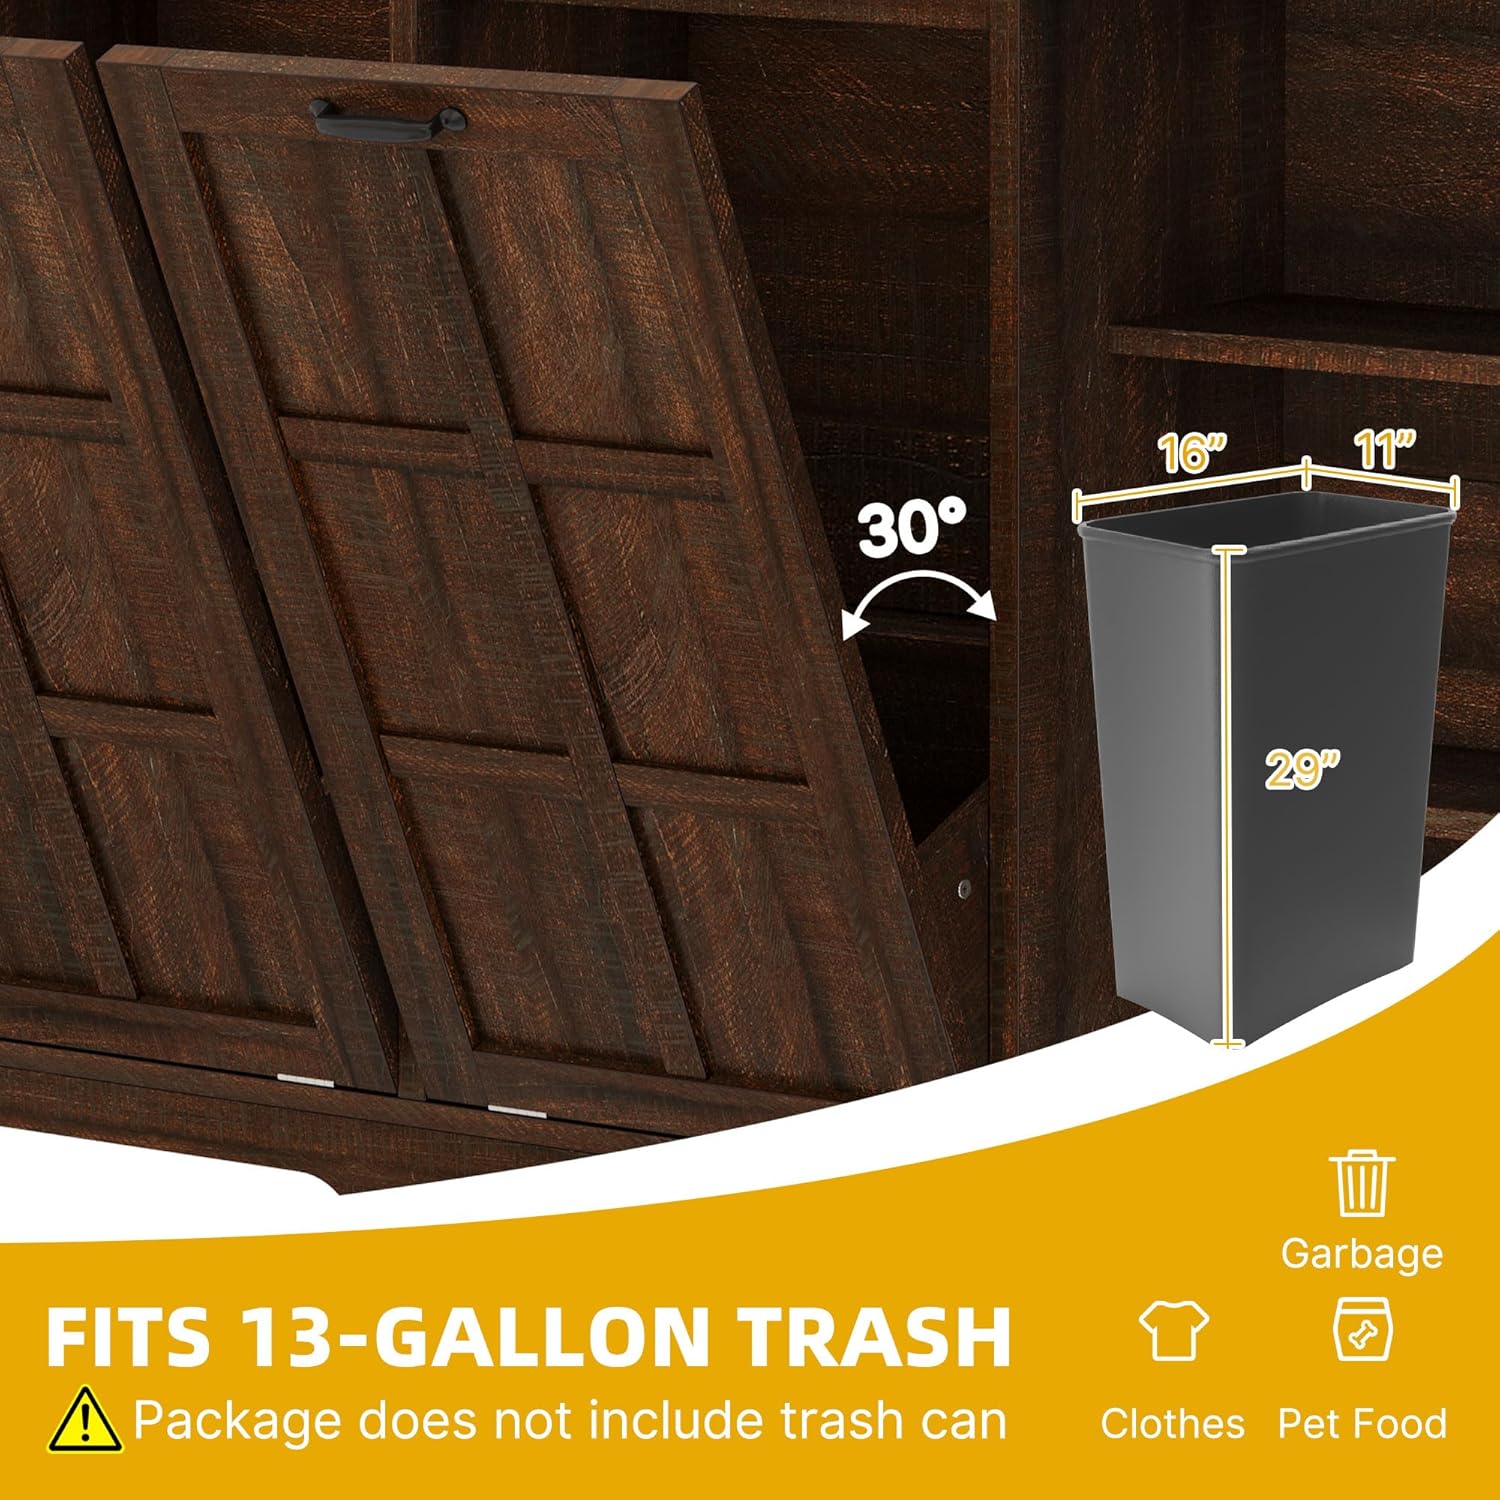
Image 4.1: The tilt-out mechanism allows for easy access to a 13-gallon trash bin, keeping it hidden when not in use. Trash bins are not included.
Watch this video for a demonstration of the tilt-out trash cabinet functionality:
Video 4.1: This video demonstrates the smooth operation of the double tilt-out trash cabinet doors and the overall design of the kitchen island.
4.2 Utilizing Side Storage
The side cabinet offers versatile storage for kitchen essentials. Adjust the shelves as needed to organize dishes, cookware, or pantry items.
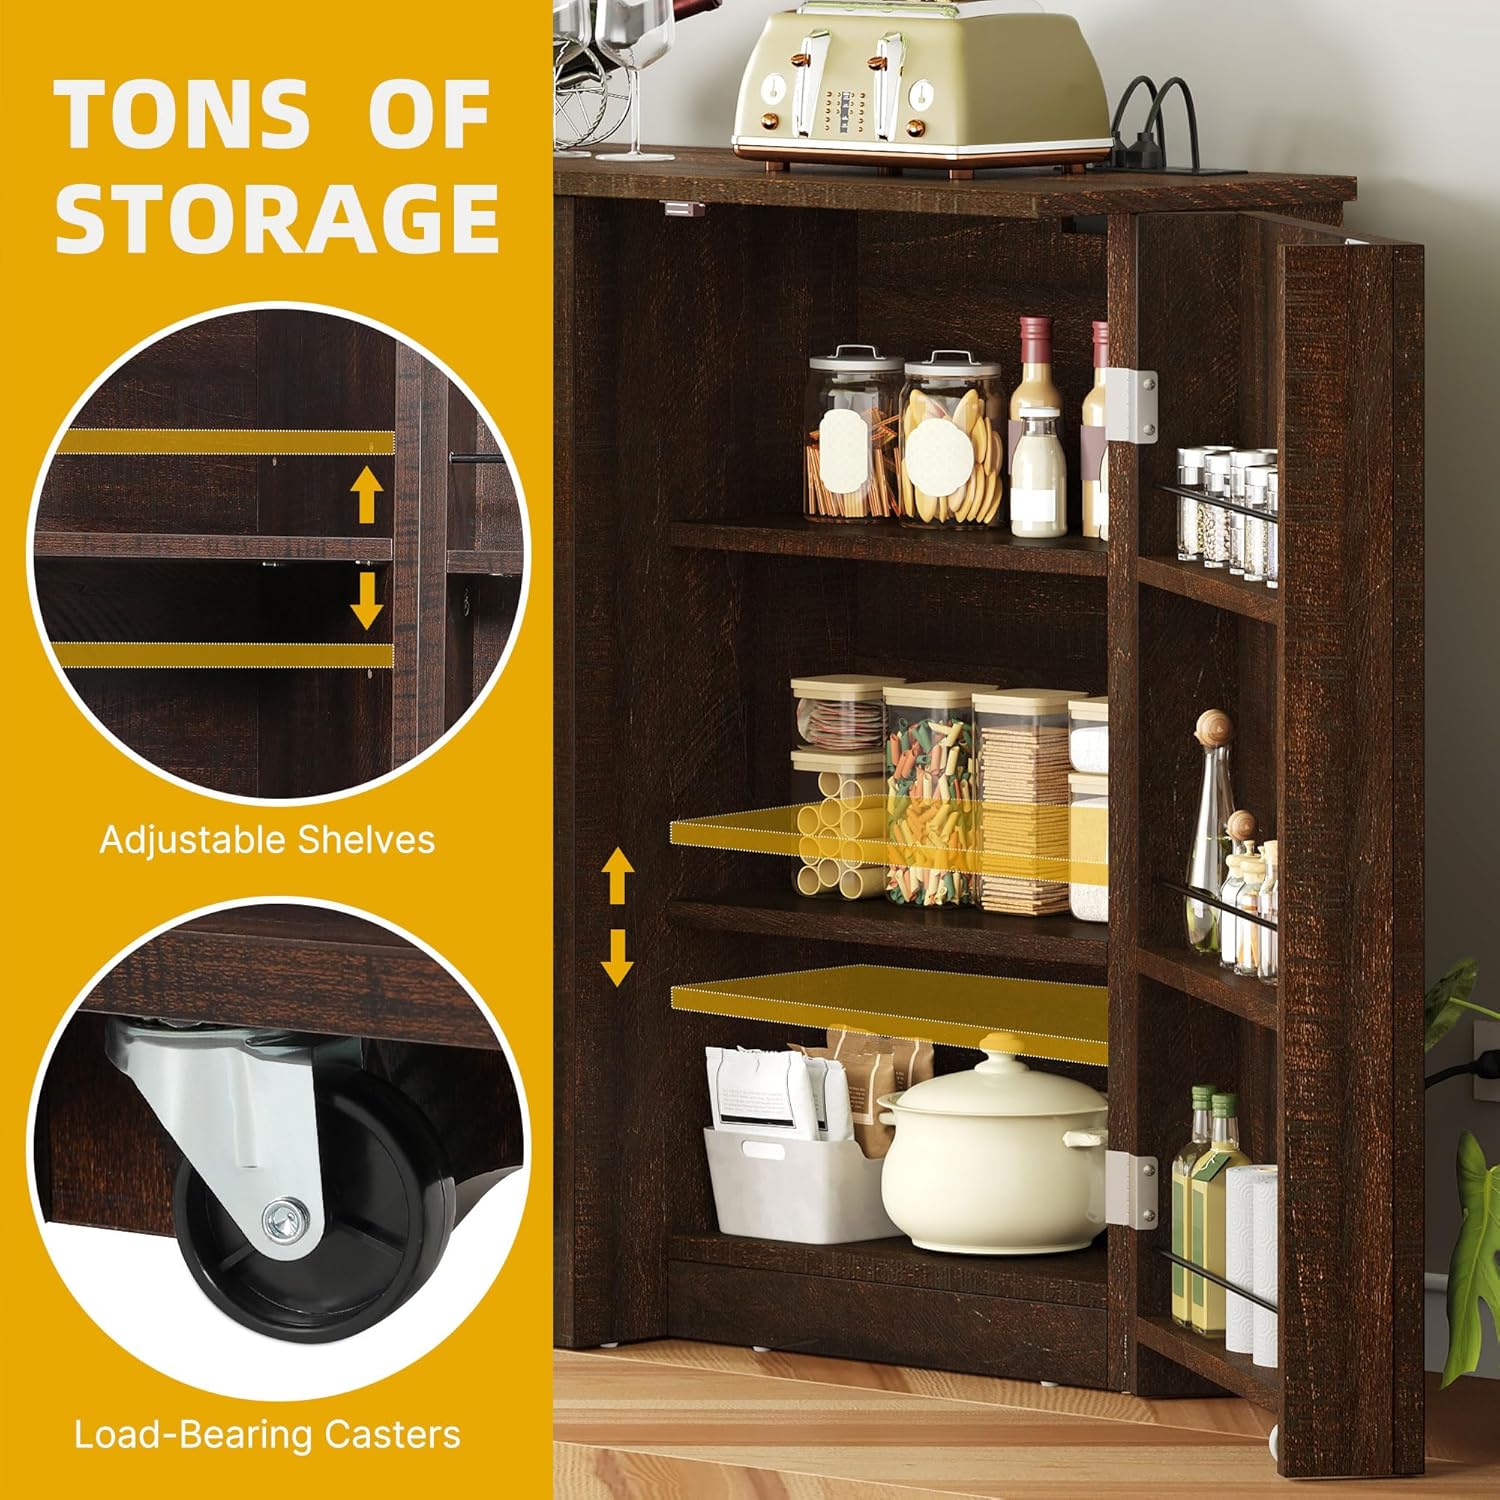
Image 4.2: The side storage cabinet with adjustable shelves provides ample space for organizing kitchen items.
5. Maintenance
To maintain the appearance and longevity of your kitchen island, wipe it with a damp cloth. Avoid harsh chemicals or abrasive cleaners that may damage the finish. Ensure the power strip is unplugged before cleaning.
6. Specifications
| Feature | Detail |
|---|---|
| Brand | DWVO |
| Model Number | MADWVsZbac |
| Material | Engineered Wood |
| Color | Brown Oak |
| Product Dimensions (D x W x H) | 14.17" x 58.3" x 37.4" |
| Item Weight | 108.02 Pounds |
| Storage Volume (Trash Bins) | 13 Gallons (per compartment) |
| Number of Doors | 2 (tilt-out) |
| Number of Shelves | 1 (adjustable) |
| Power Outlet | 2 AC Outlets (120V/12A), 2 USB Ports (5V/2A) |
| Power Cord Length | 6.5 Feet |
| Mounting Type | Floor Mount (with wall mounting hardware included) |
| Required Assembly | Yes |
7. Troubleshooting
If you encounter any issues with your DWVO Kitchen Island, please refer to the following common solutions:
- Power Outlet Not Working: Ensure the power cord is securely plugged into a functional wall outlet. Check if the wall outlet itself is receiving power.
- Doors Not Tilting Smoothly: Check for any obstructions in the tilt-out mechanism. Ensure the bins are correctly placed and not overfilled.
- Stability Concerns: Verify that all assembly hardware is tightened. If not already installed, utilize the provided wall mounting hardware to secure the island to a wall.
- Missing Parts or Damaged Components: If you find any parts missing or damaged during assembly, please contact customer support immediately.
8. Warranty & Support
For warranty information or further assistance, please refer to the purchase documentation or contact DWVO customer support directly. Contact details are typically available on the manufacturer's website or through your retailer.