
1. Introduction
This manual provides detailed instructions for the installation, operation, and maintenance of your Podofo 10.1-inch Touchscreen Autoradio. This unit is specifically designed for Peugeot 107, Citroen C1, and Toyota Aygo models, offering advanced features like wireless Apple CarPlay, wired Android Auto, Bluetooth, GPS navigation, WiFi connectivity, and a high-definition rear camera. Please read this manual thoroughly before using the product to ensure proper function, safety, and to maximize your user experience.
2. Package Contents
Please check the package contents upon unboxing. If any items are missing or damaged, contact customer support immediately.
- 1 x Autoradio (including frame)
- 1 x Rear Camera
- 1 x Canbus
- 3 x Power Cable (choose the one suitable for your car)
- 1 x GPS Antenna
- 1 x Rear Camera Input Cable
- 1 x External Microphone
- 1 x RCA Cable
- 2 x USB Cable
- 1 x Installation Tools
- 1 x User Manual (English version)
- Installation Accessories

Image: All components included in the Podofo Autoradio package.
3. Setup and Installation
Professional installation is highly recommended. Ensure the vehicle's battery is disconnected before starting any installation work to prevent electrical damage or injury.
3.1 Pre-Installation Check
Verify the product fits your specific vehicle model (Peugeot 107, Citroen C1, or Toyota Aygo). Compare your original central console with the product dimensions and design to confirm compatibility. If unsure, consult with a professional installer or contact customer support.

Image: Comparison of car dashboard before and after Podofo Autoradio installation.
3.2 Wiring Diagram (General Guidelines)
- Power Connection: Connect the appropriate power cable from the three provided to your car's wiring harness. Ensure correct polarity for ACC (Accessory), B+ (Constant Power), and GND (Ground). Incorrect wiring can damage the unit or vehicle.
- CANBUS Connection: If your vehicle requires CANBUS for steering wheel controls, vehicle information display, or other integrated functions, connect the provided CANBUS decoder. Follow the specific wiring instructions for your vehicle model.
- GPS Antenna: Mount the GPS antenna in a location with a clear view of the sky, typically on the dashboard or under the windshield. Ensure it is not obstructed by metal objects. Connect the antenna cable to the GPS input on the autoradio.
- Rear Camera: Connect the rear camera input cable to the designated port on the autoradio. Route the camera cable neatly to the rear of the vehicle and connect the camera. Ensure the camera's power supply is connected to the vehicle's reverse light circuit so it activates automatically when reverse gear is engaged.
- USB Cables: Connect the USB extension cables to the autoradio. These can be routed to the glove compartment or center console for easy access to external USB devices or for wired CarPlay/Android Auto connections.
- RCA Cables: Connect RCA cables for external amplifiers, subwoofers, or auxiliary video inputs/outputs as needed. Refer to the specific labels on the RCA ports.
- Microphone: Connect the external microphone for improved call quality. Position it near the driver's head, such as on the sun visor or A-pillar, ensuring it is not obstructed.
3.3 Mounting the Unit
- Carefully insert the autoradio with its custom frame into the dashboard opening. Ensure all cables are tucked away and not pinched.
- Secure the unit using the vehicle's mounting brackets or screws. Do not overtighten.
- Reconnect the vehicle's battery. Turn on the ignition and test all functions (power, audio, touch screen, camera, GPS, Bluetooth) before fully reassembling the dashboard trim panels.
4. Operating Instructions
4.1 Power On/Off
The unit will power on automatically when the vehicle's ignition is turned on. To manually power off, press and hold the power button (if available on the unit's interface) or simply turn off the vehicle ignition.
4.2 Wireless Apple CarPlay & Wired Android Auto / Mirror Link
- Apple CarPlay (Wireless/Wired): For wireless CarPlay, ensure your iPhone's Bluetooth and Wi-Fi are on. Pair your iPhone with the autoradio via Bluetooth. Follow the on-screen prompts to enable CarPlay. For wired CarPlay, connect your iPhone using a USB cable to one of the unit's USB ports.
- Android Auto (Wired): Connect your Android phone via a USB cable to one of the unit's USB ports. Ensure the Android Auto app is installed and updated on your phone. Follow the on-screen prompts to initiate Android Auto.
- Mirror Link (Wired): Connect your smartphone (iOS or Android) via a USB cable. Select the Mirror Link application on the autoradio's main menu and follow the specific instructions displayed on the screen to mirror your phone's display onto the autoradio.

Image: Overview of Apple CarPlay, Android Auto, and Mirror Link features.
4.3 Bluetooth Connectivity
- Go to the Bluetooth application or settings on the autoradio's main menu.
- Enable Bluetooth on your mobile phone and search for available devices.
- Select the autoradio's Bluetooth name (e.g., "PODOFO_BT" or similar) from your phone's list and confirm pairing.
- Once connected, you can make/receive hands-free calls, access your phonebook, and stream audio from your phone to the autoradio.
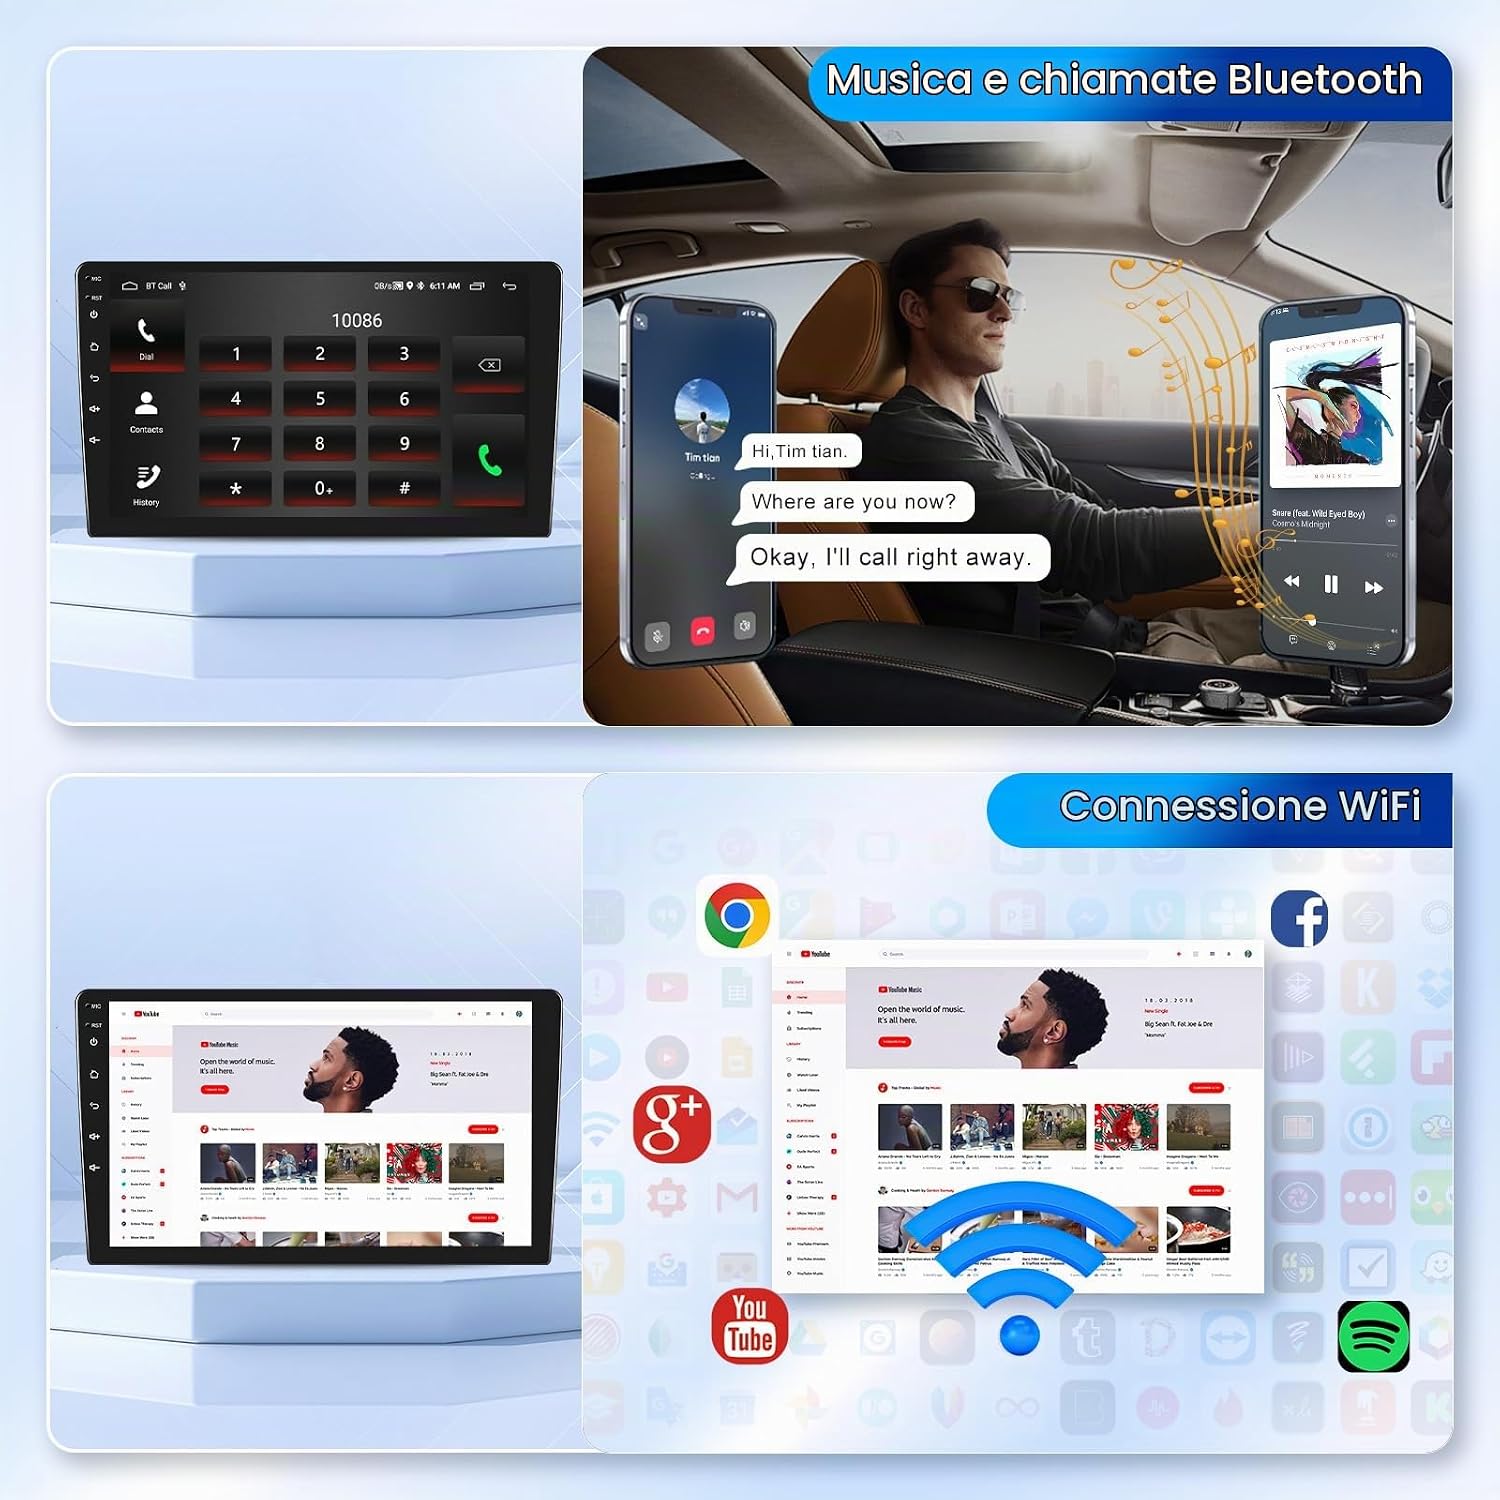
Image: Bluetooth music and hands-free calling interface.
4.4 WiFi Connection
- Navigate to the WiFi settings within the autoradio's system settings menu.
- Turn on WiFi and allow the unit to scan for available networks.
- Select your desired network (e.g., your mobile hotspot or a public Wi-Fi network) and enter the password if required.
- Once connected, you can browse the internet, download applications from the app store, and use online services.

Image: WiFi connection enabling online apps like YouTube.
4.5 GPS Navigation
The unit comes pre-installed with the "HereWego" maps application for offline navigation. You can also download and use other preferred navigation apps (e.g., Google Maps, Waze) from the app store once connected to WiFi. Ensure the GPS antenna is properly installed and has a clear view of the sky for optimal signal reception and accurate positioning.

Image: GPS navigation and FM/RDS radio interfaces.
4.6 FM/RDS Radio
Access the Radio application from the main menu. You can manually tune to stations, perform automatic scans to find available frequencies, and save your favorite stations as presets (up to 6 channels). The RDS (Radio Data System) feature displays station information, song titles, and other data where available.
4.7 Steering Wheel Control
If your vehicle is equipped with steering wheel controls and the CANBUS decoder is correctly connected and configured, you can map your vehicle's steering wheel buttons to control the autoradio functions (e.g., volume, track skip, mode). Go to the "Steering Wheel Control" settings in the unit's menu and follow the on-screen instructions to program each button.

Image: HD rear camera view and steering wheel control setup.
4.8 HD Rear Camera
When the vehicle is put into reverse gear, the display will automatically switch to the rear camera view, providing a clear image to assist with parking and maneuvering. The included camera offers 1280x720 pixel resolution, is waterproof, and features night vision capabilities for improved visibility in low-light conditions. Dynamic guidelines may also be displayed to aid in parking.
4.9 Split Screen Function
This feature allows you to run two applications simultaneously on the screen, such as navigation on one side and music playback or radio on the other. To activate split-screen mode, typically long-press the recent apps button or drag an app to one side of the screen. Refer to the system settings or on-screen prompts for specific instructions on how to activate and manage split-screen mode.

Image: Split-screen functionality displaying two apps concurrently.
4.10 HiFi Sound
The unit supports high-fidelity audio output, providing a rich and clear sound experience. You can customize your listening experience by adjusting equalizer settings, balance, fader, and other audio preferences available in the sound settings menu. Experiment with different settings to find your preferred audio profile.

Image: HiFi sound interface with audio visualization.
5. Maintenance
- Screen Cleaning: Use a soft, lint-free microfiber cloth to gently wipe the touchscreen. For stubborn smudges, slightly dampen the cloth with water or a screen-safe cleaner. Do not use abrasive cleaners, alcohol, or solvents, as these can damage the screen coating.
- Software Updates: Periodically check for software updates from the manufacturer's official website or through the unit's system settings (if an update feature is available). Keeping the software updated ensures optimal performance, security, and access to new features.
- General Care: Avoid exposing the unit to extreme temperatures (hot or cold), direct sunlight for prolonged periods, or excessive moisture. Ensure proper ventilation around the unit to prevent overheating.
6. Troubleshooting
- No Power:
- Check all power connections (B+, ACC, GND) to ensure they are secure and correctly wired. Verify that the vehicle's fuse for the radio is not blown. Test the power supply at the harness connectors.
- No Sound:
- Check all speaker connections for proper polarity and secure contact. Verify volume levels on the autoradio and ensure it is not muted. Check audio output settings and ensure external amplifiers (if used) are powered on and functioning.
- GPS Signal Lost/Weak:
- Ensure the GPS antenna is properly connected to the unit and has a clear, unobstructed view of the sky. Relocate the antenna if it is under metal or other signal-blocking materials. Check GPS settings in the unit.
- Bluetooth Connection Issues:
- Ensure Bluetooth is enabled on both the autoradio and your mobile phone. Delete previous pairings from both devices and try reconnecting. Restart both the autoradio and your phone. Ensure your phone is within range.
- Rear Camera Not Displaying:
- Check the camera's power connection (ensure it's connected to the reverse light circuit) and the RCA video input cable connection to the autoradio. Verify the camera itself is functional. Some units require a specific reverse trigger wire to be connected.
- Steering Wheel Controls Not Working:
- Verify the CANBUS decoder is correctly connected and configured for your vehicle model. Reconfigure the steering wheel control settings in the unit's menu, ensuring each button is properly mapped.
7. Specifications
| Brand | Podofo |
| Model Number | B0DC9YHJF7 |
| Screen Size | 10.1 inches |
| RAM | 2GB |
| ROM | 64GB |
| Operating System | Android |
| Connectivity | USB, RCA, Bluetooth, WiFi |
| Special Features | Wireless Apple CarPlay, Wired Android Auto, Mirror Link, GPS Navigation, FM/RDS Radio, HD Rear Camera, Steering Wheel Control, Split Screen, HiFi Sound |
| Output Power | 45 Watts (per channel, typical) |
| Dimensions (approx.) | 9.1D x 26W x 26.5H cm (Unit with frame) |
8. Warranty and Support
Podofo products typically come with a manufacturer's warranty. Please refer to your purchase documentation or the product listing for specific warranty terms and duration. For technical support, troubleshooting assistance, or warranty claims, please contact Podofo customer service directly.
- Customer Support Email: podofo@yeah.net
- Support Services: Podofo offers 30 Days Exchange or Return, 365 Days Technical Support, and 24/7 Customer Service.

Image: Podofo After-Sales Service details.

Image: Guide on how to contact the seller for support.


