
1. Product Overview
This manual provides detailed instructions for the installation and use of the A-MIND LCD Screen Replacement Kit for the Motorola Moto G 5G 2024. This kit is designed to replace a damaged or non-functional display, restoring your device's visual and touch capabilities. Please read all instructions carefully before beginning the replacement process.

Image 1.1: Overview of the A-MIND LCD Screen Replacement Kit for Motorola Moto G 5G 2024, highlighting its features and compatibility.
2. Compatibility
This LCD screen replacement kit is specifically designed for the following Motorola Moto G 5G 2024 models:
- Motorola Moto G 5G 2024 (Model: XT2417)
- Motorola Moto G 5G 2024 (Model: XT2417-1)
- Motorola Moto G 5G 2024 (Model: XT2417D)
Important: This screen is an LCD without a frame and is not an AMOLED original. It is NOT compatible with Moto G 5G Plus or Moto G Power 5G 2024 models. Please verify your device model number before purchase to ensure correct identification and avoid potential damage.
3. What's Included
The A-MIND LCD Screen Replacement Kit typically includes the following components:
- LCD Display Touch Screen Digitizer Assembly (without frame)
- Basic repair tools (e.g., screwdrivers, pry tools, suction cup)
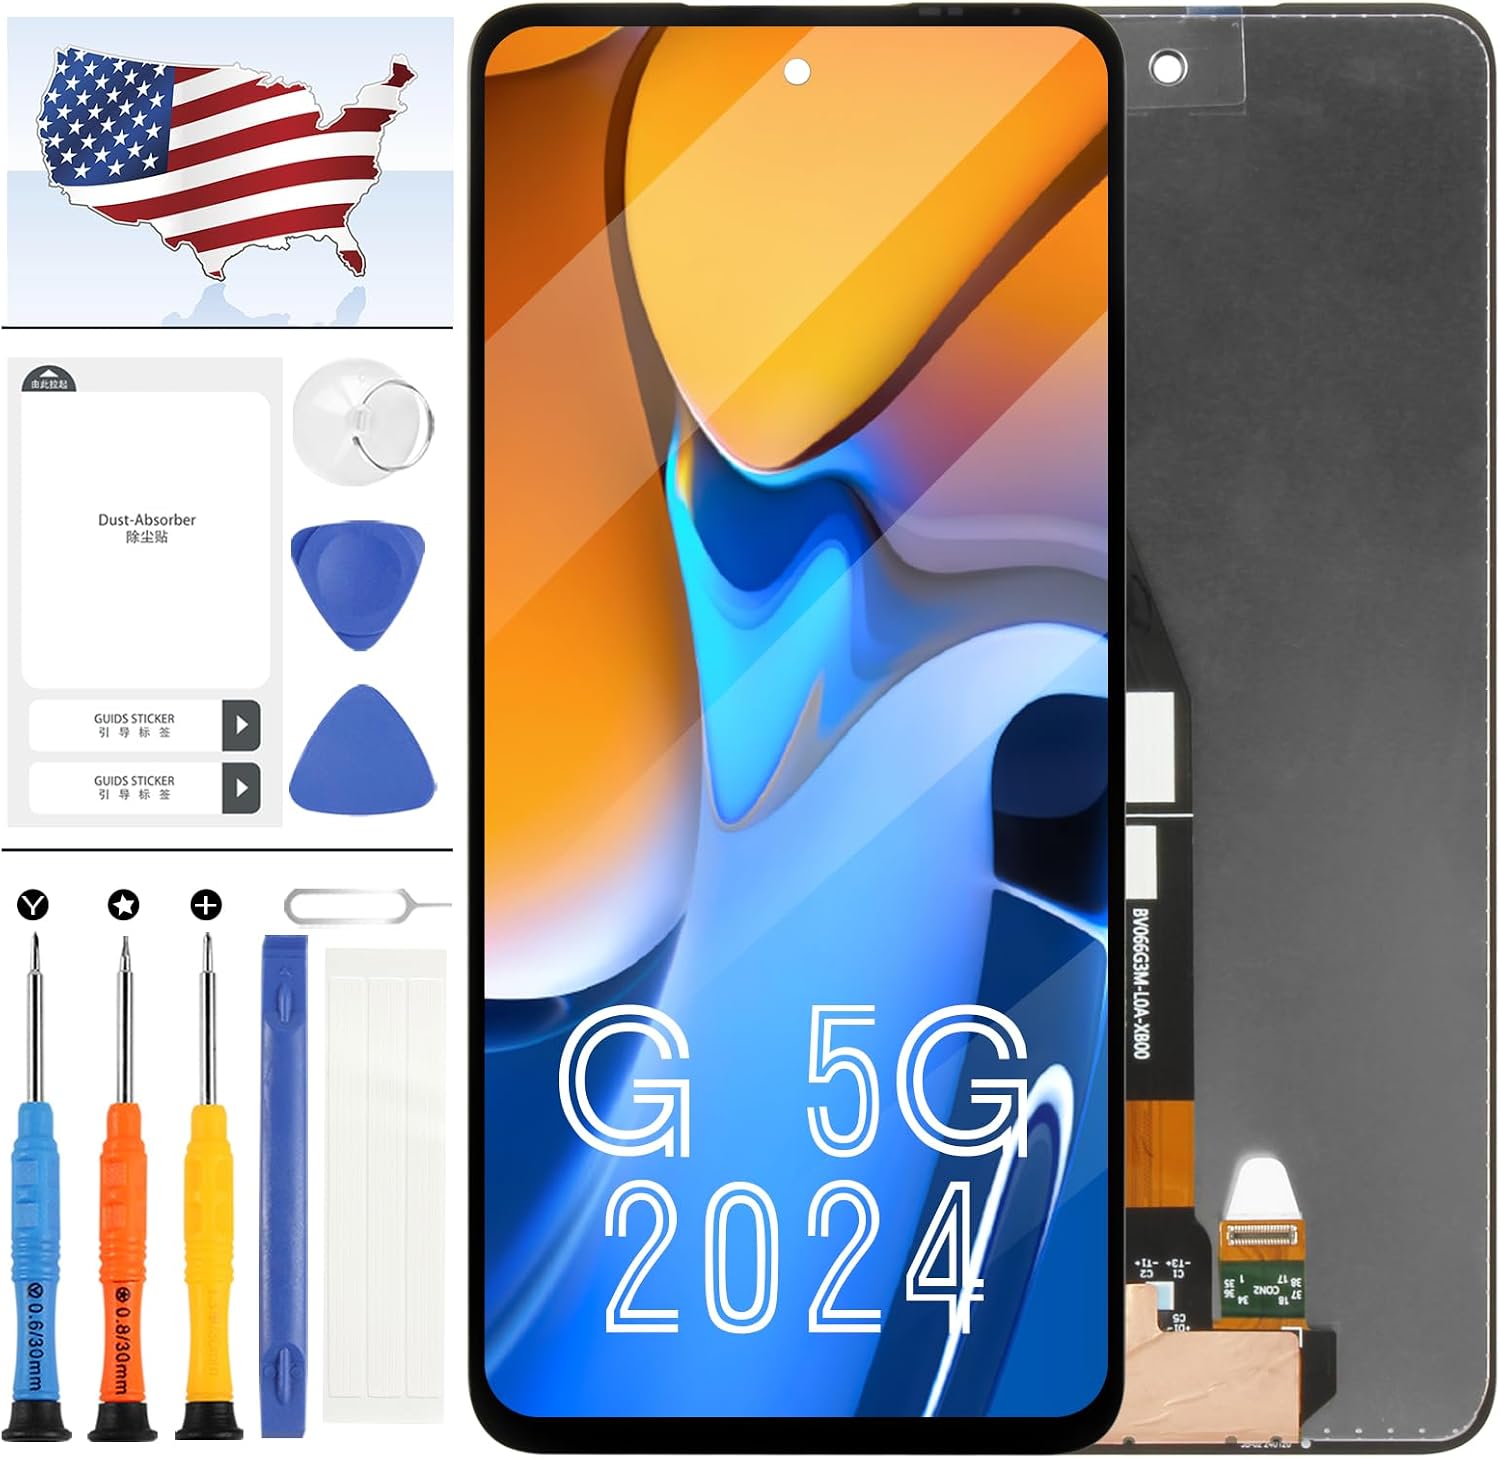
Image 3.1: The replacement LCD screen and the accompanying set of repair tools provided in the kit.
4. Before You Begin Installation
Replacing a phone screen requires precision and care. It is highly recommended to seek professional assistance if you are not experienced with phone repairs. Incorrect installation can lead to further damage to your device.
- No Printed Instructions: This kit does not include printed installation instructions. It is advised to search for installation videos specific to the Motorola Moto G 5G 2024 LCD screen replacement on platforms like YouTube.
- No Frame: This replacement screen does not come with a pre-attached frame. This means you will need to carefully transfer components from your old screen's frame or attach the new screen to your existing frame.

Image 4.1: The replacement screen without a frame, emphasizing the need for careful handling during installation.
5. Installation Guide
Follow these general steps for installation. Refer to online video guides for visual assistance.
- Power Off Device: Ensure your Motorola Moto G 5G 2024 is completely powered off before starting.
- Remove Battery: For safety, disconnect and remove the device's battery before proceeding with screen replacement. This prevents short circuits and potential damage.
- Disassemble Device: Carefully open your phone, typically by heating the edges to loosen adhesive, then using pry tools to separate the back cover and access internal components.
- Disconnect Old Screen: Locate and carefully disconnect the flex cables connecting the old screen to the motherboard.
- Remove Old Screen: Gently remove the damaged screen from the device frame. Clean any old adhesive residue from the frame.
- Connect New Screen (Test First): Before applying any adhesive, connect the flex cables of the new screen to the motherboard. Reconnect the battery temporarily.
- Initial Test: Power on your device and thoroughly test the new screen's functionality (touch response, display quality, dead pixels, color accuracy). Do not proceed with full installation until the screen works perfectly.
- Power Off and Disconnect: If the test is successful, power off the device and disconnect the battery and new screen.
- Apply Adhesive and Install: Apply new adhesive to the device frame and carefully seat the new screen. Reconnect all flex cables and the battery.
- Reassemble Device: Carefully reassemble your phone, ensuring all components are properly seated and secured.

Image 5.1: Illustrates the delicate nature of phone repair, showing a screwdriver being used on internal components.
6. Testing the New Screen
After connecting the new screen but before permanently adhering it, perform a comprehensive test:
- Visual Inspection: Check for any scratches, dead pixels, or lines on the display.
- Touch Functionality: Test the entire screen for touch response. Drag an icon across the screen to ensure all areas respond.
- Display Quality: Verify colors, brightness, and clarity.

Image 6.1: Top section of the screen, highlighting pre-shipment testing.

Image 6.2: Flex cable area of the screen, confirming rigorous testing.
7. Operating Your Device with the New Screen
Once successfully installed, your new A-MIND LCD screen will restore your device's display and touch capabilities. The screen is designed to provide:
- Sensitive Touch: Enjoy responsive and accurate touch interaction for all your applications and navigation.
- High Resolution: Experience clear and detailed visuals for media consumption and daily use.
- High Brightness: The display offers good brightness levels for comfortable viewing in various lighting conditions.

Image 7.1: Illustrates the sensitive touch functionality of the screen.

Image 7.2: Depicts the high resolution capabilities of the display.

Image 7.3: Demonstrates the improved brightness of the replacement screen.
8. Maintenance
To ensure the longevity and optimal performance of your new screen, follow these maintenance tips:
- Clean Gently: Use a soft, lint-free cloth, slightly dampened with water or a screen cleaner, to wipe the screen. Avoid harsh chemicals or abrasive materials.
- Protect from Scratches: Consider using a screen protector to prevent scratches from keys, coins, or other objects.
- Avoid Extreme Temperatures: Do not expose your device to extreme heat or cold, as this can affect screen performance and battery life.
- Handle with Care: Avoid dropping your device or subjecting it to strong impacts, which can damage the screen.
9. Troubleshooting
If you encounter issues after installation, consider the following common problems and solutions:

Image 9.1: Common screen issues that this replacement kit aims to resolve.
Common Issues and Solutions:
- Screen Not Turning On / Stuck on Logo:
- Ensure all flex cables are securely connected.
- Verify the battery is properly connected and charged.
- Perform a hard reset on your device (refer to your phone's original manual for instructions).
- If the issue persists, the screen or its connection may be faulty. Re-check connections or consider professional inspection.
- Touch Not Working / Unresponsive:
- Check the digitizer flex cable connection.
- Ensure no debris or adhesive is interfering with the touch sensor area.
- Restart the device.
- Display Problems (Dead Pixels, Lines, Wrong Colors):
- Verify the display flex cable is correctly and firmly seated.
- Ensure no pressure is being applied to the screen from inside the device.
- If these issues appear immediately after installation, the screen itself might be defective.
- Screen Detaching / Not Sealing Properly:
- Ensure the old adhesive was completely removed and the frame was clean before applying new adhesive.
- Use appropriate adhesive and allow sufficient curing time.
If you continue to experience issues, please refer to the 'Warranty and Support' section for assistance.
10. Specifications
Key specifications for the A-MIND LCD Screen Replacement for Motorola Moto G 5G 2024:
- Compatible Models: Motorola Moto G 5G 2024 (XT2417, XT2417-1, XT2417D)
- Display Type: LCD (Not AMOLED Original)
- Screen Size: 6.6 inches
- Resolution: 720 x 1612 Pixels
- Pixel Density: Approximately 267 ppi
- Color: Black
- Item Weight: 1.6 ounces
- Manufacturer: A-MIND
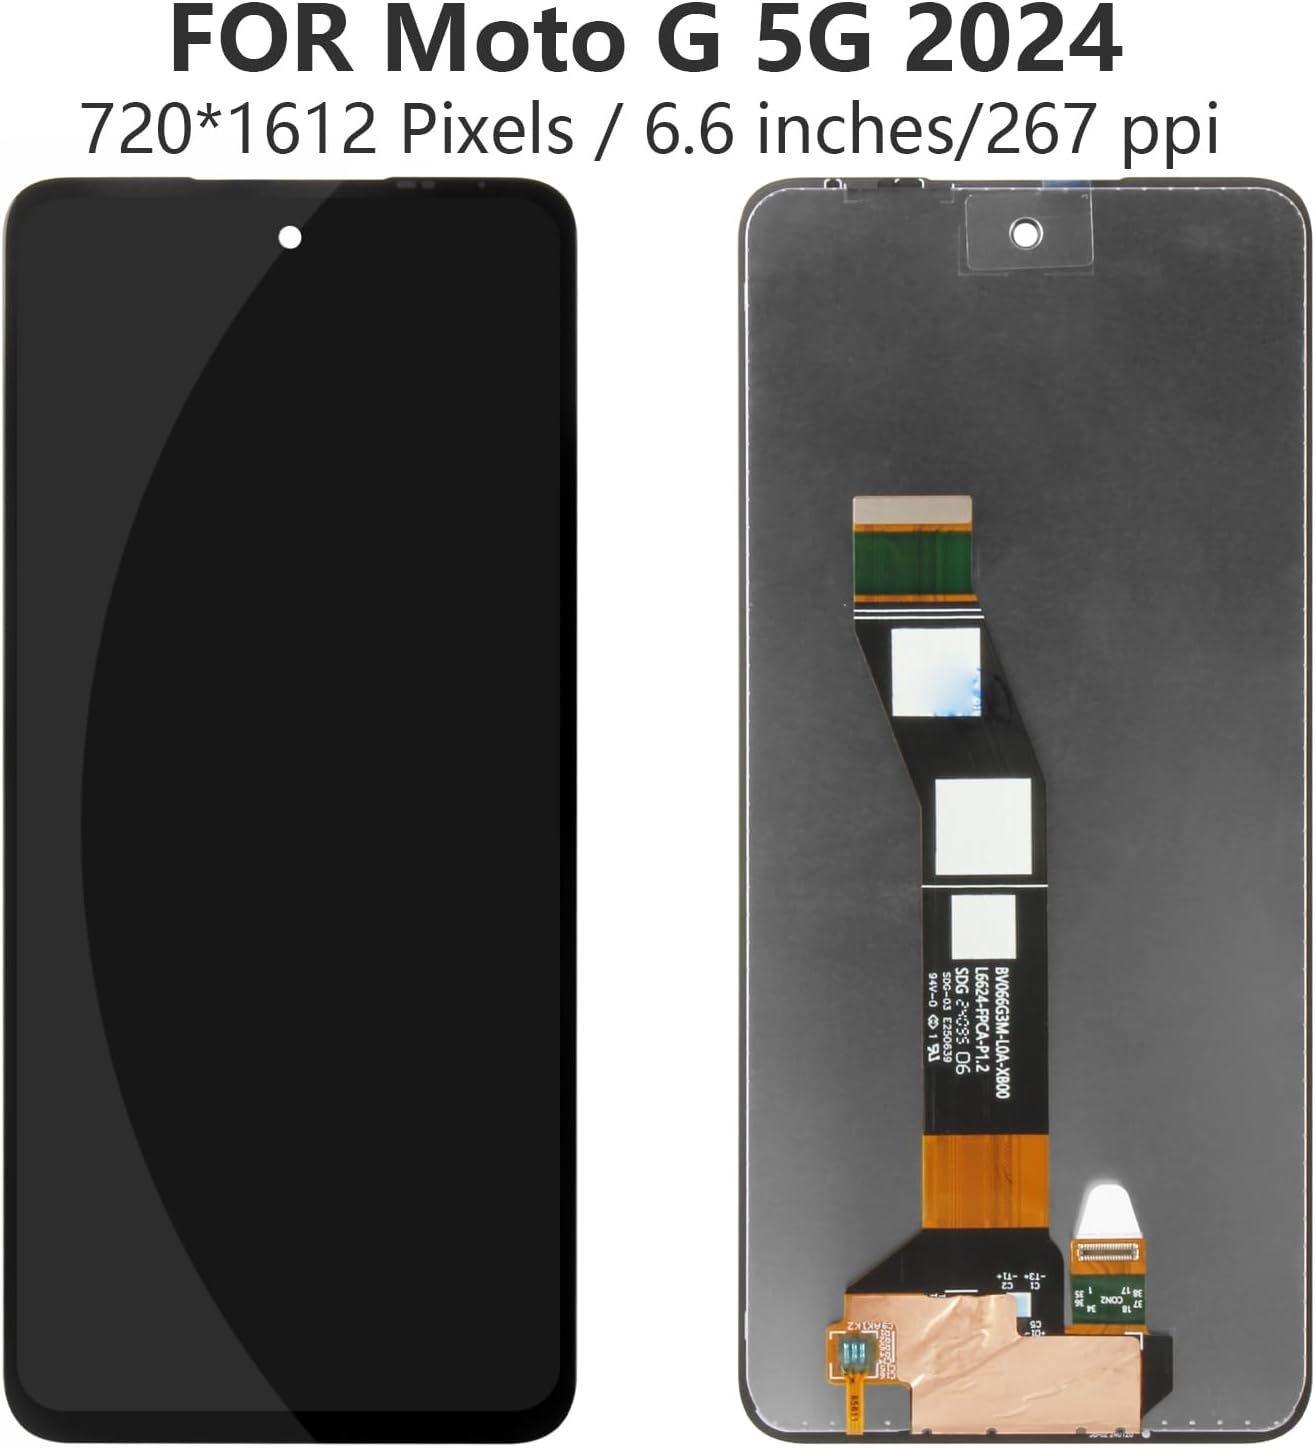
Image 10.1: Front and back of the screen, displaying key specifications like size and resolution.
11. Warranty and Support
A-MIND is committed to providing quality products and customer satisfaction. Should you encounter any issues with your Motorola Moto G 5G 2024 LCD touch screen upon receipt or during installation, please contact our customer service team.
- After-Sale Service: We will promptly address any concerns and offer appropriate solutions once the specifics of the issue are understood.
- Contact: Please refer to your purchase platform or packaging for specific contact details for A-MIND customer support.
Rest assured of your purchase from our store. We aim to provide a satisfactory resolution for any product-related concerns.