
NAILGIRLS 3F1500
NAILGIRLS 3F1500 LED Full Spectrum Grow Light User Manual
Model: 3F1500 | Brand: NAILGIRLS
1. Introduction
This manual provides detailed instructions for the safe and efficient operation of your NAILGIRLS 3F1500 LED Full Spectrum Grow Light. Please read this manual thoroughly before installation and use, and retain it for future reference.
2. Safety Information
- Always disconnect power before installation, maintenance, or moving the light.
- Do not look directly at the LED lights when the unit is operating. Eye protection is recommended.
- Ensure the light is installed in a well-ventilated area to prevent overheating.
- Keep the light away from water and other liquids. This product is for indoor use only.
- Do not attempt to modify or repair the unit yourself. Contact qualified personnel for service.
- Ensure the hanging system is secure and can support the weight of the grow light.
3. Package Contents
Verify that all items are present in the package:
- 1 x NAILGIRLS 3F1500 LED Grow Light
- 1 x Adjustable Rope Hanger
- 1 x Digital Temperature Hygrometer
- 1 x Power Cord (also used for Daisy Chain connection)
- 1 x User Manual (this document)
4. Product Features
The NAILGIRLS 3F1500 LED Grow Light is designed to provide optimal lighting for various plant growth stages with the following key features:
- Full Spectrum Lighting: Provides a comprehensive light spectrum essential for photosynthesis, including blue, red, and warm white light. Features 120 specialized red LEDs to enhance plant yield.
- Energy-saving Technology: Utilizes high-tech double chips for efficient light output, reducing energy consumption compared to traditional HPS systems. Achieves up to 90% light utilization.
- Efficient Cooling System: Equipped with two high-speed cooling fans and an integrated aluminum heat sink to effectively dissipate heat, maintaining an optimal operating temperature of 50°F to 60°F and extending the light's lifespan.
- Veg & Bloom Switches: Independent switches allow for customized light spectrums tailored to specific plant growth stages:
- Veg Switch: Activates blue and white LEDs, ideal for seed germination, seedling growth, and early vegetative stages.
- Bloom Switch: Activates red and white LEDs, optimized for flowering and blooming stages.
- Veg + Bloom Switches: Both switches can be activated simultaneously for maximum light intensity and performance during critical growth phases.
- Daisy Chain Function: Allows multiple grow lights to be connected in series using a single power outlet. For safety, it is recommended to connect no more than 3 units in a single chain, with a maximum of 5 units.
5. Setup Instructions
- Unpack the Grow Light: Carefully remove all components from the packaging. Inspect the light for any signs of damage.
- Install the Adjustable Rope Hanger: Attach the adjustable rope hanger to the mounting points on the top of the grow light. Ensure the hangers are securely fastened.

Image: The NAILGIRLS 3F1500 LED Grow Light showing its top-mounted hanging points and included adjustable rope hanger.
- Mount the Grow Light: Hang the grow light from a sturdy support structure (e.g., ceiling, grow tent frame) using the adjustable rope hanger. Adjust the height according to the plant's growth stage (refer to Section 6.2 for recommended heights).
- Connect Power: Plug the provided power cord into the power input port on the grow light. Then, plug the other end of the power cord into a standard electrical outlet.
- Daisy Chain Connection (Optional): If connecting multiple lights, use the provided power cord to link the output of one light to the input of the next. Ensure the total wattage does not exceed the circuit's capacity. It is recommended to connect no more than 3 lights in a single daisy chain for optimal safety and performance.

Image: Illustration of the daisy chain function, demonstrating how multiple grow lights can be connected in series.
- Position the Digital Temperature Hygrometer: Place the digital temperature hygrometer within your growing area to monitor environmental conditions.
6. Operating Instructions
6.1. Using the Veg & Bloom Switches
The grow light features two independent switches to optimize the light spectrum for different plant growth stages:
- Veg Switch (Blue & White LEDs): Turn on the "VEG" switch for plants in the germination, seedling, or early vegetative stages. This spectrum promotes strong stem and leaf development.
- Bloom Switch (Red & White LEDs): Turn on the "BLOOM" switch when plants enter the flowering or fruiting stages. This spectrum encourages flower and fruit production.
- Both Switches (Veg + Bloom): For maximum light intensity and comprehensive spectrum during peak growth, flowering, or fruiting stages, activate both the "VEG" and "BLOOM" switches.
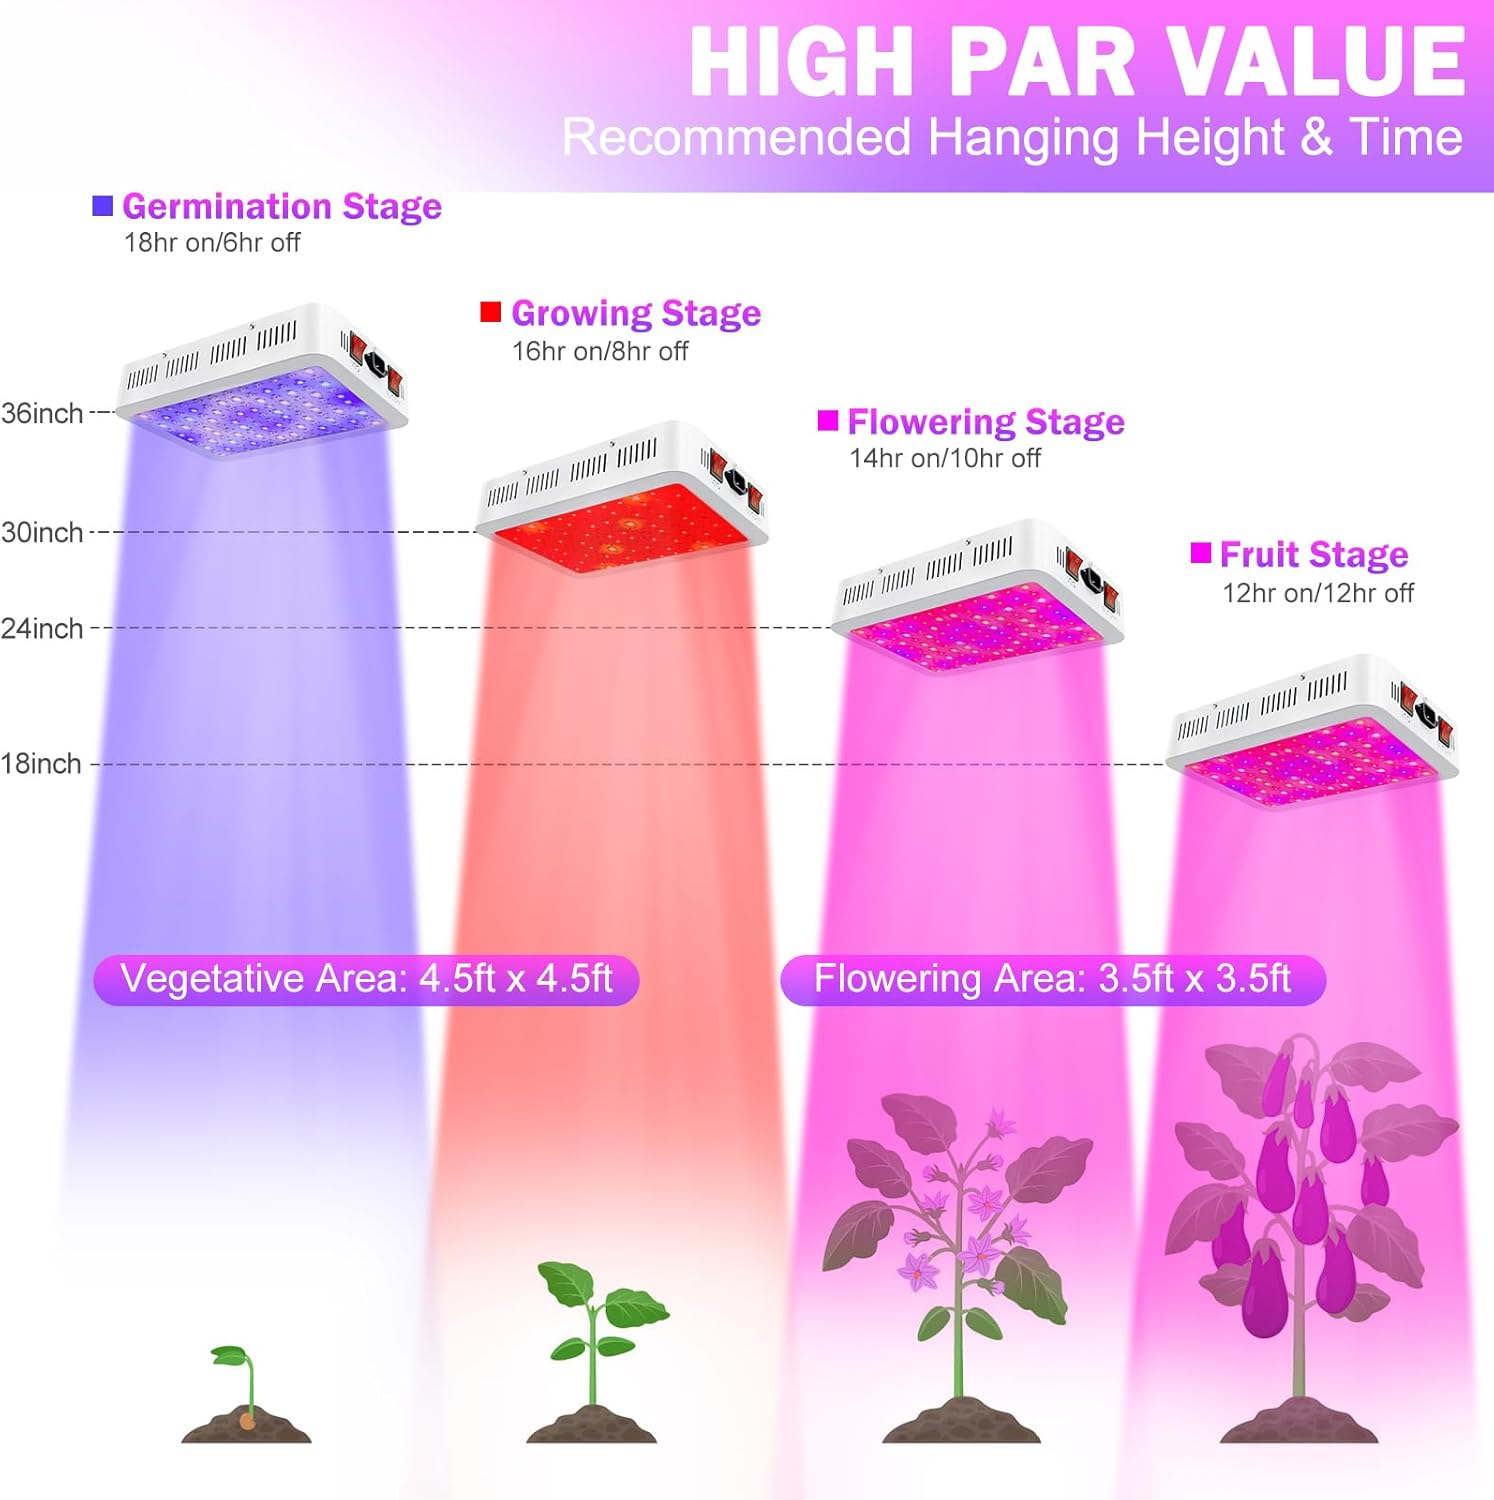
Image: Visual representation of the three lighting modes (Veg, Bloom, Veg+Bloom) and their corresponding plant growth stages.
6.2. Recommended Hanging Height and Lighting Schedule
Adjust the hanging height and lighting duration based on your plant's current growth stage to ensure optimal development and coverage.
| Growth Stage | Recommended Height | Lighting Schedule | Coverage Area |
|---|---|---|---|
| Germination | 30-36 inches | 18 hours on / 6 hours off | Veg: 4.5x4.5 ft |
| Vegetative (Growing) | 24-30 inches | 18 hours on / 6 hours off | Veg: 4.5x4.5 ft |
| Flowering | 18-24 inches | 14 hours on / 10 hours off | Flower: 3.5x3.5 ft |
| Fruiting | 18 inches | 12 hours on / 12 hours off | Flower: 3.5x3.5 ft |

Image: Visual guide for optimal hanging height and light duration during germination, growing, flowering, and fruiting stages.
The integrated digital temperature hygrometer can be used to monitor the ambient temperature and humidity, allowing you to adjust your growing environment as needed for optimal plant health.
7. Maintenance
- Cleaning: Periodically clean the light fixture and LED lenses with a soft, dry cloth to ensure maximum light output. Do not use abrasive cleaners or solvents. Ensure the light is unplugged before cleaning.
- Cooling System: The grow light features an efficient cooling system with fans and an aluminum heat sink. Ensure that the air vents are not obstructed to allow for proper airflow and heat dissipation.

Image: Illustration of the grow light's cooling system, highlighting the fans and heat dissipation design.
- Inspection: Regularly inspect the power cord and hanging system for any signs of wear or damage. Replace any damaged components immediately.
8. Troubleshooting
If you encounter issues with your grow light, refer to the following common problems and solutions:
- Light Does Not Turn On:
- Check if the power cord is securely plugged into both the light and the electrical outlet.
- Verify that the power outlet is functional by plugging in another device.
- Ensure both the "VEG" and "BLOOM" switches are in the "ON" position if you intend to use both.
- Partial LEDs Not Lighting Up:
- If only one section (e.g., red or blue) is not lighting, check the corresponding "VEG" or "BLOOM" switch.
- If individual LEDs are out, this is typically normal for LED arrays and does not significantly impact performance unless a large number are affected.
- Overheating:
- Ensure the cooling fans are operating and not obstructed.
- Verify there is adequate ventilation around the grow light.
- Check the ambient room temperature; excessive room temperature can lead to higher light temperatures.
- Daisy Chain Not Working:
- Ensure all connections in the daisy chain are secure.
- Verify that the total wattage of connected lights does not exceed the recommended limit (max 5, recommended 3 units).
If these steps do not resolve the issue, please contact customer support.
9. Specifications
| Feature | Detail |
|---|---|
| Model Number | 3F1500 |
| Brand | NAILGIRLS |
| Wattage | 1500 Watts |
| Light Source Type | Light Emitting Diode (LED) |
| Spectrum | Full Spectrum (Blue, Red, Warm White) |
| Veg Coverage | 4.5 x 4.5 ft |
| Flower Coverage | 3.5 x 3.5 ft |
| Product Dimensions | 12.5"L x 8.5"W x 2.5"H |
| Item Weight | 5.79 pounds |
| Material | Aluminum |
| Cooling System | 2 High-speed fans, Aluminum heat-sink |
| Power Source | Corded Electric |
| Included Components | LED Grow Light, Adjustable Rope Hanger, Digital Temperature Hygrometer, Power Cord, User Manual |
10. Warranty and Support
For warranty information or technical support, please contact NAILGIRLS customer service through the retailer where the product was purchased or visit the official NAILGIRLS website. Please have your model number (3F1500) and purchase date available when contacting support.
For additional resources and product information, you may visit the NAILGIRLS Store on Amazon.
Ask a question about this manual
Ask about setup, troubleshooting, compatibility, parts, safety, or missing instructions. Manuals+ will review the question and use this page’s manual context to help answer it.