
1. Introduction
Thank you for choosing the ELIVED EV6012W Dual Monitor Stand. This manual provides essential information for the correct assembly, operation, and maintenance of your monitor stand. Please read these instructions carefully before installation and keep them for future reference.
The ELIVED EV6012W is a robust and versatile desk-mounted solution designed to support two monitors, enhancing your workspace ergonomics and organization. Key features include:
- Universal Compatibility: Supports most flat and curved monitors from 13 to 32 inches, with a weight capacity of 2 to 9 kg (4.4 to 19.8 lbs) per arm. Compatible with VESA mounting patterns 75x75mm and 100x100mm.
- Full Motion Adjustment: Offers a wide range of motion including tilt (+70° to -45°), swivel (180°), and rotation (360°). Height adjustment up to 440mm (17.3 inches) and arm extension up to 501mm (19.7 inches) for optimal viewing angles.
- Gas Spring System: Equipped with a durable gas spring mechanism, tested for over 20,000 lift cycles, allowing for smooth and tool-free monitor adjustments.
- Quick-Release VESA Plate: Facilitates easy attachment and detachment of monitors.
- Integrated Cable Management: Helps organize and conceal cables for a tidy workspace. Includes a dedicated slot for Allen key storage.
- Two Installation Options: Can be installed using either a C-clamp or a grommet mount.
2. Safety Information
WARNING: Failure to read and follow all instructions may result in personal injury or property damage. If you do not understand these instructions or have doubts about the safety of the installation, please contact customer support.
- Do not exceed the maximum weight capacity of 9 kg (19.8 lbs) per arm.
- Ensure your desk surface is strong enough to support the combined weight of the stand and your monitors.
- This product is designed for installation on solid wood, particle board, or metal desks. Do not install on glass desks.
- Always use the provided hardware. If any parts are missing or defective, contact ELIVED customer support.
- Keep children away during installation. Small parts may be a choking hazard.
- Tighten all screws firmly but do not overtighten. Overtightening can damage the components.
- Before adjusting the monitor arm, ensure that the monitor is securely attached and the gas spring tension is correctly set for the monitor's weight.
3. Package Contents
Please verify that all components are present and undamaged before beginning installation. If any parts are missing or damaged, please contact ELIVED customer support.
(A detailed list of parts with corresponding labels would typically be included here. As specific part names are not provided in the JSON, this section serves as a placeholder for checking contents.)
4. Specifications
| Feature | Specification |
|---|---|
| Model Number | EV6012W |
| Brand | ELIVED |
| Compatible Screen Size | 13 - 32 inches |
| Weight Capacity (per arm) | 2 - 9 kg (4.4 - 19.8 lbs) |
| VESA Compatibility | 75x75mm, 100x100mm |
| Mounting Type | Desk Mount (C-clamp or Grommet) |
| Desk Thickness (C-clamp/Grommet) | 10 - 70 mm |
| Grommet Hole Diameter | 10 - 60 mm |
| Tilt Angle | +70° to -45° |
| Swivel Angle | 180° |
| Rotation Angle | 360° |
| Max Height Adjustment | 440 mm (17.3 inches) |
| Max Arm Extension | 501 mm (19.7 inches) |
| Material | Metal |
| Color | White |
| Package Dimensions | 40.79 x 26.7 x 12.5 cm |
| Package Weight | 3.92 kg |
5. Installation Guide
Step 1: Choose Your Mounting Option
The ELIVED EV6012W offers two installation methods: C-clamp mounting or grommet mounting. Select the option that best suits your desk setup.
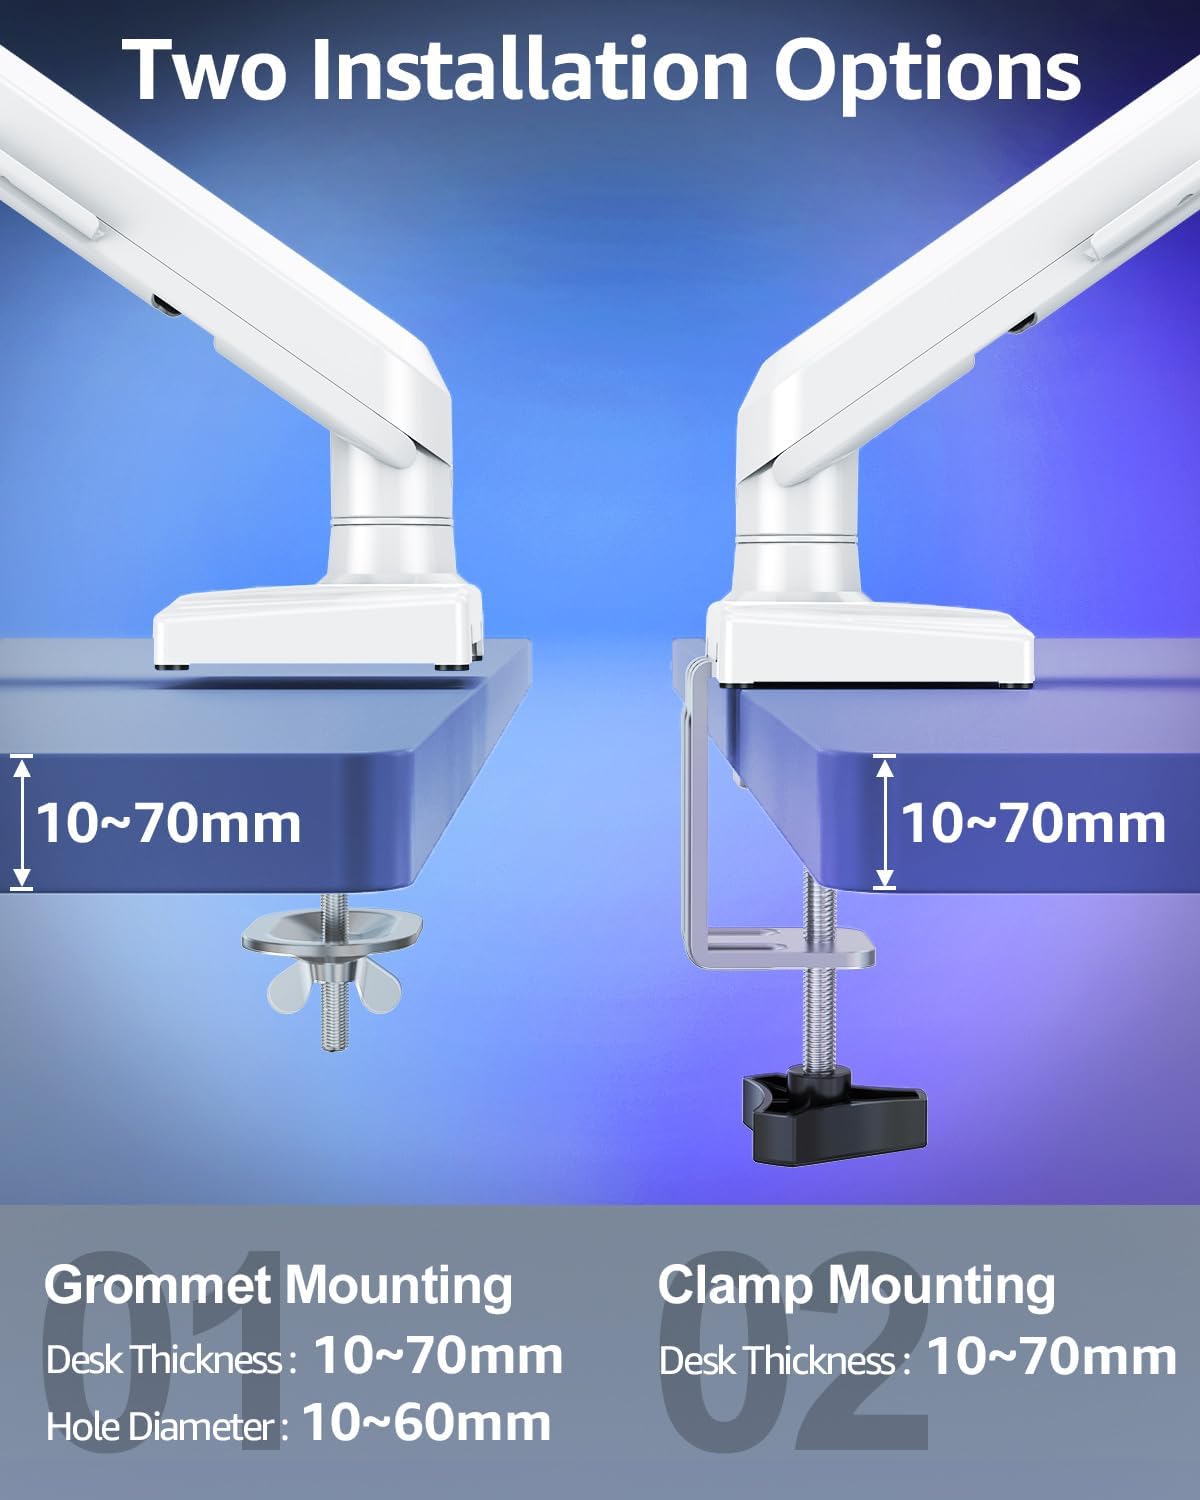
Image: Two Installation Options. This image illustrates the C-clamp mounting method on the right and the grommet mounting method on the left. Both methods are suitable for desk thicknesses between 10mm and 70mm. The grommet mount requires a hole diameter of 10mm to 60mm.
C-Clamp Mounting:
- Attach the C-clamp to the edge of your desk.
- Ensure the clamp is securely tightened to prevent movement.
- Suitable for desk thicknesses from 10mm to 70mm.
Grommet Mounting:
- Insert the grommet bolt through the existing hole in your desk.
- Secure the base from underneath the desk with the provided plate and nut.
- Suitable for desk thicknesses from 10mm to 70mm and hole diameters from 10mm to 60mm.
Step 2: Assemble the Stand Base and Arms
Follow the detailed instructions in your product manual to assemble the main pole and attach the gas spring arms to the chosen desk mount. Ensure all connections are secure.
Step 3: Attach VESA Plate to Monitor
Before mounting your monitor to the arm, attach the quick-release VESA plate to the back of your monitor using the appropriate screws. Ensure the VESA plate is oriented correctly and securely fastened.

Image: Quick Release VESA Plate. This image shows the quick-release VESA plate attached to the back of a monitor, ready to be slid onto the monitor arm. An inset highlights the locking screw mechanism for secure attachment.
Step 4: Mount Monitor to Arm
Carefully slide the monitor (with the attached VESA plate) onto the VESA head of the monitor arm. Ensure it clicks into place. Tighten the security screw on the VESA head to prevent accidental detachment.
6. Operation and Adjustment
The ELIVED EV6012W monitor stand offers extensive adjustability to achieve an ergonomic viewing experience.
Gas Spring Tension Adjustment
The gas spring arms require tension adjustment to match the weight of your monitors. This ensures the monitors stay in position and can be moved smoothly.
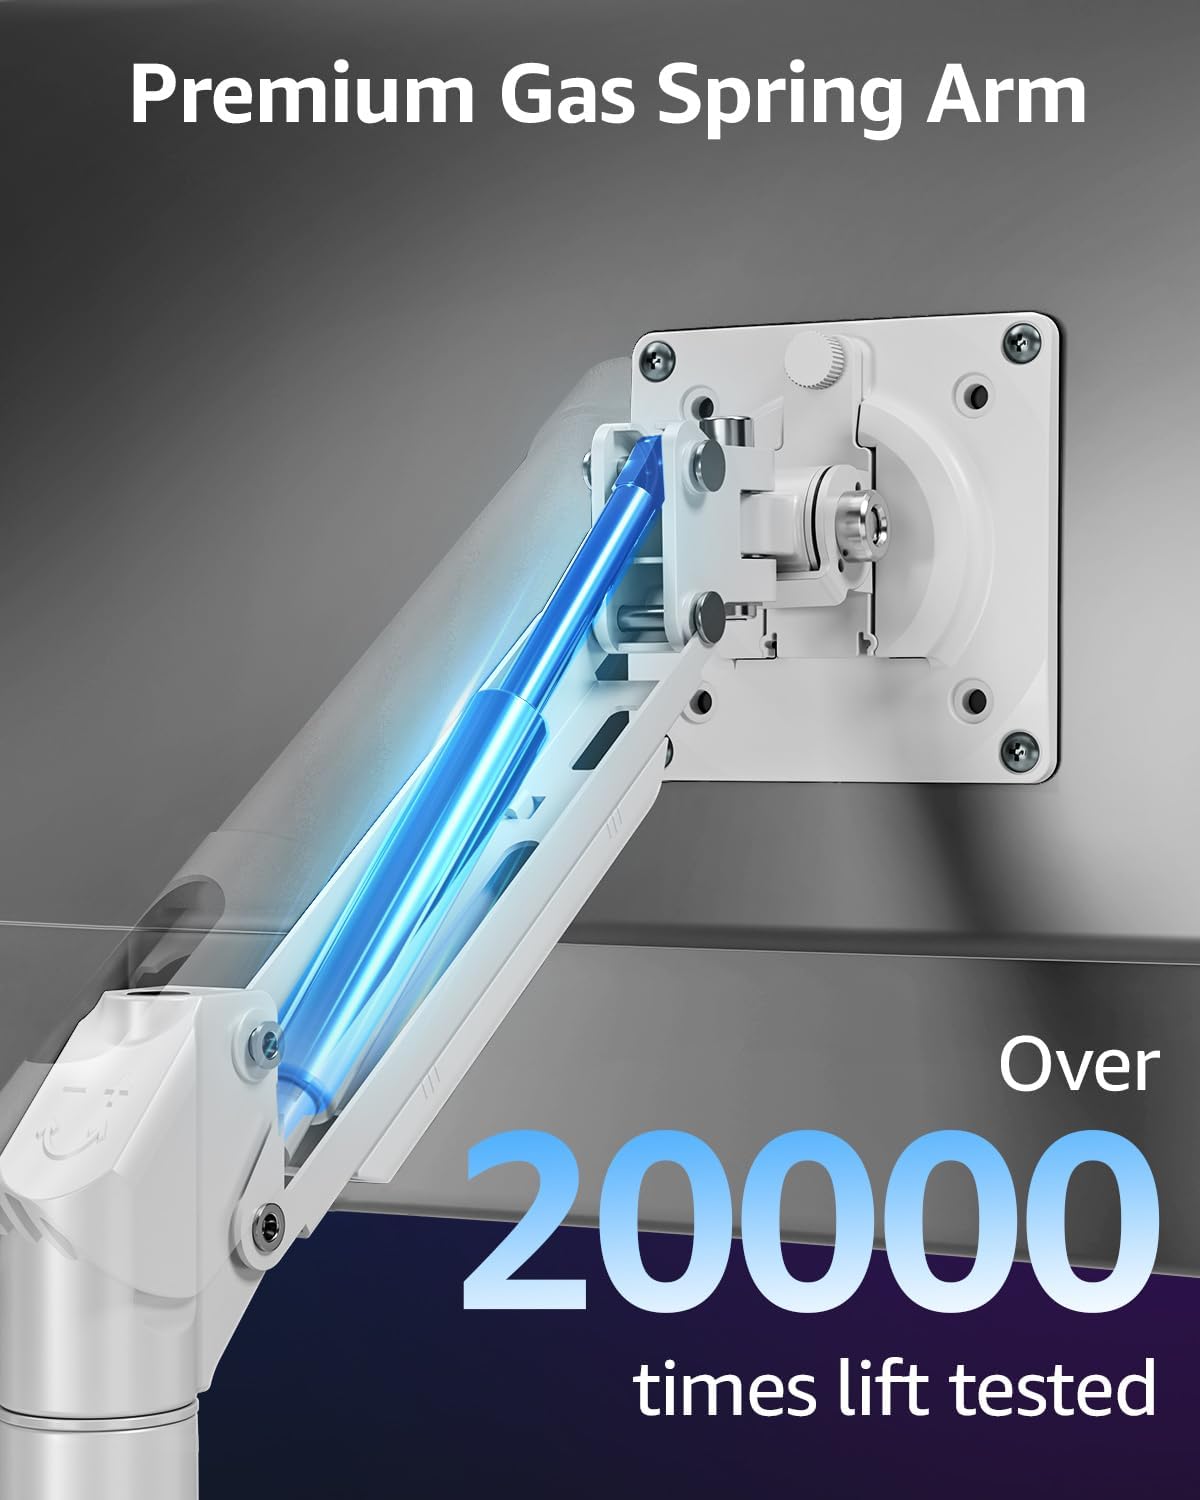
Image: Premium Gas Spring Arm. This image highlights the internal gas spring mechanism, emphasizing its durability with a 'Over 20000 times lift tested' label. Proper tension adjustment is crucial for optimal performance.
- If the monitor sags or drops, turn the adjustment screw (usually located on the arm joint) clockwise to increase tension.
- If the monitor floats up or is difficult to push down, turn the adjustment screw counter-clockwise to decrease tension.
- Adjust gradually until the monitor stays at any desired height with minimal effort.
Monitor Positioning
Utilize the various articulation points to position your monitors for maximum comfort and productivity.

Image: Optimize Your View. This image displays the four main adjustment types: Swivel (180°), Height Range (130-440mm), Tilt (+70° to -45°), and Rotation (360°), demonstrating the flexibility of the monitor stand.

Image: Full Motion Adjustment. This diagram shows the various swivel points on the monitor arm, including 180°, 270°, and 360° rotations at different joints, allowing for comprehensive positioning.

Image: Freely Position Your Screen. A side profile of the monitor arm illustrates its maximum height adjustment of 440mm and maximum arm extension of 501mm, providing ample reach and vertical range.
- Height Adjustment: Move the monitor up or down along the main pole or use the gas spring arm for vertical positioning.
- Tilt: Adjust the monitor screen vertically from +70° (upward) to -45° (downward) to reduce glare and optimize viewing angle.
- Swivel: Rotate the monitor horizontally up to 180° at the VESA plate and arm joints to share your screen or change viewing direction.
- Rotation: Rotate the monitor 360° from landscape to portrait orientation.
- Extension: Extend or retract the arms to bring the monitors closer or push them further away from you.
Cable Management
Route your monitor cables through the integrated cable management clips on the arms and along the main pole to maintain a clean and organized workspace.

Image: Organize Wires and Tools. This image shows how cables can be neatly routed through the integrated cable management channels on the monitor arms. An inset highlights a convenient storage slot for Allen keys directly on the arm, preventing them from getting lost.
Various Screen Combinations
The flexible design allows for various monitor arrangements to suit your workflow. Note that stacking displays vertically is not possible with this model.

Image: Various Screen Combinations. This grid displays multiple ways to configure two monitors using the stand, including side-by-side, angled, and one in portrait/one in landscape. It also explicitly states that vertical stacking is not supported.
7. Maintenance
- Regularly check all screws and connections to ensure they remain tight.
- Clean the stand with a soft, damp cloth. Avoid abrasive cleaners or solvents.
- Inspect the gas spring arms periodically for any signs of wear or damage.
8. Troubleshooting
Monitor Sags or Does Not Hold Position:
- Solution: The gas spring tension is too low for the monitor's weight. Increase the gas spring tension by turning the adjustment screw clockwise. Refer to the "Gas Spring Tension Adjustment" section.
Monitor Floats Up or is Difficult to Push Down:
- Solution: The gas spring tension is too high for the monitor's weight. Decrease the gas spring tension by turning the adjustment screw counter-clockwise. Refer to the "Gas Spring Tension Adjustment" section.
Stand is Unstable or Wobbles:
- Solution: Ensure the C-clamp or grommet mount is securely tightened to the desk. Check that all screws connecting the pole and arms are firm. Verify your desk surface is stable and not damaged.
Monitor Cannot Be Tilted or Swiveled:
- Solution: Check if any adjustment screws at the tilt or swivel joints are overtightened. Loosen them slightly to allow movement, then retighten to hold the desired position.
9. Warranty and Support
ELIVED products are manufactured with quality and durability in mind. For warranty information, technical support, or any questions regarding your ELIVED EV6012W Dual Monitor Stand, please contact ELIVED customer service.
You can often find support contact details on the ELIVED official website or through the retailer where you purchased the product. For more information about ELIVED products, please visit the ELIVED Brand Store.