
RAINPOINT WG012RF2
RAINPOINT Wireless Rain Gauge Instruction Manual
Model: WG012RF2
Introduction
This manual provides detailed instructions for the setup, operation, and maintenance of your RAINPOINT Wireless Plastic Rain Gauge. Designed for accurate outdoor rainfall monitoring, this device integrates with the HomGar app to provide real-time and historical precipitation data. Please read this manual thoroughly before use to ensure optimal performance and longevity of your rain gauge.
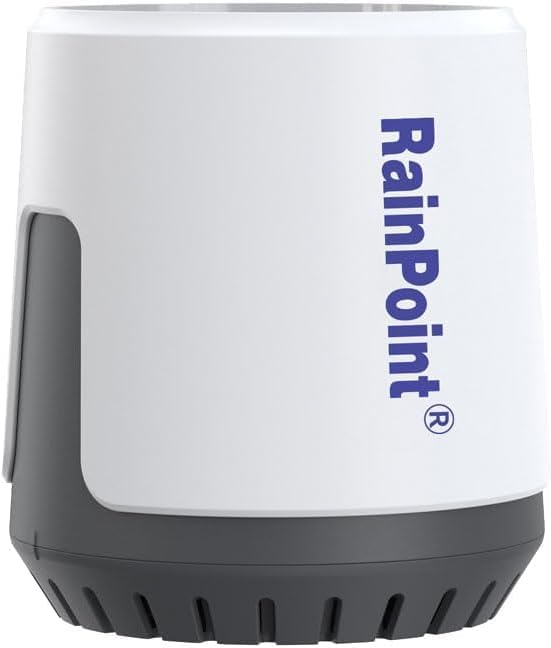
Image: The RAINPOINT Wireless Plastic Rain Gauge, a compact white and grey device.
Product Features
- Accurate Wireless Rain Monitoring: Delivers precise rainfall measurements with real-time updates via the HomGar app.
- Self-Emptying Design: Prevents overflow and ensures hassle-free use.
- Expandable System: Integrates seamlessly with the RAINPOINT Wi-Fi gateway hub (sold separately) for multi-zone tracking.
- Long-Range Wireless Coverage: Transmits data up to 100 meters for continuous monitoring.
- Weather-Resistant: Built to withstand various weather conditions, including freeze-proof design.
- Real-Time & Historical Data: Provides current and past rainfall data for trend analysis and optimized garden care.
Image: Visual representation of key features: Waterproof, Accurate Measuring, APP Control, Easier Installation.
What's in the Box
The RAINPOINT Wireless Plastic Rain Gauge package typically includes:
- RAINPOINT Wireless Rain Gauge (Model: WG012RF2)
- User Manual (this document)
- Note: A RAINPOINT Wi-Fi gateway hub is required for app functionality and is sold separately. Batteries (3*AA) are also not included.
Setup Instructions
- Prepare the Rain Gauge:
- Open the battery cover located at the bottom of the rain gauge.
- Insert 3 AA batteries (not included) into the battery compartment, ensuring correct polarity.
- Securely close the battery cover.
- Important: Before first use, locate and carefully tear off the clear sticker or tape that secures the balancing instrument (tipping bucket mechanism) inside the rain gauge. This sticker is for shipping protection and must be removed for accurate operation.
- Prepare the RAINPOINT Wi-Fi Gateway Hub (Sold Separately):
- Ensure your RAINPOINT Wi-Fi gateway hub is powered on and connected to your home Wi-Fi network (2.4GHz band only).
- Download and install the HomGar app on your smartphone or tablet.
- Register or log in to your HomGar account.
- Pairing the Rain Gauge with the App:
- Open the HomGar app.
- On the app's home page, select the "+" symbol to add a new device. Alternatively, navigate to the hub's home page and use the "Sub-devices" option to add devices.
- Find and select the "Rain Sensor" icon (or the specific icon for HCS012 Rain Sensor) from the list of available devices.
- Follow the on-screen prompts to initiate the pairing process. Keep the rain gauge close to the hub during pairing.
- The app will search for the device. Once discovered, it will confirm successful addition.
- Placement of the Rain Gauge:
- Choose an outdoor location that is open and unobstructed by trees, buildings, or other objects that could block rainfall or cause splash-back.
- Ensure the rain gauge is placed on a flat, horizontal surface to ensure accurate readings. Inclined placement will lead to inaccurate data.
- The device is weather-resistant and freeze-proof, suitable for year-round outdoor use.
Video: Official setup guide for the RAINPOINT High Precision Rain Gauge (Model HCS012), demonstrating battery installation and app pairing steps.


Image: Proper horizontal placement of the rain gauge for accurate readings (left) versus incorrect inclined placement (right).
Operating Instructions
Once successfully set up and paired, your RAINPOINT Wireless Rain Gauge will automatically begin monitoring rainfall. Data is transmitted to your HomGar app via the Wi-Fi gateway hub.
- Real-Time Monitoring: View current rainfall data directly on the HomGar app. The device updates data every 3 minutes.
- Historical Data: Access past rainfall records (24 hours, 7 days, 30 days, 12 months) within the app to track trends and patterns.
- App Notifications: Configure notifications within the HomGar app to receive alerts for specific rainfall events or thresholds.
- Self-Emptying Mechanism: The rain gauge features a tipping bucket mechanism that automatically empties collected water, ensuring continuous operation without manual intervention.
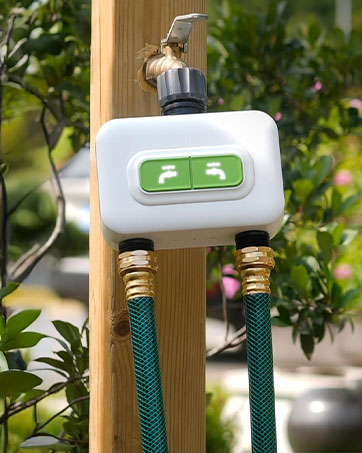
Image: Screenshots of the HomGar app displaying real-time and historical rainfall data, and a comparison of app and hub views.
Maintenance
Regular maintenance ensures the accuracy and longevity of your rain gauge.
- Cleaning: Periodically clean the rain gauge, especially the collection funnel and the tipping bucket mechanism, to remove dirt, leaves, insects, or debris that could obstruct water flow or affect accuracy. Use a soft cloth and mild soapy water. Rinse thoroughly with clean water.
- Battery Replacement: When the battery level is low (indicated in the app), replace the 3 AA batteries promptly to ensure continuous operation.
- Check Placement: Occasionally verify that the rain gauge remains level and free from obstructions.
- Winter Care: The device is freeze-proof, but ensuring it is clear of heavy snow or ice buildup can prevent physical damage.
Troubleshooting
| Problem | Possible Cause | Solution |
|---|---|---|
| No data or inaccurate readings in app. |
|
|
| Device not pairing with app. |
|
|
| App shows "Offline". |
|
|
Specifications
- Model: WG012RF2
- Product Dimensions: 4 x 4 x 5 inches (approximately 10.16 x 10.16 x 12.7 cm)
- Item Weight: 8 ounces (approximately 226.8 grams)
- Rainfall Range: 0-9999mm
- Accuracy: ±0.1mm
- Data Reporting: Every 3 minutes
- Wireless Range: Up to 100 meters (328 feet)
- Power Source: 3*AA batteries (not included)
- Manufacturer: RAINPOINT
- Country of Origin: China

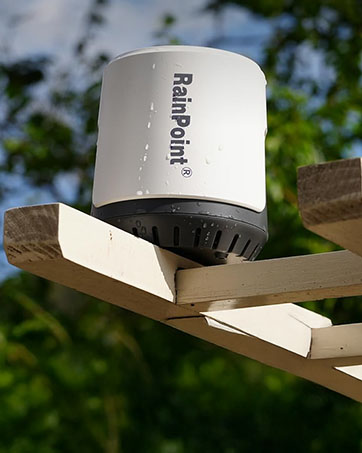
Image: Visual summary of rain gauge specifications and detailed dimensions.
Safety Information
- Do not attempt to disassemble or modify the device. This will void the warranty and could cause damage.
- Keep batteries out of reach of children. Dispose of used batteries responsibly according to local regulations.
- Ensure the device is placed securely to prevent it from falling or being knocked over, which could cause injury or damage.
- While the device is weather-resistant, avoid submerging it in water.
Warranty and Support
RAINPOINT products are designed for reliability and performance. For warranty information, technical support, or assistance with your device, please refer to the contact information provided on the product packaging or visit the official RAINPOINT website. Please have your model number (WG012RF2) and purchase details ready when contacting support.
Ask a question about this manual
Ask about setup, troubleshooting, compatibility, parts, safety, or missing instructions. Manuals+ will review the question and use this page’s manual context to help answer it.