
1. Introduction
This manual provides detailed instructions for the installation, operation, and maintenance of your GeekTale Smart Keypad Door Lock, Model K07-01. Please read this manual thoroughly before installation and use to ensure proper function and safety. This electronic digital door lock offers keyless access via a keypad, mechanical key override, and various security features designed for convenience and protection in residential and office environments.
2. Safety Information
- Do not attempt to disassemble or repair the lock yourself. Refer to qualified personnel for service.
- Use only specified batteries (4 x AA alkaline batteries). Do not mix old and new batteries or different types of batteries.
- Keep mechanical keys in a safe place outside the property.
- Avoid exposing the lock to direct sunlight, rain, or corrosive substances.
- Ensure the door is properly aligned and the latch operates smoothly before installing the lock.
3. Product Overview
The GeekTale Smart Keypad Door Lock K07-01 is designed for easy integration into most standard US doors, providing secure and convenient access. It features a backlit keypad, auto-lock functionality, and emergency power options.

Image: Front view of the GeekTale Smart Keypad Door Lock K07-01, showcasing the illuminated numeric keypad.
Package Contents:
- Exterior Keypad Knob
- Interior Knob
- Latch Mechanism
- Strike Plate
- Mounting Screws
- Mechanical Keys (2)
- User Manual

Image: Exploded view of the lock components and key dimensions for installation, indicating the need for 4 AAA alkaline batteries.
4. Installation Guide
Follow these steps to install your GeekTale Smart Keypad Door Lock. Ensure your door meets the specified dimensions (35mm to 54mm thickness) for proper fit.
- Prepare the Door: Ensure the door has a standard bore hole and backset. If replacing an existing knob, remove the old hardware.
- Install the Latch: Insert the latch mechanism into the edge of the door. Secure it with screws. Ensure the latch bolt faces the correct direction for your door swing.
- Install Exterior Keypad Knob: Place the exterior keypad knob through the door, aligning the spindle with the latch mechanism.
- Install Interior Knob: Attach the interior knob to the exterior knob, ensuring the connecting wires are properly routed and connected. Secure with mounting screws.
- Install Batteries: Open the battery cover on the interior knob. Insert 4 new AA alkaline batteries, observing polarity. Close the battery cover.
- Test Operation: After installation, test the mechanical key and the default passcode (if any) to ensure the lock operates smoothly.

Image: The keypad door lock shown installed on different types of doors, illustrating its versatility for various US door standards.
5. Operating Instructions
5.1. Programming Passcodes
The lock supports up to 20 unique 4-8 digit passcodes. Refer to the detailed programming instructions in the included quick start guide or the GeekTale app for specific steps to add, modify, or delete user codes.

Image: The keypad smart lock highlighting its soft-touch buttons and the capacity for up to 20 different PIN codes.
5.2. Unlocking the Door
- Using a Passcode: Enter your 4-8 digit passcode on the keypad, then press the '#' key. The lock will unlock.
- Using a Mechanical Key: Insert the mechanical key into the keyhole on the exterior knob and turn to unlock.
5.3. Locking the Door
- Automatic Locking: The lock features an auto-lock function that re-locks the door after a set period (configurable via the app or programming instructions).
- Manual Locking: From the interior, turn the knob to the locked position. From the exterior, press the '#' key to manually lock the door.

Image: A person closing a door with the smart keypad lock, illustrating the auto-lock feature engaging automatically.
5.4. Anti-Peep Technology
To prevent others from guessing your passcode, you can enter random digits before or after your actual code. The lock will still recognize the correct sequence within the longer string of numbers.

Image: An example of using the anti-peep code feature, where random digits are added before and after the correct password to obscure it.
5.5. Passage Mode & Security Mode
The lock can be set to different modes:
- Passage Mode: The door remains unlocked for continuous access, ideal for high-traffic periods.
- Security Mode: The door automatically locks after each entry, ensuring maximum security.
These modes can typically be configured through the lock's programming settings or a connected app, if applicable.

Image: A collage showing the interior knob with a privacy button and a family enjoying their home, representing the flexibility of privacy and passage modes.
6. Maintenance
6.1. Battery Replacement
When the battery is low, the lock will provide an audible alert (buzzer beeps twice) and visual indication (indicator flashes green then red) after unlocking. Replace all four AA alkaline batteries promptly to avoid being locked out.
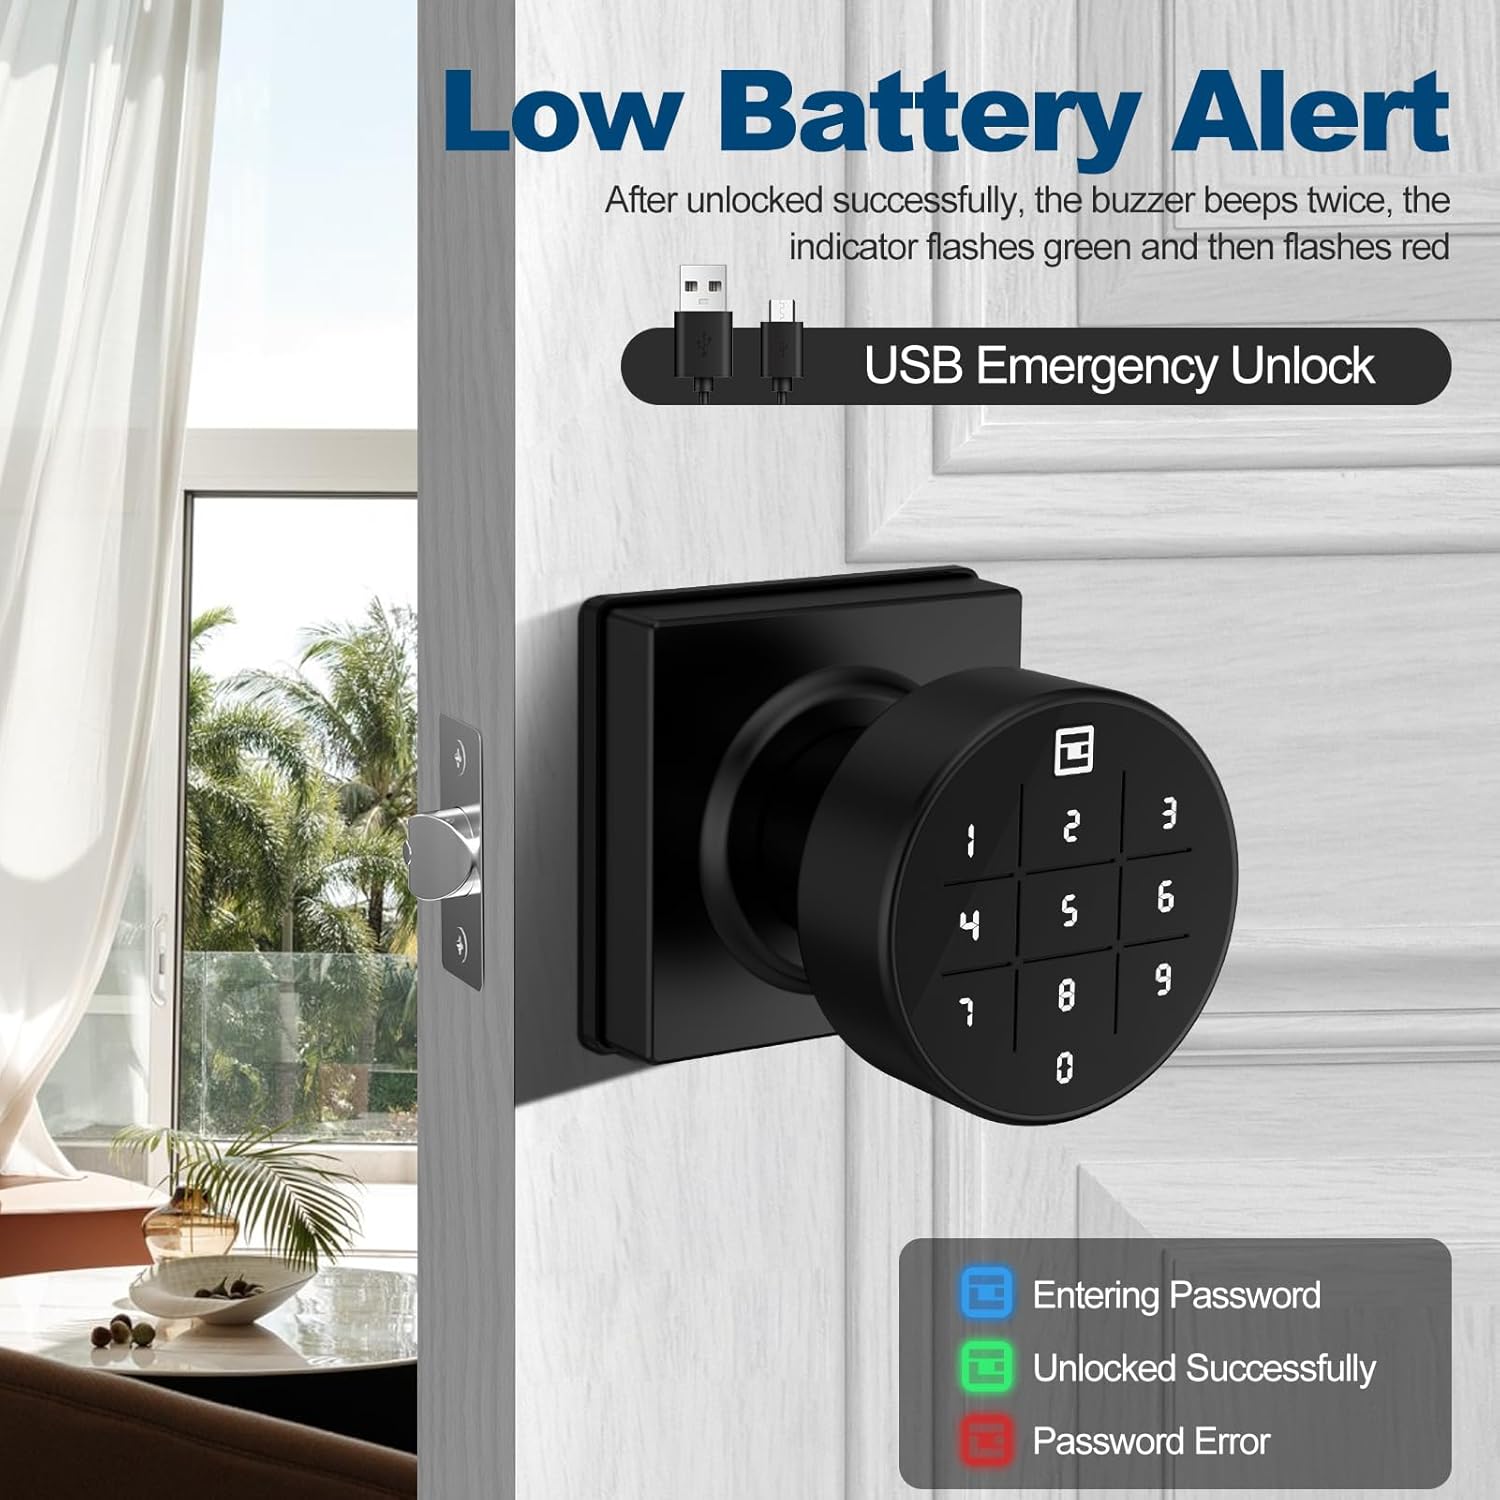
Image: The keypad lock displaying a low battery alert, with visual cues for password entry (blue), successful unlock (green), and password error (red). It also highlights the USB-C port for emergency power.
6.2. Emergency Power
In case batteries completely drain, a Type-C USB port is available on the exterior knob for emergency power. Connect a portable power bank to this port to temporarily power the lock and gain access.
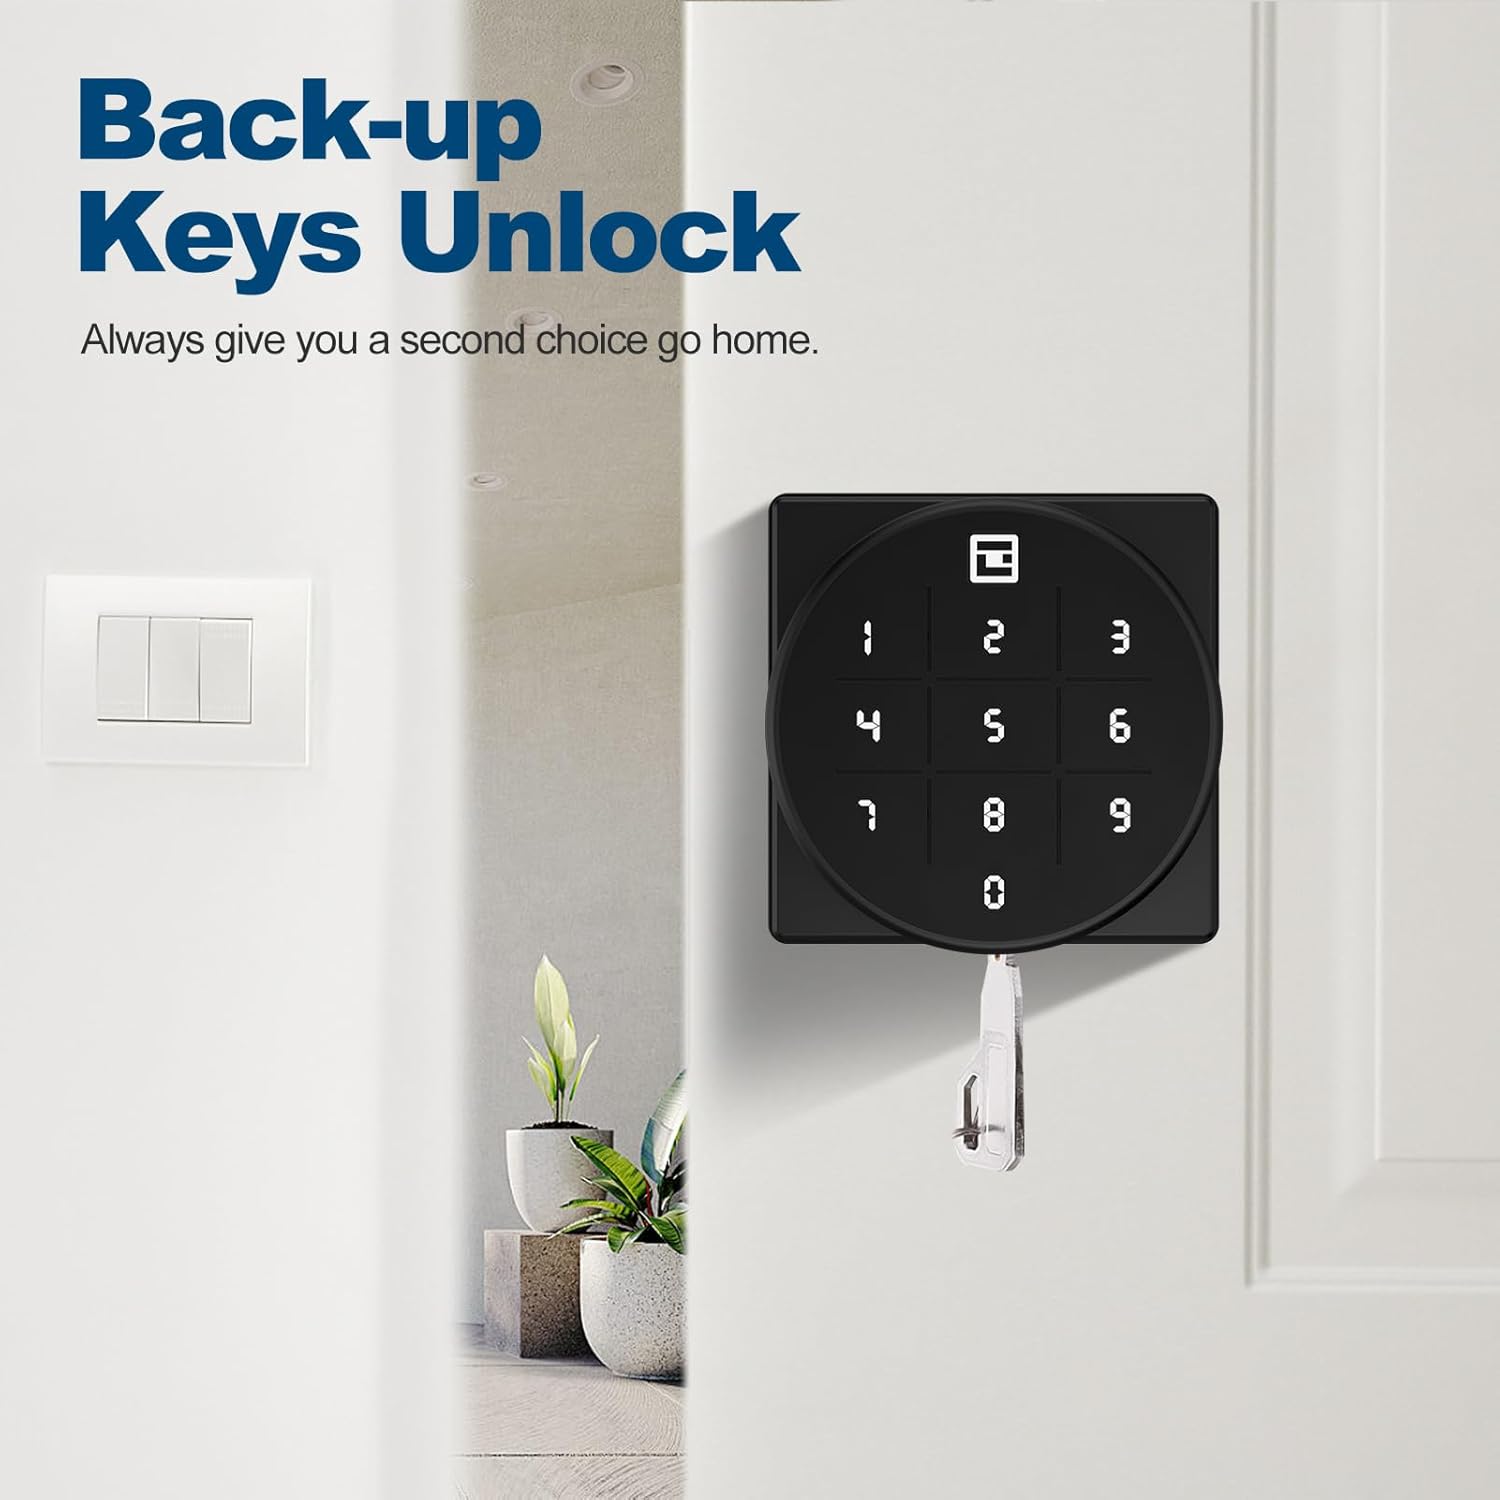
Image: The smart keypad lock with a mechanical key inserted, demonstrating the backup key unlock feature for emergency access.
6.3. Cleaning
Clean the lock's surface with a soft, damp cloth. Avoid using abrasive cleaners or solvents that could damage the finish or electronic components.
7. Troubleshooting
- Lock not responding: Check battery levels. Use the USB-C emergency power port or mechanical key if batteries are dead.
- Passcode not working: Ensure the correct passcode is entered. Try using the anti-peep feature. Re-program the passcode if necessary.
- Door not locking/unlocking smoothly: Check for any obstructions around the latch or strike plate. Ensure the lock is installed correctly and the door frame is aligned.
- Keypad not lighting up: This may indicate very low battery levels or a fault. Replace batteries or use emergency power.
8. Specifications
| Feature | Detail |
|---|---|
| Brand | GeekTale |
| Model Name | K07-01 |
| Lock Type | Keypad |
| Material | Alloy Steel, Brass |
| Color | Black |
| Recommended Uses | Home, Apartment, Office |
| Special Features | Keypad door knob, store 20 passcodes, anti-peep code, passage mode & security mode, two mechanical keys, easy to install |
| Power Source | 4 x AA Batteries (not included) |
| Emergency Power | Type-C USB Port |
| Item Weight | 1.74 pounds (0.79 Kilograms) |
| Connectivity Protocol | Wi-Fi (Note: Product description mentions Wi-Fi, but features focus on keypad. App control is mentioned in reviews, implying Bluetooth or Wi-Fi bridge. For this manual, focus on direct lock features.) |
9. Warranty and Customer Support
GeekTale offers localized After-Sales Customer Service. For any product-related issues, please contact our customer support team through the official after-sales channels. We are committed to resolving your questions and ensuring your satisfaction. Please retain your proof of purchase for warranty claims.
For further assistance, visit the official GeekTale website or contact the retailer where the product was purchased.