
1. Introduction
This manual provides detailed instructions for the safe and effective use of your iCarsoft LR V3.0 Bidirectional OBD2 Scanner. The device is designed for comprehensive vehicle diagnostics, offering full system scanning, bidirectional control, reset services, and battery testing for Land Rover and Jaguar vehicles. Please read this manual thoroughly before operating the device.
2. Product Overview
The iCarsoft LR V3.0 is an advanced diagnostic tool equipped with a range of features to assist in vehicle maintenance and troubleshooting. It supports full system diagnosis for over 270 systems, powerful bidirectional control, and more than 38 reset services. The device also includes full OBD2 functions, one-key automatic diagnostics, and Auto VIN identification.

Image: The iCarsoft LR V3.0 scanner, showcasing its capabilities for Land Rover and Jaguar owners, including full system diagnosis and various reset services.
2.1 Key Features
- Full System Diagnosis: Accesses and scans over 270 vehicle systems for fault codes.
- Bidirectional Control: Performs active tests to command vehicle components.
- Reset Services: Offers 38+ maintenance reset functions, including Oil Reset, EPB Reset, SAS Reset, and Battery Registration.
- Full OBD2 Functions: Supports all 10 OBD2 test modes for comprehensive engine diagnostics.
- One-key Automatic Diagnostics: Simplifies the diagnostic process.
- Auto VIN: Automatically identifies vehicle information.
- Live Data Graphing: Displays 118 graphic live data streams for real-time monitoring.
- Battery Test: Evaluates battery health and starting performance.
- Multi-language Support: Operates in 15 different languages.
- Lifetime Free Update: Ensures the software remains current.
- Lifetime Free Hardware Repair: Provides long-term support for the device.
2.2 Package Contents
Upon unboxing, verify that all items are present:

Image: The iCarsoft LR V3.0 package contents, showing the main scanner unit, cables, storage, and documentation.
- iCarsoft LR V3.0 Car Scanner
- Main OBD2 Cable
- PC Connecting Cable
- TF Card (pre-installed in the scanner)
- Card Reader
- User's Manual
- Nylon Carry Case
3. Setup
Follow these steps to prepare your iCarsoft LR V3.0 scanner for first use.
3.1 Initial Device Power-Up
- Connect the main OBD2 cable to the scanner's diagnostic port.
- Locate the OBD2 port in your vehicle (typically under the dashboard on the driver's side).
- Plug the OBD2 connector into the vehicle's OBD2 port. The scanner will power on automatically using the vehicle's electrical system.
3.2 Language and Unit Settings
After powering on, navigate to the 'Settings' menu to configure the device:
- Select 'Language' to choose your preferred operating language from the 15 available options.
- Adjust 'Unit of Measure' for data display (e.g., Celsius/Fahrenheit, PSI/Bar).
- Configure 'Buzzer' and 'Log' settings as desired.
3.3 Software Updates
The iCarsoft LR V3.0 offers lifetime free updates. Regularly updating the software ensures access to the latest vehicle models, diagnostic functions, and bug fixes.
- Connect the scanner to a computer using the provided PC connecting cable.
- Visit the official iCarsoft website (www.icarsoft.us) to download the update tool and latest software packages.
- Follow the on-screen instructions of the update tool to install the new software onto your scanner's TF card.
3.4 Vehicle Compatibility Check
Before performing diagnostics, it is recommended to verify your vehicle's compatibility with the iCarsoft LR V3.0 scanner and its specific functions. This can be done via the official iCarsoft website.

Image: Instructions for checking vehicle compatibility on the iCarsoft official website.
- Navigate to the compatibility section on the iCarsoft official website.
- Enter your vehicle's brand, model, and year to check the supported functions.
- Alternatively, search for 'iCarsoft LR V3.0' and review the detailed compatibility list for Land Rover and Jaguar models.
4. Operating Instructions
This section outlines the primary functions and how to use them.
4.1 Full System Diagnosis
The scanner can perform an in-depth diagnosis of all available electronic control units (ECUs) in your vehicle.
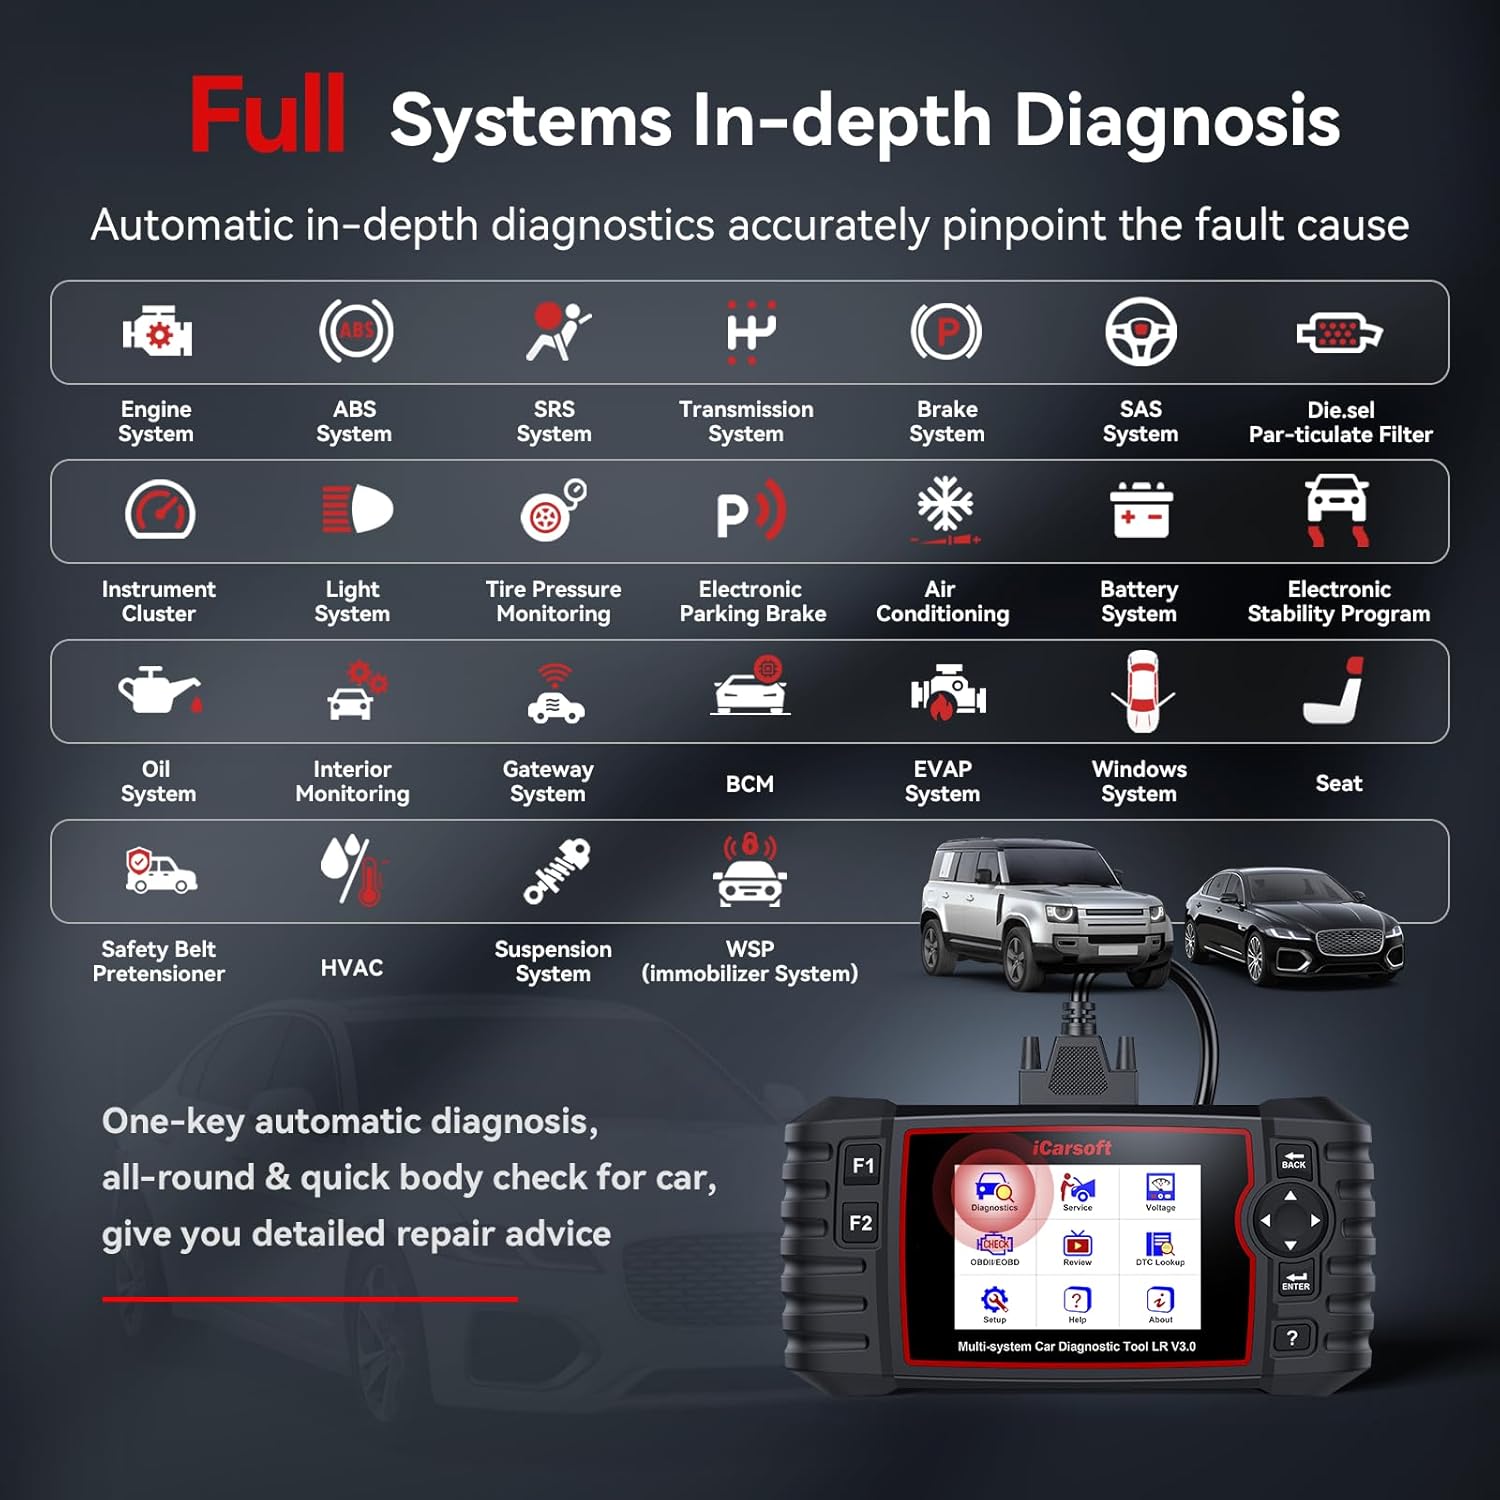
Image: Visual representation of the full system in-depth diagnosis capability, covering numerous vehicle modules.
- From the main menu, select 'Diagnosis'.
- Choose your vehicle make (Land Rover or Jaguar).
- Select 'Auto Scan' or manually select the system you wish to diagnose (e.g., Engine, ABS, Airbag, Transmission).
- The scanner will read fault codes (DTCs) and display their descriptions.
- You can then view freeze frame data or clear the fault codes after repairs are made.
4.2 Bidirectional Control (Active Tests)
Bidirectional control allows the scanner to send commands to vehicle components and monitor their operation, aiding in faster troubleshooting.

Image: The scanner performing bidirectional tests, demonstrating its ability to send commands and receive feedback from vehicle systems.
- From the 'Diagnosis' menu, select 'Active Test' or 'Bidirectional Control'.
- Choose the specific component or system you wish to test (e.g., Injector Test, Fuel Pump Test, Cooling Fan Test, Door Lock Test, Window Test).
- Follow the on-screen prompts to activate the component and observe its response.
4.3 Reset Services
The LR V3.0 offers numerous reset functions to perform maintenance and calibration tasks after component replacement or service.

Image: The scanner's menu showing a comprehensive list of reset services available for vehicle maintenance.
Commonly used reset functions include:
- Oil Reset
- Electronic Parking Brake (EPB) Reset
- Steering Angle Sensor (SAS) Reset
- Battery Registration
- ABS Bleeding
- Throttle Position Sensor (ETC) Reset
- Diesel Particulate Filter (DPF) Regeneration
- Tire Pressure Monitoring System (TPMS) Reset
Professional special functions include Powertrain configuration reset, Suspension height calibration, Rain sensor calibration, Active damping control module calibration, and various key services.
- From the main menu, select 'Service'.
- Choose the desired reset function from the list.
- Follow the on-screen instructions to complete the procedure. Ensure all safety precautions are observed.
4.4 Battery Test
The battery test function assesses the vehicle's battery health and starting capabilities.

Image: The scanner's battery test interface, displaying voltage readings and judgment standards.
- From the main menu, select 'Battery Test'.
- Follow the prompts to perform the test. The scanner will display the battery voltage and a judgment of its condition (e.g., Too Low, Low, Normal, Too High).
- Refer to the on-screen guidance for interpreting results and potential actions.
4.5 Live Data Graphing
Monitor real-time sensor data in a graphical format to identify performance issues or verify repairs.

Image: Live data graphing feature, showing real-time vehicle parameters for analysis.
- After a diagnosis, select 'Live Data' or 'Data Stream'.
- Choose the parameters you wish to monitor.
- Select 'Graph' to view the data graphically. This can help identify intermittent issues or abnormal sensor readings.
4.6 Data Record and Playback
The scanner allows you to record live data sessions for later review and analysis.
- During a live data session, select the 'Record' option.
- To review recorded data, navigate to 'Diagnostic History' or 'Data Playback' from the main menu.
4.7 Print and Share
Diagnostic reports can be printed or shared for documentation or further consultation.
- Connect the scanner to a computer with the PC connecting cable.
- Use the iCarsoft PC software to retrieve and print diagnostic reports.
5. Maintenance
Proper maintenance ensures the longevity and optimal performance of your iCarsoft LR V3.0 scanner.
5.1 Cleaning the Device
- Use a soft, damp cloth to clean the scanner's screen and casing.
- Avoid using abrasive cleaners or solvents that could damage the device.
- Ensure the device is powered off and disconnected from any power source before cleaning.
5.2 Storage
- Store the scanner in its provided nylon carry case when not in use to protect it from dust, moisture, and physical damage.
- Keep the device in a cool, dry place, away from direct sunlight and extreme temperatures.
5.3 Software Maintenance
Regularly update the scanner's software as described in Section 3.3 to ensure it has the latest vehicle data and diagnostic capabilities.
6. Troubleshooting
This section addresses common issues you might encounter.
6.1 Device Not Powering On
- Ensure the OBD2 cable is securely connected to both the scanner and the vehicle's OBD2 port.
- Check the vehicle's battery. The scanner draws power from the vehicle.
- Verify the vehicle's ignition is in the 'ON' position (engine off or running, depending on the test).
6.2 Communication Errors
- Confirm the OBD2 cable is not damaged and is properly connected.
- Ensure the vehicle's ignition is on.
- Verify that the scanner's software is up to date.
- Check vehicle compatibility on the iCarsoft official website (refer to Section 3.4).
6.3 Inaccurate or Missing Data
- Ensure the correct vehicle model and year are selected in the scanner's menu.
- Perform a software update to ensure the latest diagnostic protocols are installed.
- Some functions may not be supported on all vehicle models or ECUs due to differences in protocols. Consult the compatibility list on the official website.
6.4 Device Freezes or Responds Slowly
- Restart the scanner by disconnecting and reconnecting it from the vehicle.
- Ensure the TF card is properly inserted and not corrupted.
- Perform a software update.
7. Specifications
| Feature | Specification |
|---|---|
| Model Number | Land Rover V3.0 |
| Dimensions (L x W x H) | 26.19 x 19.1 x 6.71 cm (10.31 x 7.52 x 2.64 inches) |
| Weight | 789.25 grams (1.74 pounds) |
| Power Source | Vehicle OBD2 port (Electrical cable) |
| Internal Storage | 16GB (TF Card) |
| Supported Languages | 15 |
| UPC / GTIN | 850030851727 |
8. Warranty and Support
iCarsoft is committed to providing high-quality products and customer service.
8.1 Warranty Information
- The iCarsoft LR V3.0 scanner comes with a 1-year hardware warranty.
- Lifetime Free Hardware Repair is provided for the device.
8.2 Software Updates
- Enjoy Lifetime Free Software Updates to keep your scanner's diagnostic capabilities current with new vehicle models and functions.
8.3 Technical Support
- iCarsoft offers 24/7 quick response from professional engineers for any technical inquiries or support needs.
- For support, please contact: sales@icarsoft.us


