
Introduction
This manual provides detailed instructions for the assembly, operation, and maintenance of your AMERICAN PHOENIX 20x20 ft Heavy Duty Party Tent. Please read all instructions carefully before beginning assembly to ensure proper setup and safe use of the product. This tent is designed for temporary outdoor events such as parties, weddings, and fairs.
Safety Information
Your safety is paramount. Please adhere to the following guidelines:
- Secure the Tent Properly: Always ensure the tent is firmly anchored to the ground using all provided ropes and pegs. Additional anchoring methods (e.g., sandbags, water barrels, heavy weights) are recommended, especially in windy conditions.
- Monitor Weather Conditions: Do not set up or leave the tent unattended during severe weather conditions, including strong winds, heavy rain, snow, or thunderstorms. Disassemble the tent immediately if adverse weather is anticipated.
- Assembly Personnel: Assembly requires multiple individuals due to the size and weight of the components. Do not attempt to assemble alone.
- Fire Retardant Roof: The roof material is fire retardant. However, keep all heat sources, open flames, and flammable materials away from the tent fabric.
- Clear Area: Ensure the assembly area is clear of obstructions, power lines, and sharp objects.
- Children and Pets: Keep children and pets away from the assembly area to prevent injury.
Package Contents
Before beginning assembly, verify that all components are present and undamaged. If any parts are missing or damaged, contact customer support immediately.
- Galvanized Steel Tubes (various lengths and types for frame)
- Durable Metal Connectors
- Metal Base Plates
- PE/PVC Fabric Roof Cover (1x)
- Removable Sidewalls (6x) with plastic windows
- Door/End Walls (2x) with zippers
- Heavy-duty Velcro and Bungee Cord Straps
- Corner Ropes and Pegs
Setup Instructions
Assembly requires a minimum of 3-4 people. It is recommended to sort and identify all parts before starting.
Step 1: Unpack and Organize Components
Carefully unpack all boxes. Lay out all steel tubes, connectors, and fabric parts on a clean, flat surface. It is helpful to label the different tube types (e.g., using a marker) as per the included diagram to simplify identification during assembly.

This sequence of images depicts the progression of tent assembly, from the initial bare frame to the attachment of sidewalls and finally the complete tent with the roof cover.
Step 2: Assemble the Base Frame
- Connect the horizontal base tubes using the appropriate metal connectors to form the rectangular footprint of the tent.
- Attach the vertical leg poles to the base frame at each corner and along the sides as indicated in the diagram. Ensure all connections are secure.
Step 3: Construct the Roof Frame
- Assemble the roof support tubes and connectors on the ground according to the provided diagram. This typically involves creating triangular sections.
- Carefully lift and attach the assembled roof frame sections to the top of the vertical leg poles. This step requires multiple people to lift evenly and prevent bending.
- Secure all roof frame connections with the provided hardware.

This image illustrates the robust galvanized steel tube framework, including the metal connectors and the triangle roof support structure, essential for the tent's stability.
Step 4: Install the Roof Cover
- Unfold the roof cover and carefully drape it over the assembled roof frame. Ensure it is centered and evenly distributed.
- Secure the roof cover to the frame using the bungee cord straps and Velcro fasteners. Ensure a snug fit to prevent water pooling and wind damage.
Step 5: Attach Sidewalls and End Walls
- Attach the removable sidewalls to the tent frame using the Velcro and bungee straps. The sidewalls feature plastic windows.
- Install the zippered door/end walls at the desired locations. These allow for easy entry and exit.
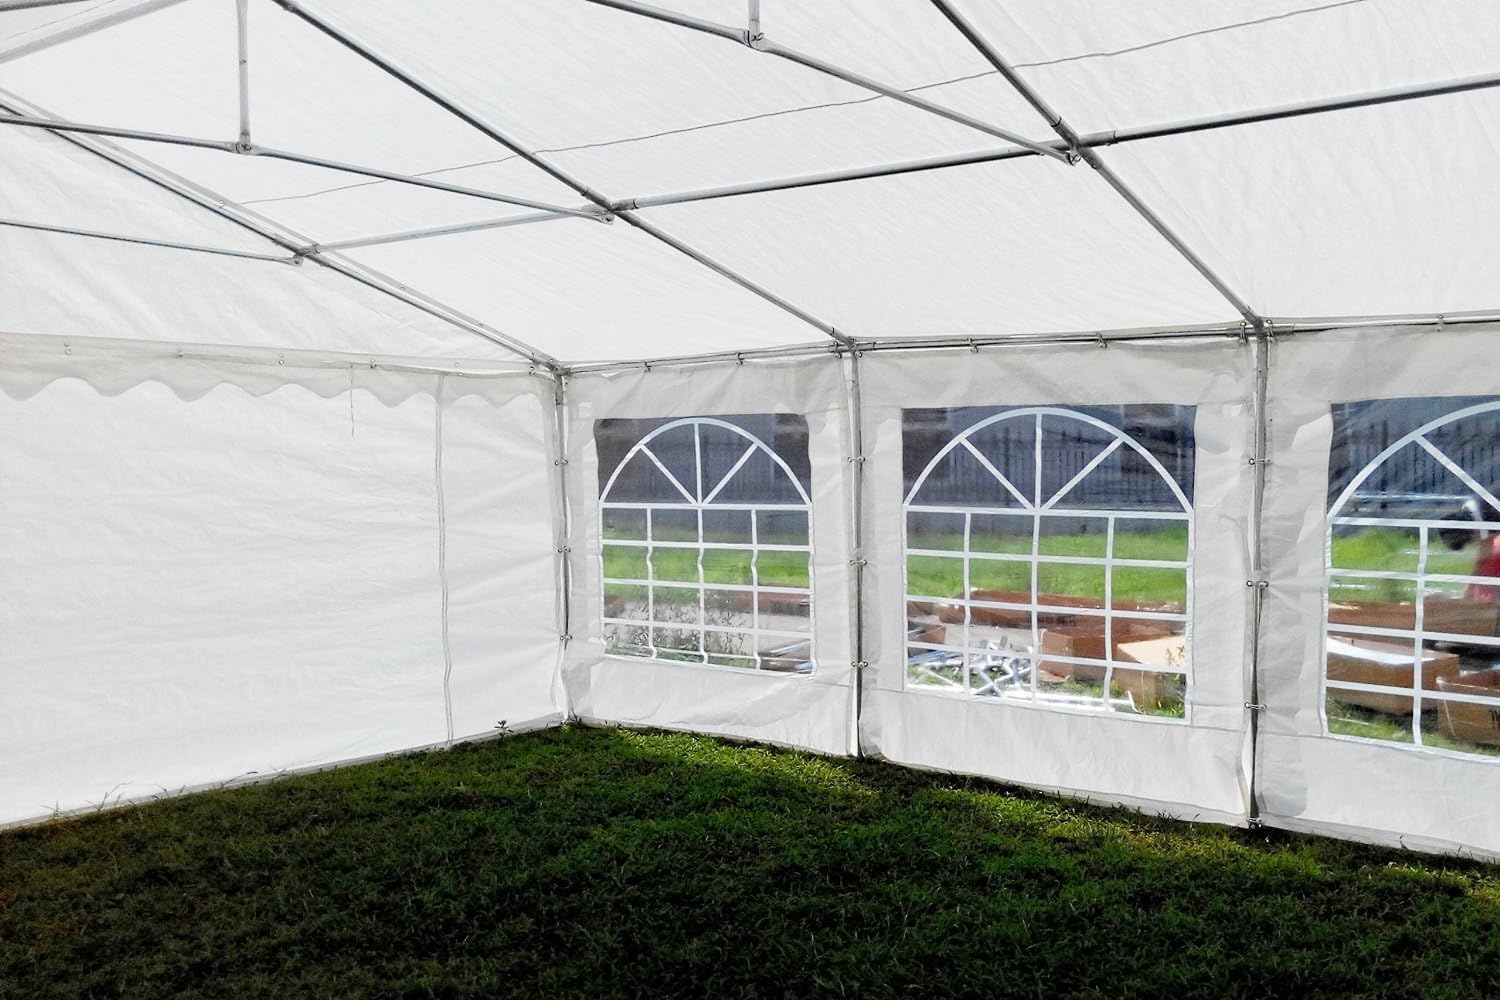
An interior perspective of the tent, showcasing the removable sidewalls with clear plastic windows that allow light entry. The internal frame is also visible.
Step 6: Anchor the Tent
Once the tent is fully assembled, use the provided corner ropes and pegs to firmly anchor the tent to the ground. For added stability, especially in areas prone to wind, consider using additional heavy-duty anchors or weights at each leg.

This image shows the complete 20x20 ft party tent, highlighting its size and appearance when fully assembled for an event.
Operating Instructions
- Entry and Exit: Utilize the zippered door/end walls for convenient entry and exit. Ensure zippers are fully closed when not in use to protect the interior from elements.
- Ventilation: The removable sidewalls allow for adjustable ventilation. They can be partially or fully removed as needed for airflow.
- Weather Monitoring: Continuously monitor weather conditions. In case of strong winds or heavy precipitation, consider temporarily removing sidewalls to reduce wind resistance or disassembling the tent if conditions become severe.
Maintenance
- Cleaning Fabric: Clean the PE/PVC fabric roof and sidewalls with mild soap and water. Do not use harsh chemicals or abrasive cleaners, as these can damage the material and its UV-resistant coating. Rinse thoroughly and allow to air dry completely before storage.
- Cleaning Frame: Wipe down galvanized steel tubes with a damp cloth to remove dirt and debris. Inspect for any signs of rust or corrosion and address promptly.
- Inspection: Regularly inspect all poles, connectors, ropes, and pegs for wear, damage, or bending. Replace any compromised parts immediately to maintain structural integrity.
- Storage: Disassemble the tent and ensure all components are clean and completely dry before storing. Store in a cool, dry place away from direct sunlight and extreme temperatures to prolong the lifespan of the materials.
Troubleshooting
- Issue: Tent is unstable or moves in light wind.
- Solution: Ensure all anchoring ropes and pegs are securely fastened. Consider adding extra weight to each leg using sandbags or water barrels. Verify that all frame connections are tight.
- Issue: Missing or damaged parts upon arrival.
- Solution: Carefully check all packaging. If parts are genuinely missing or damaged, contact AMERICAN PHOENIX customer service with your purchase details for assistance.
- Issue: Grommets or fabric tear during setup.
- Solution: Handle fabric carefully during installation. Avoid excessive pulling or tension on grommets. If a minor tear occurs, a repair kit designed for PE/PVC fabric may be used. For significant damage, contact customer service.
- Issue: Poles bend or connectors break during assembly.
- Solution: Ensure not to overtighten nuts or apply excessive force when connecting poles. Always lift frame sections evenly with multiple people. Replace any bent or broken components immediately.
Specifications
| Brand | AMERICAN PHOENIX |
| Model Number | Pavilion |
| Dimensions (L x W x H) | 236"L x 236"W x 120"H (20x20 ft x 10 ft) |
| Floor Area | 400 Square Feet |
| Item Weight | 215 Pounds |
| Frame Material | Galvanized Steel |
| Roof Top Material | PE/PVC Fabric (Waterproof, UV-resistant, Fire Retardant) |
| Sidewalls | Removable with plastic windows |
| Color | White |
| Required Assembly | Yes |

This diagram provides the overall dimensions of the tent, indicating a width of 6 meters (20 ft) and a peak height of 3.05 meters (10 ft).
Warranty and Support
For warranty information, replacement parts, or technical support, please contact AMERICAN PHOENIX customer service. Keep your purchase receipt and model number handy for faster service.
Contact information can typically be found on the product packaging or the official AMERICAN PHOENIX website.


