
Product Overview
This manual provides instructions for the Aoleaby HMI Touch Screen, specifically for models including TP2504-E, TL2507, TP2507, TP2507-E, TL2510, TP2510, and TP2510-E, with resolutions up to 800x480 and Ethernet capabilities. The current model covered in detail is the TP2510(2COM).
Key Features:
- Low power consumption, fast operation speed, and stable performance.
- Versatile application in various industrial automation scenarios.
- Simple installation with included screws and fixing accessories.
- Intuitive operation through touch and key functionality.
- Ideal entry-level range for basic HMI applications.
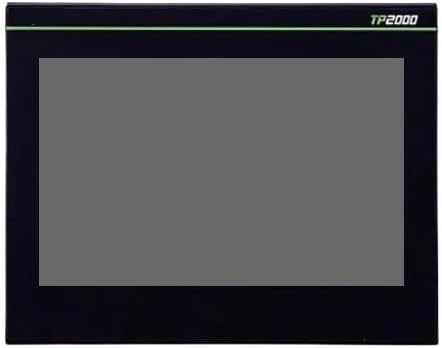
Image: Front view of an Aoleaby HMI Touch Screen, showing the display area and the model designation "TP2000" in the top right corner. This image represents the general appearance of the HMI series.
Setup
This section details the steps required to set up your Aoleaby HMI Touch Screen for initial operation.
Package Contents:
Before beginning, ensure all components are present:
- Aoleaby HMI Touch Screen Unit
- Mounting Screws
- Fixing Accessories
- User Manual (this document)
Installation Steps:
- Prepare Mounting Location: Select a suitable panel or enclosure for installation. Ensure adequate space for ventilation and cable routing.
- Cut Panel Opening: Based on the dimensions provided in the specifications, cut an appropriate opening in the panel. Refer to the specific model's cutout dimensions for accuracy.
- Insert HMI Unit: Carefully insert the HMI unit into the prepared opening from the front.
- Secure with Fixing Accessories: From the rear of the panel, attach the provided fixing accessories and screws. Tighten them evenly to secure the HMI unit firmly in place, but do not overtighten.
- Connect Power: Connect the appropriate DC power supply to the HMI unit's power input terminal. Ensure the voltage and current ratings match the device requirements.
- Connect Communication Cables: Connect necessary communication cables (e.g., Ethernet, RS232, RS485 for 2COM models) to the respective ports on the HMI.
Operating Instructions
This section guides you through the basic operation of your Aoleaby HMI Touch Screen.
Powering On/Off:
- Power On: Once all connections are secure, apply power to the HMI unit. The screen will illuminate, and the system will begin its boot sequence.
- Power Off: To power off, disconnect the power supply. It is recommended to ensure any critical operations are completed and data saved before powering down.
Touch Screen Operation:
The HMI features a resistive touch screen for user interaction.
- Tapping: Lightly tap the screen with your finger or a stylus to select buttons, input fields, or navigate menus.
- Calibration: If touch response is inaccurate, refer to the system settings for touch screen calibration.
Key Functionality:
Some models may include physical keys for additional control. Refer to your specific application software for key assignments.
Connecting to a PLC/Controller:
The HMI communicates with Programmable Logic Controllers (PLCs) or other industrial controllers via its communication ports (e.g., Ethernet, RS232, RS485). Configuration of communication parameters is typically done using the HMI programming software on a PC.
- Ethernet: Connect an Ethernet cable to the HMI's Ethernet port and to your network switch or directly to the PLC. Configure IP addresses and subnet masks within the HMI's network settings.
- Serial (2COM models): For models like TP2510(2COM), connect serial cables (RS232/RS485) to the respective COM ports. Ensure baud rates, data bits, parity, and stop bits match the connected device.
Maintenance
Proper maintenance ensures the longevity and reliable operation of your Aoleaby HMI Touch Screen.
Cleaning the Screen:
- Power Off: Always power off the device before cleaning.
- Gentle Cleaning: Use a soft, lint-free cloth lightly dampened with a non-abrasive, mild glass cleaner or isopropyl alcohol. Do not spray cleaner directly onto the screen.
- Avoid Harsh Chemicals: Do not use strong solvents, abrasive cleaners, or ammonia-based products, as these can damage the screen surface.
Environmental Considerations:
- Temperature: Operate the HMI within its specified temperature range to prevent damage.
- Humidity: Avoid excessive humidity or condensation.
- Dust and Debris: Keep the HMI and its surroundings free from excessive dust and debris, which can affect performance and lifespan.
Firmware Updates:
Periodically check the Aoleaby official website for firmware updates. Updates can improve performance, add features, or fix bugs. Follow the provided instructions carefully when performing firmware updates.
Troubleshooting
This section provides solutions to common issues you might encounter with your HMI Touch Screen.
No Power/Screen Blank:
- Check Power Supply: Ensure the power cable is securely connected and the power supply is providing the correct voltage and current.
- Verify Power Source: Confirm the power outlet or source is active.
Touch Screen Unresponsive/Inaccurate:
- Clean Screen: Ensure the screen surface is clean and free of obstructions.
- Recalibrate Touch: Access the system settings to perform a touch screen calibration.
- Restart Device: Power cycle the HMI unit.
Communication Issues (PLC/Controller):
- Check Cables: Verify all communication cables (Ethernet, serial) are correctly connected and undamaged.
- Verify Settings: Ensure communication parameters (IP address, baud rate, data bits, etc.) on both the HMI and the connected device match.
- Software Configuration: Confirm the HMI project software is correctly configured for the specific PLC/controller.
System Freezes/Slow Performance:
- Restart Device: A simple power cycle can often resolve temporary software glitches.
- Check for Updates: Ensure the HMI firmware is up to date.
- Simplify Project: If the HMI project is very complex, consider optimizing it to reduce resource usage.
Specifications (Model TP2510(2COM))
| Feature | Detail |
|---|---|
| Model | TP2510(2COM) |
| Screen Size | 10 inches (part of 4.3"/7"/10" series) |
| Resolution | 800 x 480 pixels |
| Communication Ports | Ethernet, 2 x COM ports (RS232/RS485) |
| Power Consumption | Low |
| Installation Method | Panel mount with screws and fixing accessories |
| Operation Method | Touch and key functionality |
| Package Dimensions | 1.18 x 0.79 x 0.39 inches |
| Item Weight | 4.41 pounds |
| Manufacturer | Aoleaby |
Warranty and Support
Aoleaby products are designed for reliability and performance. For specific warranty details, please refer to the warranty card included with your product or visit the official Aoleaby website.
For technical support, troubleshooting assistance beyond this manual, or service inquiries, please contact Aoleaby customer support through their official channels. Keep your product model number (TP2510(2COM)) and purchase information readily available when contacting support.