
Introduction
This manual provides comprehensive instructions for the safe installation, operation, and maintenance of your Ledvion Single-Phase LED Track Lighting System, model LVT10003_2m6s_RGB. Designed for modern spaces, this system offers flexible and targeted illumination. Please read these instructions carefully before installation and retain them for future reference.
Safety Information
- Always disconnect power at the main circuit breaker before installation or maintenance.
- Installation should be performed by a qualified electrician or in accordance with local electrical codes.
- This product is designed for indoor use only. Do not expose to moisture or extreme temperatures.
- Ensure the mounting surface can support the weight of the fixture.
- Do not look directly into the LED light source when illuminated.
- Use only GU10 LED bulbs with appropriate wattage.
What's in the Box
Verify that all components are present before beginning installation.
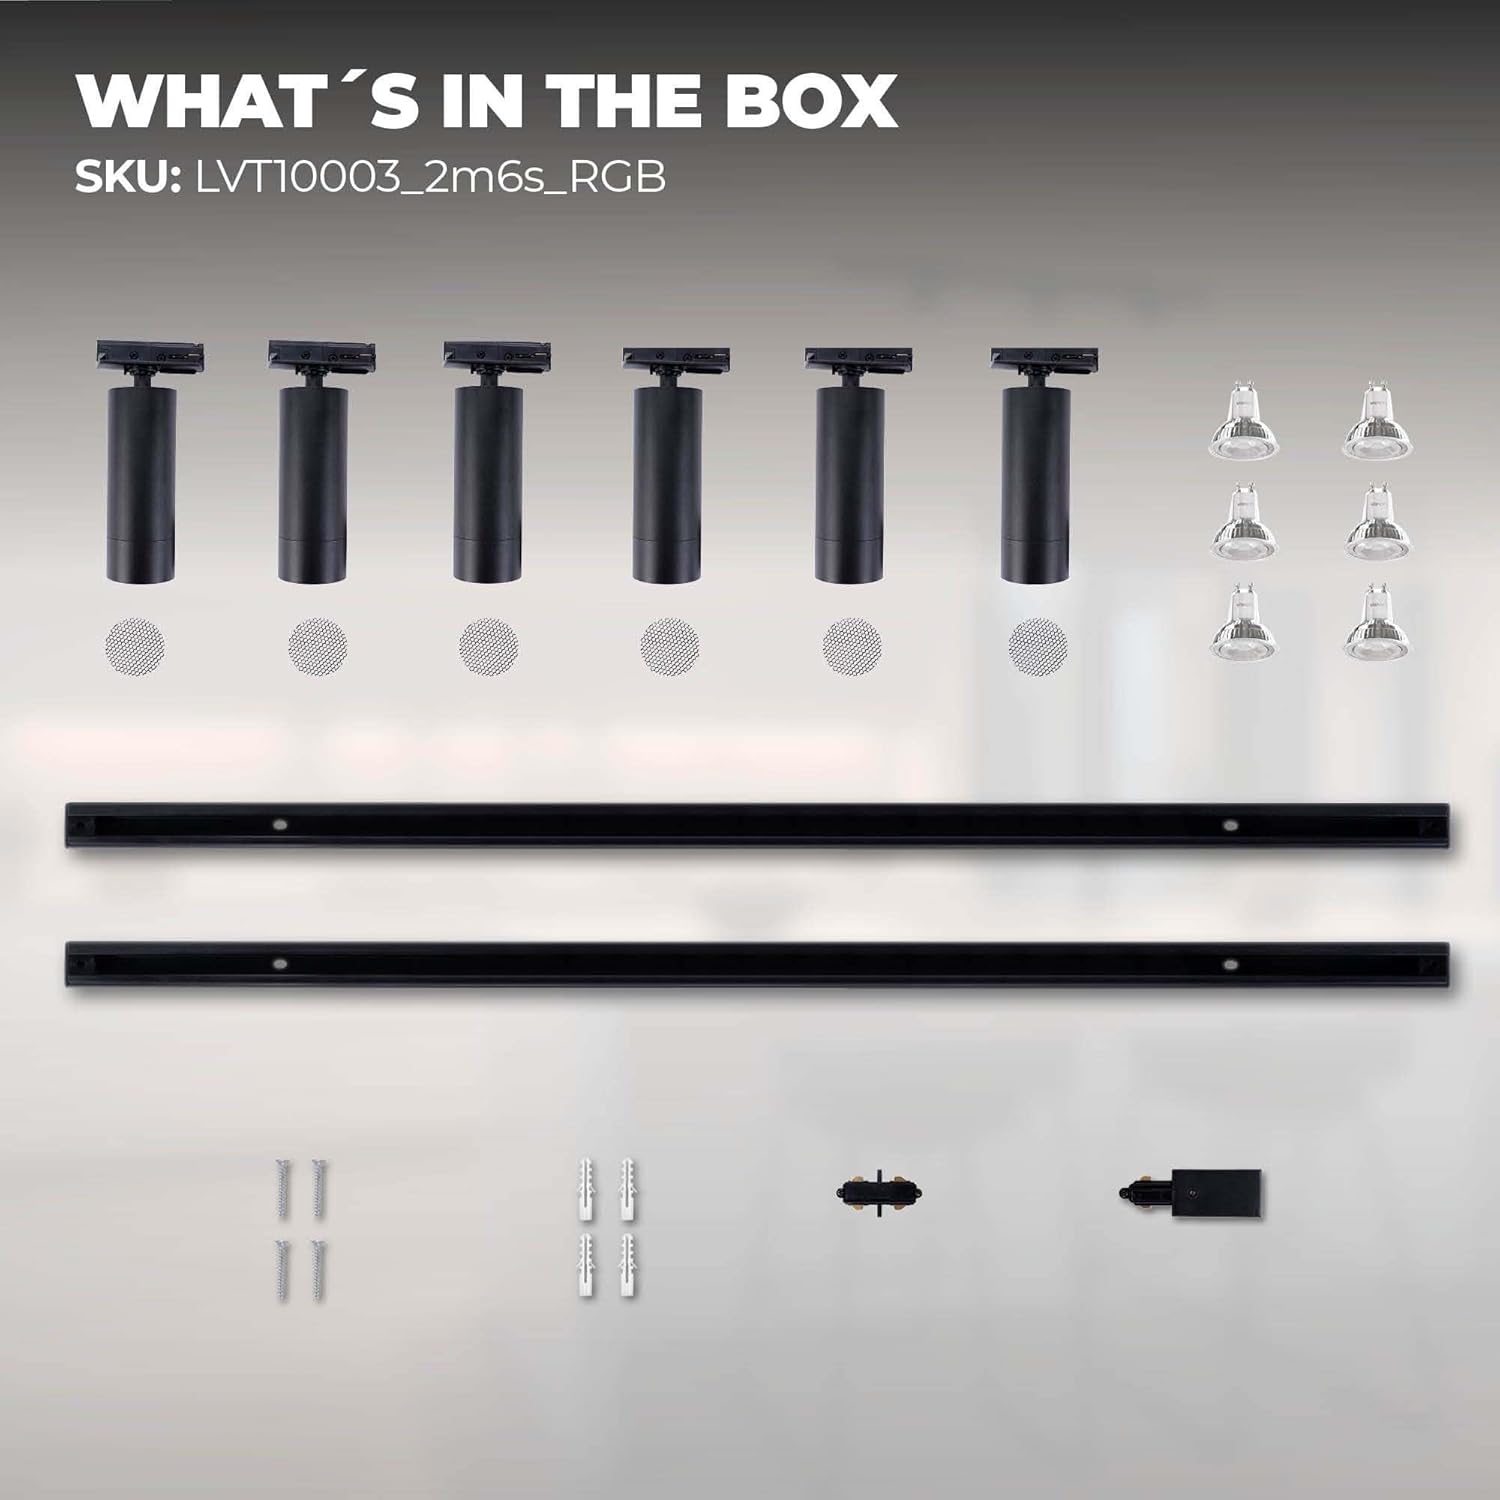
Image: All components included in the Ledvion Single-Phase LED Track Lighting System package. This includes the 2-meter track, six GU10 spot fixtures, GU10 bulbs, mounting hardware, and connectors.
- 1x 2-meter Single-Phase Track
- 6x GU10 Spot Fixtures (Black)
- 6x GU10 LED Bulbs (6500K Cool White)
- Mounting Hardware (screws, wall plugs)
- Power Connector
- End Cap
Setup and Installation
Follow these steps for proper installation of your track lighting system.
- Plan the Layout: Determine the desired location for your track lighting. Ensure it is a dry, indoor area.
- Disconnect Power: Turn off the power supply at the main circuit breaker to avoid electrical shock.
- Mount the Track:
- Mark the drilling points on the ceiling according to the track length.
- Drill holes and insert wall plugs if necessary.
- Secure the track to the ceiling using the provided screws.
- Connect Power:
- Connect the live (L), neutral (N), and ground (GND) wires from your ceiling power supply to the corresponding terminals on the track's power connector.
- Ensure all connections are secure.
- Install Spot Fixtures:

Image: Diagram showing the "Plug and Play" installation method for attaching spot fixtures to the track. The spot is inserted into the track and then locked into place with a simple mechanism.
- Insert each GU10 LED bulb into its respective spot fixture.
- Align the spot fixture with the track and push it in.
- Rotate the locking mechanism on the spot fixture to secure it firmly to the track.
- Repeat for all 6 spot fixtures.
- Attach End Cap: Place the end cap on the open end of the track for safety and aesthetics.
- Restore Power: Once all components are securely installed, restore power at the main circuit breaker.
Optional Upgrades
The Ledvion track system is expandable with various accessories:

Image: Various optional accessories for expanding the track lighting system, including power feeders with cover plates or I-connectors, X-connectors, T-connectors, and pendant spot adjustable cords.
These accessories allow for custom configurations and extended layouts. Refer to the specific accessory's instructions for installation.
Operating Instructions
Your Ledvion track lighting system is designed for ease of use.
- Turning On/Off: Control the lighting system using your standard wall switch connected to the power supply.
- Adjusting Spotlights:

Image: Illustration demonstrating the adjustability of the track lighting spots. Each spot can be tilted 350 degrees and rotated 90 degrees, allowing for precise light direction.
Each spot fixture is adjustable and rotatable. You can tilt the spotlight up to 350 degrees in all directions and rotate it 90 degrees to direct light precisely where needed.
- Repositioning Spotlights: To move a spotlight along the track, unlock its mechanism, slide it to the desired position, and then re-lock it. Ensure power is off before repositioning.
- Anti-Glare Grid (Optional):

Image: A close-up of a track spot with an optional anti-glare grid installed. The grid helps to reduce direct glare from the light source.
If you have the optional anti-glare grid, it can be easily added or removed from the front of the spot fixture to prevent glare.
Maintenance
- Cleaning: Disconnect power before cleaning. Wipe the track and spot fixtures with a soft, dry cloth. Do not use abrasive cleaners or solvents.
- Bulb Replacement:
- Ensure power is off and the bulb has cooled down.
- Gently twist and pull the GU10 bulb from the spot fixture.
- Insert a new GU10 LED bulb by aligning the pins and twisting it into place.
- Inspection: Periodically check all connections and mounting points for tightness and security.
Troubleshooting
| Problem | Possible Cause | Solution |
|---|---|---|
| Lights do not turn on. |
|
|
| Lights flicker. |
|
|
| One spot not working. |
|
|
Specifications

Image: Technical drawing showing the dimensions of the 2-meter track and the individual spot fixtures, including height and diameter.
| Brand | Ledvion |
| Model Number | LVT10003_2m6s_RGB |
| Product Dimensions (L x W x H) | 105 x 20 x 15 cm (packaged); 2m track length |
| Item Weight | 2.84 kg |
| Material | Aluminum |
| Color | Black |
| Power Source | Electric (230 Volts) |
| Bulb Type | LED |
| Bulb Base | GU10 |
| Number of Bulbs | 6 |
| Wattage (per spot) | 4.9 Watts |
| Light Color | Cool White (6500 Kelvin) |
| Control Method | Wall Switch (Push Button) |
| Installation Type | Semi-Flush Mount / Track Mount |
| Indoor/Outdoor Use | Indoor Only |
| Specific Uses | Home, Office, Store |
| Country of Origin | China |
Warranty and Support
For warranty information or technical support, please contact Ledvion customer service. Keep your purchase receipt as proof of purchase.
Contact information may be available on the product packaging or the official Ledvion website.

Image: Product packaging showing the Ledvion brand logo, a QR code, and manufacturer contact details (Tecvion B.V., 5037 TB Tilburg, Netherlands).
Manufacturer: Ledvion (Tecvion B.V.)
Address: 5037 TB Tilburg, Netherlands
Please refer to the QR code on the packaging for the most up-to-date information or to register your product.