
1. Introduction
Thank you for choosing the PIZHLO 66ft Dimmable LED Strip Lights. This product features a 66-foot (20-meter) tunable LED strip with 2400 high-brightness LED beads, offering adjustable color temperature from 2700K (warm white) to 6500K (cool white) and brightness control from 0% to 100%. This manual provides essential information for safe installation, operation, and maintenance of your LED strip lights.
2. Safety Information
- This product is designed for indoor use only. Do not expose to water or high humidity.
- Operates at a safe 12-volt voltage, producing low heat and being energy-efficient. The strip is safe to touch.
- Ensure the power adapter is connected to a suitable power outlet. Do not use damaged power cords or adapters.
- Do not cover the LED strip with materials that could impede heat dissipation.
- Keep out of reach of children.
- Do not stare directly into the LED lights for extended periods.
3. Package Contents
Verify that all components are present in the package:
- 66ft / 20m LED Strip Light (consisting of two 33ft/10m rolls)
- 1 x 12V Power Adapter
- 1 x Remote Control (with 1 CR2032 battery included)
- 1 x Remote Control Receiver
- 24 x Fixing Clips
- 24 x Fixing Screws
- 1 x User's Guide
4. Setup and Installation
Follow these steps for proper installation:
- Prepare the Surface: Ensure the installation surface is clean, dry, and smooth. Wipe away any dust or debris.
- Measure and Cut (Optional): If a shorter length is desired, cut the LED strip along the designated cut marks (copper pads) using scissors. Cutting at other points may damage the strip.
- Connect Components:
- Connect the two 33ft LED strip rolls to the included connectors.
- Connect the LED strip(s) to the remote control receiver.
- Connect the 12V power adapter to the remote control receiver.
- Plug the power adapter into a wall outlet.
- Adhere the Strip: Peel off the protective backing from the 3M self-adhesive tape on the back of the LED strip. Carefully press the strip onto the desired surface, ensuring firm contact.
- Secure with Clips: For added security, use the provided fixing clips and screws to reinforce the LED strip, especially on corners or uneven surfaces.

Figure 4.1: Connection Diagram for the 66ft LED Strip Light Set.

Figure 4.2: Step-by-step guide for preparing and adhering the LED strip.
5. Operating Instructions
The LED strip lights are controlled using the included remote control. Ensure the remote control is pointed towards the remote control receiver for optimal functionality.
Remote Control Functions:

Figure 5.1: Remote Control Layout and Functions.
- Power On/Off: Press the ON or OFF button to turn the lights on or off.
- Color Temperature Adjustment (CCT):
- Use the CCT +/- buttons to gradually adjust the color temperature between 2700K (warm white) and 6500K (cool white).
- Directly select preset color temperatures: 2700K, 3200K, 4000K, 5000K, 5500K, 6500K.
- Brightness Adjustment: Use the Bright/Speed +/- buttons to increase or decrease the light brightness from 0% to 100%.
- Special Lighting Modes:
- Sunrise: Simulates a gradual increase in light, mimicking a sunrise.
- Sunset: Simulates a gradual decrease in light, mimicking a sunset.
- Night Light: Activates a low-brightness, warm light setting suitable for night use.
- 60S Delay Off: Press this button to activate a 60-second delay before the lights turn off automatically.

Figure 5.2: Tunable Color Temperature range from 2700K to 6500K.
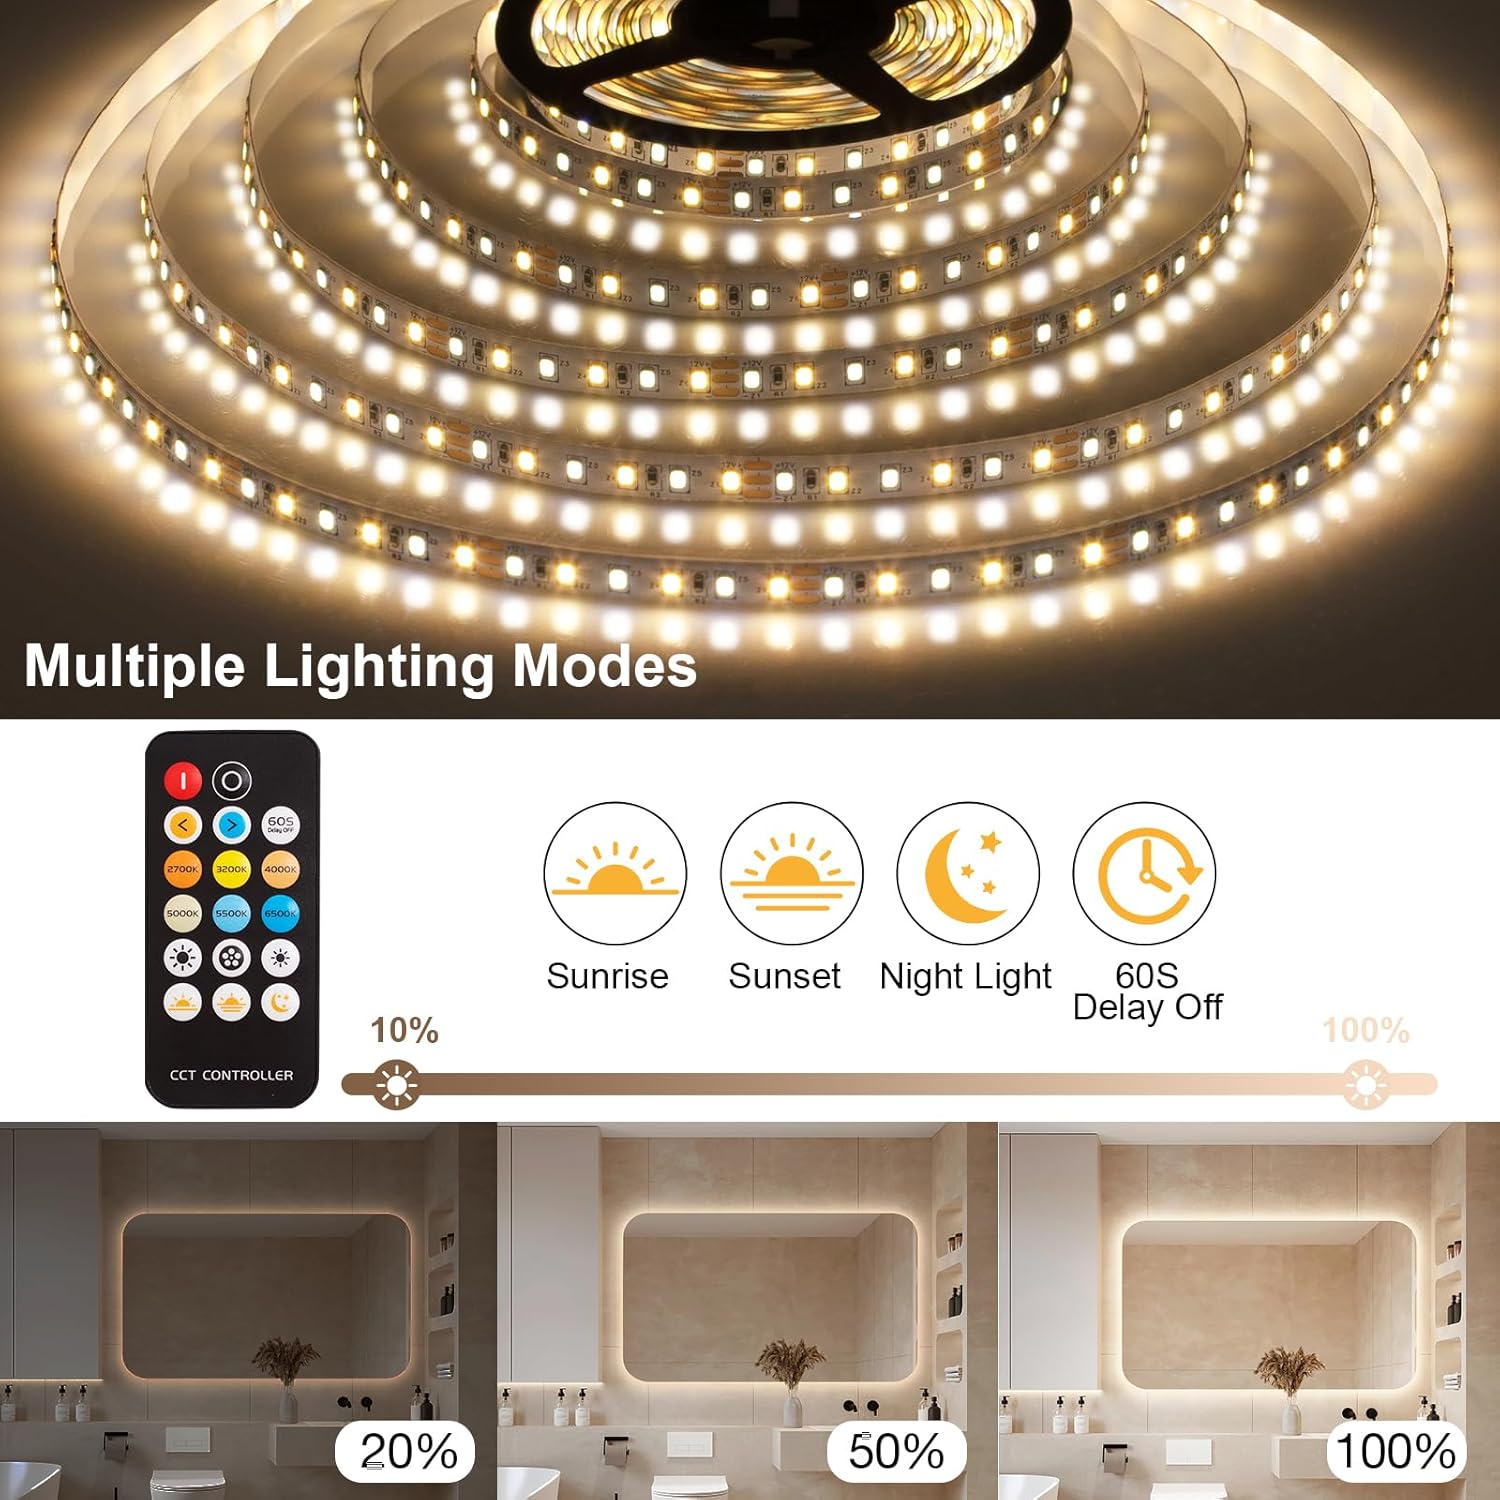
Figure 5.3: Multiple Lighting Modes and Brightness Adjustment.
6. Maintenance
To ensure the longevity and optimal performance of your LED strip lights, follow these maintenance guidelines:
- Cleaning: Gently wipe the LED strip with a soft, dry cloth to remove dust. Do not use abrasive cleaners or immerse the strip in water.
- Connection Check: Periodically inspect all connections (strip to receiver, receiver to power adapter) to ensure they are secure.
- Adhesive Integrity: If the adhesive begins to weaken, use the provided fixing clips or additional adhesive tape to re-secure the strip.
- Remote Battery: If the remote control's range or responsiveness decreases, replace the CR2032 battery.
7. Troubleshooting
If you encounter issues with your LED strip lights, refer to the following common problems and solutions:
| Problem | Possible Cause | Solution |
|---|---|---|
| Lights do not turn on. | No power, loose connection, remote battery dead. | Check power adapter connection to outlet and receiver. Ensure all strip connections are secure. Replace remote control battery. |
| Remote control is unresponsive. | Remote battery dead, remote not pointed at receiver, obstruction. | Replace remote control battery. Ensure direct line of sight to the receiver. Remove any obstructions. |
| Lights are not bright enough or too bright. | Brightness setting is incorrect. | Use the Bright/Speed +/- buttons on the remote to adjust brightness. |
| Color temperature is not as expected. | Incorrect CCT setting. | Use the CCT +/- buttons or direct CCT buttons (2700K-6500K) to select the desired color temperature. |
| LED strip is falling off the surface. | Surface not clean, adhesive weakened, heavy strip section. | Ensure surface is clean and dry before installation. Use the provided fixing clips and screws for additional support, especially on textured or frequently touched surfaces. |
8. Specifications
| Model Number | 66ft/20M LED Strip Light |
| Brand | PIZHLO |
| Length | 66 feet (20 meters) |
| LED Quantity | 2400 LEDs |
| Color Temperature | 2700K - 6500K (Tunable White) |
| Brightness | 0% - 100% Dimmable |
| Wattage | 24 watts |
| Voltage | 12V |
| Power Source | Corded Electric |
| Control Method | Remote Control |
| Remote Battery | 1 x CR2032 (included) |
| Indoor/Outdoor Usage | Indoor Only |
| Item Weight | 13.4 ounces |
9. Warranty and Support
For warranty information or technical support, please refer to the contact details provided with your purchase or visit the official PIZHLO website. Keep your purchase receipt for warranty claims.