
1. Introduction
This manual provides essential information for the safe and effective use of your Nessxa 10 Gallon Ultra Quiet Air Compressor. Please read these instructions thoroughly before operating the unit to ensure proper function, longevity, and user safety. This air compressor is designed for various pneumatic applications, including tire inflation, automotive repair, spray painting, and woodworking nailing.

Image 1.1: Front view of the Nessxa 10 Gallon Ultra Quiet Air Compressor. This image displays the overall design, including the tank, motor assembly, pressure gauges, and wheels.
2. Safety Information
Operating any power tool requires adherence to safety guidelines to prevent injury or damage. Always follow these precautions:
- Read the Entire Manual: Understand all operating procedures and warnings before use.
- Personal Protective Equipment: Always wear safety glasses or goggles. Hearing protection is recommended, even with quiet models, for extended use.
- Ventilation: Operate the compressor in a well-ventilated area.
- Electrical Safety: Ensure the power supply matches the compressor's requirements (110V/60Hz). Do not use damaged cords or plugs.
- Pressure Safety: Never exceed the maximum operating pressure of the compressor or the tool being used. The unit is equipped with automatic overheat protection and pressure relief mechanisms.
- Stability: Place the compressor on a stable, level surface during operation.
- Maintenance: Regularly inspect the compressor for damage, leaks, or loose parts. Perform routine maintenance as described in this manual.
- Children and Bystanders: Keep children and unauthorized persons away from the operating compressor.
- Overheat Protection: The compressor features two cooling fans and automatic overheat protection. If the unit becomes too hot, it will shut down automatically. Allow it to cool before restarting.
- Pressure Regulation: The motor will restart automatically when internal pressure drops below 70 PSI and will shut down or provide pressure relief if pressure becomes too high.
3. Product Components and Features
Familiarize yourself with the key components of your Nessxa air compressor:

Image 3.1: Labeled diagram of the Nessxa 10 Gallon Ultra Quiet Air Compressor, highlighting key parts such as pressure gauges, quick connectors, motor, tank, wheels, rubber floor mat, and drain valve.
- 1. Powerful 2HP Motor: Oil-free design for reduced maintenance.
- 2. Two Pressure Control Gauges: Monitor tank pressure and regulated output pressure.
- 3. Two Female Industrial "Push to Connect" Quick Connectors: For attaching air tools.
- 4. Air Filter: Protects the motor from debris.
- 5. Double Tubes (Stainless Steel): Enhanced air intake efficiency.
- 6. 10 Gallon Steel Tank: Durable air storage.
- 7. Wheels: For easy portability.
- 8. Rubber Floor Mat: Provides stability and reduces vibration.
- 9. Drain Valve: For removing condensation from the tank.
The compressor features a dual tube and dual cylinder design for efficient air intake. The intake tube is constructed from 392°F high-temperature resistant silicone with a stainless steel braided mesh for durability and performance.

Image 3.2: Close-up view illustrating the double tube and double efficiency design, highlighting the inner silicone and outer stainless steel braided mesh construction of the air intake tubes.
The oil-free motor delivers 2HP and 3.45 CFM at 115 PSI, capable of filling the 10-gallon tank to maximum pressure in approximately 70 seconds. It also includes 275°F automatic overheat protection.

Image 3.3: Detailed view of the 2HP oil-free motor, emphasizing its internal components and automatic overheat protection feature.
The compressor is designed for low noise operation, rated at 70dB, comparable to a normal conversation. This is achieved through high-quality silencers, including a thickened muffler and filter cotton.

Image 3.4: Diagram illustrating the noise reduction components, including the rubber muffler pipe, filter cotton, and thick sound muffler, contributing to the 70dB quiet operation.
The tank construction features a 3-layer process for durability and resistance against rust, wear, and leakage. It includes a rust and wear-resistant layer, a plastic powder adhesion layer, and Q235B structural steel.

Image 3.5: Cross-sectional view of the air compressor tank, detailing its three-layer construction for enhanced durability and safety.
4. Setup
- Unpacking: Carefully remove the compressor and all components from the packaging. Inspect for any shipping damage.
- Attach Wheels and Handle: If not pre-assembled, attach the wheels and handle according to the included hardware. Ensure all fasteners are securely tightened.
- Placement: Position the compressor on a firm, level surface in a clean, well-ventilated area. Ensure there is adequate space around the unit for air circulation.
- Initial Check: Before connecting to power, ensure the drain valve at the bottom of the tank is closed. Check that all connections are tight.
- Power Connection: Connect the power cord to a grounded 110V/60Hz electrical outlet.
5. Operating Instructions
- First Use (Break-in Period): For the first operation, run the compressor with the tank drain valve open for 15-20 minutes to allow the motor components to break in. This helps ensure proper lubrication and extends motor life.
- Power On: Turn the power switch to the "ON" position. The compressor will begin to fill the tank.
- Monitor Pressure: Observe the tank pressure gauge. The compressor will automatically shut off when it reaches its maximum pressure (115 PSI).
- Adjust Output Pressure: Use the regulator knob to set the desired output pressure for your pneumatic tool. The regulated pressure will be displayed on the output pressure gauge.
- Connect Air Tool: Attach your air hose to one of the quick connectors, then connect your pneumatic tool to the hose.
- Begin Operation: Once the desired pressure is set and the tool is connected, you can begin using your air tool. The compressor will cycle on and off automatically to maintain tank pressure.
- Power Off: When finished, turn the power switch to the "OFF" position.
- Depressurize Tank: Slowly open the drain valve to release all air pressure from the tank. This is important for safety and to prevent moisture buildup.
The Nessxa air compressor is suitable for a wide range of applications:

Image 5.1: Visual representation of common applications for the air compressor, including tire inflation, auto repair, woodworking nailing, and spray painting.
6. Maintenance
Regular maintenance ensures the longevity and safe operation of your air compressor.
- Drain Tank Daily: After each use, or at least daily, open the drain valve at the bottom of the tank to release accumulated moisture. This prevents rust and corrosion inside the tank. Ensure the tank is depressurized before draining.
- Clean Air Filter: Periodically inspect and clean or replace the air filter. A clogged filter reduces efficiency and can damage the motor. Refer to the filter housing for specific cleaning instructions.
- Inspect for Leaks: Regularly check all hoses, fittings, and connections for air leaks. Leaks reduce efficiency and can cause the compressor to run excessively.
- General Cleaning: Keep the compressor clean and free of dust and debris. Wipe down the exterior with a damp cloth. Do not use harsh chemicals.
- Motor Cooling: Ensure the cooling fans and vents are clear of obstructions to allow for proper heat dissipation.
7. Troubleshooting
| Problem | Possible Cause | Solution |
|---|---|---|
| Compressor does not start. | No power, tripped circuit breaker, faulty switch, overheat protection activated. | Check power connection and outlet. Reset circuit breaker. Allow compressor to cool if overheated. Contact support if switch is faulty. |
| Compressor runs continuously or cycles frequently. | Air leak in tank or connections, drain valve open, pressure switch malfunction. | Check all connections for leaks. Ensure drain valve is closed. Contact support if pressure switch is faulty. |
| Low air pressure or insufficient airflow. | Clogged air filter, air leak, regulator set too low, undersized air hose/tool. | Clean or replace air filter. Check for leaks. Adjust regulator to higher pressure. Ensure appropriate air hose and tool are used. |
| Excessive noise or vibration. | Loose components, compressor on uneven surface, internal motor issue. | Check and tighten all fasteners. Place compressor on a stable, level surface. Contact support if motor issue is suspected. |
| Water in air line. | Tank not drained regularly. | Drain the tank daily after use. Consider an inline air dryer for sensitive applications. |
8. Specifications
Technical specifications for the Nessxa 10 Gallon Ultra Quiet Air Compressor:
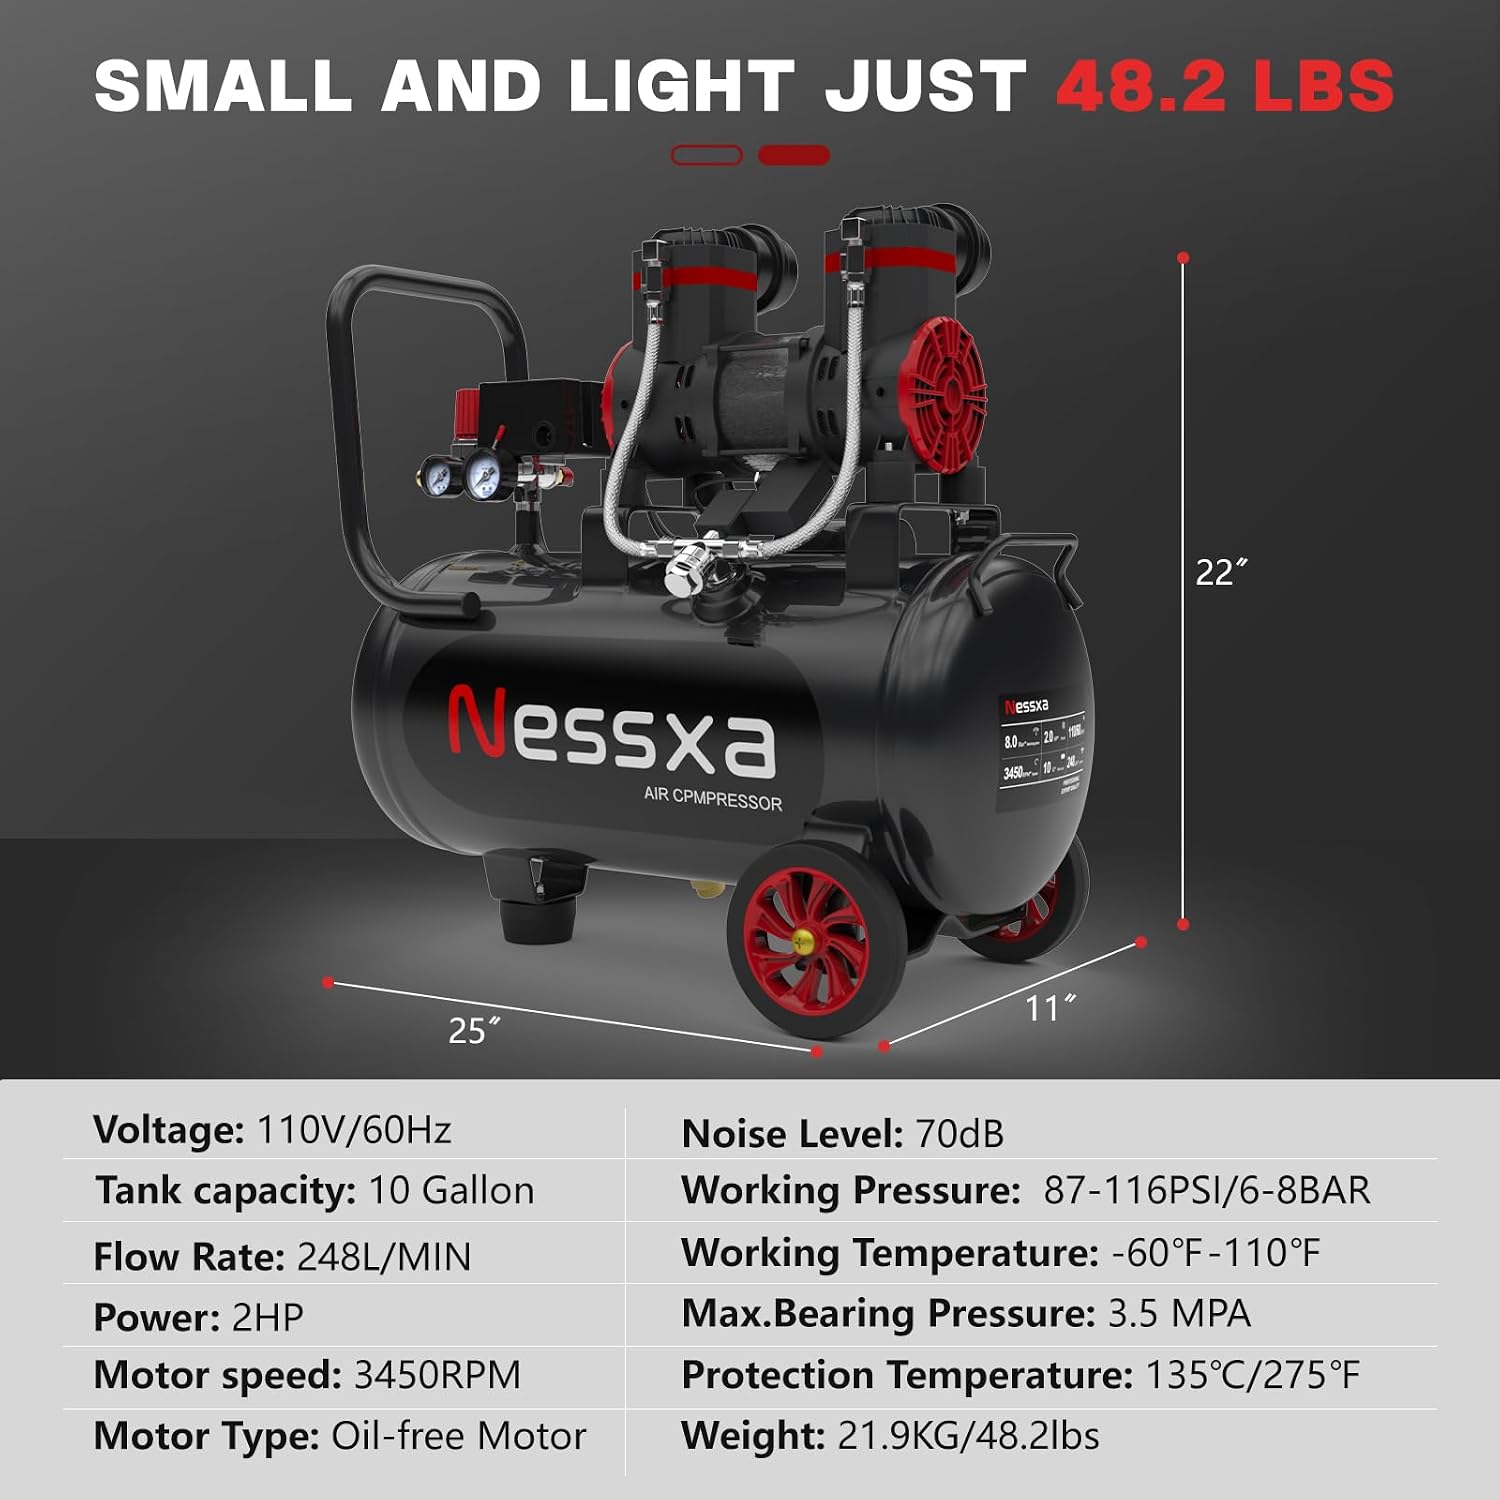
Image 8.1: Diagram showing the dimensions of the air compressor along with a table of key specifications.
| Feature | Detail |
|---|---|
| Brand | Nessxa |
| Model Name | Ultra Quiet Air Compressor |
| Tank Capacity | 10 Gallons |
| Power | 2 HP (Horsepower) |
| Motor Type | Oil-free Motor |
| Voltage | 110V/60Hz |
| Air Flow Capacity (CFM) | 3.45 CFM @ 115 PSI |
| Air Flow Capacity (L/MIN) | 248 L/MIN |
| Noise Level | 70 dB |
| Motor Speed | 3450 RPM |
| Working Pressure | 87-116 PSI / 6-8 BAR |
| Maximum Bearing Pressure | 3.5 MPa |
| Working Temperature | -60°F - 110°F |
| Protection Temperature | 135°C / 275°F |
| Item Weight | 48.2 lbs (21.9 kg) |
| Dimensions (Approx.) | 25" (L) x 11" (W) x 22" (H) |
| Included Components | Ultra Quiet Air Compressor |
9. Warranty and Support
Nessxa products are manufactured to high-quality standards. For warranty information, technical assistance, or to inquire about replacement parts, please refer to the contact information provided at the point of purchase or visit the official Nessxa website. Please have your model number (Ultra Quiet Air Compressor) and purchase date available when contacting support.