
ANENG SZ309
ANENG SZ309 Digital Multimeter User Manual
Model: SZ309
1. Introduction
The ANENG SZ309 Digital Multimeter is a versatile and essential tool designed for accurate electrical measurements in various applications, from household tasks to professional electrical maintenance. This manual provides detailed instructions for setting up, operating, and maintaining your multimeter to ensure safe and efficient use.
Key features include:
- Measures AC/DC Voltage up to 600V
- Measures AC/DC Current up to 10A
- Measures Resistance, Capacitance, Frequency, and Duty Cycle
- Continuity and Diode Testing
- Non-Contact Voltage (NCV) detection
- True RMS for accurate readings
- Auto-Ranging capability
- High-definition backlit display with Data Hold function
- Automatic shut-off for power saving
- Compact and portable design with a stretchable support frame
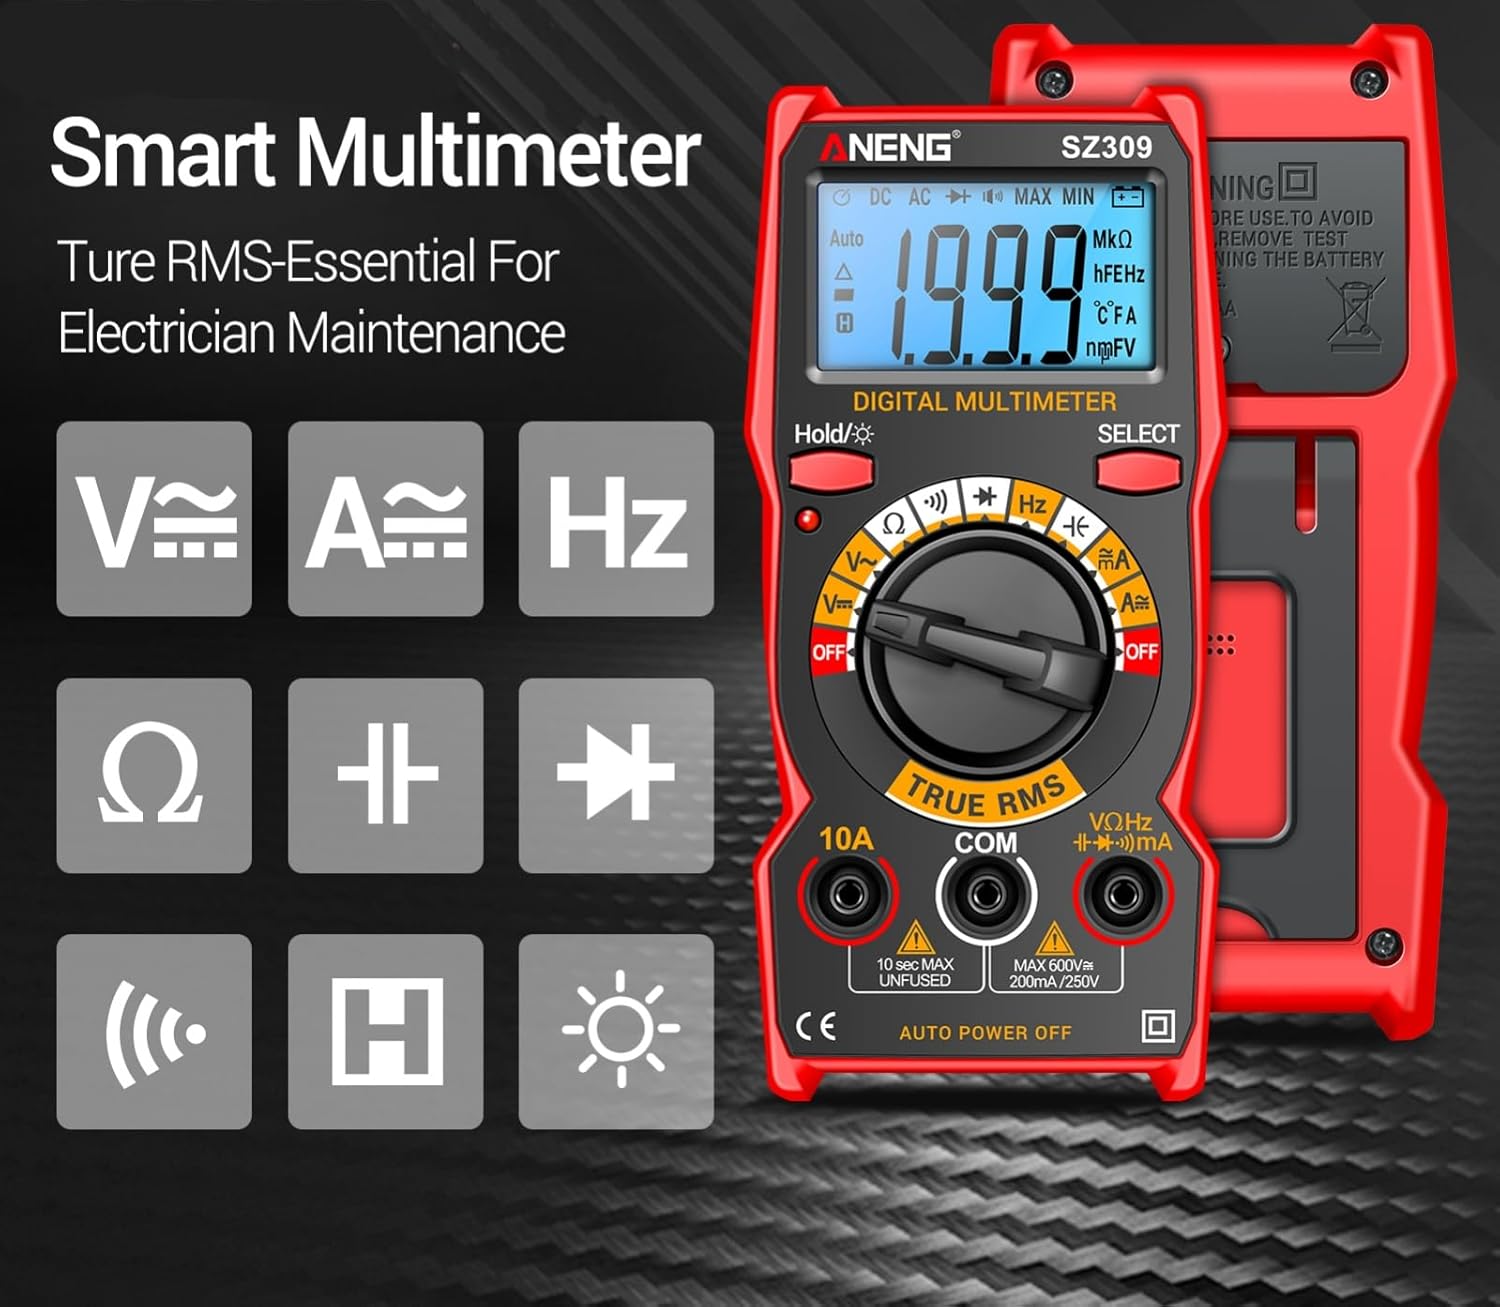
Figure 1: ANENG SZ309 Smart Multimeter highlighting its core measurement capabilities.
2. Package Contents
Upon opening the package, please verify that all the following items are included:
- 1 x ANENG SZ309 Digital Multimeter
- 1 x Multimeter Test Lead Set (Red and Black)
- 1 x Electrical Tester Kit (including 4 connection sockets, 2 PVC cables, 2 copper needles, 2 U-shaped inserts, 2 meter pens, 4 alligator clips)
- 2 x AAA Batteries
- 1 x Instruction Manual
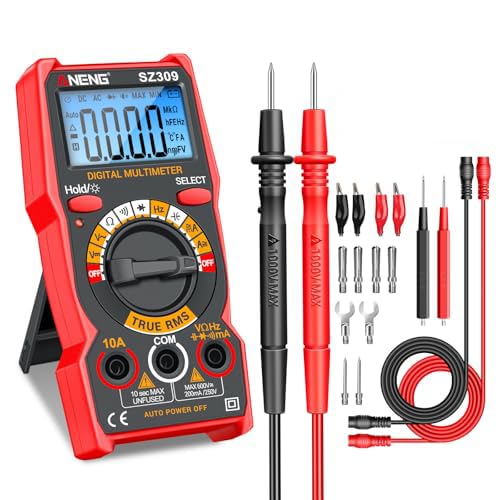
Figure 2: Complete package contents of the ANENG SZ309 Digital Multimeter.

Figure 3: Visual representation of "What's in the Box" for the ANENG SZ309.
3. Setup and Battery Installation
Before first use, install the AAA batteries into the multimeter. A screwdriver is typically required for this step.
- Locate the battery compartment cover on the back of the multimeter.
- Use a screwdriver to remove the screw securing the battery cover.
- Carefully remove the battery compartment cover.
- Insert two AAA batteries, ensuring correct polarity (+ and -).
- Replace the battery compartment cover and secure it with the screw.
Video 1: Unboxing and Battery Installation for the ANENG SZ309 Multimeter (0:05 - 0:22). This video demonstrates how to open the battery compartment, insert the two AAA batteries, and secure the cover.
4. Product Overview
Familiarize yourself with the main components and display features of your ANENG SZ309 Digital Multimeter.
4.1. Display Features
The multimeter features a high-definition backlit LCD display for clear readings, even in low-light conditions. It also includes a Data Hold function to freeze the current reading on the screen.
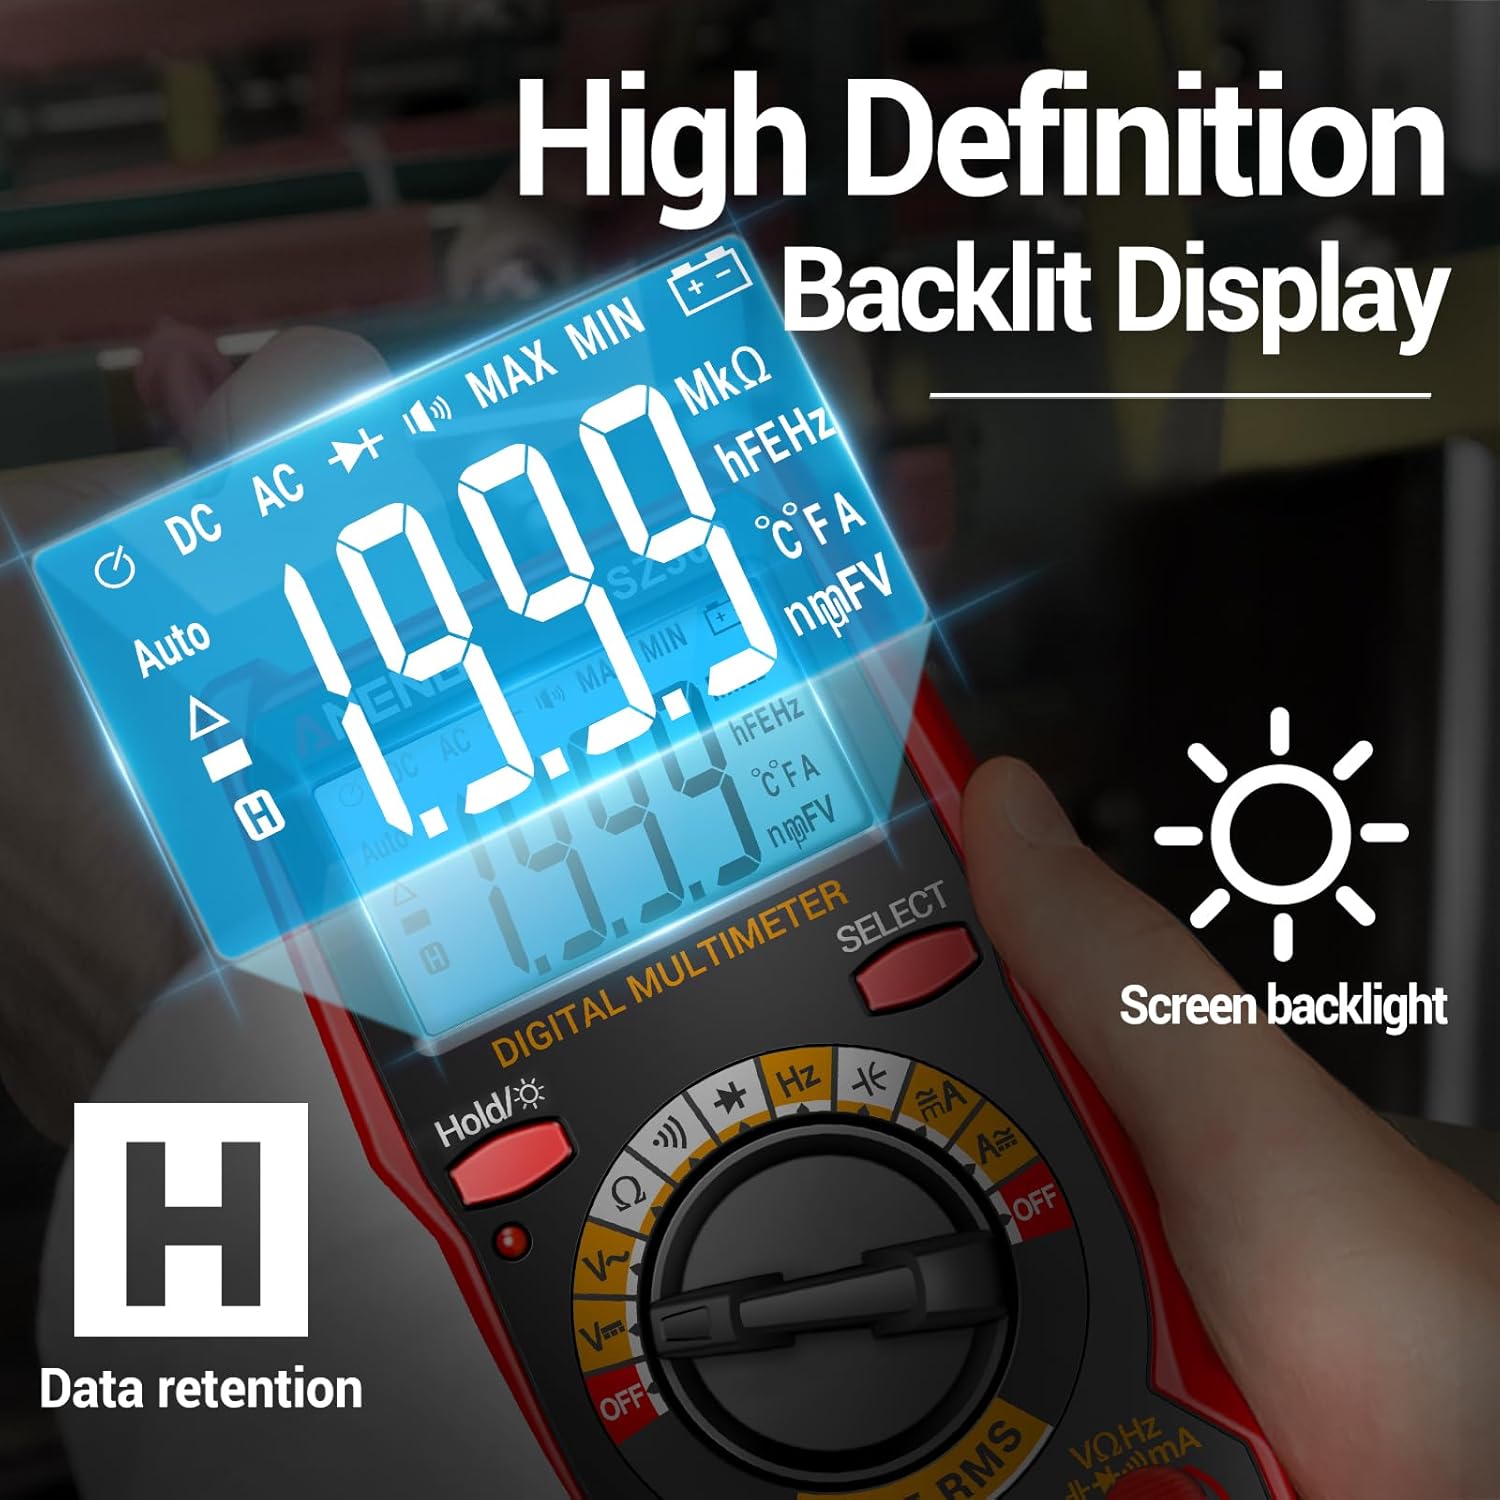
Figure 4: High Definition Backlit Display of the ANENG SZ309, showing data retention and backlight indicators.
4.2. Physical Features
The compact design allows for easy portability, and the integrated stretchable support frame on the back provides convenient viewing angles during use.

Figure 5: The adjustable back support frame of the ANENG SZ309 for optimal viewing.
5. Operating Instructions
Always ensure the multimeter is set to the correct function and range before making any measurements. Connect the test leads securely to the appropriate input jacks.
5.1. Connecting Test Leads
The black test lead is typically connected to the "COM" (common) jack. The red test lead is connected to the appropriate jack based on the measurement type (e.g., VΩHz for voltage/resistance/frequency, 10A for high current, mA for low current).
Video 2: Demonstrates plugging the test pens into the corresponding ports on the multimeter (0:52 - 0:57).
5.2. AC Current Measurement
To measure AC current, insert the test leads into the appropriate current ports (e.g., 10A or mA) and switch the rotary dial to the AC current setting. Connect the multimeter in series with the circuit you wish to measure.
Video 3: AC Current Measurement demonstration (0:23 - 0:33). Shows connecting the multimeter in series with a light bulb circuit to measure AC current.
5.3. DC Current Measurement
For DC current measurement, switch the dial to the DC current setting and connect the multimeter in series with the DC circuit. Ensure correct polarity when connecting the leads.
Video 4: DC Current Measurement demonstration (0:34 - 0:39). Illustrates measuring DC current in a circuit with an LED strip and a battery.
5.4. mA DC Current Measurement
For measuring small DC currents (milliamperes), switch the dial to the mA DC current setting. Connect the multimeter in series with the circuit. The "Hold" button can be used to freeze the reading on the screen.
Video 5: mA DC Current Measurement demonstration (0:40 - 0:51). Shows measuring current draw of computer fans and using the "Hold" function.
5.5. DC Voltage Measurement
To measure DC voltage, switch the dial to the DC Voltage (V=) setting. Connect the test leads in parallel across the component or power source you want to measure. Ensure correct polarity.

Figure 6: Measuring DC voltage on a car battery using the ANENG SZ309.
Video 6: DC Voltage Measurement demonstration (0:57 - 1:10). Shows measuring voltage across different battery types.
5.6. AC Voltage Measurement
To measure AC voltage, switch the dial to the AC Voltage (V~) setting. Connect the test leads in parallel across the AC power source or component.

Figure 7: Measuring AC voltage in an electrical panel with the ANENG SZ309.
Video 7: AC Voltage Measurement demonstration (1:11 - 1:25). Shows measuring household AC voltage from a power strip.
5.7. Resistance Measurement
To measure resistance, turn the dial to the Ohm (Ω) setting. Connect the test leads across the component. Ensure the component is de-energized before measuring resistance.
Video 8: Resistance Measurement demonstration (1:26 - 1:40). Shows measuring resistance of various resistors.
5.8. Buzzer (Continuity) Measurement
The buzzer function tests for continuity in a circuit. Switch the dial to the continuity setting. If there is a continuous path (low resistance), the multimeter will emit an audible beep. A silent reading indicates an open circuit or high resistance.
Video 9: Buzzer (Continuity) Measurement demonstration (1:41 - 1:54). Shows testing continuity of a light bulb filament and a coiled wire.
5.9. Diode Measurement
To test a diode, switch the dial to the diode symbol. Connect the test leads across the diode. The multimeter will display a voltage drop in one direction and an open circuit (OL) in the reverse direction for a healthy diode.
Video 10: Diode Measurement demonstration (1:55 - 2:06). Shows testing the forward voltage drop of an LED.
5.10. Frequency Measurement
To measure frequency (Hz), switch the dial to the Hz setting. Connect the test leads across the signal source. The multimeter will display the frequency in Hertz.
Video 11: Frequency Measurement demonstration (2:07 - 2:15). Shows measuring the frequency of an electrical signal from a circuit breaker.
5.11. Capacitance Measurement
To measure capacitance, switch the dial to the capacitance (F) setting. Before testing, ensure the capacitor is fully discharged by short-circuiting its terminals. Then, connect the test leads across the capacitor terminals.
Video 12: Capacitance Measurement demonstration (2:16 - 2:35). Shows discharging and then measuring the capacitance of various capacitors.
6. Safety Information
WARNING: Always observe safety precautions when working with electricity. Failure to do so may result in injury or damage to the multimeter or other equipment.
- Do not attempt to measure voltage or current beyond the specified maximum limits.
- Ensure the test leads are in good condition, free from cracks or damage.
- Always disconnect power to a circuit before measuring resistance, continuity, or capacitance.
- Do not use the multimeter if it appears damaged or is not operating correctly.
- Keep hands and fingers behind the probe barriers during measurements.
- Replace batteries promptly when the low battery indicator appears to ensure accurate readings.
7. Maintenance
7.1. Cleaning
Wipe the multimeter casing with a damp cloth and mild detergent. Do not use abrasives or solvents. Ensure the device is completely dry before storage or next use.
7.2. Storage
When not in use for extended periods, remove the batteries to prevent leakage. Store the multimeter in a cool, dry place, away from direct sunlight and extreme temperatures.
7.3. Battery Replacement
Refer to Section 3 for detailed instructions on replacing the AAA batteries when the low battery indicator is displayed on the screen.
8. Troubleshooting
If you encounter issues with your ANENG SZ309 Multimeter, try the following common troubleshooting steps:
| Problem | Possible Cause | Solution |
|---|---|---|
| No display or dim display | Dead or low batteries; Incorrect battery installation | Replace batteries; Check battery polarity (refer to Section 3) |
| "OL" (Overload) displayed | Measurement range too low; Open circuit (for continuity/resistance) | Switch to a higher range; Check circuit connections |
| Inaccurate readings | Incorrect function selected; Damaged test leads; External interference | Verify dial setting; Inspect and replace leads if damaged; Move away from strong electromagnetic fields |
| No continuity beep | Open circuit; Buzzer function not selected | Check circuit path; Ensure dial is on buzzer setting |
9. Specifications
Below are the technical specifications for the ANENG SZ309 Digital Multimeter:
| Specification | Value |
|---|---|
| Product Dimensions | 1.97 x 1.97 x 0.79 inches |
| Item Weight | 9.59 ounces |
| Manufacturer | ANENG |
| Power Source | Battery Powered (2x AAA) |
| Color | Red |
| Style | SZ309 Red (With 16-piece test set) |
10. Warranty and Support
ANENG provides considerate service and technical support for its products. For any inquiries, technical assistance, or warranty claims, please contact the seller or manufacturer directly through the platform where the product was purchased.
For more information about ANENG products, you may visit the official ANENG Store: ANENG Store on Amazon.
Related documentsSZ309


Ask a question about this manual
Ask about setup, troubleshooting, compatibility, parts, safety, or missing instructions. Manuals+ will review the question and use this page’s manual context to help answer it.