Introduction
Thank you for choosing the WallarGe Atomic Digital Wall Clock. This clock is designed for precision and ease of use, featuring automatic time synchronization, a large, easy-to-read display, and a customizable backlight. This manual provides detailed instructions to help you set up and operate your new clock effectively.
Package Contents
- WallarGe Atomic Digital Wall Clock (Model: CL5005)
- User Manual
Note: 4 x AA batteries are not included and must be purchased separately.
Setup
1. Battery Installation
The WallarGe Atomic Digital Wall Clock is battery-operated, offering flexible placement without the need for power outlets. It requires four (4) AA batteries (not included).
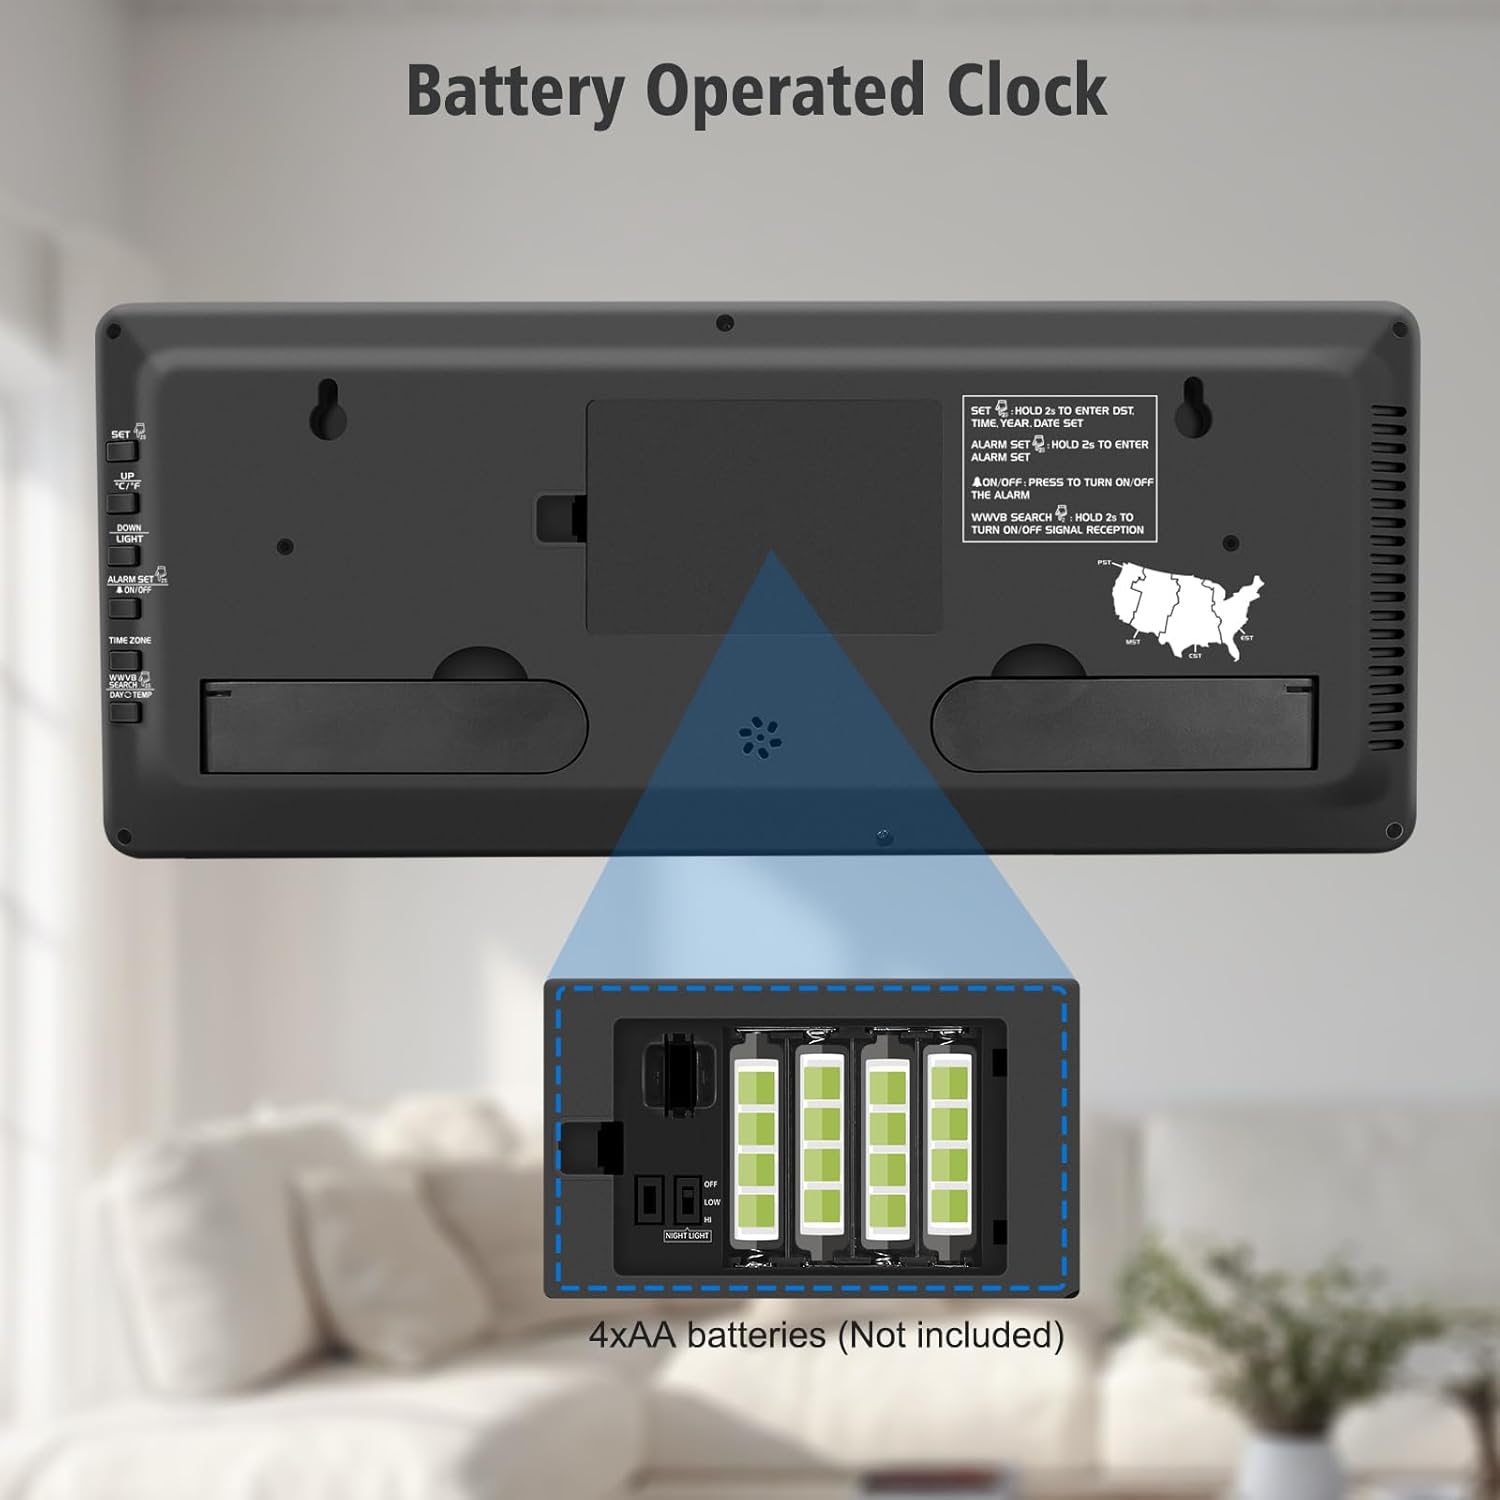
Figure 1: Battery Compartment
Locate the battery compartment on the back of the clock. Insert four AA batteries, ensuring correct polarity (+/-) as indicated inside the compartment.
- Open the battery compartment cover on the back of the clock.
- Insert four (4) AA batteries, observing the correct polarity (+ and -) markings.
- Close the battery compartment cover securely.
- The clock will power on and begin searching for the atomic time signal.
2. Initial Atomic Time Synchronization
Upon battery installation, the clock will automatically attempt to synchronize with the WWVB atomic time signal. This ensures the clock is always accurate to within one second.
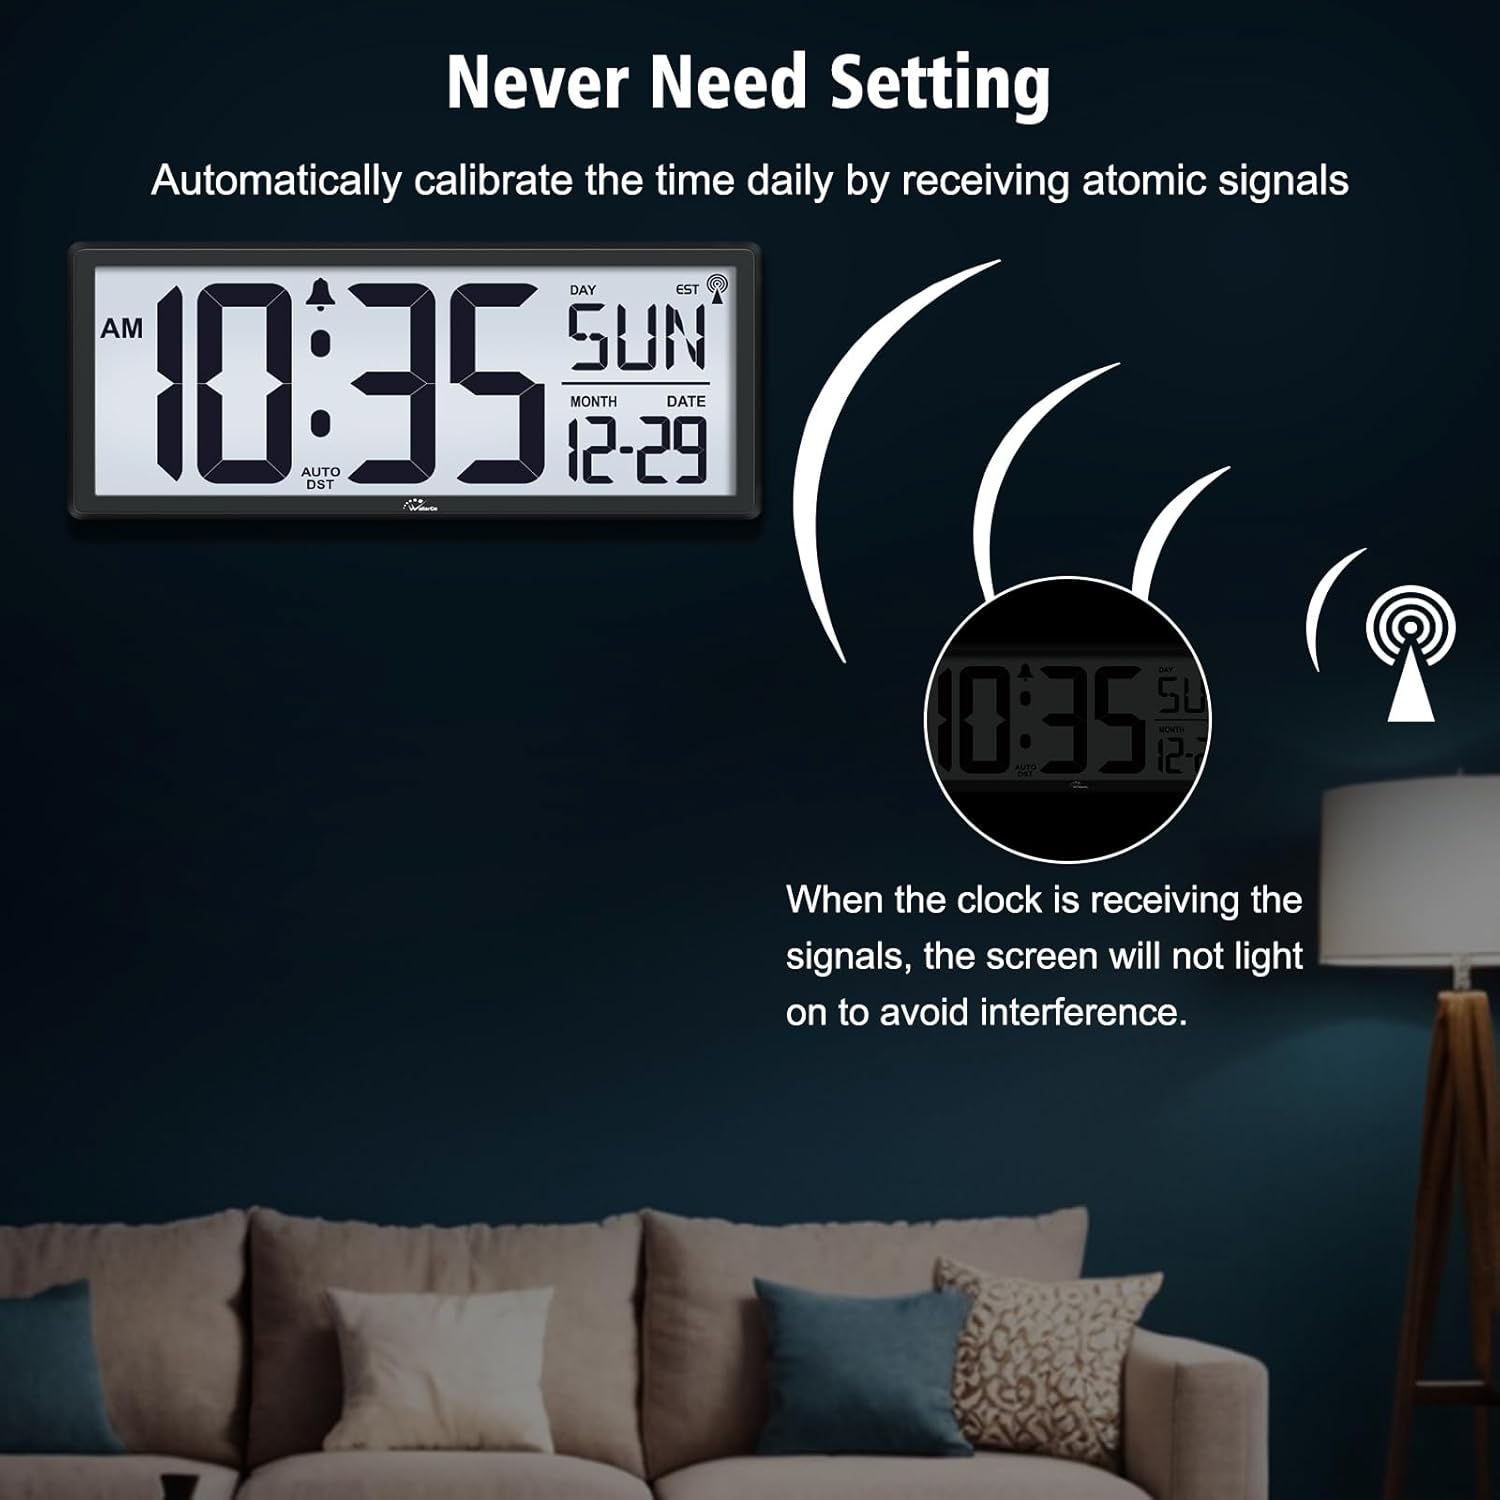
Figure 2: Atomic Signal Reception
The clock automatically calibrates its time daily by receiving atomic signals. During signal reception, the screen will not light up to avoid interference.
- Place the clock in an area with good reception, ideally near a window and away from electronic devices that might cause interference.
- A signal icon (often a tower with waves) will appear on the display when the clock is actively searching for or has successfully received the signal.
- Synchronization may take a few minutes to several hours depending on your location and signal strength.
- Once synchronized, the clock will display the correct time, date, and day of the week.
If the clock does not synchronize automatically, you can manually initiate a search by pressing the "WWVB SEARCH" button on the back of the clock (refer to the button layout section).
Operating Instructions
1. Button Layout and Functions
Familiarize yourself with the buttons located on the back of your clock for various settings and adjustments.
Figure 3: Back Panel Buttons
The back panel includes buttons for setting time, alarm, initiating WWVB search, adjusting time zone, and changing display modes.
- SET: Used to enter time/date setting mode. Hold for 3 seconds to enter.
- ALARM SET: Used to enter alarm setting mode. Hold for 3 seconds to enter. Press to turn alarm ON/OFF.
- WWVB SEARCH: Press and hold for 2 seconds to manually initiate or stop WWVB signal reception.
- TIME ZONE: Press to cycle through available time zones (PST, MST, CST, EST).
- DAY/TEMP: Press to switch between display modes for day/temperature (Day Only, Temp Only, Day & Temp alternating).
- NIGHT LIGHT (Switch): A physical switch to control backlight levels (OFF-LOW-HIGH).
2. Customizable Backlight Function
The clock features a soft backlight with three adjustable levels (OFF, LOW, HIGH) to ensure readability in various lighting conditions, especially at night.

Figure 4: Backlight Settings
Adjust the backlight using the NIGHT LIGHT switch on the side/back of the clock to suit your preference and ambient light conditions.
- Locate the "NIGHT LIGHT" switch on the side or back of the clock.
- Slide the switch to select your desired backlight level:
- OFF: No backlight. Ideal for complete darkness or to conserve battery.
- LOW: Provides a soft nightlight, allowing you to read the time without disturbing sleep.
- HIGH: Offers a brighter illumination for clear visibility in dimly lit environments.
3. Selectable Display Modes
The clock can display the day of the week and indoor temperature in different configurations.

Figure 5: Display Mode Options
Cycle through different display modes for day and temperature information using the DAY/TEMP button.
- Press the "DAY/TEMP" button on the back of the clock to cycle through the following display options:
- DAY ONLY: Displays only the day of the week along with month and date.
- TEMP ONLY: Displays only the indoor temperature along with month and date.
- DAY & TEMP: Alternates between displaying the day of the week and the indoor temperature every 10 seconds.
4. Setting Time Zone and Manual Time/Date Adjustment
While the atomic clock automatically sets the time, you may need to set your specific time zone or manually adjust time/date if atomic signal is unavailable.
- Time Zone Setting:
- Press the "TIME ZONE" button repeatedly to cycle through the available time zones: PST (Pacific Standard Time), MST (Mountain Standard Time), CST (Central Standard Time), EST (Eastern Standard Time).
- The clock will automatically adjust the time based on the selected time zone after atomic synchronization.
- Manual Time/Date Setting (if needed):
- Press and hold the "SET" button for 3 seconds to enter manual setting mode.
- The first adjustable item (e.g., Year) will flash. Use the UP/DOWN buttons (if available, or other designated buttons) to adjust the value.
- Press "SET" again to confirm and move to the next item (Month, Date, Hour, Minute, 12/24H format, Temperature unit °C/°F).
- Repeat until all settings are adjusted. The clock will exit setting mode automatically after a period of inactivity or by pressing "SET" one last time.
5. Daylight Saving Time (DST)
The clock is equipped with an automatic Daylight Saving Time (DST) feature. When the atomic signal is received, the clock will automatically adjust for DST changes.
- The "AUTO DST" indicator on the display will show if the automatic DST function is active.
- No manual adjustment is typically required for DST when the atomic signal is successfully received.
Maintenance
- Cleaning: Wipe the clock with a soft, dry cloth. Do not use abrasive cleaners or chemicals.
- Battery Replacement: A low battery indicator will appear on the display when the batteries need to be replaced. Replace all four AA batteries simultaneously to ensure optimal performance.
- Placement: Avoid placing the clock in direct sunlight, near heat sources, or in areas with high humidity.
Troubleshooting
| Problem | Possible Cause / Solution |
|---|---|
| Clock does not display anything. |
|
| Clock does not synchronize with atomic time. |
|
| Backlight is not working or is too dim. |
|
| Incorrect temperature reading. |
|
Specifications
- Brand: WallarGe
- Model Number: CL5005
- Color: Black
- Display Type: Digital
- Material: Acrylonitrile Butadiene Styrene (ABS)
- Dimensions (L x W x H): Approximately 36.8 cm x 3.81 cm x 15.24 cm (14.5 inches x 1.5 inches x 6 inches)
- Weight: Approximately 880 grams (1.94 lbs)
- Power Source: 4 x AA Batteries (not included)
- Special Features: Atomic Clock, Backlight (3 levels), DST (Daylight Saving Time), Indoor Temperature Display, Day of the Week, Date
- Indoor/Outdoor Use: Indoor
Warranty and Support
WallarGe is committed to providing high-quality products. For any questions, concerns, or technical support regarding your WallarGe Atomic Digital Wall Clock, please refer to the contact information provided with your purchase or visit the official WallarGe website. Please retain your proof of purchase for warranty claims.
This product comes with a standard manufacturer's warranty against defects in materials and workmanship. The warranty period typically begins from the date of purchase. Please consult the warranty card included in your package for specific terms and conditions.

