
Roxicosly Mirror Alarm Clock+Projection Alarm Clock
Roxicosly Mirror Alarm Clock + Projection Alarm Clock User Manual
Model: Mirror Alarm Clock+Projection Alarm Clock
Brand: Roxicosly
1. Introduction
Thank you for purchasing the Roxicosly Mirror Alarm Clock with Projection. This device combines a stylish mirror display with advanced projection capabilities, offering convenience and functionality for your daily routine. Please read this manual carefully to understand how to set up, operate, and maintain your new alarm clock.
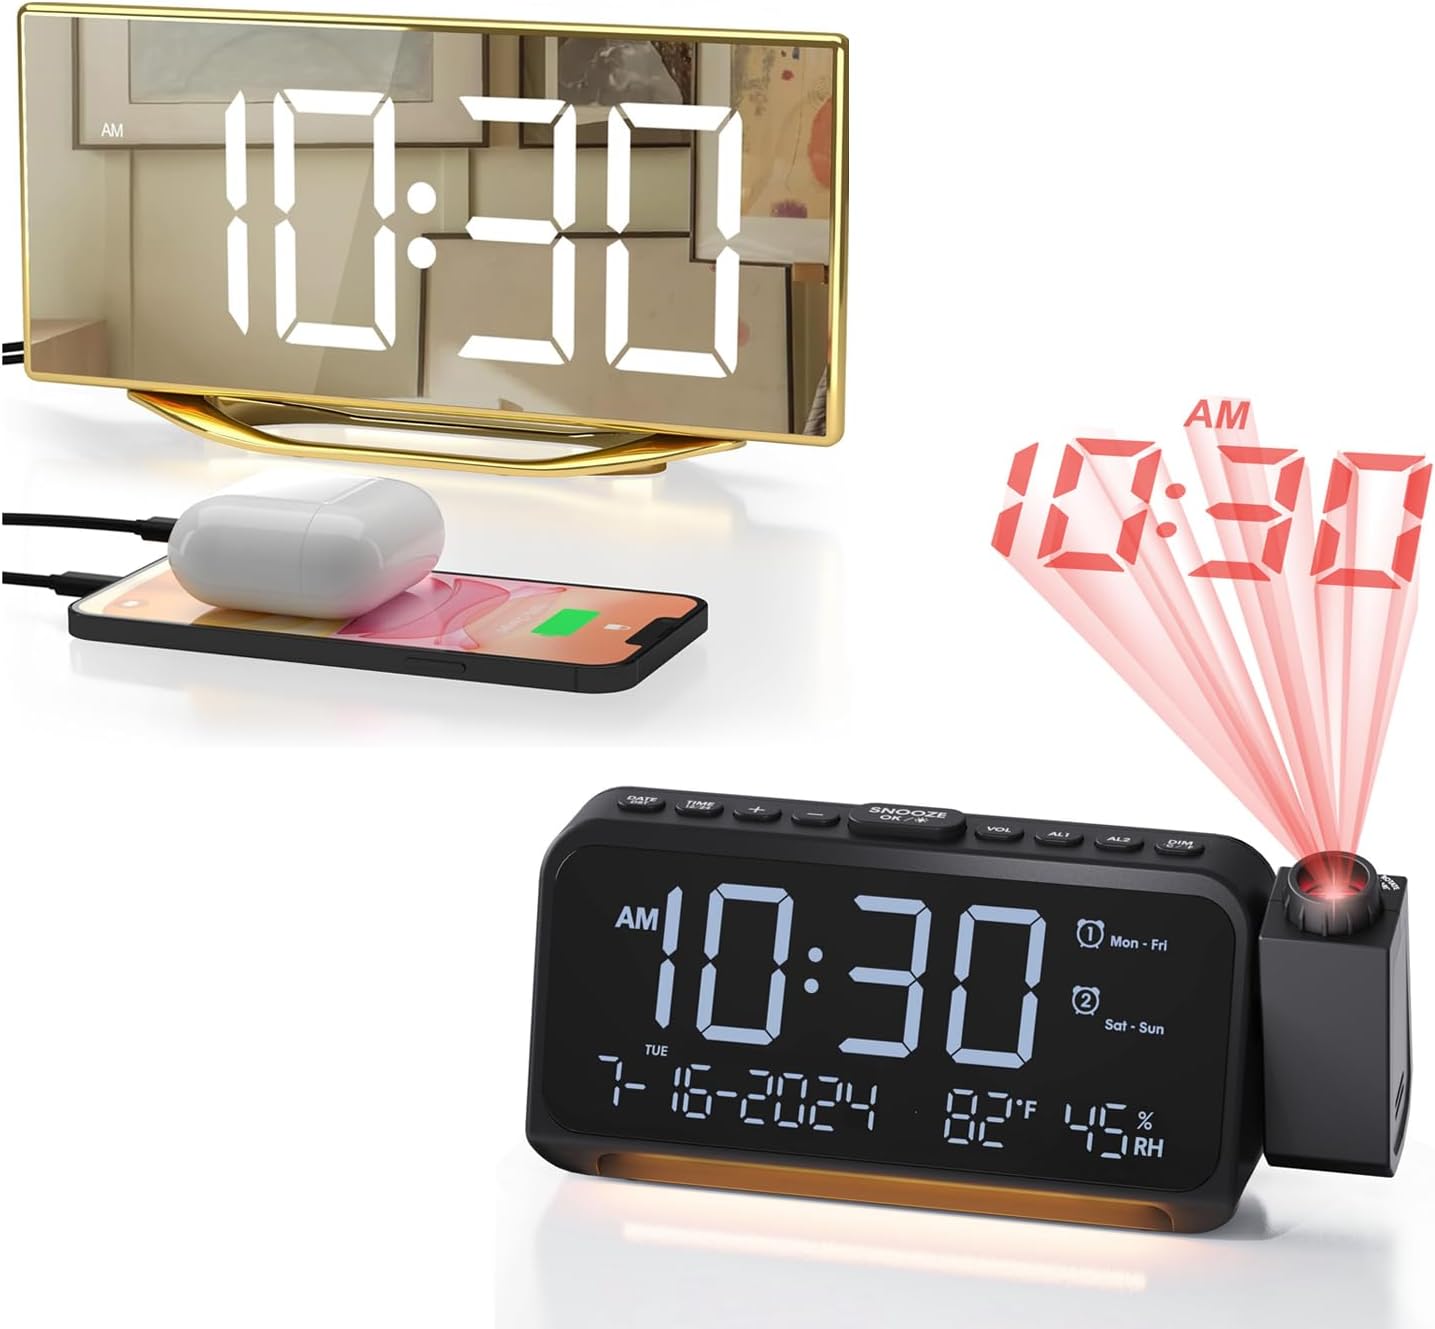
Image 1: The Roxicosly Mirror Alarm Clock with Projection, showing both the mirror display and the projection feature.
2. Product Features
- Crystal Clear Projection: Projects time onto your ceiling or wall with a 350-degree adjustable projector.
- Adjustable Projection: Features 350° rotatable and 180° flipped projection, with a 5-10 ft projection distance and focus ring for clarity.
- Calendar Clock with Temperature & Humidity: Displays date, day of the week, temperature (Celsius/Fahrenheit switchable), and humidity.
- 5 Dimmable Display Brightness Levels: Adjust the main display brightness to your preference (L1 to L5).
- Multiple Alarm Settings: Supports Everyday, Weekday, Weekend, and One-time alarm modes.
- 7 Adjustable Increasing Volume Levels: Customize alarm volume to your comfort.
- Snooze Function: Provides an extra 9 minutes of sleep.
- Ambient Light: Features a warm light with 2 brightness levels.
- USB & Type-C Charger: Charge two devices simultaneously.
- Battery Backup: Retains time settings during power outages (batteries not included).
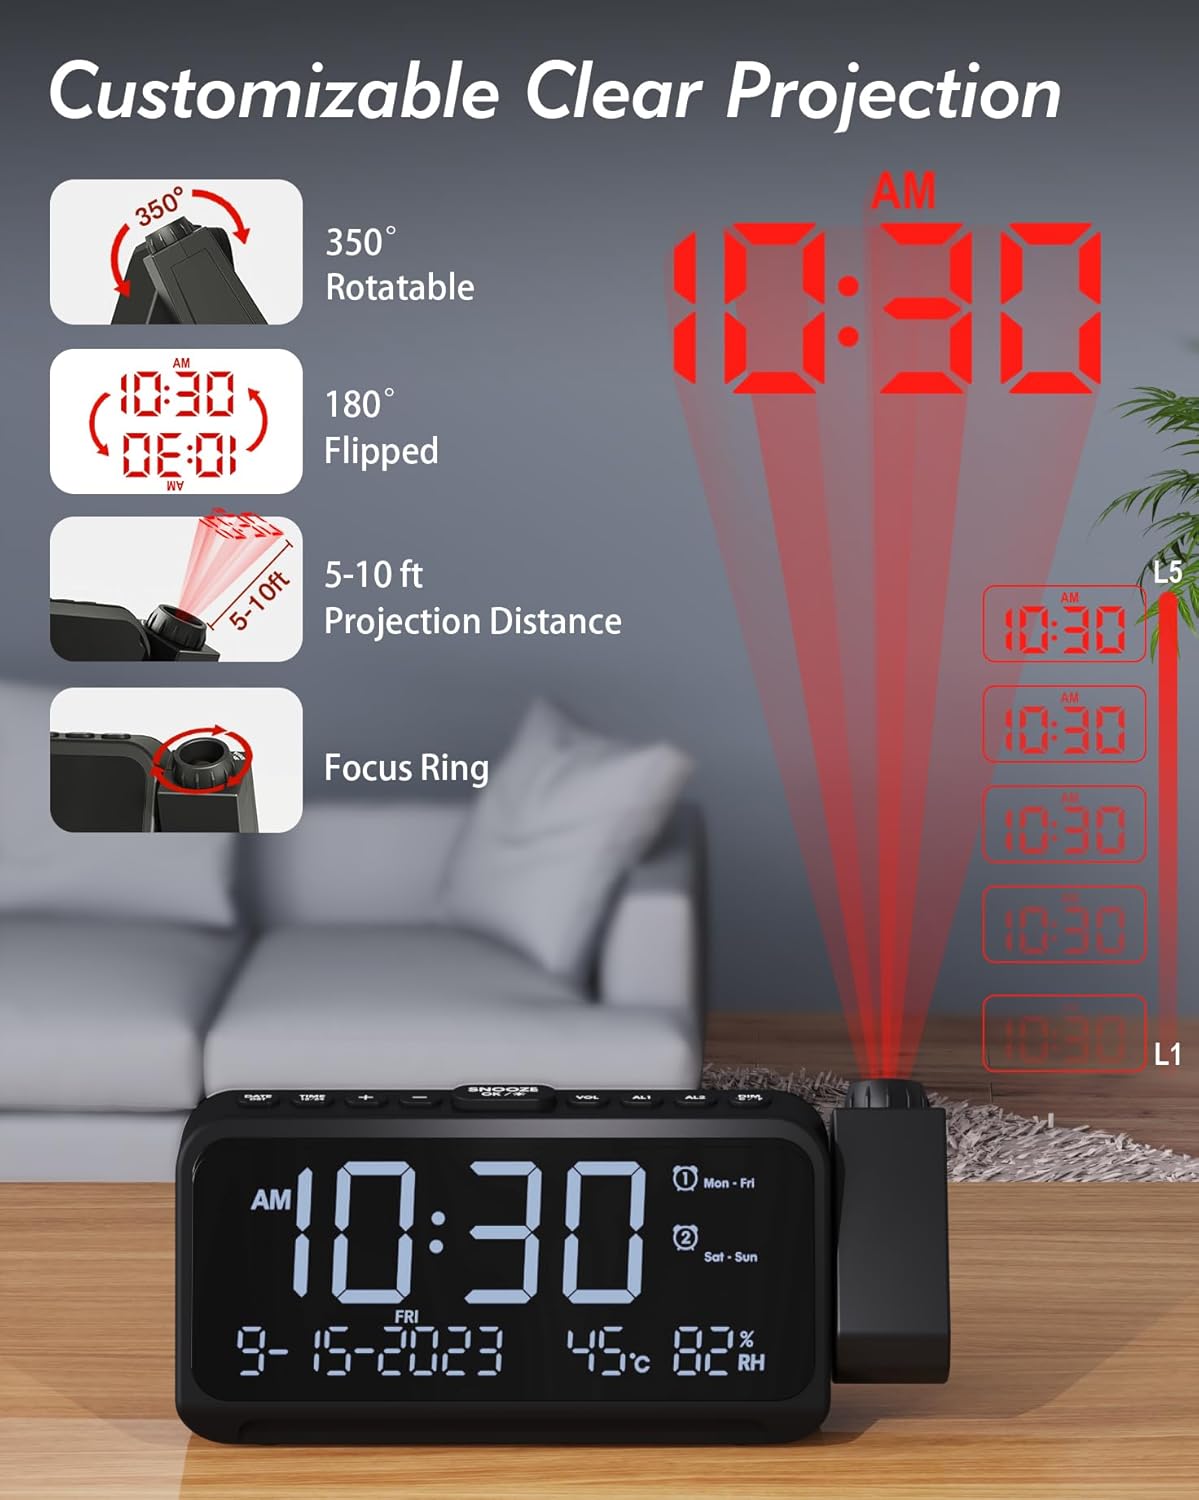
Image 2: Illustration of the customizable projection features, including rotation, flip, distance, and focus ring.

Image 3: The clock display showing date, time, temperature, and humidity, with an option to switch between Celsius and Fahrenheit.

Image 4: Visual representation of the five adjustable brightness levels for the main display.
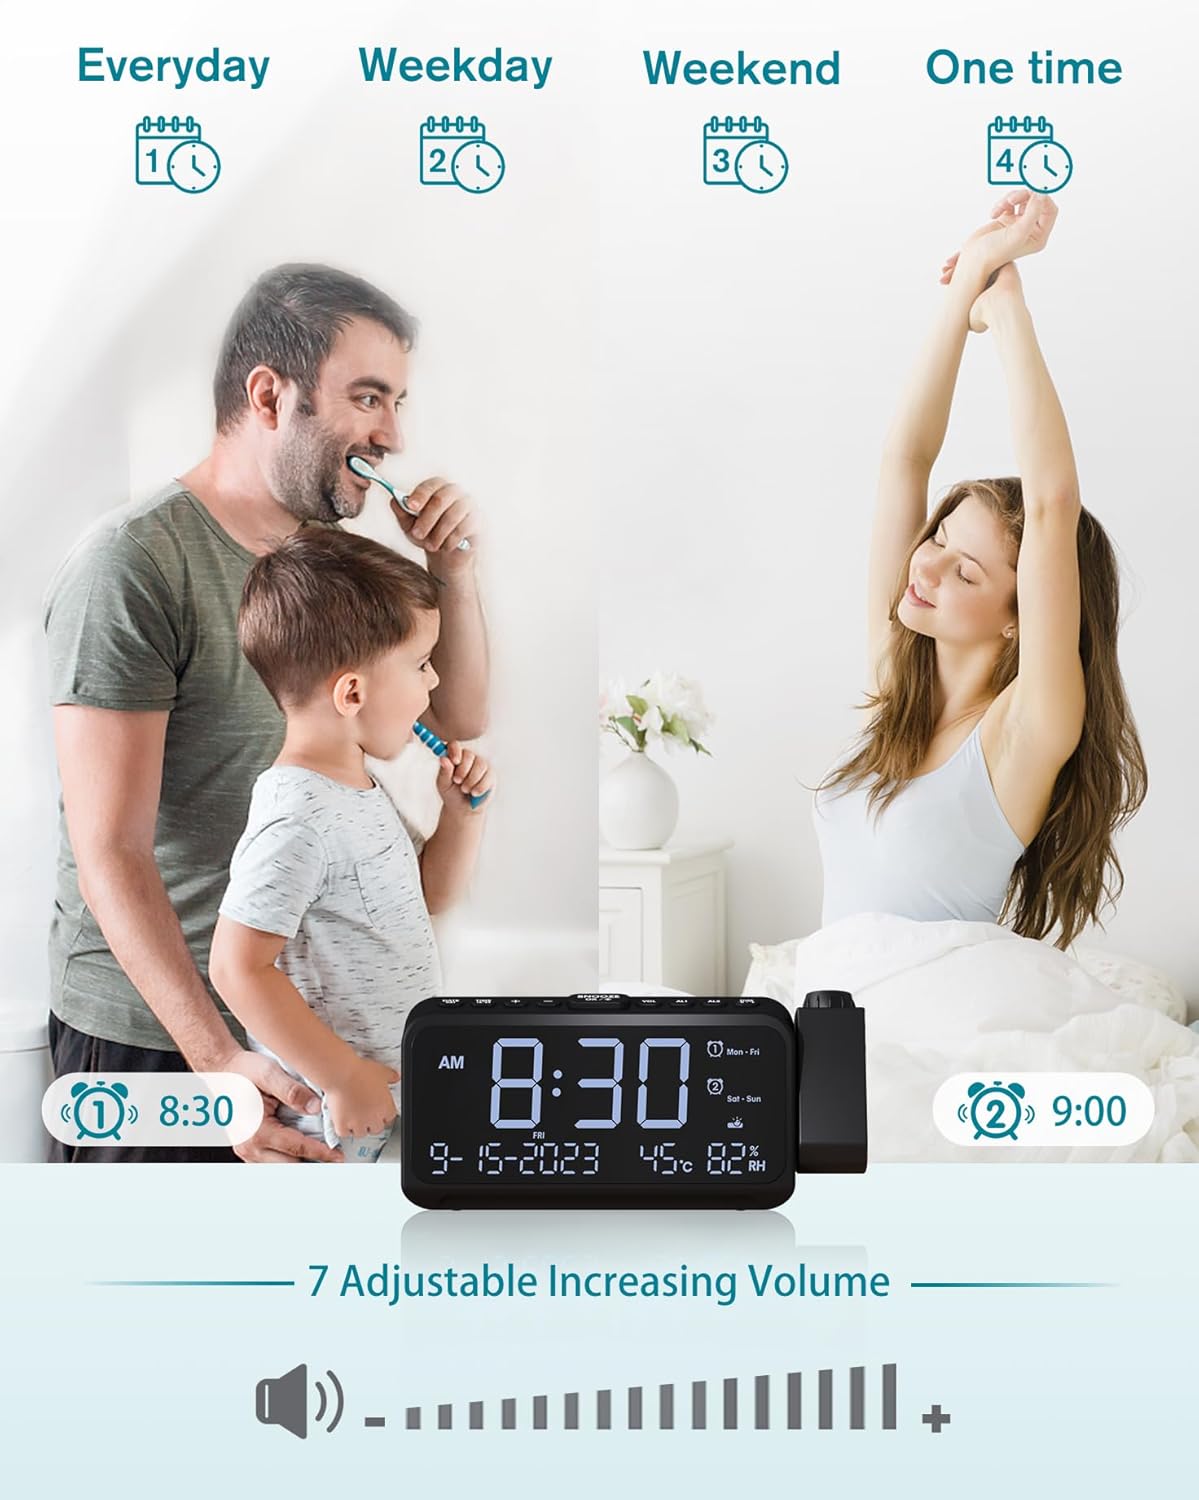
Image 5: Depiction of different alarm settings (Everyday, Weekday, Weekend, One time) and the 7-level adjustable increasing volume feature.

Image 6: The clock showing the snooze button and the warm ambient light feature.

Image 7: The alarm clock with a phone and earbuds charging via its USB and Type-C ports.

Image 8: Close-up of the battery compartment, indicating where backup batteries are inserted.
3. Setup Guide
3.1 Power Connection
- Connect the provided power adapter to the DC IN port on the back of the alarm clock.
- Plug the adapter into a standard wall outlet. The display will light up.
3.2 Battery Backup Installation (Optional)
The battery backup feature is designed to save your time and alarm settings in case of a power interruption. It does not power the main display or projection.
- Locate the battery compartment on the bottom of the clock.
- Open the battery cover.
- Insert two AAA batteries (not included) according to the polarity markings (+ and -).
- Close the battery cover securely.
3.3 Initial Time and Date Setting
Upon first power-on, you may need to set the correct time and date.
- Press and hold the TIME SET button (usually on the top or back) for 3 seconds to enter time setting mode.
- Use the + or - buttons to adjust the hour. Press TIME SET again to confirm and move to minutes.
- Repeat for minutes, year, month, and day.
- Press TIME SET one last time or wait for 10 seconds for the settings to save automatically.
4. Operating Instructions
4.1 Setting Alarms (AL1 / AL2)
Your clock supports two independent alarms (AL1 and AL2).
- Press and hold the AL1 or AL2 button for 3 seconds to enter alarm setting mode.
- Use + or - to set the desired alarm hour, then press the alarm button again to confirm.
- Repeat for minutes.
- Select the alarm mode (Everyday, Weekday, Weekend, One-time) using + or -, then press the alarm button to confirm.
- Press the alarm button again or wait for 10 seconds to save.
- To activate/deactivate an alarm, short press the AL1 or AL2 button. An alarm icon will appear/disappear on the display.
4.2 Snooze Function
When the alarm sounds, press the SNOOZE/OK/* button to activate snooze. The alarm will sound again after 9 minutes.
4.3 Adjusting Display Brightness
Short press the DIM button repeatedly to cycle through 5 brightness levels (L5 brightest to L1 dimmest) and OFF.
4.4 Projection Control

Image 9: The alarm clock projecting the time onto a surface.
- Activate/Deactivate Projection: Short press the PROJECTION button (usually on the side of the projector arm).
- Adjust Projection Angle: Manually rotate the projector arm up to 350 degrees to direct the time onto your desired surface (wall or ceiling).
- Flip Projection: If the projected time is upside down, short press the PROJECTION button again to flip the display 180 degrees.
- Adjust Focus: Rotate the focus ring on the projector lens to achieve a clear image at different distances (5-10 ft recommended).
4.5 Adjusting Alarm Volume
When an alarm is sounding, or in standby mode, press the VOL button to cycle through 7 increasing volume levels.
4.6 Ambient Light Control
Short press the LIGHT button to turn on the ambient light. Press again to cycle through 2 brightness levels and OFF.
4.7 USB & Type-C Charging Ports
Connect your mobile devices (smartphones, earbuds, etc.) to the USB-A or Type-C ports on the back of the clock for charging. The clock must be powered on for charging to function.
4.8 Temperature Unit Switch
Short press the °C/°F button (often combined with another button like VOL or SNOOZE) to switch between Celsius and Fahrenheit temperature display.
5. Maintenance
- Cleaning: Use a soft, dry cloth to wipe the surface of the clock. Do not use abrasive cleaners or solvents.
- Mirror Display: For the mirror display, use a microfiber cloth to avoid scratches.
- Storage: If storing the clock for an extended period, disconnect it from power and remove the backup batteries.
- Environment: Keep the clock away from direct sunlight, high temperatures, and high humidity.
6. Troubleshooting
| Problem | Possible Cause | Solution |
|---|---|---|
| Display is blank. | No power connection. | Ensure the power adapter is securely plugged into the clock and a working outlet. |
| Projection is blurry. | Focus not adjusted; incorrect distance. | Rotate the focus ring on the projector lens until the image is clear. Ensure the clock is within the 5-10 ft projection range. |
| Alarm does not sound. | Alarm not activated; volume too low; incorrect alarm time/mode. | Check if the alarm icon is displayed. Adjust alarm volume. Verify alarm time and mode settings. |
| Time/settings reset after power outage. | No backup batteries or batteries are dead. | Install fresh AAA batteries in the backup compartment. |
| Devices not charging via USB/Type-C. | Clock not powered; cable issue; device not compatible. | Ensure the clock is connected to main power. Try a different charging cable. Check device compatibility. |
7. Specifications
| Feature | Detail |
|---|---|
| Brand | Roxicosly |
| Display Type | Digital |
| Style | Mirror Alarm Clock+Projection Alarm Clock |
| Special Feature | Alarm, Projection, Temperature, Humidity, USB Charging |
| Shape | Square |
| Alarm Clock | Yes (Dual Alarms) |
| Operation Mode | Electrical (AC Powered) |
| ASIN | B0D9KR6HM2 |
| Temperature Range | -50°C to 70°C (-58°F to 158°F) |
| Temperature Accuracy | ±1°C |
| Humidity Range | 0%-99% RH |
| Humidity Accuracy | ±2% RH |
| Projection Distance | 5-10 ft |
| Power Source | AC Power Adapter (included) |
| Backup Battery | 2 x AAA batteries (not included) |
8. Warranty and Support
For any questions, technical support, or warranty inquiries regarding your Roxicosly Mirror Alarm Clock + Projection Alarm Clock, please contact the seller or manufacturer directly through your purchase platform. Please have your order number and product model information ready when contacting support.
For more information, you may visit the Roxicosly Store on Amazon.
Related documentsMirror Alarm Clock+Projection Alarm Clock

Ask a question about this manual
Ask about setup, troubleshooting, compatibility, parts, safety, or missing instructions. Manuals+ will review the question and use this page’s manual context to help answer it.