
1. Introduction
The TERRAMASTER F8 SSD Plus is an 8-bay all-SSD Network Attached Storage (NAS) server designed for high-performance data management. It features an Intel Core i3-N305 8-core, 8-thread processor, 16GB DDR5 RAM, and a 10GbE port, making it suitable for various applications including virtualization, database management, post-production, and multimedia serving. Its compact design and quiet operation integrate seamlessly into home or small business environments.

Image 1.1: Overview of the TERRAMASTER F8 SSD Plus NAS highlighting its core specifications including CPU, GPU, RAM, 10GbE port, M.2 interfaces, and 4K hardware decoding capabilities.

Image 1.2: Visual representation of the F8 SSD Plus NAS emphasizing its powerful performance, compact size, quiet operation, and high-speed data transfer.
2. Setup
2.1 Unpacking and Initial Inspection
Carefully remove the NAS unit and all accessories from the packaging. Verify that all components listed in the packing list are present and undamaged. If any items are missing or damaged, contact customer support.
2.2 SSD Installation
The F8 SSD Plus supports up to eight M.2 2280 NVMe SSDs, with a maximum capacity of 8TB per SSD, totaling 64TB. The installation process is tool-free and can typically be completed within two minutes.
- Locate the SSD installation slots on the device.
- Gently insert each M.2 NVMe SSD into its designated slot. Ensure the SSD is fully seated.
- Secure the SSDs using the provided retention mechanisms, which are designed for tool-free installation.
- Attach the included heat sinks to each SSD to ensure optimal thermal performance.

Image 2.1: Demonstration of the tool-less SSD installation process and memory expansion within the NAS unit.

Image 2.2: Detailed view of installing M.2 NVMe SSDs and expanding RAM, highlighting the ease of access and tool-free design.
2.3 Network Connection
Connect the NAS to your network using an Ethernet cable. The device features a 10GbE port for high-speed data transfer. Ensure your network infrastructure supports 10GbE for optimal performance.
2.4 Power On
Connect the power adapter to the NAS and a power outlet. Press the power button to turn on the device. Follow the on-screen instructions or refer to the TerraMaster Operating System (TOS) quick start guide for initial software setup.
2.5 Advanced OS Installation (Optional)
For users intending to install alternative operating systems such as TrueNAS Scale or Unraid, it may be necessary to adjust BIOS settings. Specifically, disabling Secure Boot under the Security menu and VT-d under the Chipset > North Bridge menu in the BIOS can resolve potential boot issues, especially when all NVMe slots are populated. Consult the documentation for your chosen operating system for detailed installation procedures.
3. Operating the NAS
3.1 Data Storage and Management
The F8 SSD Plus provides robust storage capabilities with support for various RAID configurations, including TerraMaster Flexible RAID Array (TRAID/TRAID+). These options allow for optimized storage capacity, data protection, and performance based on your specific needs.

Image 3.1: Illustrates the differences in available space and protection between TRAID, TRAID+, RAID 5, and RAID 6 configurations for various drive sizes.
3.2 Business Backup Suite (BBS)
The TerraMaster Business Backup Suite (BBS) offers a comprehensive set of tools for data protection and synchronization:
- Centralized Backup: For consolidating data from multiple sources.
- TerraSync: For server and PC synchronization.
- CloudSync: For synchronization and recovery with cloud services.
- Snapshot: For ransomware protection and point-in-time recovery.

Image 3.2: Flowchart illustrating the various components and data flows within the Business Backup Suite, including Centralized Backup, Duple Backup, TerraSync, and CloudSync.
3.3 Multimedia and Virtualization
The F8 SSD Plus supports 4K video decoding and can function as a reliable multimedia server for applications like Plex, Emby, and Jellyfin. It also provides virtualization tools for various projects, supporting operating systems such as Windows, Linux, and Docker.

Image 3.3: Depiction of the NAS supporting 4K video decoding for seamless media consumption with platforms like Plex, Emby, and Jellyfin.

Image 3.4: Illustrates the range of virtualization tools and compatible operating systems, including various Windows versions, Linux distributions, and Docker, supported by the NAS.
3.4 Surveillance Manager
The integrated Surveillance Manager allows for effortless connection and management of cameras, enabling real-time viewing, recording, and timeline review of surveillance footage.
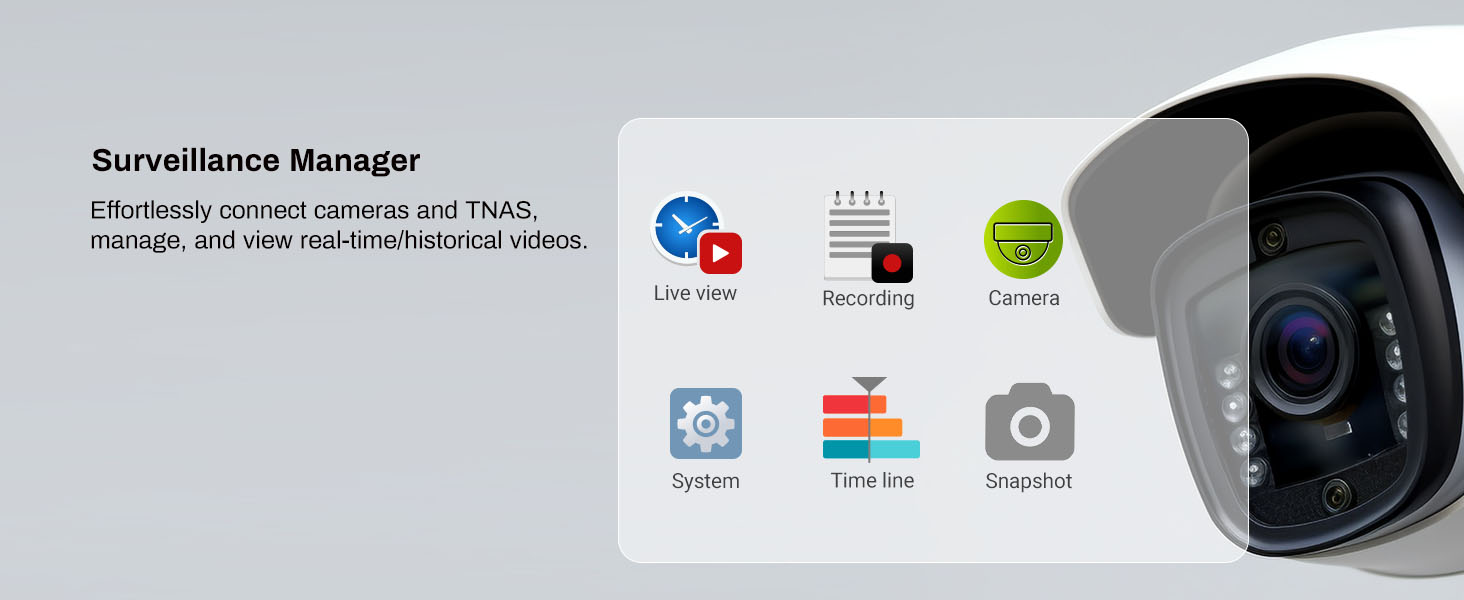
Image 3.5: Screenshot of the Surveillance Manager interface, showing options for live view, recording, camera management, system settings, timeline, and snapshots.
3.5 Storage Expansion
The F8 SSD Plus includes USB 3.2 ports, allowing for direct connection of external storage devices to expand the total available NAS space beyond the internal 64TB capacity.

Image 3.6: The F8 SSD Plus NAS connected to a D8 Hybrid external storage unit via USB 3.2, demonstrating storage expansion capabilities.
4. Maintenance
4.1 Cooling System
The F8 SSD Plus incorporates an innovative convection active cooling design. Each SSD is equipped with a heat sink, and silent fans are integrated to maintain optimal operating temperatures and ensure stable, efficient SSD performance, even under heavy load.

Image 4.1: Diagram illustrating the innovative cooling system of the NAS, showing airflow and the inclusion of eight heat sinks for SSDs.

Image 4.2: Visual representation emphasizing the efficient cooling mechanisms, including heat sinks and silent fans, designed to ensure SSD stability.
4.2 Quiet Operation
Due to its SSD-based storage and advanced cooling system, the F8 SSD Plus operates with minimal noise. Standby noise levels are typically below 19dB, ensuring a quiet environment.

Image 4.3: The NAS positioned in a home setting, illustrating its quiet performance with a noise level of 19dB(A).
4.3 Software Updates
Regularly check for and install software updates for the TerraMaster Operating System (TOS) to ensure optimal performance, security, and access to the latest features. Instructions for updating are available within the TOS interface.
5. Troubleshooting
5.1 General Issues
- No Power: Ensure the power adapter is securely connected to both the NAS and a working power outlet.
- Network Connectivity: Verify Ethernet cable connections. Check network settings within TOS. Ensure your router/switch is functioning correctly.
- SSD Not Recognized: Re-seat the SSDs. Ensure they are M.2 2280 NVMe compatible. Check the TOS storage manager for drive status.
5.2 Advanced Troubleshooting
- Linux Boot Issues with All NVMe Slots Populated: If experiencing kernel panics or boot failures when running Linux-based operating systems with multiple NVMe drives, access the BIOS and disable VT-d (under Chipset > North Bridge) and Secure Boot (under Security).
- iSCSI Connection Problems: If iSCSI connections are unstable or fail, consider disabling DoS protection within your NAS network settings, especially when integrating with systems like Proxmox.
6. Specifications
| Feature | Detail |
|---|---|
| Model | F8 SSD Plus |
| Processor | Core i3-N305 8-core, 8-thread (up to 3.4GHz) |
| RAM | 16GB DDR5 4800MHz |
| Storage Bays | 8 x M.2 2280 NVMe SSD |
| Max Internal Capacity | 64TB (8 x 8TB SSDs) |
| Ethernet Port | 1 x 10GbE |
| USB Ports | USB 3.2 x 3 |
| Dimensions (L x W x H) | 6.9 x 5.5 x 2.4 inches (17.5 x 14 x 6.1 cm) |
| Item Weight | 1.32 pounds (0.6 kg) |
| Material | Plastic |
| Compatible OS | Android, Linux, Mac, Windows, iOS |
7. Warranty and Support
7.1 Warranty Information
Warranty details for the TERRAMASTER F8 SSD Plus NAS are typically provided with your purchase documentation. For specific terms and conditions, please refer to the warranty card included in the product packaging or visit the official TERRAMASTER website.
7.2 Technical Support
For technical assistance, troubleshooting, or further inquiries, please visit the official TERRAMASTER support website. The website offers resources such as FAQs, knowledge bases, and contact information for customer service.


