
1. Introduction and Overview
This manual provides essential information for the safe and efficient use of your YAREMYEYE 54.6V 3A Universal Li-ion Battery Charger. This charger is designed for 13S 48V Lithium-ion battery packs, commonly found in e-bikes, scooters, and hoverboards. It features multiple connectors for broad compatibility and incorporates safety mechanisms for reliable charging.
Key Features:
- Output: 54.6V, 3A Max
- Input: 100V-240V AC ~50/60Hz
- Compatibility: Designed for 48V Lithium Battery packs (output 54.6V)
- Connectors: Includes 7 types of connectors for universal application.
- LED Indicator: Multi-color LED to show charging status.
- Safety Protections: Over-temperature, short-circuit, over-current, over-voltage, and short-battery protection.
2. Package Contents
Upon opening the package, please ensure all items are present and in good condition:
- 1 x YAREMYEYE 54.6V 3A Battery Charger Unit
- 1 x AC Power Cord
- 1 x DC Adapter Wire with 7 interchangeable connectors (5.5x2.1mm DC plug, 8mm 1-prong, 9mm 3-prong, 12mm 3-prong, XLR/Cannon, IEC plug, and an integrated 5.5x2.5mm DC plug)
- 1 x User Manual
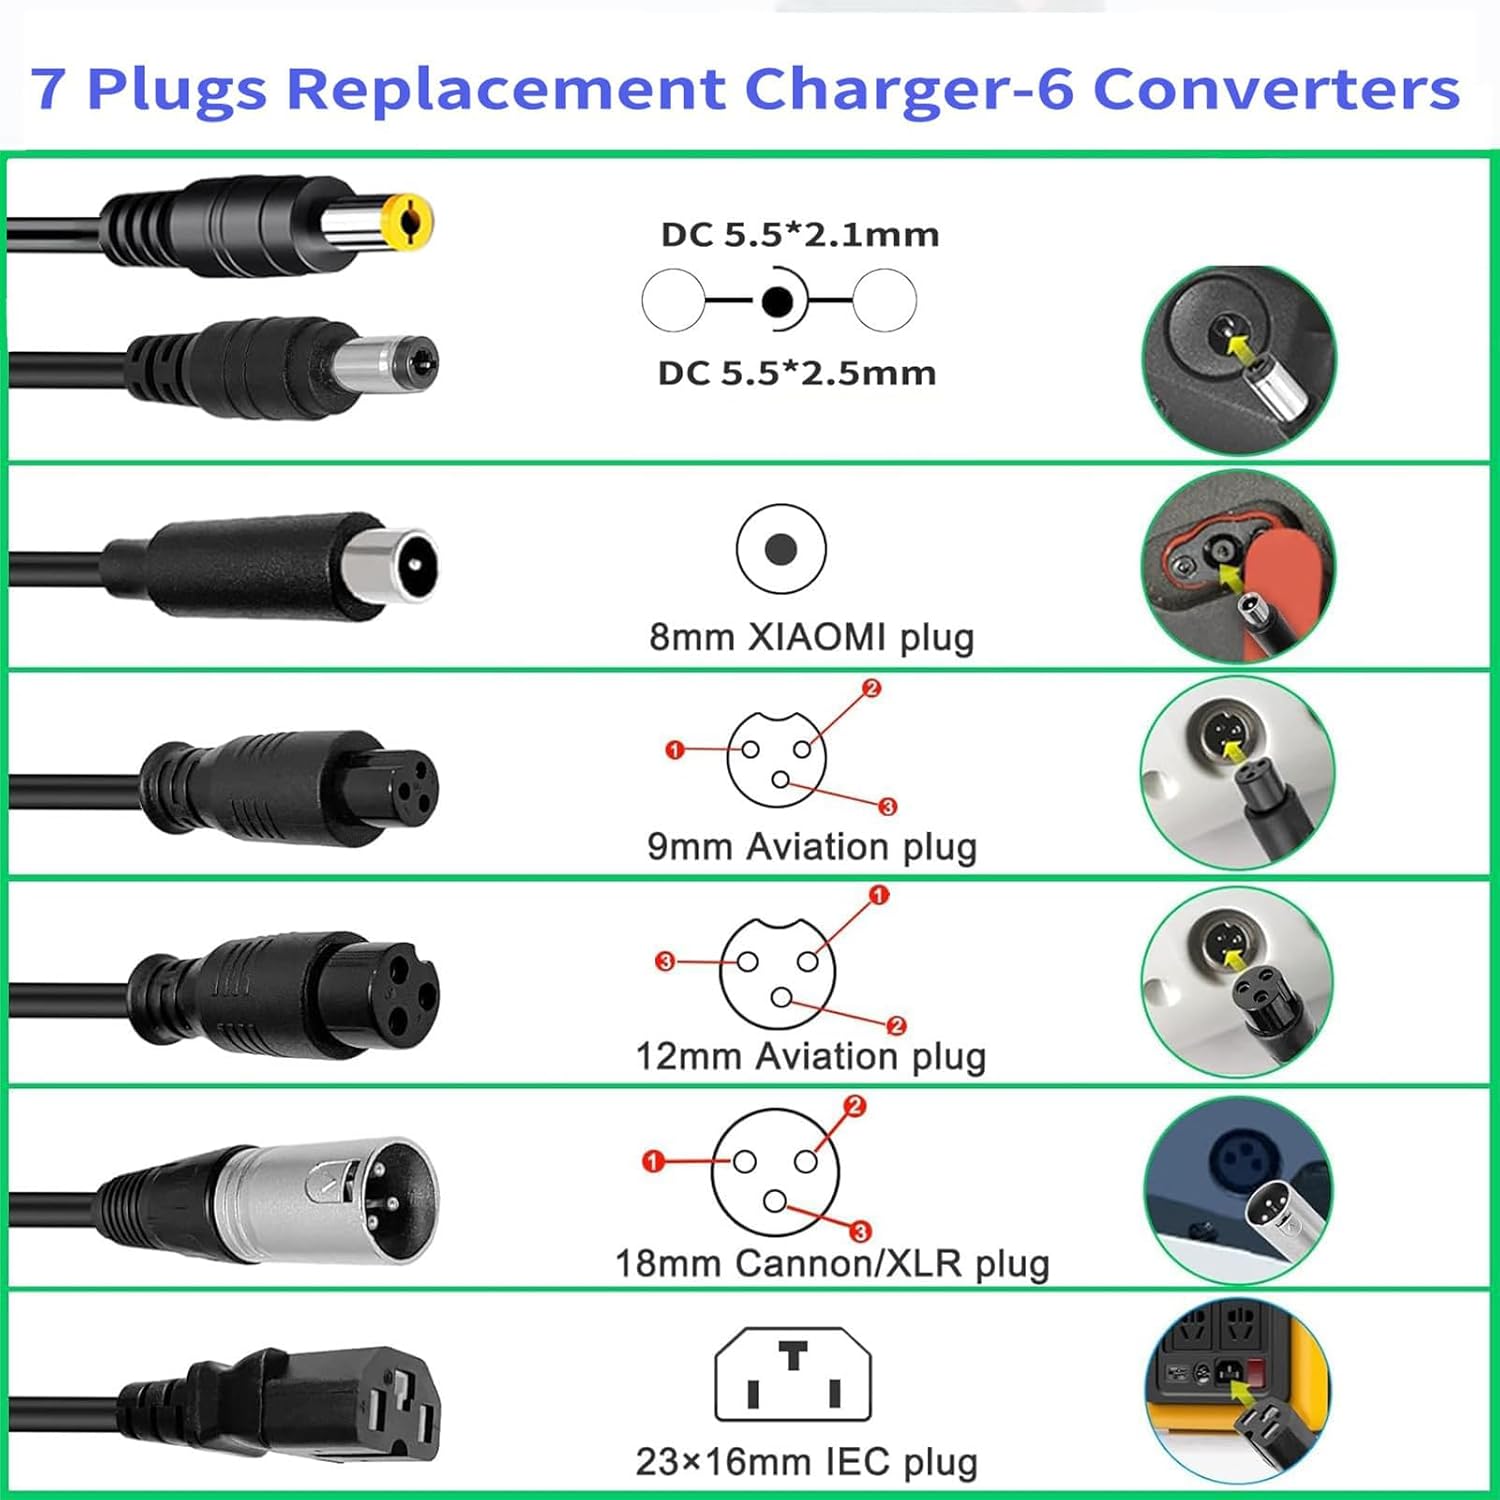
Figure 2.1: The charger comes with 7 different plug types to ensure compatibility with a wide range of devices.
3. Specifications
| Feature | Specification |
|---|---|
| Input Voltage | 100V-240V AC ~50/60Hz |
| Output Voltage | 54.6V |
| Max Charging Current | 3.0A |
| Charging Modes | CC-CV (Constant Current - Constant Voltage) |
| Compatible Battery Type | 13S 48V Li-ion Battery Packs |
| Product Dimensions | 5.5 x 2.5 x 1.5 inches (14 x 6.35 x 3.8 cm) |
| Item Weight | 1.23 pounds (0.56 kg) |
| Included Components | 1 x Power Adapter, AC Power Cord, DC Adapter Wire with 7 Connectors |

Figure 3.1: Physical dimensions of the charger unit.
4. Setup and Connection
Follow these steps to set up your charger:
- Identify Battery Type: Confirm your device uses a 48V Lithium-ion battery pack. This charger is not compatible with Lead-Acid battery packs or other voltage systems (e.g., 36V, 42V, 24V).
- Check Parameters: Verify that the required charging voltage and current for your device's battery are consistent with the charger's specifications (54.6V, 3A).
- Select Correct Connector: Choose the appropriate DC connector from the provided adapter wire that matches your device's charging port. Refer to the image below for connector types.
- Connect to Device: Firmly plug the selected DC connector into your device's charging port.
- Connect to Power: Plug the AC power cord into the charger unit, then plug the AC power cord into a standard 100V-240V wall outlet.
Video 4.1: This video demonstrates connecting the charger to an e-bike, showcasing the various connector options and the LED indicator changing from green (standby) to red (charging).
5. Operation (Charging Process)
Once connected, the charger will begin the charging process. Observe the LED indicator for status updates:
- RED Light: Indicates that the battery is currently charging.
- GREEN Light: Indicates that the battery is fully charged or disconnected.
The charger utilizes an intelligent high-speed charging process with CC-CV working mode to optimize charging and extend battery life.
Video 5.1: This video illustrates the charging process, showing the charger's LED indicator and its compact design.
6. Safety Guidelines
Adhere to the following safety guidelines to prevent damage and ensure safe operation:
- Do not use this charger for Lead-Acid battery packs. It is exclusively for Lithium-ion batteries.
- Do not use the charger in wet environments. Keep it dry.
- Always disconnect the AC power from the wall outlet once the battery is fully charged.
- Do not attempt to charge a damaged or broken battery.
- During the first charge, monitor the battery temperature. If the temperature becomes excessively high, immediately disconnect the charger.
- Charge only one battery at a time.
- Keep the charger away from children and pets.
- Ensure proper ventilation around the charger during use.

Figure 6.1: The charger is equipped with multiple protection features for safe operation.
7. Troubleshooting
If your charger is not working as expected, consider the following common issues and solutions:
- Green Light On, Not Turning Red: If the green light remains on after plugging into your device, it may indicate an unsuccessful connection. Ensure the DC connector is fully and securely plugged into the device's charging port.
- Green Light Turns Off After Connecting: If the green light turns off after connecting to your device, it could be due to an internal short circuit within your device's battery, triggering the charger's self-protection function. In this case, it is recommended to have your device's battery checked by a professional.
- Battery Not Charging After Extended Use/Storage: Lithium batteries have a limited lifespan. If your device's battery has been in use or stored for many months and is no longer charging, it may be broken and require replacement.
8. Maintenance
To ensure the longevity and optimal performance of your charger:
- Keep the charger clean and free from dust and debris.
- Store the charger in a cool, dry place when not in use.
- Avoid dropping or subjecting the charger to strong impacts.
- Do not attempt to open or repair the charger yourself. Refer to qualified service personnel.

Figure 8.1: The charger features a built-in cooling fan to maintain optimal operating temperature during heavy use.
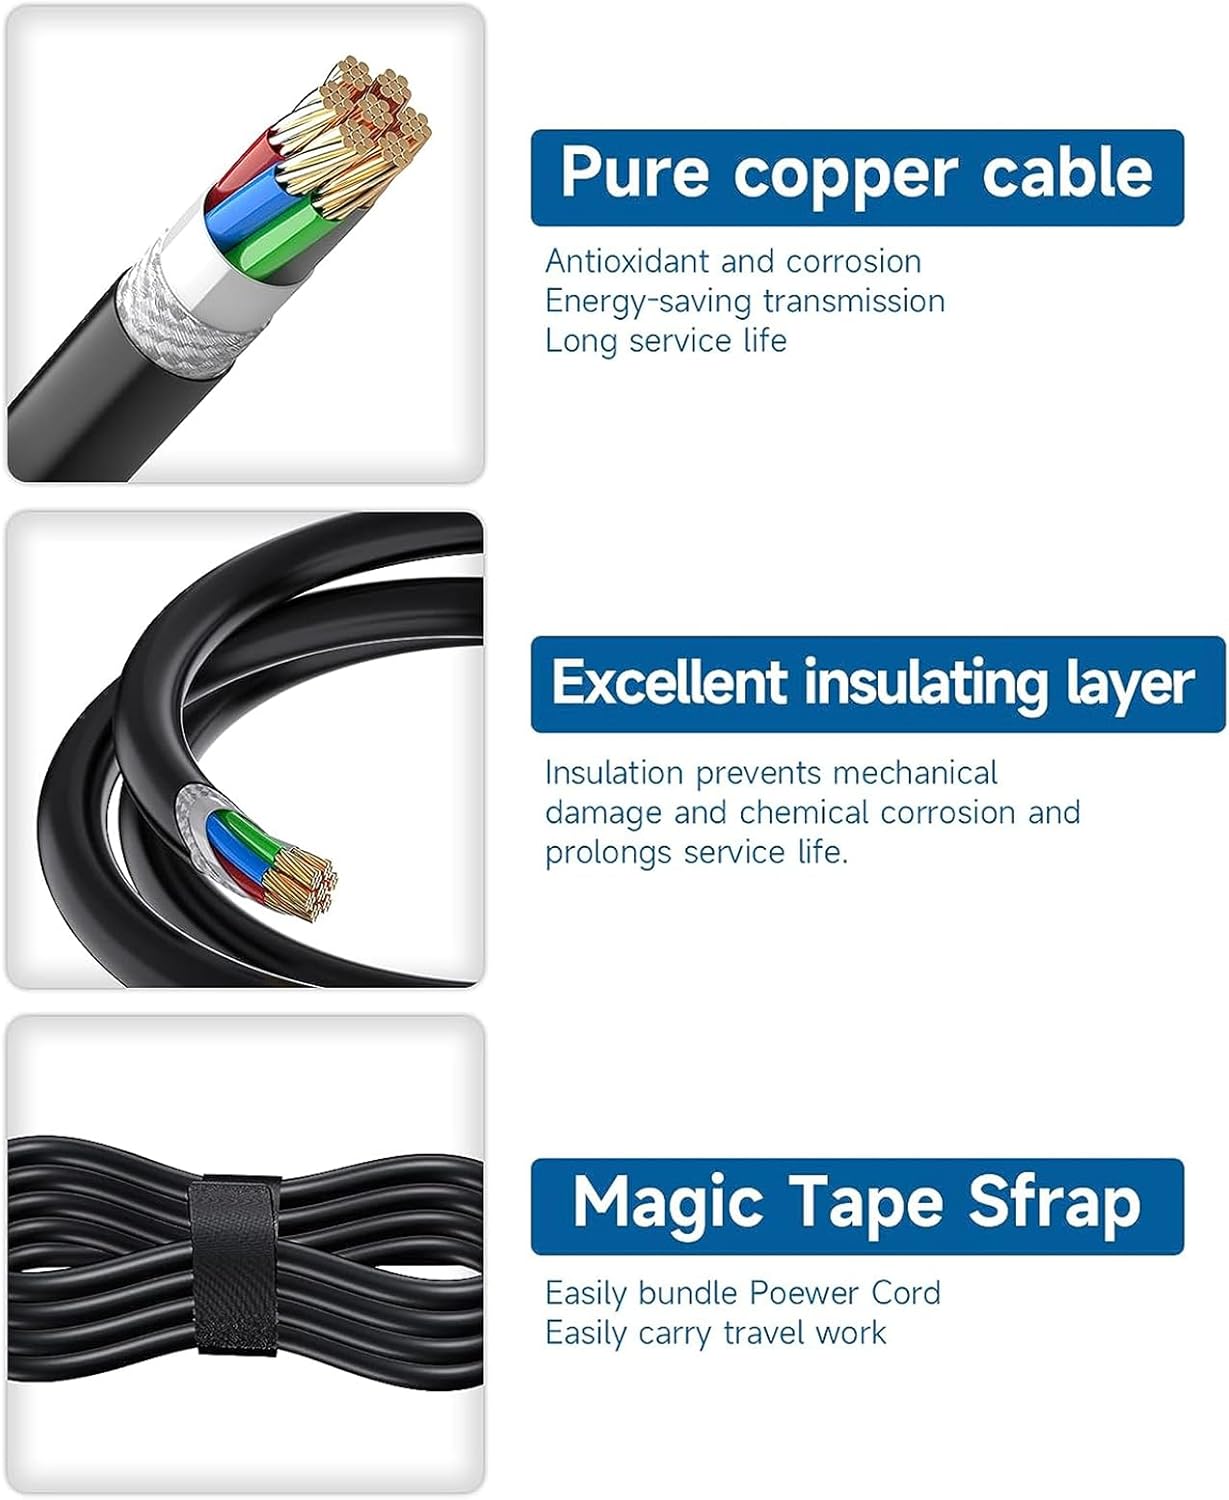
Figure 8.2: The charger cables are designed with pure copper for efficient transmission and an excellent insulating layer for durability. A magic tape strap is included for easy cable management.
9. Compatibility
This charger is compatible with a wide range of 48V Lithium-ion battery-powered devices, including but not limited to:
- Hammer, Seagull
- Matt Black 48V Fat Tire FAT20S900, 48V Fat Tire FAT20850C, Matt Green 48V Fat Tire
- Lectric XP (1.0, 2.0, 3.0 models), Lectric XP Step-Thru (1.0, 2.0, 3.0 models), LECTRIC XP Lite, Lectric XPremium
- Kugoo M4, Kugoo X1, Kugoo M4 Pro, Kugoo C1, Kugoo G2 PRO
- 48V VSETT 8/VSETT 8+/VSETT 9+
- 48V KAABO Mantis 8/Mantis 10
- SAMEBIKE 20LVXD30/LO26
- WUXI D-Power DPLC
- 48V ZERO 8/ZERO 9
- 48V Skywalker 8S
- Evercross H5
Note: Always verify your device's specific charging port and voltage requirements before use.
10. Warranty and Support
If you encounter any questions or issues with your YAREMYEYE charger, please contact our customer support. We are committed to providing assistance and will respond to your inquiries within 24 hours.