
1. Introduction
This manual provides detailed instructions for the installation, operation, and maintenance of your Mcezdy M6C-6-Pin Ebike LCD Display. This display is designed to enhance your electric bike experience by providing essential riding data and control functions. Please read this manual thoroughly before use to ensure proper functionality and safety.
2. Important Compatibility Note
The M6C ebike display operates using the UART No. 2 protocol. It is crucial that your ebike controller also uses the UART No. 2 protocol for proper communication and functionality. Additionally, this M6C-6WP model requires a 6-pin connector. Please verify the compatibility of your ebike's controller and connector type before installation.

Image: The display screen showing a warning to check for UART No. 2 Protocol compatibility.
3. Product Features Overview
The Mcezdy M6C-6-Pin Ebike LCD Display offers a range of features to optimize your riding experience:
- Advanced Color LCD Display: Provides clear and vibrant real-time riding data.
- Durable Construction: Crafted with an acrylic screen and robust nylon housing for longevity and resistance to scratches and weather.
- Wide Voltage Compatibility: Supports 24V, 36V, 48V, and 60V ebike batteries.
- Integrated USB Charging Port: Features a 5V/500mA USB port for charging mobile devices.
- User-Friendly Keypad: Allows for effortless adjustment of display settings and functions.
- IPX65 Waterproof Rating: Ensures protection against water splashes and rain.

Image: An advanced color LCD display, a separate keypad for adjustments, and examples of different cable types.
4. Setup
4.1 Handlebar Mounting
The display comes with an adjustable bracket designed for universal fit. It is compatible with handlebar diameters of 22.2mm, 25.4mm, and 31.8mm. Securely attach the display to your ebike's handlebar using the provided bracket and fasteners, ensuring it is positioned for optimal visibility and access to the keypad.
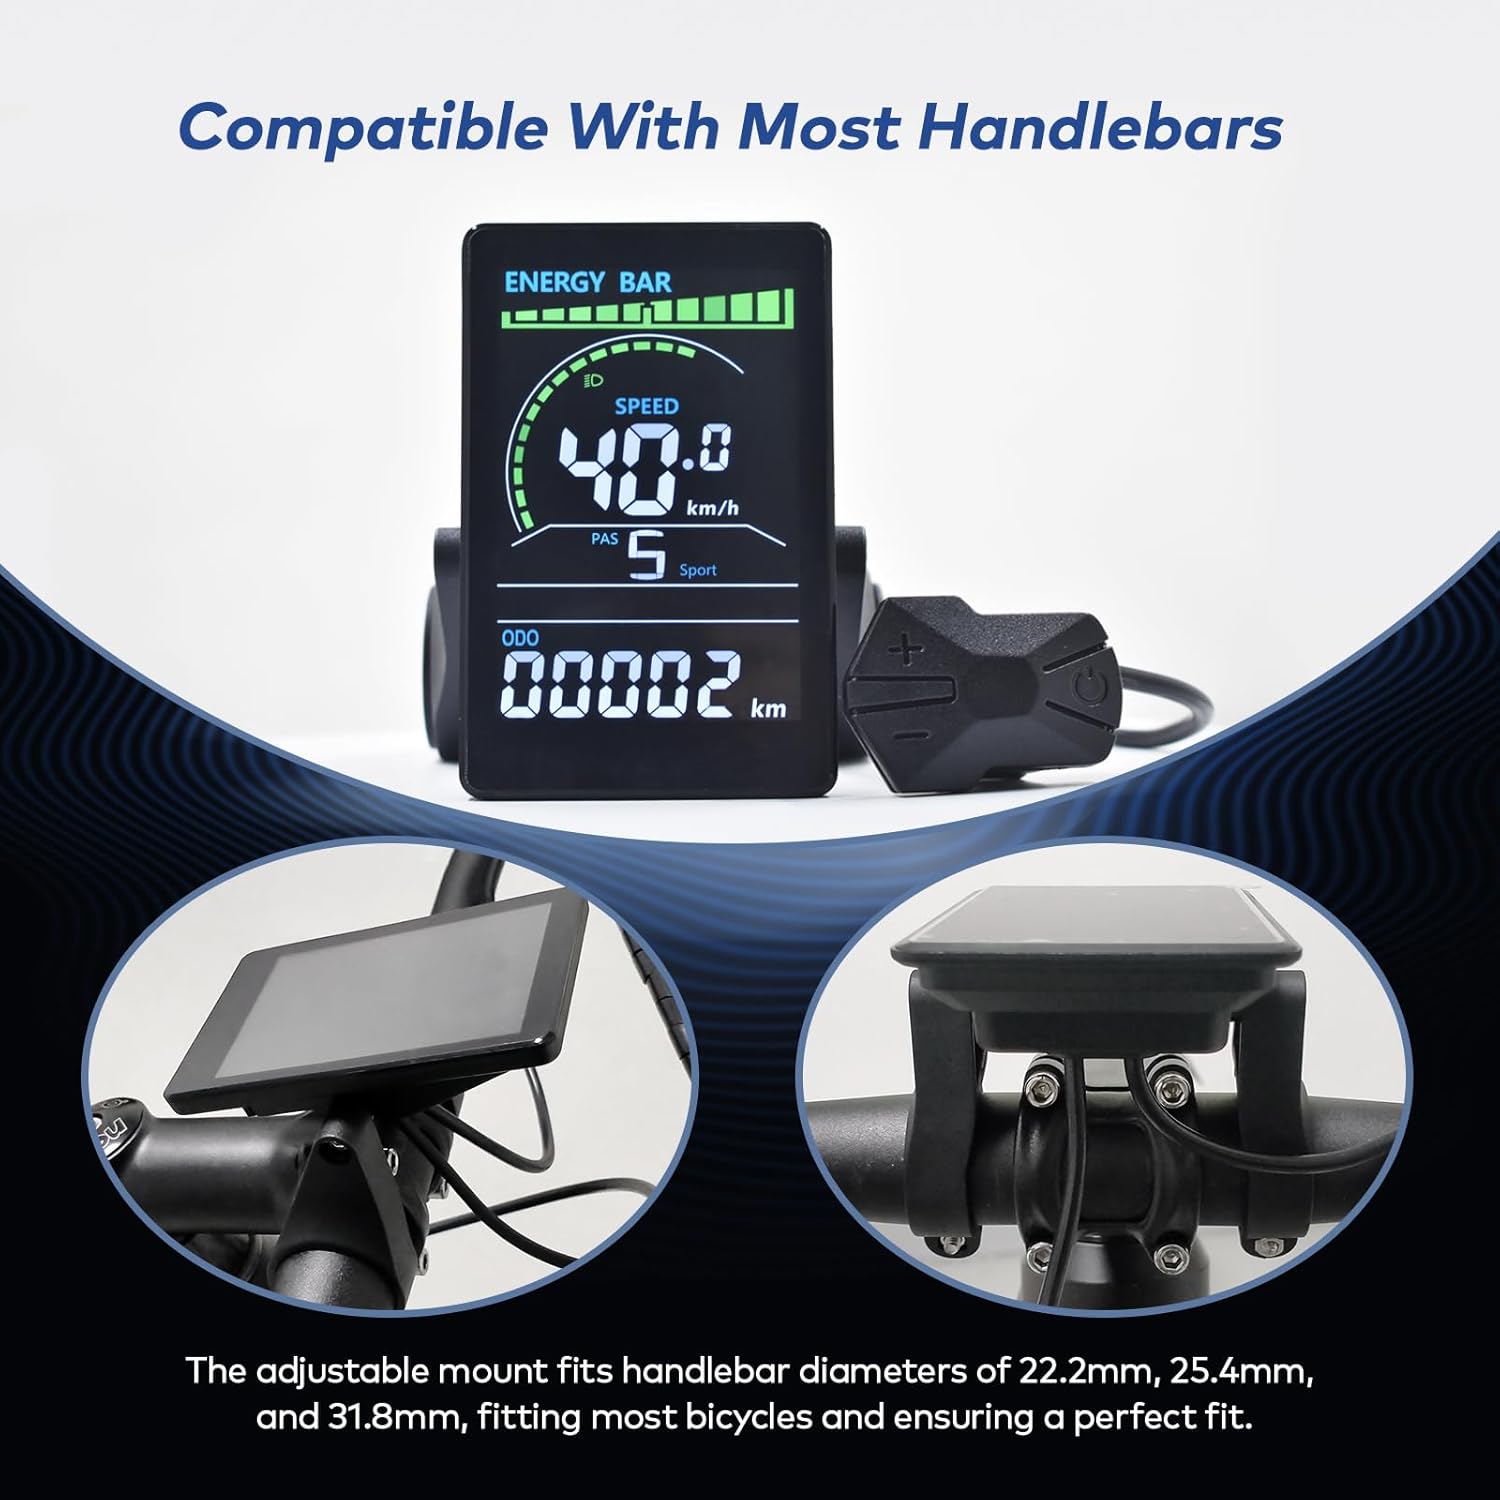
Image: The ebike display mounted on a handlebar, illustrating its compatibility with different handlebar diameters.
4.2 Cable Connection
Connect the display to your ebike's controller using the included 150mm 6-pin waterproof cable (JL-F-Z609AG). Ensure the connection is firm and secure to prevent disconnections during riding. The cable length exposed is 150mm. Verify that your controller's connector is compatible with the 6-pin type.
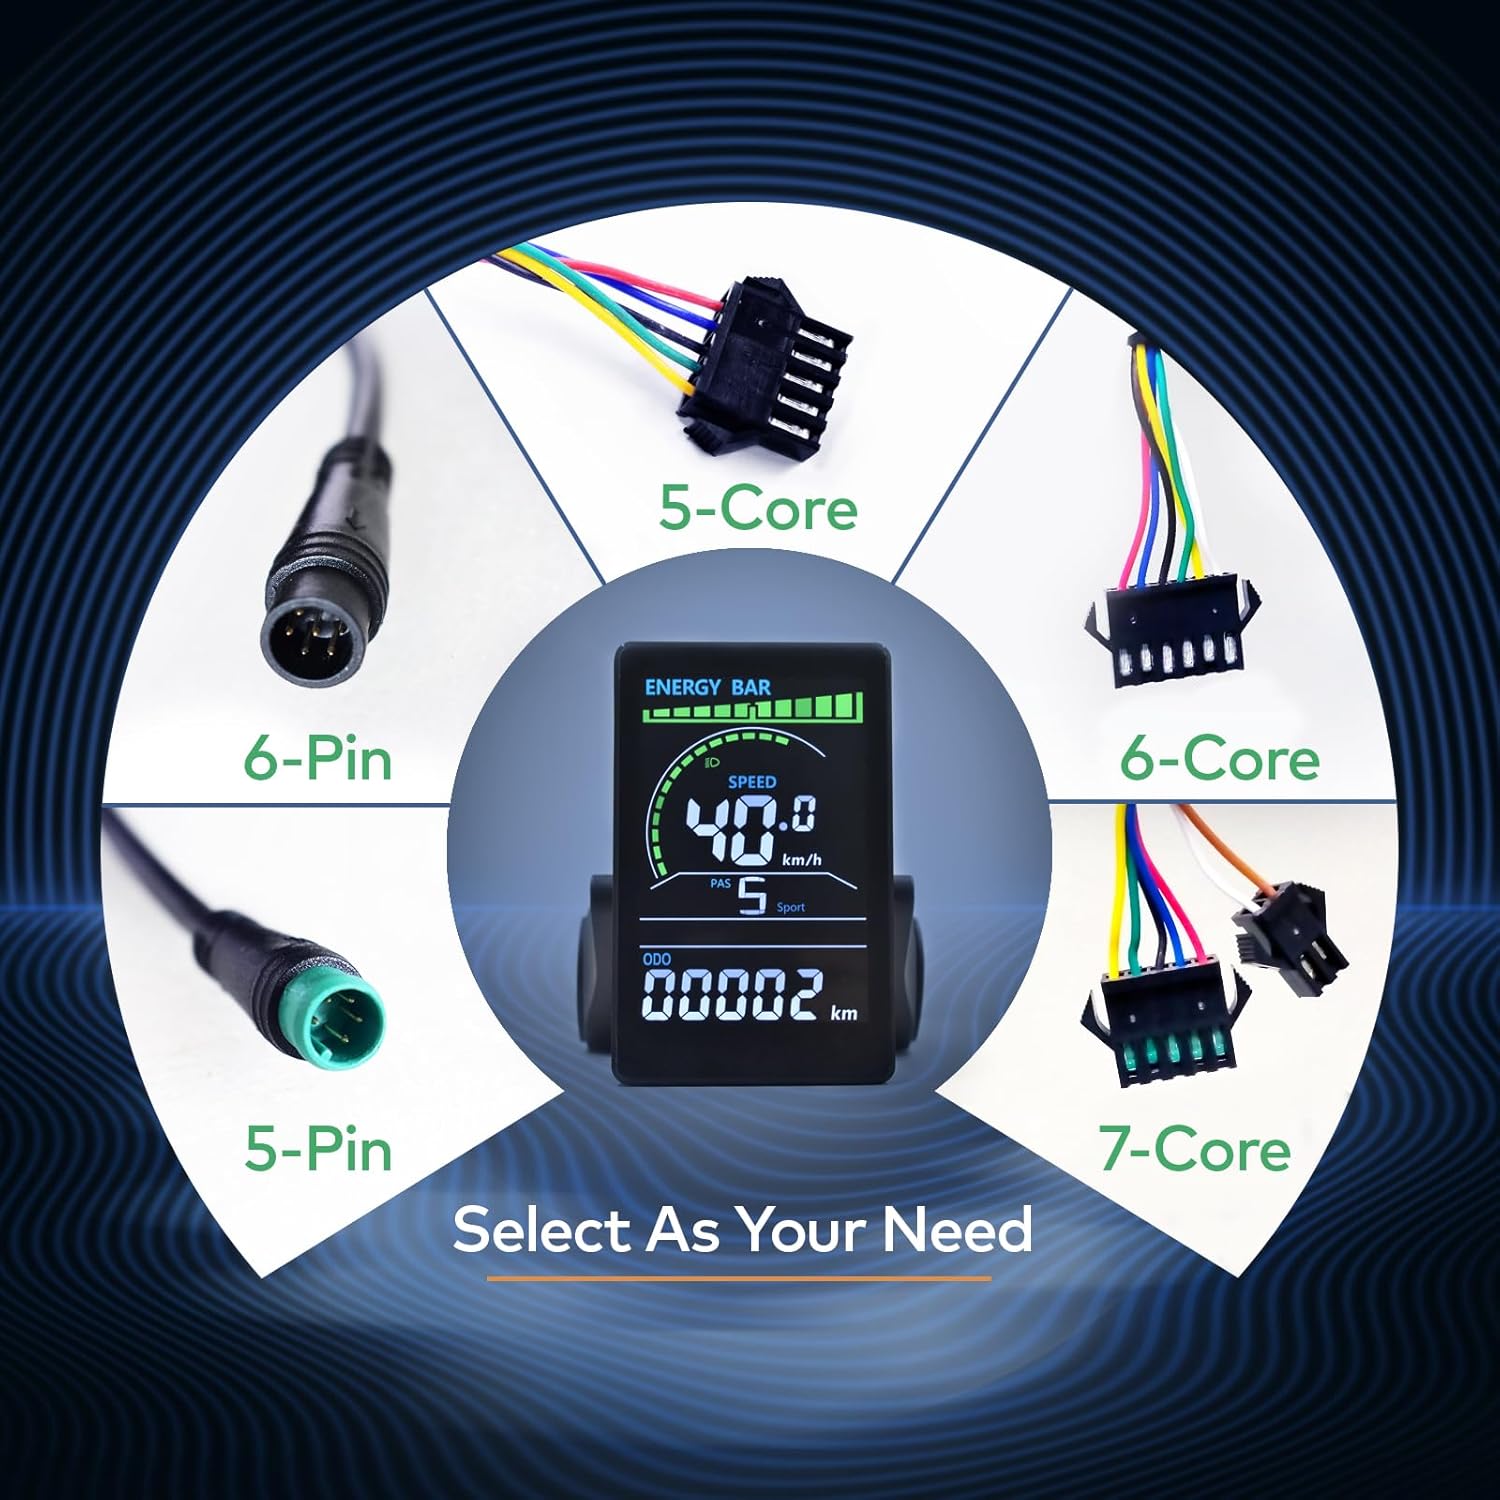
Image: A selection of ebike cable connector types, including the 6-pin connector relevant to this model.
5. Operating Instructions
5.1 Power On/Off
To power on the display, press and hold the power button on the keypad. To power off, press and hold the power button again until the display shuts down.
5.2 Keypad Functions
The keypad allows you to navigate through display modes and adjust settings. Specific button functions typically include:
- Power Button: Turns the display on/off.
- Up/Down Buttons: Adjust assist levels, navigate menus, or change parameter values.
- Mode/Set Button: Cycles through display information or enters/confirms settings.
5.3 Special Modes
- Walk-Assist Mode: Engages a low-speed motor assist for easier walking alongside your ebike. Refer to your ebike's controller manual for activation details, typically by holding a specific button.
- Cruise Control: Maintains a set speed without continuous throttle input. Activation methods vary; consult your ebike's controller manual.
5.4 Parameter Adjustment
The display allows modification of key bike parameters such as wheel diameter and speed limits. Accessing these settings usually involves a specific button sequence or entering a settings menu. Refer to the detailed instructions included with your product for precise steps on how to adjust these parameters.
6. Understanding the Display
The M6C-6-Pin display provides comprehensive real-time information to keep you informed during your ride. Key indicators include:
- Energy Bar: Indicates the current battery charge level.
- Speed: Shows current riding speed (km/h or mph).
- PAS (Pedal Assist System) Level: Displays the current level of motor assistance.
- ODO (Odometer): Shows the total distance traveled by the ebike.
- Trip Mileage: Displays the distance covered during the current ride.
- Battery Voltage: Real-time voltage reading of your ebike battery.
- Headlight Indicator: Shows if the ebike's headlight is active.
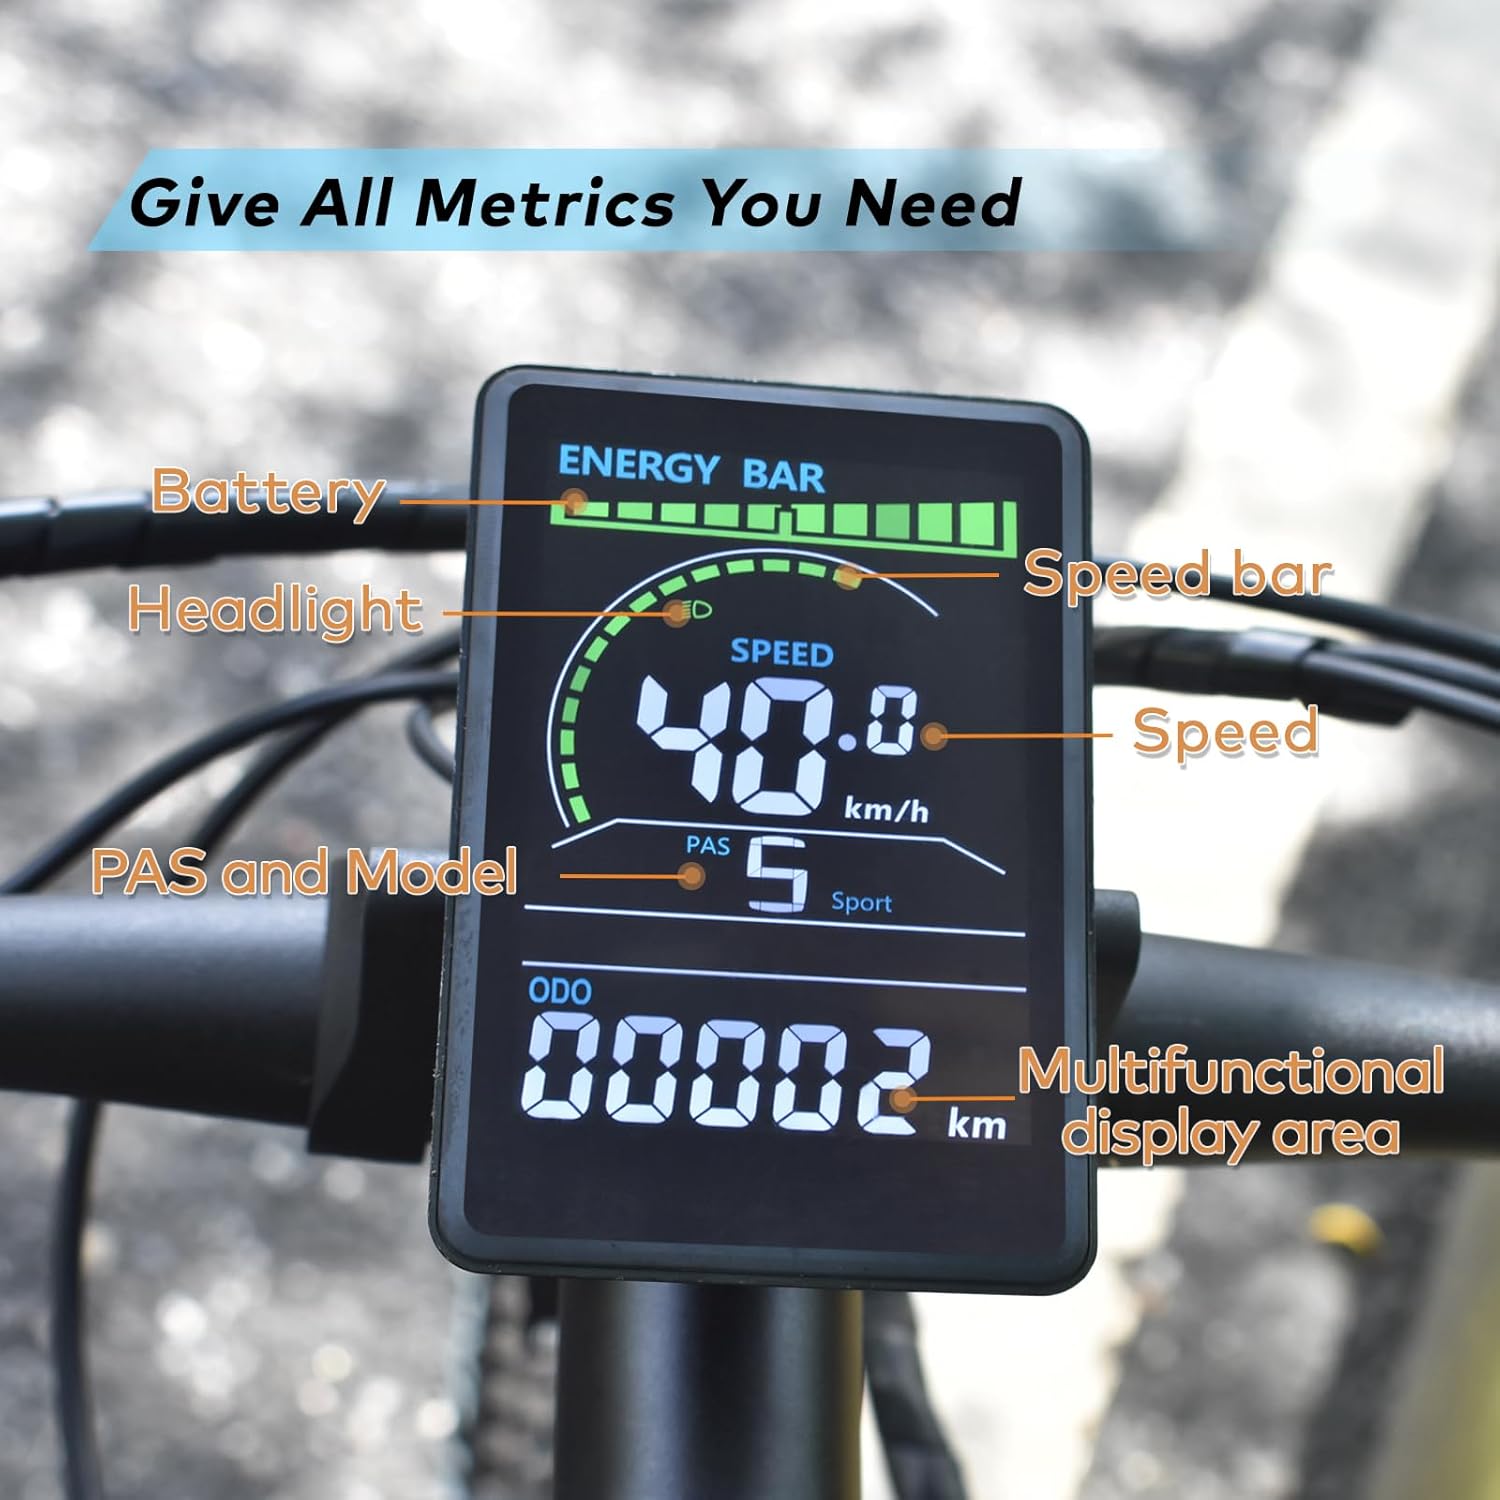
Image: The ebike display screen with labels pointing to the Energy Bar, Headlight, Speed, PAS and Model, Odometer, and Multifunctional display area.
7. Maintenance
To ensure the longevity and optimal performance of your Mcezdy M6C-6-Pin Ebike LCD Display, follow these maintenance guidelines:
- Cleaning: Wipe the display screen and housing with a soft, damp cloth. Avoid using abrasive cleaners or solvents that could damage the acrylic screen or plastic components.
- Water Exposure: While the display has an IPX65 waterproof rating, avoid submerging it in water or exposing it to high-pressure water jets.
- Cable Inspection: Periodically check the connection cable for any signs of wear, damage, or loose connections.
- Storage: When not in use for extended periods, store the ebike in a dry, temperate environment.
8. Troubleshooting
If you encounter issues with your Mcezdy M6C-6-Pin Ebike LCD Display, consider the following:
- Display Not Turning On: Ensure the ebike battery is charged and properly connected. Check all cable connections for looseness or damage.
- Incorrect Readings: Verify that the wheel diameter and other parameters are correctly set in the display's settings menu.
- Error Codes: The display may show fault codes if an issue is detected. Refer to the Fault Code Description document included with your product for a list of codes and their corresponding troubleshooting steps.
- Compatibility: Reconfirm that your ebike controller uses the UART No. 2 protocol and has a compatible 6-pin connector. Incompatibility is a common reason for non-functionality.
If problems persist, contact customer support for further assistance.
9. Specifications
| Feature | Specification |
|---|---|
| Model Number | M6C-6-Pin |
| Display Type | LCD, Color |
| Material | Acrylic (Screen), Nylon (Housing) |
| Work Voltage | DC 24V, 36V, 48V, 60V |
| Connectivity Protocol | UART No. 2 |
| Connector Type | 6-Pin Waterproof (JL-F-Z609AG) |
| Cable Length Exposed | 150mm |
| Handlebar Compatibility | 22.2mm, 25.4mm, 31.8mm |
| USB Charging Port | 5V/500mA |
| International Protection Rating | IPX65 |
| Item Weight | 222 g |
| Parcel Dimensions | 12.9 x 10.11 x 7.7 cm |
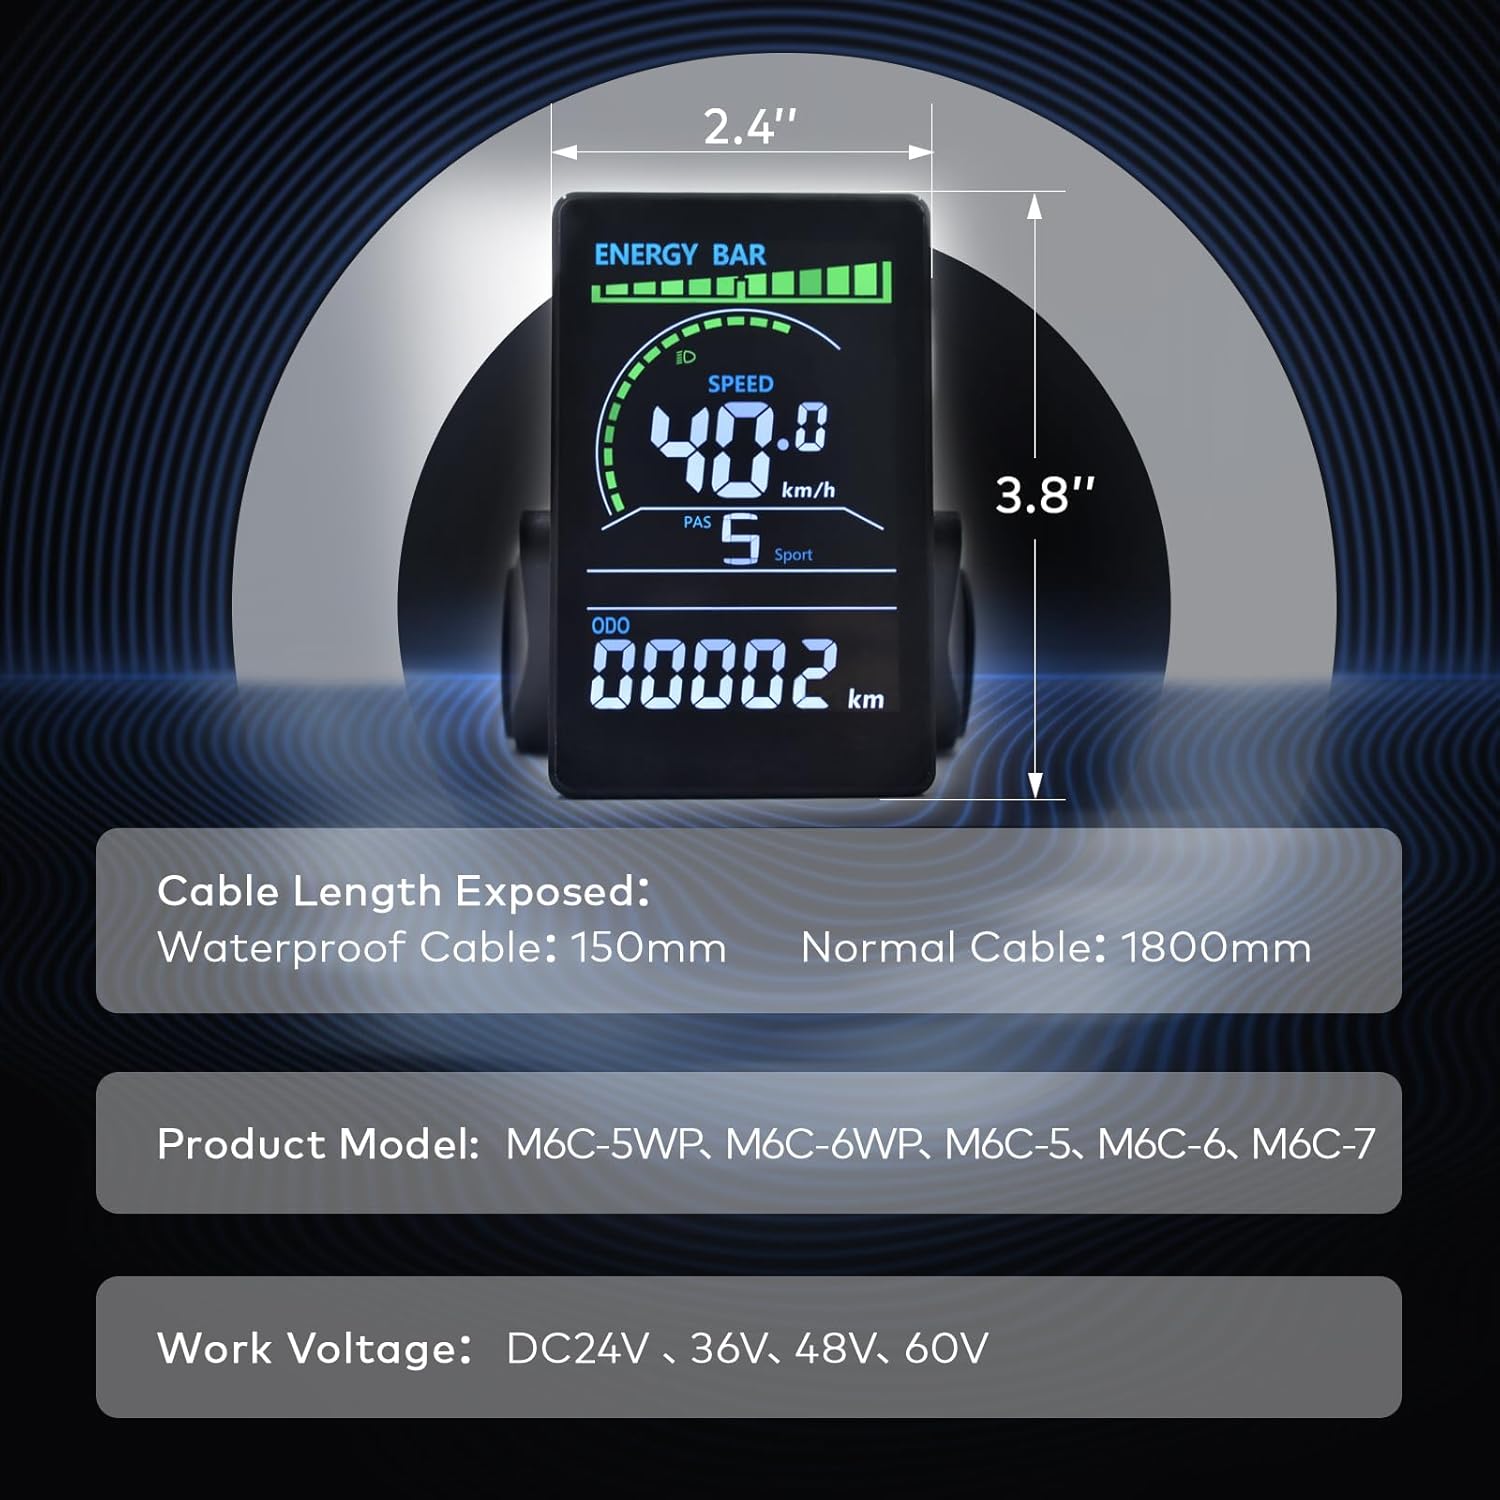
Image: A diagram illustrating cable length, various product models (including M6C-6WP), and compatible work voltages.
10. Warranty and Support
For warranty information and customer support, please refer to the documentation provided with your purchase or contact Mcezdy customer service directly. Ensure you have your product model number (M6C-6-Pin) and purchase details available when seeking support.
