
1. Introduction
Thank you for choosing the MICTUNING P1B RGB 12 Gang Switch Panel. This product is designed to provide a centralized and efficient control solution for multiple auxiliary lights and accessories in your vehicle. It features customizable RGB backlighting, multiple control modes, and a robust design suitable for various applications including RVs, marine vessels, cars, trucks, off-road vehicles, ATVs/UTVs, boats, and caravans.
Please read this manual thoroughly before installation and operation to ensure proper use and to maximize the product's lifespan.
2. Safety Information
- Always disconnect the vehicle's battery before performing any electrical installation to prevent electrical shock or damage.
- Ensure all wiring connections are secure and properly insulated to avoid short circuits.
- Do not exceed the maximum current rating of 80A or the maximum power rating of 960W/12V (1920W/24V) for the switch panel.
- Install the control box in a location protected from excessive heat and moisture, although it has an IP65 waterproof rating.
- Consult a professional if you are unsure about any part of the installation process.
3. Setup and Installation
3.1. What's in the Box
Verify that all components are present before beginning installation:
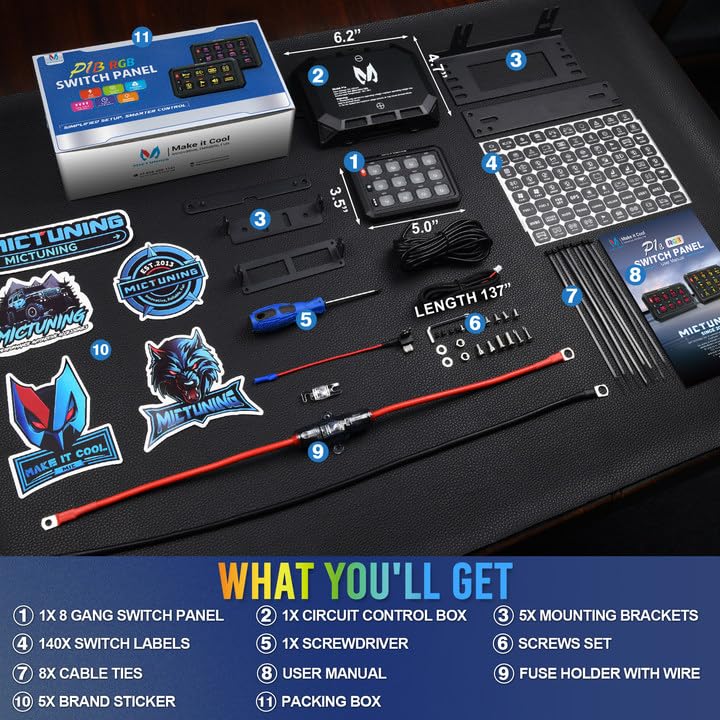
Image: Contents of the MICTUNING P1B RGB 12 Gang Switch Panel package, including the switch panel, control box, mounting brackets, labels, screwdriver, screws, fuse holder, and user manual.
- 1x 12 Gang Switch Panel
- 1x Circuit Control Box
- 5x Mounting Brackets
- 140x Switch Labels
- 1x Screwdriver
- 1x Screws Set
- 8x Cable Ties
- 1x User Manual
- 1x Fuse Holder with Wire
- 1x Packing Box
Video: Product Unboxing & Packaging Details. This video demonstrates the contents of the MICTUNING P1B RGB 12 Gang Switch Panel package and details of its packaging.
3.2. Power Source Options
The control box offers two methods for power input: connecting to the ACC (Accessory) circuit or directly to the Battery. A power source switch allows selection between these options.

Image: Wiring diagram illustrating how to connect the switch panel to either the ACC circuit or directly to the vehicle's battery, along with fuse ratings for each circuit.
3.3. Mounting the Switch Panel and Control Box
The switch panel and control box can be mounted in various locations using the provided brackets, offering flexibility for installation.
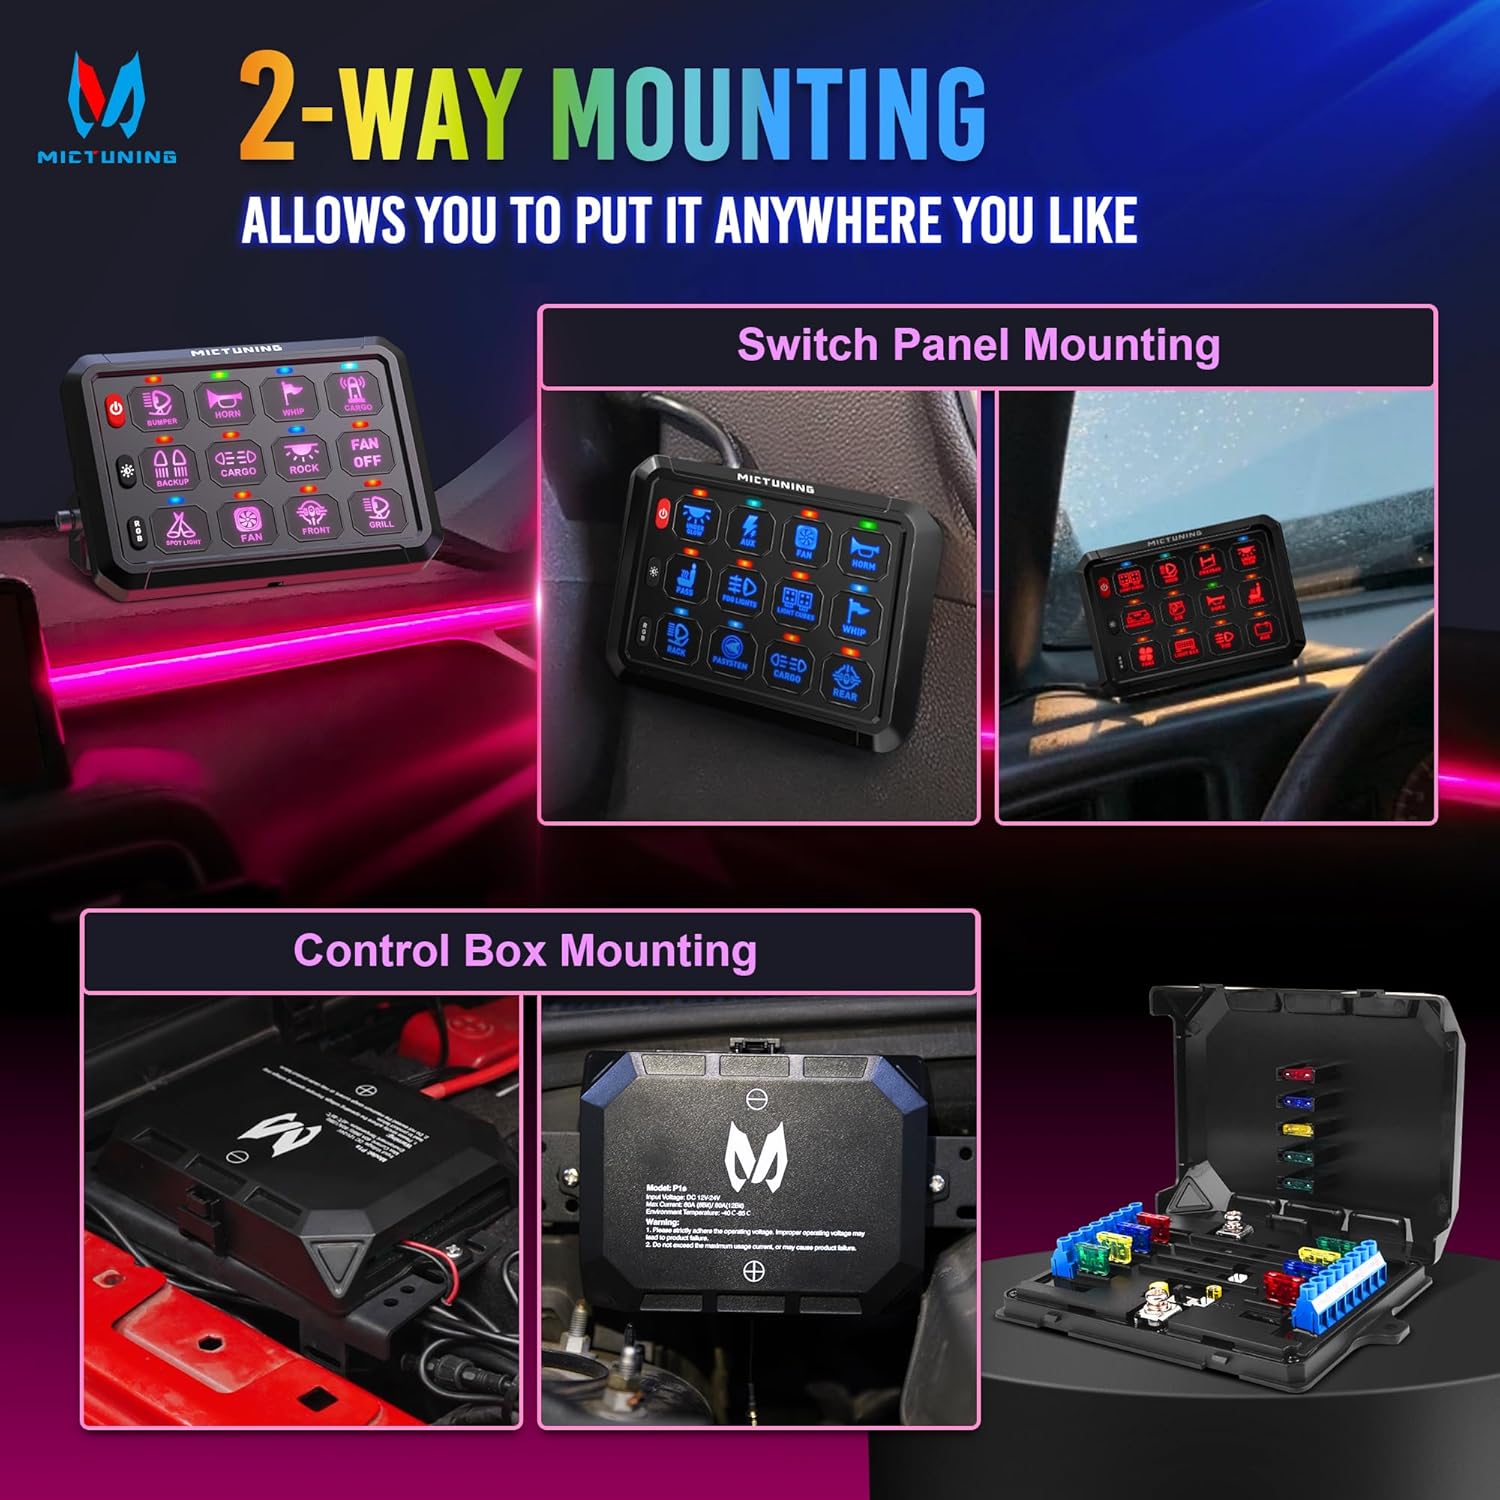
Image: Visual examples of mounting the switch panel inside the vehicle cabin and the control box in the engine bay, demonstrating flexible installation options.
Video: How to Install the Switch Panel. This video provides a detailed guide on the installation process for the MICTUNING P1B RGB 12 Gang Switch Panel.
4. Operating Instructions
4.1. Function Buttons
The MICTUNING P1B features three silicone function buttons for easy control:
- ON/OFF Switch with Memory Function: Controls the main power to the panel and remembers the last state.
- Brightness Adjustment Button: Cycles through 5 levels of backlight brightness (100%, 75%, 50%, 25%, 10%) and a backlight-off function.
- RGB Color Button: Changes the RGB backlight color to match your vehicle's ambiance.

Image: Illustration of the RGB color customization options and the 5-level brightness adjustment feature for the switch panel's backlight.
4.2. Control Modes
Each switch on the panel can operate in one of four distinct control modes, indicated by different backlight colors:
- Red - Toggle Mode: Provides constant power (ON/OFF). Ideal for lights that need to stay on.
- Green - Momentary Mode: Power is supplied only while the button is pressed and held. Suitable for horns or momentary ignition.
- Blue - Flash Light Mode: Activates a slow flashing pattern. Can be used for turn signals.
- Cyan - Pulsed Strobe Mode: Activates a rapid strobe pattern. Useful for emergency or warning lights.

Image: Visual representation of the four control modes (Toggle, Momentary, Strobe, Flash) and their corresponding backlight colors (Red, Green, Cyan, Blue).
Video: Switch Panel Operation Guide. This video demonstrates how to use the various functions and control modes of the MICTUNING P1B RGB 12 Gang Switch Panel.
4.3. Customizing Labels
Use the included 140 labeling stickers to customize each switch button according to the connected accessory. This enhances usability and organization.

Image: A sheet of 140 diverse labeling stickers provided for customizing the functions of each switch on the panel.
5. Maintenance
- Regularly inspect all wiring connections for tightness and signs of wear or corrosion.
- Keep the switch panel and control box clean. Use a soft, dry cloth to wipe surfaces. Avoid abrasive cleaners or solvents.
- Check the fuses in the control box periodically. Replace any blown fuses with ones of the correct amperage.
- Ensure the control box cover is securely fastened to maintain its IP65 waterproof rating.
6. Troubleshooting
- Panel Not Powering On: Check the main power connection to the control box (ACC or Battery). Ensure the fuse in the main power line is intact.
- Individual Switch Not Working: Verify the connection for that specific accessory at the control box. Check the corresponding fuse for that circuit in the control box.
- Backlight Issues: Ensure the brightness setting is not at 0% or 'Backlight Off'. Cycle through brightness levels using the dedicated button.
- Intermittent Operation: Inspect all wiring for loose connections or damaged insulation. Ensure the power source is stable and providing adequate voltage (12V/24V).
7. Specifications
| Feature | Specification |
|---|---|
| Model | P1B |
| Number of Gangs | 12 |
| Input Voltage | 12V/24V |
| Maximum Current | 80A |
| Maximum Power (12V) | 960W |
| Maximum Power (24V) | 1920W |
| Operating Temperature | -40°C to 105°C |
| IP Rating | IP65 |
| Material | Aluminum |
| Control Method | Touch |
| Switch Type | Push Button, Toggle |

Image: Visual summary of the MICTUNING P1B RGB 12 Gang Switch Panel's key specifications, including input voltage, maximum power, current, operating temperature, and dimensions.
8. Warranty and Support
The MICTUNING P1B RGB 12 Gang Switch Panel comes with a two-year warranty. If you encounter any issues during the use of this product, please contact MICTUNING customer support. Our team is committed to assisting you within 24 hours to resolve your problems.
For further assistance, please visit the official MICTUNING website or contact your authorized dealer.